

Grow Fresh Tomatoes, right in your backyard! Imagine biting into a juicy, sun-ripened tomato, bursting with flavor, that you nurtured from a tiny seed. Sounds idyllic, doesn’t it? For centuries, cultivating tomatoes has been a cherished tradition, dating back to the Aztecs and Incas who first domesticated this vibrant fruit. Today, the joy of harvesting your own tomatoes is within everyone’s reach, regardless of garden size or experience level.
But let’s be honest, sometimes growing tomatoes can feel like a battle against pests, diseases, and unpredictable weather. That’s where these DIY tricks and hacks come in! I’m here to share some simple, yet incredibly effective, methods to help you grow fresh tomatoes like a pro, even if you’re a complete beginner.
Why do you need these tips? Because store-bought tomatoes often lack the intense flavor and nutritional value of homegrown ones. Plus, there’s nothing quite as satisfying as serving a salad made with ingredients you’ve personally cultivated. So, get ready to roll up your sleeves and discover the secrets to a bountiful tomato harvest. Let’s get growing!
DIY: From Seed to Sauce – Growing Your Own Delicious Tomatoes!
Okay, tomato lovers, let’s get our hands dirty! I’m going to walk you through everything you need to know to grow your own juicy, flavorful tomatoes right at home. Forget those bland grocery store tomatoes – we’re talking about sun-ripened goodness bursting with flavor. This guide is designed for beginners, so don’t worry if you’ve never grown anything before. I’ll break it down step-by-step.
Choosing Your Tomato Variety
Before we even think about soil, we need to decide what kind of tomatoes we want to grow! There are literally hundreds of varieties, so it can be a little overwhelming. Here’s a quick rundown to help you choose:
* **Determinate vs. Indeterminate:** This is crucial! Determinate tomatoes grow to a certain size and then produce all their fruit at once, making them great for canning. Indeterminate tomatoes keep growing and producing fruit throughout the season. I personally prefer indeterminate because I love having fresh tomatoes all summer long.
* **Size and Shape:** Do you want tiny cherry tomatoes, beefsteak giants, or something in between? Consider how you plan to use your tomatoes. Cherry tomatoes are perfect for salads, while beefsteaks are ideal for sandwiches. Roma tomatoes are excellent for sauces.
* **Disease Resistance:** Look for varieties that are resistant to common tomato diseases like Fusarium wilt, Verticillium wilt, and nematodes. The seed packet will usually have abbreviations like “VFNT” to indicate resistance.
* **Days to Maturity:** This tells you how long it will take for the tomatoes to ripen after transplanting. Choose varieties that are suitable for your climate’s growing season.
Some of my personal favorites include:
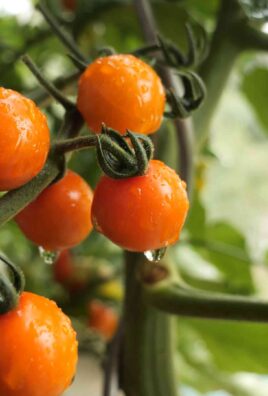
* **’Sungold’ (Cherry):** Incredibly sweet and flavorful.
* **’Early Girl’ (Medium):** A reliable early producer.
* **’Roma’ (Plum):** Perfect for making sauce.
* **’Brandywine’ (Beefsteak):** Heirloom variety with amazing flavor.
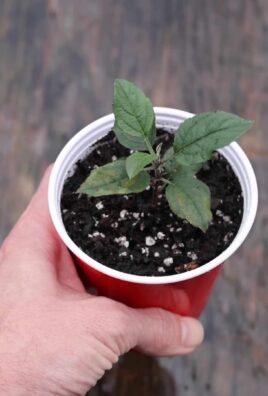
Starting Your Tomato Seeds Indoors
Starting your seeds indoors gives you a head start on the growing season, especially if you live in a cooler climate.
* **Timing is Key:** Start your seeds about 6-8 weeks before the last expected frost in your area. You can find this information online by searching for your local frost dates.
* **Gather Your Supplies:**
* Seed starting trays or small pots
* Seed starting mix (this is different from regular potting soil)
* Tomato seeds
* Spray bottle
* Heat mat (optional, but helpful)
* Grow lights (essential if you don’t have a very sunny window)
* **The Seed Starting Process:**
1. **Fill the Trays:** Moisten the seed starting mix and fill your seed starting trays or pots. Gently press down to remove any air pockets.
2. **Sow the Seeds:** Make a small indentation (about 1/4 inch deep) in the center of each cell or pot. Place 2-3 tomato seeds in each indentation. This increases your chances of at least one seed germinating.
3. **Cover the Seeds:** Gently cover the seeds with more seed starting mix.
4. **Water Carefully:** Use a spray bottle to mist the soil thoroughly. Avoid overwatering, which can lead to damping off (a fungal disease that kills seedlings).
5. **Provide Warmth:** Place the trays on a heat mat (if using) and cover them with a humidity dome or plastic wrap to create a warm, humid environment.
6. **Provide Light:** Place the trays under grow lights or in a very sunny window. If using grow lights, keep them a few inches above the trays and adjust as the seedlings grow.
7. **Monitor and Water:** Check the soil moisture daily and water as needed to keep it consistently moist but not soggy.
8. **Remove Humidity Dome:** Once the seedlings emerge (usually within 5-10 days), remove the humidity dome.
9. **Thin the Seedlings:** Once the seedlings have their first true leaves (the second set of leaves that appear after the initial seed leaves), thin them to one seedling per cell or pot. Choose the strongest, healthiest-looking seedling and snip off the others at the soil line. Don’t pull them out, as this can disturb the roots of the remaining seedling.
10. **Fertilize:** Once the seedlings have a few sets of true leaves, start fertilizing them with a diluted liquid fertilizer specifically formulated for seedlings. Follow the instructions on the fertilizer label.
11. **Harden Off:** About a week before you plan to transplant the seedlings outdoors, you need to “harden them off.” This means gradually exposing them to outdoor conditions to acclimate them to the sun, wind, and temperature changes. Start by placing them outdoors in a sheltered location for a few hours each day, gradually increasing the amount of time they spend outside.
Preparing Your Garden Bed
While your seedlings are growing indoors, it’s time to prepare your garden bed. Tomatoes need plenty of sunlight and well-drained soil.
* **Choose a Sunny Location:** Tomatoes need at least 6-8 hours of direct sunlight per day.
* **Prepare the Soil:**
* **Soil Testing:** Ideally, you should test your soil to determine its pH and nutrient levels. You can purchase a soil testing kit at most garden centers or send a sample to your local agricultural extension office.
* **Amend the Soil:** Tomatoes prefer slightly acidic soil with a pH between 6.0 and 6.8. If your soil is too alkaline, you can amend it with sulfur. If it’s too acidic, you can add lime.
* **Add Organic Matter:** Incorporate plenty of organic matter into the soil, such as compost, aged manure, or leaf mold. This will improve drainage, aeration, and nutrient content.
* **Till or Dig:** Till the soil to a depth of at least 12 inches to loosen it up and improve drainage. If you prefer not to till, you can use a garden fork to loosen the soil.
* **Consider Raised Beds:** Raised beds are a great option for growing tomatoes, especially if you have poor soil drainage. They also warm up faster in the spring.
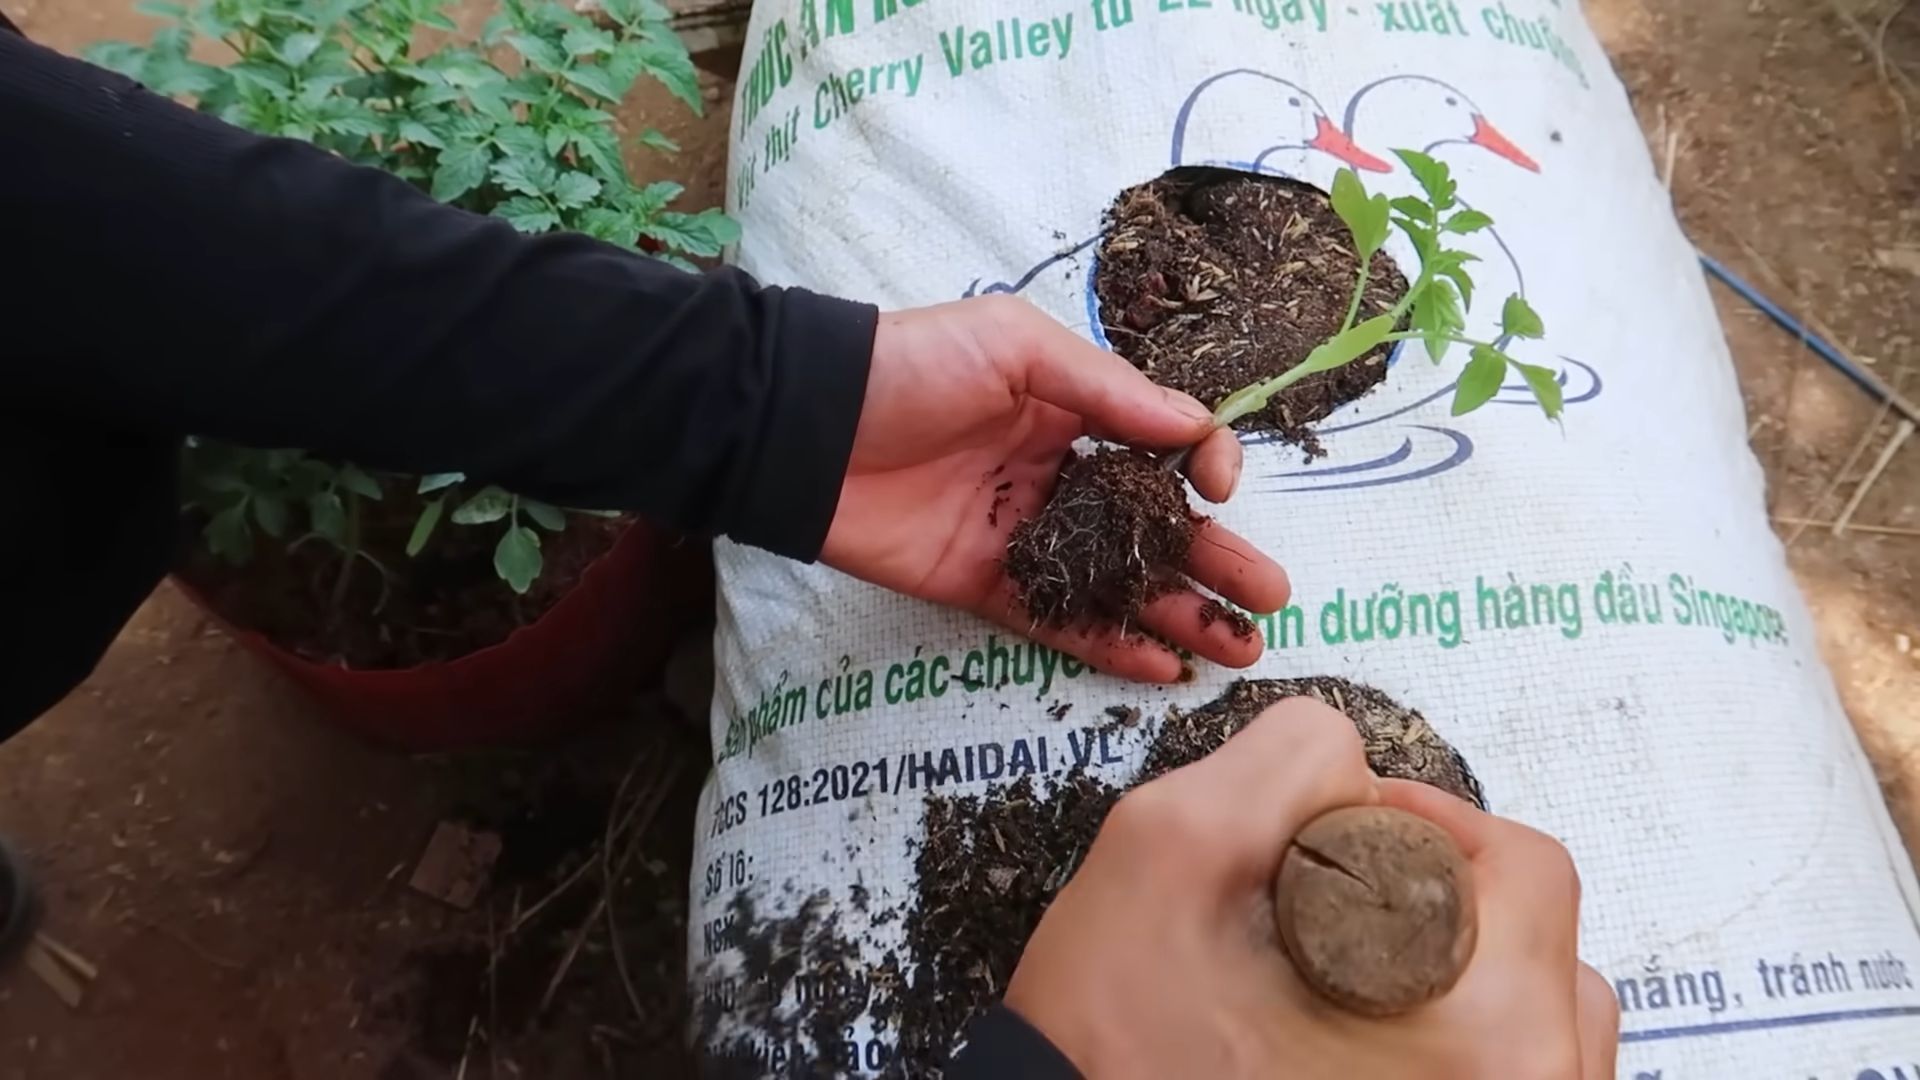
Transplanting Your Tomato Seedlings Outdoors
The big day has arrived! It’s time to transplant your tomato seedlings into the garden.
* **Wait for Warm Weather:** Make sure the danger of frost has passed and the soil has warmed up to at least 60°F (15°C).
* **Choose a Cloudy Day:** Transplanting on a cloudy day will help prevent the seedlings from getting stressed by the sun.
* **Dig the Holes:** Dig holes that are slightly larger than the root balls of your seedlings. Space the holes about 2-3 feet apart, depending on the variety of tomato you’re growing.
* **Plant Deep:** This is a crucial step! Tomatoes can grow roots along their stems, so planting them deep will encourage a stronger root system. Remove the lower leaves from the seedlings and plant them so that only the top few sets of leaves are above the soil.
* **Add Fertilizer:** Add a handful of slow-release fertilizer to each hole before planting.
* **Water Thoroughly:** Water the seedlings thoroughly after planting.
* **Mulch:** Apply a layer of mulch around the plants to help retain moisture, suppress weeds, and regulate soil temperature. Straw, wood chips, or shredded leaves are all good options.
* **Stake or Cage:** Tomatoes, especially indeterminate varieties, need support to keep them from sprawling on the ground. Use stakes, cages, or trellises to support the plants. I prefer cages because they provide good support and allow the plants to grow naturally.
Caring for Your Tomato Plants
Now that your tomatoes are in the ground, it’s time to provide them with the care they need to thrive.
* **Watering:** Water your tomato plants deeply and regularly, especially during hot, dry weather. Aim to water at the base of the plants to avoid wetting the foliage, which can lead to disease.
* **Fertilizing:** Fertilize your tomato plants every 2-3 weeks with a balanced fertilizer.
* **Pruning:** Pruning is important for indeterminate tomato varieties. Remove the suckers (the small shoots that grow between the main stem and the branches) to encourage the plant to focus its energy on producing fruit.
* **Pest and Disease Control:** Keep an eye out for pests and diseases. Common tomato pests include aphids, tomato hornworms, and whiteflies. Common tomato diseases include early blight, late blight, and blossom end rot. Use organic pest control methods whenever possible. For example, you can spray aphids with a mixture of soapy water.
* **Blossom End Rot Prevention:** Blossom end rot is caused by a calcium deficiency. To prevent it, make sure your soil has adequate calcium and water your plants consistently. You can also add calcium to the soil by incorporating crushed eggshells or bone meal.
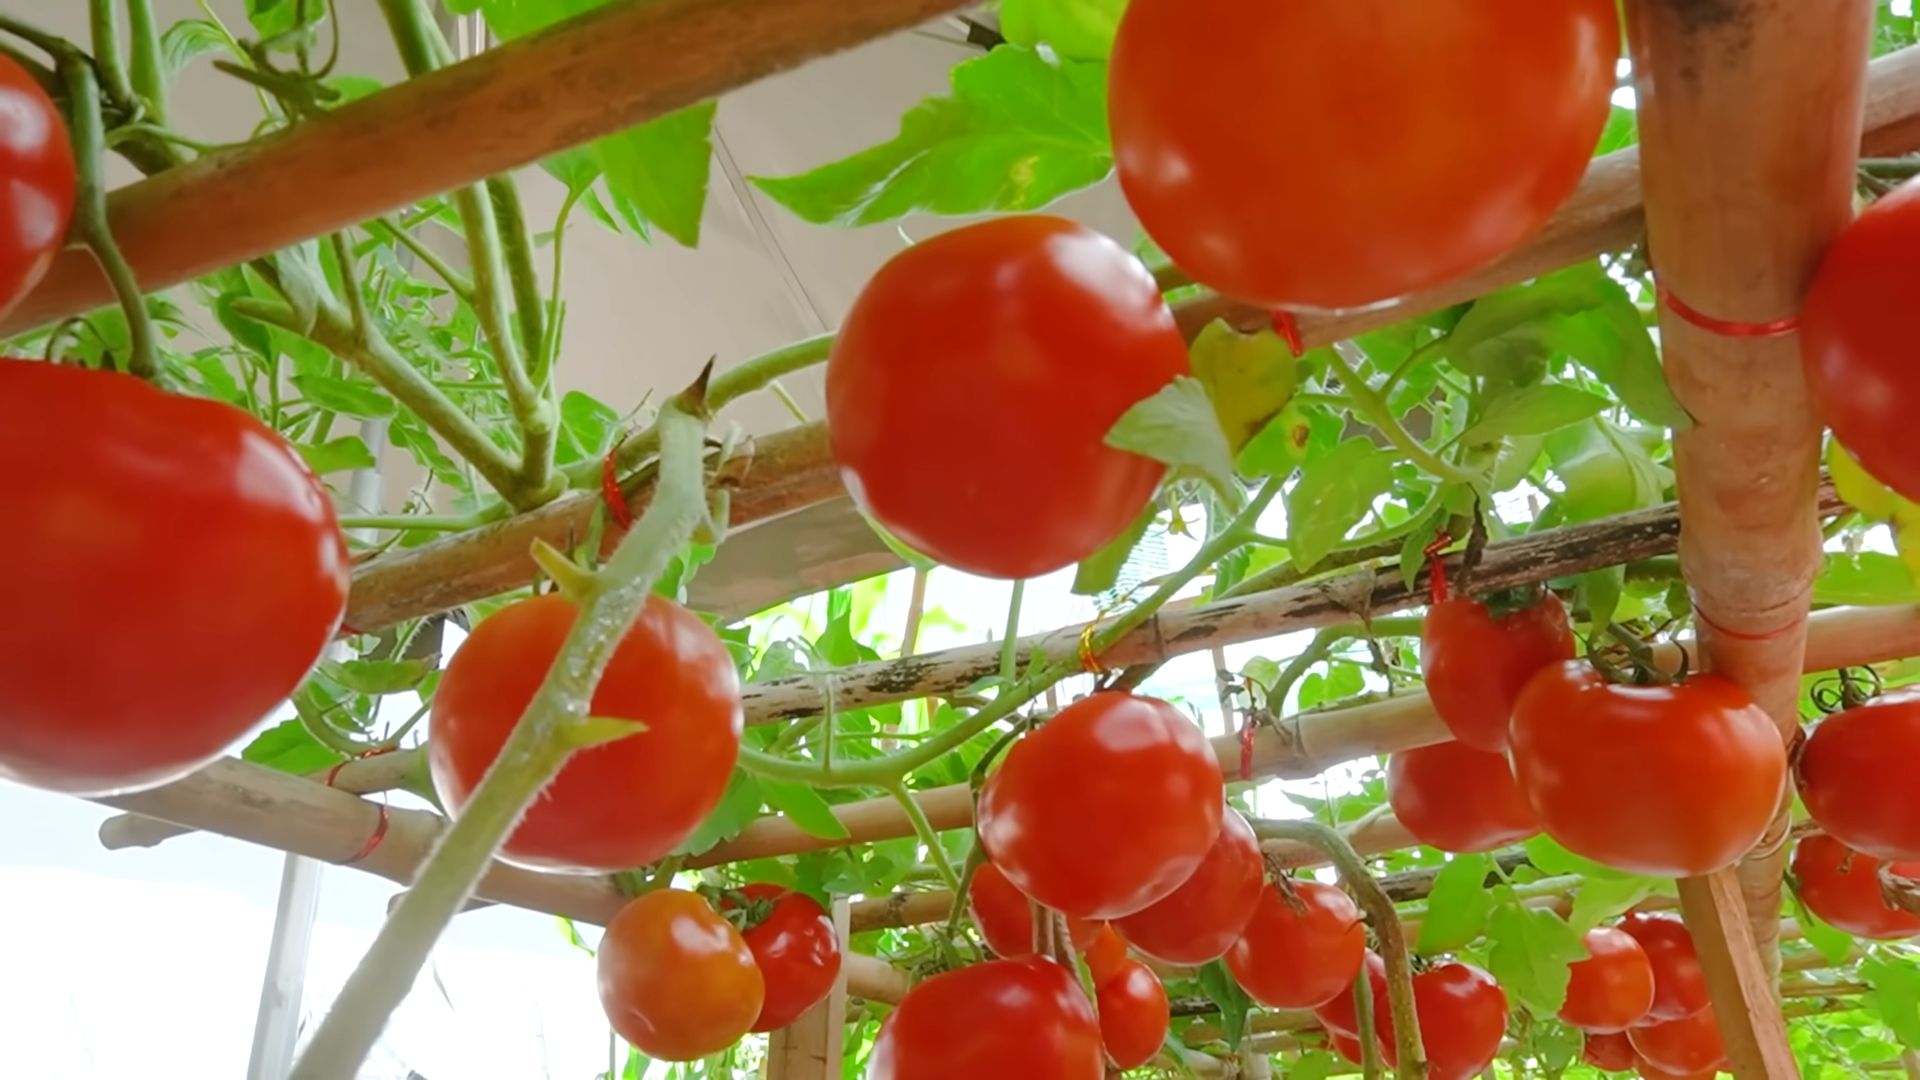
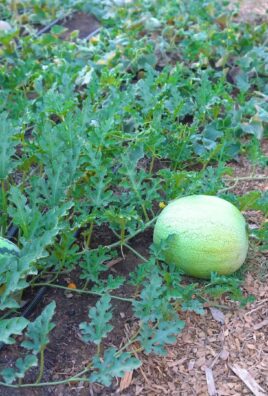
Harvesting Your Tomatoes
The moment we’ve all been waiting for!
Conclusion
So, there you have it! Growing your own tomatoes doesn’t have to be an expensive or complicated endeavor. This simple DIY trick, utilizing readily available materials and a little bit of ingenuity, unlocks the potential for a bountiful harvest right in your backyard, balcony, or even windowsill. Forget those bland, store-bought tomatoes that lack the vibrant flavor of sun-ripened goodness. With this method, you’re not just growing tomatoes; you’re cultivating an experience, a connection to nature, and a source of immense satisfaction.
Why is this DIY trick a must-try? Because it’s accessible, affordable, and incredibly effective. It bypasses the need for specialized equipment or extensive gardening knowledge. It’s a fantastic way to recycle materials, reduce your carbon footprint, and enjoy the unparalleled taste of homegrown produce. Plus, it’s a fun and rewarding project for the whole family!
But don’t stop there! Feel free to experiment and adapt this method to suit your specific needs and preferences. Consider these variations:
* Container Size: While we’ve focused on a specific container size, feel free to adjust it based on the space you have available and the variety of tomato you’re growing. Larger containers generally mean more room for root growth and potentially larger yields.
* Soil Amendments: Enhance your soil mix with organic amendments like compost, worm castings, or bone meal to provide your tomato plants with extra nutrients. These additions can significantly boost growth and fruit production.
* Support Systems: As your tomato plants grow, they’ll need support to prevent them from sprawling and breaking under the weight of the fruit. Use stakes, cages, or trellises to provide the necessary support.
* Variety Selection: The world of tomatoes is vast and diverse! Experiment with different varieties to find your favorites. From juicy beefsteaks to sweet cherry tomatoes, there’s a tomato out there for everyone. Consider disease-resistant varieties if you live in an area prone to tomato blight or other common ailments.
* Watering Techniques: Consistent watering is crucial for healthy tomato growth. Avoid overwatering, which can lead to root rot, and underwatering, which can stress the plants. Aim for deep, infrequent watering, allowing the soil to dry slightly between waterings. Consider using a soaker hose or drip irrigation system for efficient and even watering.
This DIY approach to grow fresh tomatoes is more than just a gardening hack; it’s a gateway to a more sustainable and flavorful lifestyle. It’s about taking control of your food source and enjoying the simple pleasures of homegrown goodness.
So, what are you waiting for? Gather your supplies, follow the steps outlined, and embark on your tomato-growing adventure today! We’re confident that you’ll be amazed by the results. And most importantly, we want to hear about your experience! Share your photos, tips, and stories in the comments below. Let’s build a community of tomato enthusiasts and inspire others to discover the joy of growing their own food. Happy gardening!
Frequently Asked Questions (FAQ)
What type of tomatoes are best suited for this DIY method?
This method is quite versatile and can accommodate a wide range of tomato varieties. However, determinate (bush) varieties tend to be more manageable in containers compared to indeterminate (vining) varieties, which require more extensive support. Cherry tomatoes, Roma tomatoes, and patio tomatoes are excellent choices for beginners. If you’re feeling adventurous, you can certainly try growing larger beefsteak tomatoes, but be prepared to provide ample support and potentially a larger container. Ultimately, the best tomato variety depends on your personal preferences and the space you have available. Research different varieties to find those that are well-suited to your climate and growing conditions.
How often should I water my tomato plants grown using this method?
Watering frequency depends on several factors, including the weather, the size of the container, and the type of soil you’re using. As a general rule, aim to water deeply when the top inch of soil feels dry to the touch. Avoid overwatering, as this can lead to root rot. During hot, sunny weather, you may need to water daily, while during cooler, cloudy weather, you may only need to water every few days. The key is to monitor the soil moisture and adjust your watering schedule accordingly. A moisture meter can be a helpful tool for determining when to water.
What kind of fertilizer should I use for my tomato plants?
Tomato plants are heavy feeders and require regular fertilization to thrive. Choose a fertilizer that is specifically formulated for tomatoes or vegetables, with a balanced NPK ratio (nitrogen, phosphorus, and potassium). You can use either a granular fertilizer or a liquid fertilizer. Granular fertilizers are typically slow-release and provide a steady supply of nutrients over time. Liquid fertilizers are fast-acting and can be applied directly to the soil or foliage. Follow the instructions on the fertilizer packaging for application rates and frequency. Organic options like compost tea or fish emulsion are also excellent choices.
How much sunlight do tomato plants need?
Tomato plants need at least 6-8 hours of direct sunlight per day to produce a good crop of tomatoes. Choose a location that receives plenty of sunlight throughout the day. If you’re growing your tomatoes indoors, you may need to supplement with grow lights. Insufficient sunlight can result in leggy plants with poor fruit production.
How do I prevent common tomato diseases and pests?
Prevention is key when it comes to tomato diseases and pests. Choose disease-resistant varieties whenever possible. Ensure good air circulation around your plants by spacing them properly and pruning away any excess foliage. Water at the base of the plants to avoid wetting the leaves, which can create a favorable environment for fungal diseases. Regularly inspect your plants for signs of pests, such as aphids, whiteflies, or tomato hornworms. If you spot any pests, take action immediately to prevent them from spreading. Organic pest control methods, such as insecticidal soap or neem oil, can be effective. Crop rotation and companion planting can also help to reduce the risk of diseases and pests.
What do I do if my tomato plants are not producing fruit?
There are several reasons why your tomato plants may not be producing fruit. Insufficient sunlight, lack of pollination, nutrient deficiencies, and extreme temperatures can all contribute to poor fruit set. Ensure that your plants are receiving at least 6-8 hours of direct sunlight per day. If you suspect a lack of pollination, you can hand-pollinate the flowers by gently shaking the plants or using a small brush to transfer pollen from one flower to another. Fertilize your plants regularly with a balanced tomato fertilizer. Protect your plants from extreme temperatures by providing shade during hot weather and covering them during cold snaps.
Can I grow tomatoes indoors using this DIY method?
Yes, you can absolutely grow tomatoes indoors using this DIY method. However, you’ll need to provide adequate lighting, as indoor environments typically don’t receive enough natural sunlight. Use grow lights to supplement the natural light and ensure that your plants are getting at least 14-16 hours of light per day. Choose a sunny windowsill or a well-lit area in your home. You may also need to hand-pollinate the flowers, as there may not be enough insects indoors to do the job.
How long does it take to grow tomatoes from seed to harvest?
The time it takes to grow tomatoes from seed to harvest varies depending on the variety, the growing conditions, and the climate. Generally, it takes about 60-85 days from transplanting seedlings to harvesting ripe tomatoes. Starting your seeds indoors 6-8 weeks before the last expected frost can give you a head start on the growing season.
What are some signs that my tomatoes are ready to be harvested?
Tomatoes are typically ready to be harvested when they are fully colored and slightly soft to the touch. The color will vary depending on the variety. Gently twist the tomato from the vine. If it comes off easily, it’s ripe. You can also harvest tomatoes when they are slightly underripe and allow them to ripen indoors. This can be helpful if you’re concerned about pests or diseases.
How can I store my homegrown tomatoes?
Store your homegrown tomatoes at room temperature, away from direct sunlight. Avoid refrigerating them, as this can affect their flavor and texture. If you have a large harvest, you can preserve your tomatoes by canning, freezing, or drying them.
Leave a Comment