

Grow Bitter Melon, and unlock a world of culinary possibilities right in your backyard! Have you ever dreamed of harvesting your own exotic vegetables, impressing your friends with unique dishes, and knowing exactly where your food comes from? Well, you’re in the right place. This isn’t just about gardening; it’s about embarking on a rewarding DIY adventure that brings fresh, healthy produce to your table.
Bitter melon, also known as bitter gourd or karela, has a rich history deeply rooted in Asian and African cultures. For centuries, it’s been celebrated not only for its distinctive, slightly bitter flavor but also for its impressive health benefits. From traditional medicine to culinary delights, this remarkable vegetable has earned its place as a staple in many households. But let’s be honest, finding fresh, high-quality bitter melon at the grocery store can be a challenge, and that’s where our DIY guide comes in!
I understand that the idea of growing your own vegetables might seem daunting, especially if you’re a beginner. But trust me, with a few simple tricks and hacks, you can successfully grow bitter melon, even if you don’t have a green thumb. This article is packed with easy-to-follow instructions, insider tips, and troubleshooting advice to help you navigate every step of the process, from seed to harvest. Imagine the satisfaction of serving a delicious bitter melon stir-fry, knowing you grew every ingredient yourself. Let’s get started and transform your garden into a thriving source of fresh, flavorful bitter melon!
DIY: Growing Bitter Melon Like a Pro (Even if You’re a Beginner!)
Okay, so you want to grow bitter melon? Awesome! It’s a unique and rewarding vegetable to cultivate, even if it does have a… distinct taste. Don’t let the “bitter” part scare you off. Freshly grown bitter melon, prepared right, is a culinary adventure. And the satisfaction of harvesting your own? Priceless! I’m going to walk you through everything you need to know, from seed to harvest.
Choosing Your Bitter Melon Variety
First things first, let’s talk varieties. There are a few different types of bitter melon, and the best one for you will depend on your climate and personal preference.
* **Chinese Bitter Melon:** These are typically longer and lighter green, with smoother skin. They tend to be less intensely bitter than other varieties.
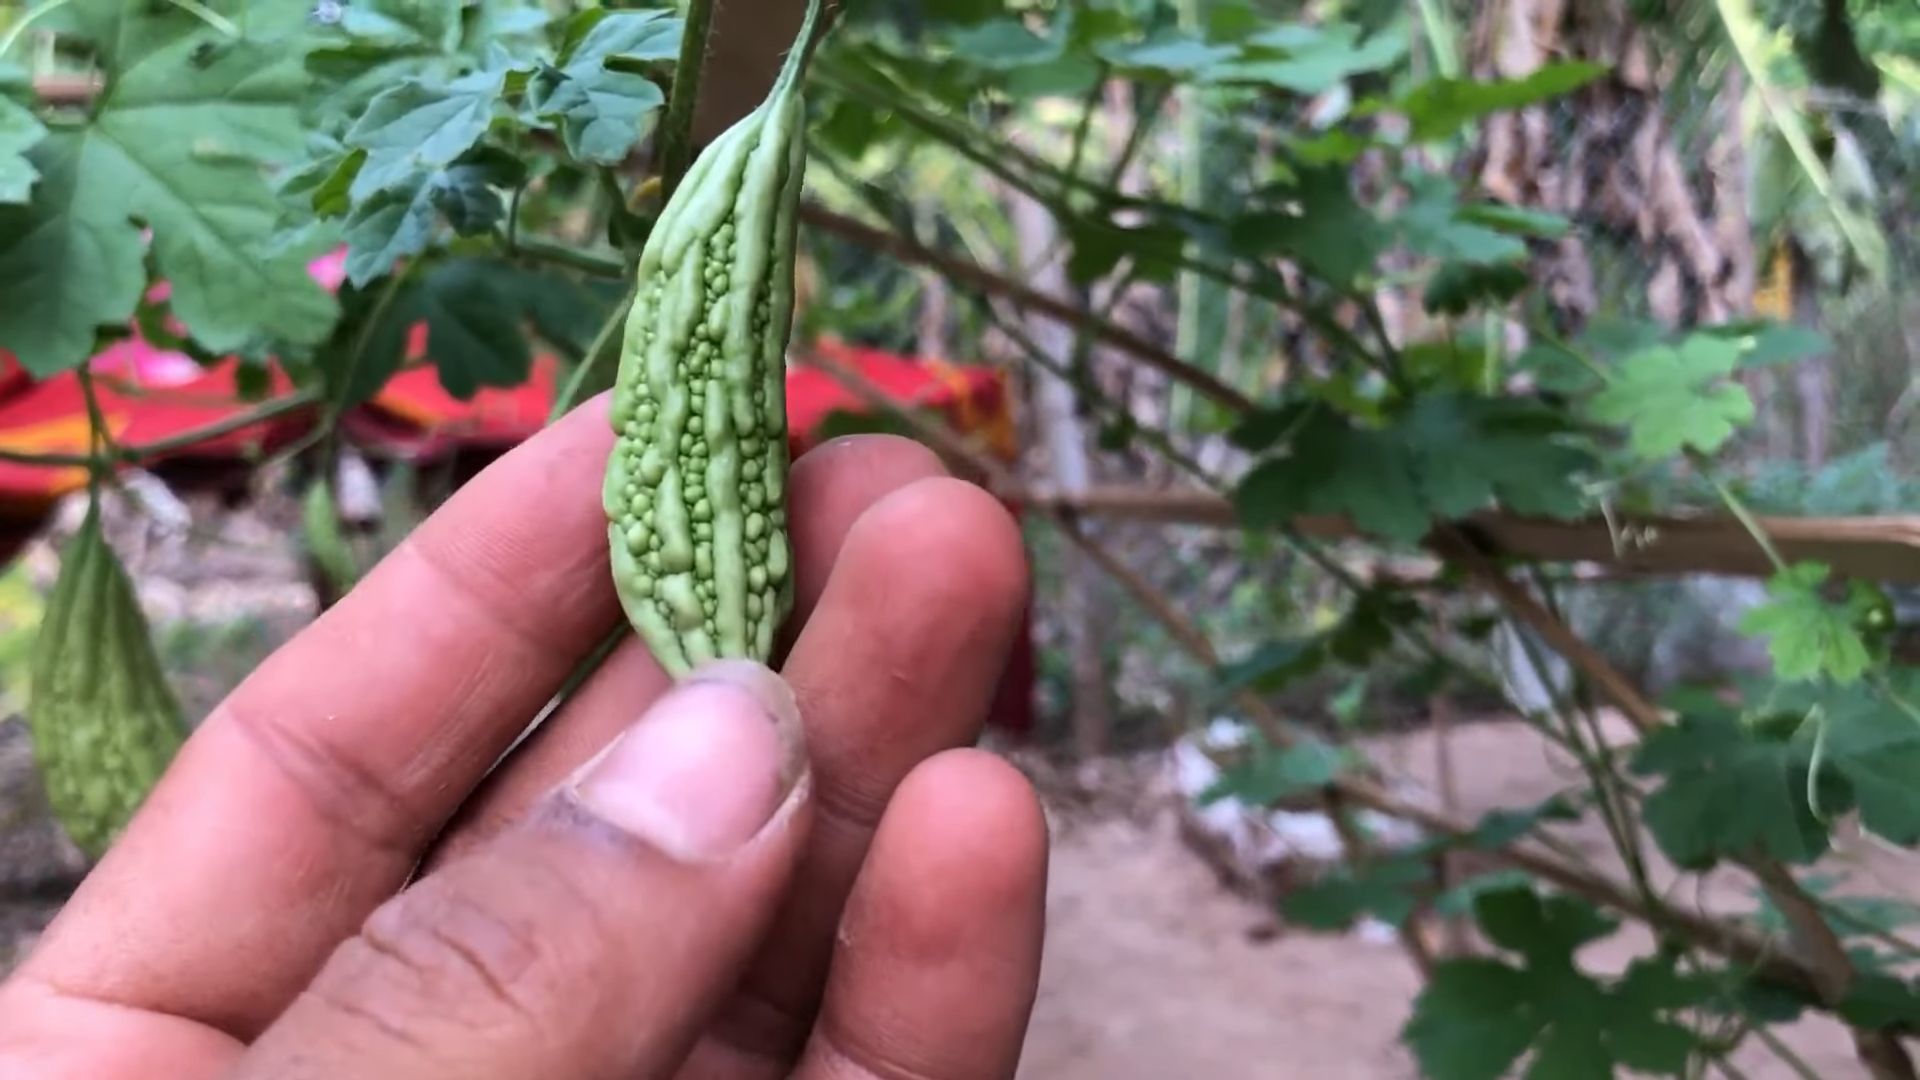
* **Indian Bitter Melon:** These are smaller, darker green, and have a more bumpy, ridged skin. They pack a bigger bitter punch!
* **Japanese Bitter Melon (Goya):** Similar to Indian varieties, but often slightly shorter and thicker. Goya is a staple in Okinawan cuisine.
I personally prefer the Chinese varieties because they’re a bit milder, but feel free to experiment! You can usually find seeds online or at your local garden center.
Getting Started: Seed Germination
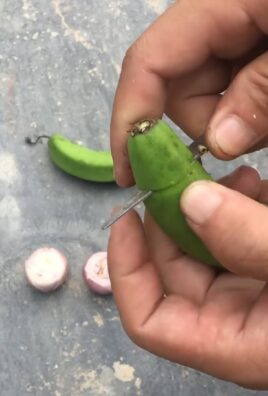
Bitter melon seeds have a tough outer shell, so we need to give them a little help to germinate. Here’s my tried-and-true method:
1. **Scarification:** Gently nick the seed coat with a nail file or sandpaper. Be careful not to damage the inside of the seed! This helps water penetrate.
2. **Soaking:** Soak the seeds in warm water for 24-48 hours. This further softens the seed coat and encourages germination. I usually change the water once or twice during this time.
3. **Planting:** Plant the seeds in small pots or seed trays filled with a well-draining potting mix. Plant them about ½ inch deep.
4. **Warmth and Moisture:** Keep the soil consistently moist but not soggy. Place the pots in a warm location (around 75-85°F or 24-29°C). A heat mat can be really helpful if you live in a cooler climate.
5. **Patience:** Germination can take anywhere from 7-21 days, so be patient! Once the seedlings emerge, provide them with plenty of light.
Preparing the Soil and Planting
Bitter melon needs well-drained, fertile soil. Here’s how I prepare my garden bed:
1. **Choose a Sunny Spot:** Bitter melon needs at least 6-8 hours of sunlight per day.
2. **Amend the Soil:** Dig in plenty of compost or well-rotted manure to improve drainage and fertility. I also like to add a little bit of bone meal for phosphorus, which promotes strong root growth.
3. **Check the pH:** Bitter melon prefers a slightly acidic to neutral soil pH (around 6.0-7.0). You can test your soil with a pH meter or a soil testing kit.
4. **Transplanting:** Once your seedlings have a few sets of true leaves (usually after 3-4 weeks), they’re ready to be transplanted into the garden. Space them about 2-3 feet apart.
5. **Water Thoroughly:** After transplanting, water the seedlings thoroughly.
Setting Up a Trellis
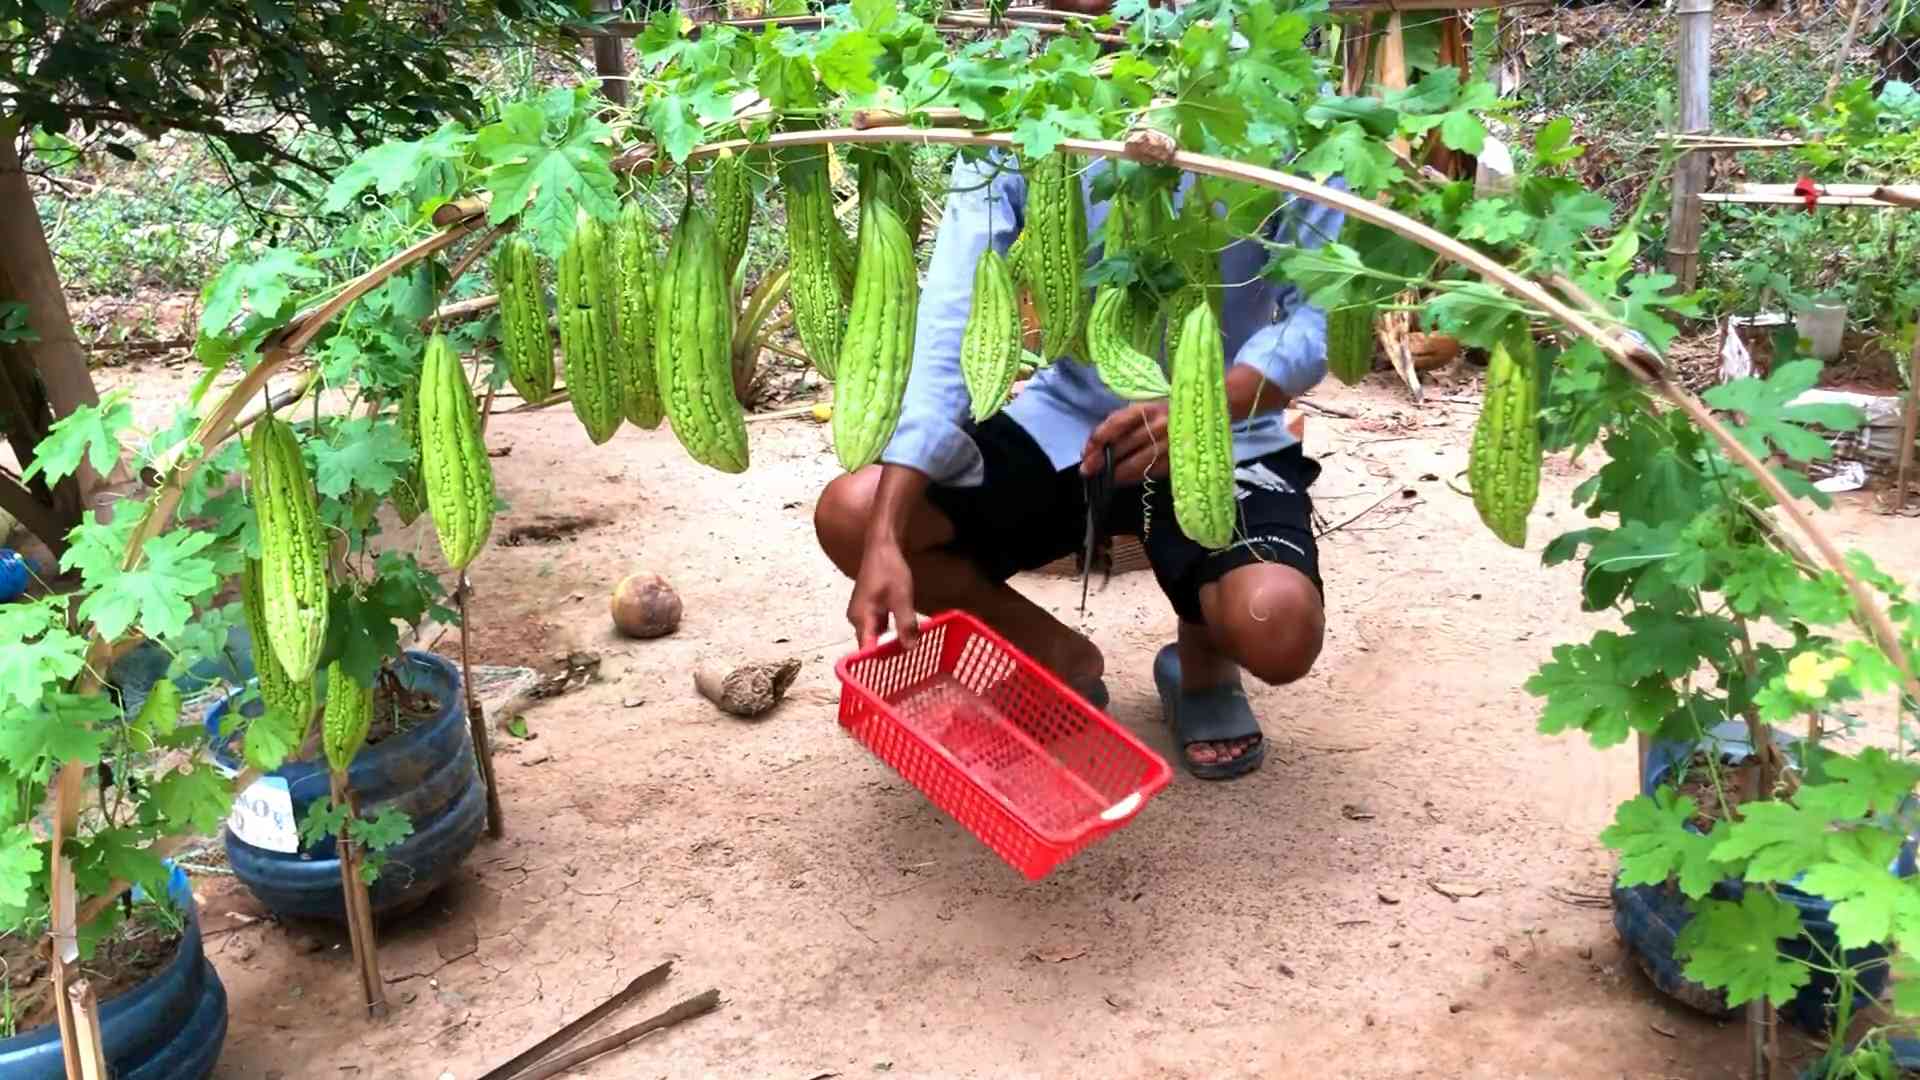
Bitter melon is a vine, so it needs a trellis to climb on. This is crucial for good air circulation and fruit production.
* **Types of Trellises:** You can use a variety of trellises, such as a fence, an arbor, a bamboo structure, or even a sturdy tomato cage. I personally like using a simple wire mesh trellis attached to wooden posts.
* **Height:** Make sure your trellis is at least 6-8 feet tall. Bitter melon vines can get quite long!
* **Placement:** Position the trellis so that it gets plenty of sunlight.
* **Training the Vines:** As the vines grow, gently guide them onto the trellis. You may need to tie them loosely with twine or plant clips.
Watering and Fertilizing
Consistent watering and fertilization are key to a healthy and productive bitter melon plant.
1. **Watering:** Water deeply and regularly, especially during hot, dry weather. Aim to keep the soil consistently moist but not waterlogged. I usually water in the morning to allow the foliage to dry before nightfall, which helps prevent fungal diseases.
2. **Fertilizing:** Feed your bitter melon plants every 2-3 weeks with a balanced fertilizer. I like to use a liquid fertilizer diluted to half strength. You can also use a slow-release granular fertilizer.
3. **Mulching:** Apply a layer of mulch around the base of the plants to help retain moisture, suppress weeds, and regulate soil temperature. I use straw or wood chips.
Pest and Disease Control
Bitter melon can be susceptible to a few pests and diseases. Here’s what to watch out for:
* **Pests:** Aphids, spider mites, and squash bugs are common pests. You can control them with insecticidal soap, neem oil, or by handpicking them off the plants.
* **Diseases:** Powdery mildew and downy mildew are common fungal diseases. To prevent them, ensure good air circulation, avoid overhead watering, and apply a fungicide if necessary.
* **Prevention is Key:** Regularly inspect your plants for signs of pests or diseases. Early detection and treatment are crucial.
Pollination
Bitter melon has separate male and female flowers. You can tell the difference because the female flowers have a tiny fruit behind them. While bees and other pollinators can help, sometimes you need to hand-pollinate to ensure good fruit set.
1. **Identify Male and Female Flowers:** Look for the flowers that are open in the morning.
2. **Collect Pollen:** Gently brush a small paintbrush or cotton swab inside the male flower to collect pollen.
3. **Transfer Pollen:** Transfer the pollen to the stigma (the sticky part) of the female flower.
4. **Repeat:** Repeat this process for several female flowers.
Harvesting
Harvesting bitter melon at the right time is crucial for the best flavor and texture.
1. **Timing:** Harvest the fruits when they are still green and firm, before they start to turn yellow or orange. Overripe fruits will be more bitter and have a tougher texture.
2. **Size:** The size of the fruit will vary depending on the variety, but generally, you can harvest them when they are about 6-8 inches long.
3. **Cutting:** Use a sharp knife or pruning shears to cut the fruit from the vine, leaving a short stem attached.
4. **Frequency:** Harvest regularly to encourage continued fruit production.
Reducing Bitterness
Okay, let’s address the elephant in the room: the bitterness! Here are a few tips to reduce the bitterness of your homegrown bitter melon:
* **Salt:** Soak sliced bitter melon in salted water for 30 minutes before cooking. This helps draw out some of the bitterness.
* **Blanching:** Blanch the sliced bitter melon in boiling water for a few minutes before cooking.
* **Pairing:** Cook bitter melon with strong flavors, such as garlic, ginger, chili peppers, or fermented black beans.
* **Younger Fruits:** Younger, smaller fruits tend to be less bitter than older, larger ones.
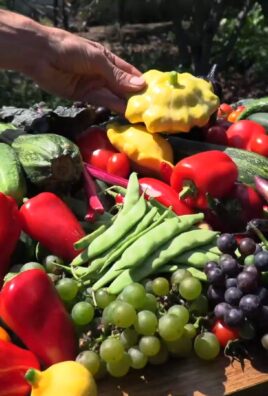
Enjoying Your Harvest
Now for the fun part: eating your homegrown bitter melon! There are countless ways to prepare it. Here are a few of my favorites:
* **Stir-fries:** Bitter melon is delicious in stir-fries with meat, tofu, or vegetables.
* **Soups:** Add sliced bitter melon to soups for a unique flavor.
* **Juices:** Blend bitter melon with other fruits and vegetables for a healthy and refreshing juice.
* **Stuffed:** Hollow out bitter melon and stuff it with a savory filling.
Growing bitter melon can be a bit challenging, but it’s definitely worth the effort. With a little patience and care, you can enjoy fresh, homegrown bitter melon all season long. Happy gardening!
Conclusion
So, there you have it! Growing your own bitter melon might seem daunting at first, but with a little patience and the right approach, you can enjoy a bountiful harvest of this incredibly nutritious and unique vegetable right in your own backyard. This DIY trick, focusing on [specific aspect of growing bitter melon, e.g., soil preparation, trellising, or pest control – choose one based on the article’s content, and insert it here. For example: “This DIY trick, focusing on creating the perfect nutrient-rich soil blend,”] is a game-changer because it addresses one of the most common challenges faced by home gardeners. It’s a must-try for several reasons:
First, you’ll have complete control over the growing process, ensuring that your bitter melons are free from harmful pesticides and chemicals. This is especially important for a vegetable like bitter melon, which is often consumed for its health benefits. Knowing exactly what goes into your food provides peace of mind and allows you to reap the full nutritional rewards.
Second, growing your own bitter melon is significantly more cost-effective than buying it from the store, especially if you consume it regularly. The initial investment in seeds and supplies is quickly offset by the abundance of fresh, homegrown produce.
Third, and perhaps most importantly, this DIY method empowers you to cultivate a truly exceptional flavor profile. Store-bought bitter melons can sometimes be overly bitter, but by controlling the growing conditions, you can influence the taste and achieve a more balanced and palatable flavor.
Ready to take your bitter melon cultivation to the next level? Consider these variations:
* Experiment with different trellising methods: While the method described above is effective, you can also try using different types of trellises, such as A-frame trellises or even repurposing old ladders. This can add visual interest to your garden and provide optimal support for the growing vines.
* Incorporate companion planting: Planting beneficial herbs and flowers alongside your bitter melon can help deter pests and attract pollinators. Marigolds, basil, and nasturtiums are excellent choices.
* Explore different bitter melon varieties: There are numerous varieties of bitter melon available, each with its own unique characteristics. Experiment with different varieties to find the one that best suits your taste and growing conditions. Some varieties are less bitter than others, while others are more productive.
* Seed Saving: Save seeds from your best-performing plants to ensure a continuous supply of high-quality seeds for future growing seasons. This allows you to adapt your bitter melon crop to your specific climate and growing conditions over time.
Don’t be afraid to get your hands dirty and experiment! Gardening is a journey of learning and discovery, and there’s no better way to learn than by doing. We are confident that this DIY trick will significantly improve your success in growing bitter melon.
We encourage you to try this DIY trick and share your experience with us! Let us know what worked well for you, what challenges you encountered, and any tips or tricks you discovered along the way. Your feedback will help us refine this method and make it even more accessible to other home gardeners. Share your photos and stories on our social media channels using #HomeGrownBitterMelon and let’s build a community of passionate bitter melon growers! We can’t wait to see your amazing results!
Frequently Asked Questions (FAQ)
What is the best time of year to plant bitter melon?
Bitter melon thrives in warm weather, so the best time to plant it is in late spring or early summer, after the last frost has passed. The soil temperature should be at least 65°F (18°C) for optimal germination. If you live in a region with a short growing season, you can start the seeds indoors 4-6 weeks before the last expected frost. This will give your plants a head start and allow them to mature before the weather cools down.
How much sunlight does bitter melon need?
Bitter melon requires at least 6-8 hours of direct sunlight per day to thrive. Choose a planting location that receives plenty of sunlight throughout the day. If you are growing bitter melon indoors, supplement with grow lights to ensure adequate light exposure. Insufficient sunlight can lead to stunted growth, reduced fruit production, and a higher susceptibility to pests and diseases.
What type of soil is best for growing bitter melon?
Bitter melon prefers well-drained, fertile soil that is rich in organic matter. Amend your soil with compost, aged manure, or other organic materials before planting to improve its drainage, fertility, and water-holding capacity. A slightly acidic to neutral soil pH of 6.0-7.0 is ideal. You can test your soil pH using a soil testing kit and adjust it accordingly.
How often should I water bitter melon?
Bitter melon needs consistent moisture, especially during hot weather. Water deeply and regularly, ensuring that the soil remains consistently moist but not waterlogged. Avoid overhead watering, as this can promote fungal diseases. Use a soaker hose or drip irrigation system to deliver water directly to the roots. Mulching around the plants can help retain moisture and suppress weeds.
How do I fertilize bitter melon?
Bitter melon is a heavy feeder and benefits from regular fertilization. Use a balanced fertilizer with equal amounts of nitrogen, phosphorus, and potassium. Apply fertilizer every 2-3 weeks during the growing season, following the instructions on the fertilizer label. You can also supplement with organic fertilizers, such as compost tea or fish emulsion. Avoid over-fertilizing, as this can lead to excessive vegetative growth and reduced fruit production.
How do I control pests and diseases in bitter melon?
Bitter melon can be susceptible to various pests and diseases, including aphids, spider mites, squash bugs, and powdery mildew. Regularly inspect your plants for signs of infestation or disease. Use organic pest control methods, such as insecticidal soap, neem oil, or diatomaceous earth, to control pests. Ensure good air circulation around the plants to prevent fungal diseases. Remove any infected leaves or fruit promptly to prevent the spread of disease.
When is bitter melon ready to harvest?
Bitter melon is typically ready to harvest 8-12 weeks after planting. The fruit should be firm, green, and slightly immature. The exact size and color will vary depending on the variety. Harvest the fruit before it turns yellow or orange, as this indicates that it is overripe and will be more bitter. Use a sharp knife or pruning shears to cut the fruit from the vine, leaving a short stem attached.
How do I reduce the bitterness of bitter melon?
Bitter melon is known for its distinctive bitter taste, but there are several ways to reduce its bitterness. Soaking the sliced bitter melon in salted water for 30 minutes before cooking can help draw out some of the bitterness. You can also blanch the bitter melon in boiling water for a few minutes before cooking. Another technique is to remove the seeds and pith, as these are the most bitter parts of the fruit.
Can I grow bitter melon in containers?
Yes, bitter melon can be successfully grown in containers, provided that you choose a large enough container (at least 10 gallons) and provide adequate support for the vines. Use a well-draining potting mix and fertilize regularly. Container-grown bitter melon may require more frequent watering than plants grown in the ground.
How do I save seeds from bitter melon?
To save seeds from bitter melon, allow the fruit to fully ripen on the vine until it turns yellow or orange. Remove the seeds from the fruit and wash them thoroughly to remove any pulp. Spread the seeds out on a paper towel to dry completely. Store the dried seeds in an airtight container in a cool, dark, and dry place. The seeds should remain viable for several years.

Leave a Comment