

Oven rack cleaning bathtub soak – sounds a little crazy, right? But trust me, it’s the secret weapon you’ve been missing in your cleaning arsenal! I know, I know, the thought of putting your greasy oven racks in the bathtub might seem a bit…unconventional. But before you dismiss it, let me tell you why this surprisingly simple DIY trick is about to revolutionize your cleaning routine.
For generations, tackling baked-on grime on oven racks has been a dreaded chore. From harsh chemicals to endless scrubbing, nothing seemed to truly conquer the mess. But what if I told you the answer was already in your bathroom? This method, while perhaps not steeped in ancient history, represents a modern shift towards simpler, less toxic cleaning solutions – a welcome departure from harsh chemicals.
Let’s face it, nobody enjoys spending hours scrubbing oven racks. It’s time-consuming, messy, and often yields disappointing results. That’s where the oven rack cleaning bathtub soak comes in. This DIY hack is not only incredibly effective at dissolving stubborn grease and grime, but it’s also surprisingly gentle on your racks and your bathtub. Plus, it’s a fantastic way to avoid those harsh chemical cleaners that can irritate your skin and lungs. I’m going to show you how to reclaim your weekends and enjoy a sparkling clean oven with minimal effort. Get ready to say goodbye to scrubbing and hello to a sparkling clean oven!
DIY Oven Rack Cleaning: The Bathtub Soak Method
Okay, let’s face it: cleaning oven racks is one of those chores we all dread. Scrubbing endlessly at burnt-on food is a real pain. But fear not! I’m going to share my favorite, super-effective method for getting those racks sparkling clean with minimal effort – the bathtub soak! Yes, you read that right. We’re giving your oven racks a spa day in the tub.
Why This Method Works
This method works because the combination of hot water, dish soap, and a degreasing agent like baking soda or laundry detergent loosens the baked-on grime. The long soak time allows the solution to penetrate even the toughest stains, making them much easier to wipe away. Plus, the bathtub provides ample space to fully submerge the racks, ensuring a thorough cleaning.
What You’ll Need
Before we get started, gather these supplies:
* Your dirty oven racks
* A bathtub (obviously!)
* Hot water
* Dish soap (Dawn is my go-to for grease)
* Baking soda *or* Laundry detergent (powdered works best)
* An old towel or blanket
* A non-abrasive sponge or scrub brush
* Rubber gloves (optional, but recommended)
* A drain stopper (if your bathtub drain is leaky)
Preparing Your Bathtub
This is a crucial step to protect your bathtub’s finish. We don’t want to trade clean oven racks for a scratched tub!
1. Protect the Tub: Lay an old towel or blanket at the bottom of your bathtub. This will prevent the oven racks from scratching the surface. Make sure it covers the entire area where the racks will be resting. I usually use an old, thick beach towel.
2. Plug the Drain: Ensure your bathtub drain is securely plugged. If your stopper is a bit leaky, you might want to use a rubber stopper or even a plastic bag filled with water to create a tight seal. You don’t want all that cleaning solution draining away!
Creating the Cleaning Solution
Now for the magic potion!
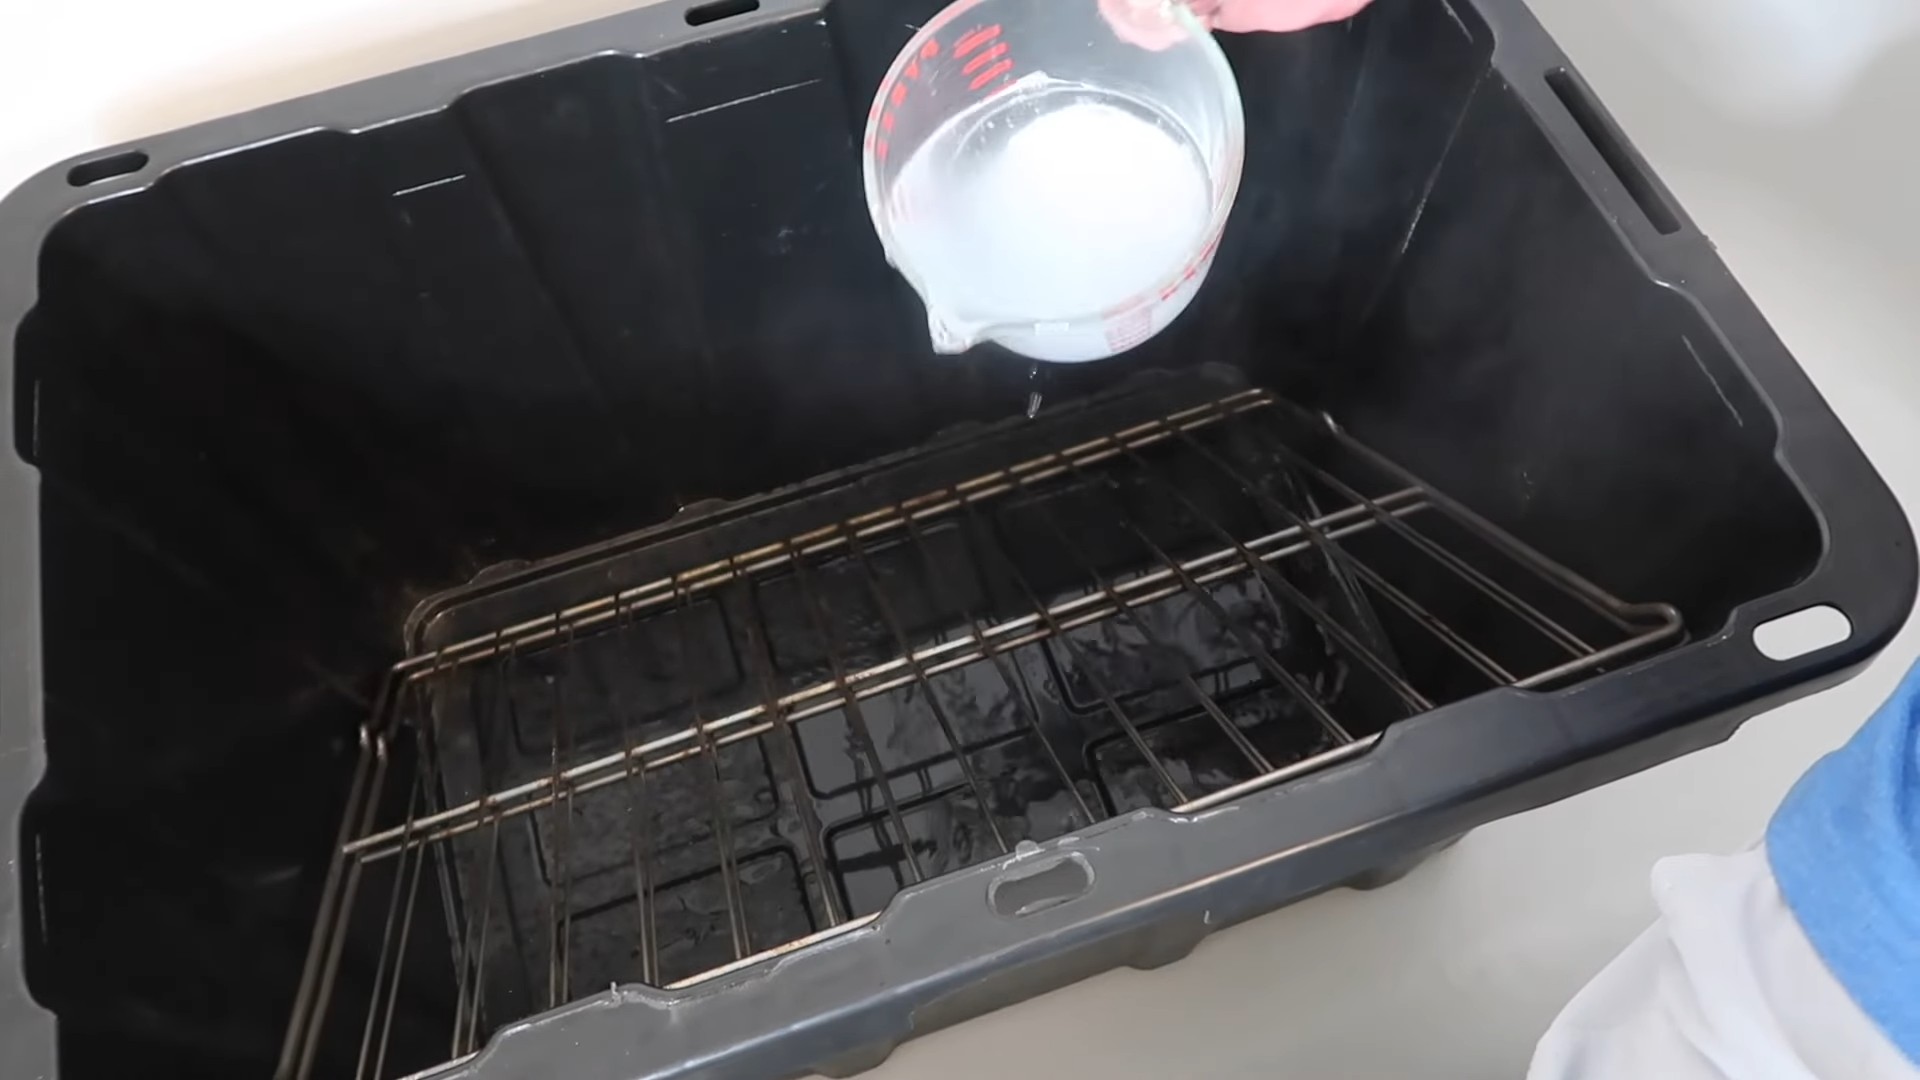
1. Fill the Tub: Start filling your bathtub with hot water. The hotter, the better, as it will help dissolve the grease and grime more effectively. But be careful not to burn yourself! Aim for a temperature you can comfortably handle with gloves. Fill the tub enough to completely submerge your oven racks.
2. Add Dish Soap: Squirt a generous amount of dish soap into the hot water. I usually use about 1/4 to 1/2 cup, depending on how dirty the racks are.
3. Add Baking Soda or Laundry Detergent: Now, add either baking soda or powdered laundry detergent. If you’re using baking soda, add about one cup. If you’re using laundry detergent, use about 1/2 cup. Both act as powerful degreasers. I find that laundry detergent works a little better on really stubborn stains, but baking soda is a great, more natural alternative.
4. Mix Well: Use your hand (with a glove on, if you prefer) or a long-handled spoon to mix the water, dish soap, and baking soda/laundry detergent thoroughly. You want to make sure everything is dissolved and evenly distributed.
Soaking the Oven Racks
This is where the magic happens!
1. Submerge the Racks: Carefully place your oven racks into the bathtub, making sure they are completely submerged in the cleaning solution. You might need to rearrange them a bit to fit them all in.
2. Add More Water (If Needed): If the racks aren’t fully submerged, add more hot water until they are.
3. Soak Time: Let the racks soak for at least 2-4 hours, or even overnight for really tough grime. The longer they soak, the easier the cleaning will be. I usually let mine soak overnight.
Scrubbing and Rinsing
Almost there!
1. Drain the Tub: After the soaking period, carefully drain the bathtub. Be prepared for some pretty dirty water!
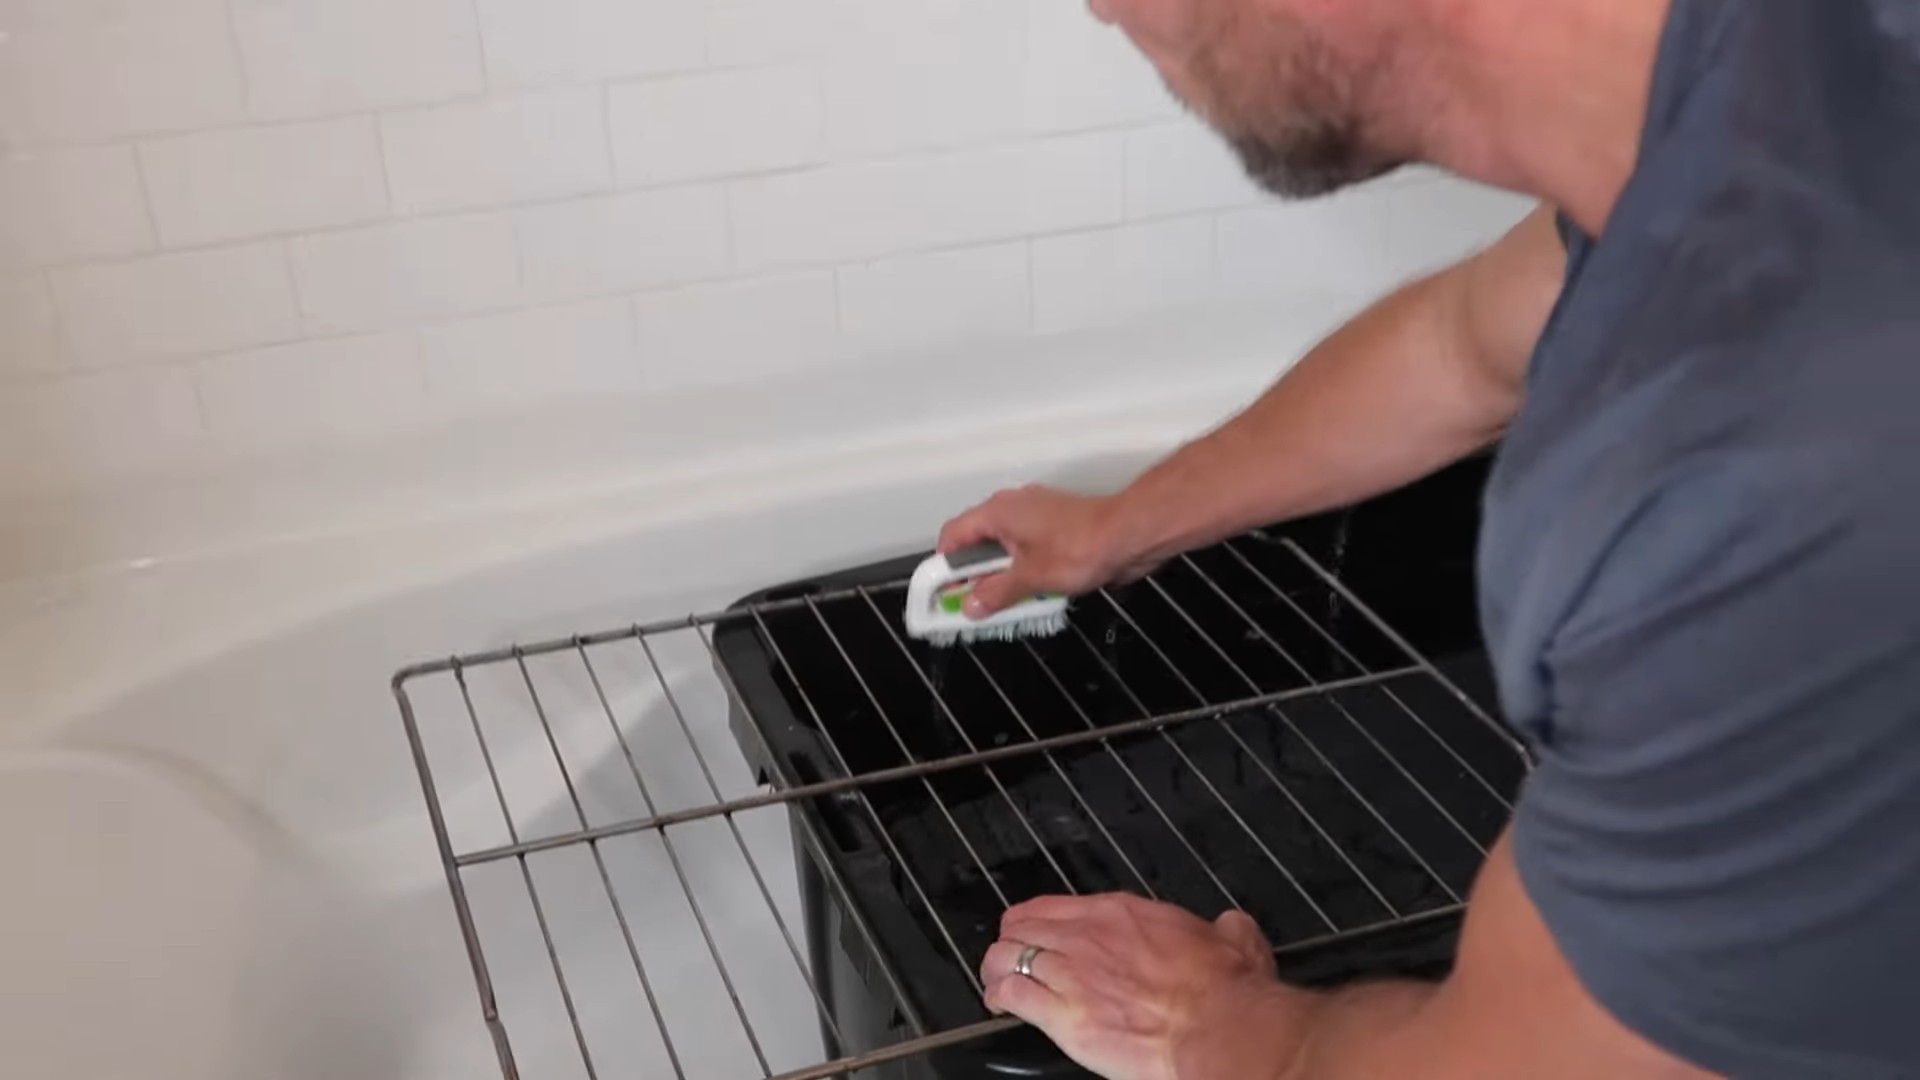
2. Scrub the Racks: Using a non-abrasive sponge or scrub brush, scrub the oven racks to remove any remaining grime. You should find that most of the baked-on food comes off easily. For stubborn spots, you can try using a paste of baking soda and water.
3. Rinse Thoroughly: Rinse the oven racks thoroughly with clean water to remove all traces of soap and cleaning solution. I usually rinse them under the bathtub faucet or with a hose in the backyard.
4. Inspect and Repeat (If Necessary): Inspect the racks to make sure they are clean. If there are any remaining stubborn spots, repeat the scrubbing and rinsing process. You might even need to soak them again for a shorter period.
Drying and Replacing
The final step!
1. Dry the Racks: Dry the oven racks thoroughly with a clean towel. You can also let them air dry completely. Make sure they are completely dry before putting them back in your oven to prevent rust.
2. Replace the Racks: Carefully place the clean, dry oven racks back into your oven.
Alternative Cleaning Solutions
While the dish soap and baking soda/laundry detergent combo is my favorite, here are a few other options you can try:
* Vinegar and Baking Soda: This is a classic cleaning combination. Add one cup of vinegar to the hot water along with the baking soda. Be prepared for some fizzing!
* Borax: Borax is a powerful cleaning agent that can be very effective at removing grease and grime. Add about 1/2 cup of Borax to the hot water. Be sure to wear gloves when using Borax.
* Oven Cleaner (Use with Caution!): If you’re dealing with extremely stubborn grime, you can try using oven cleaner. However, be very careful when using oven cleaner, as it can be harsh and corrosive. Always wear gloves and eye protection, and follow the manufacturer’s instructions carefully. I would only use this as a last resort.
Tips and Tricks for Success
* Don’t Use Abrasive Cleaners: Avoid using abrasive cleaners or steel wool, as they can scratch the oven racks.
* Ventilate the Bathroom: Open a window or turn on the bathroom fan to ventilate the area while you’re cleaning.
* Wear Gloves: Wearing rubber gloves will protect your hands from the hot water and cleaning solution.
* Clean Regularly: The more often you clean your oven racks, the easier it will be to keep them clean. Try to clean them every few months, or after any major spills.
* Spot Clean: For minor spills, you can spot clean the racks with a damp sponge and dish soap.
* Consider a Self-Cleaning Oven: If you have a self-cleaning oven, you can use the self-cleaning cycle to clean the racks. However, be aware that this can be a harsh process and may damage the racks over time. I prefer the bathtub soak method for its gentleness.
* Don’t Forget the Oven Interior: While you’re at it, don’t forget to clean the inside of your oven! You can use a similar cleaning solution to clean the oven walls and floor.
Dealing with Extremely Stubborn Grime
Sometimes, even after soaking and scrubbing, you might still have some stubborn grime clinging to your oven racks. Here are a few extra tips for tackling those tough spots:
* Baking Soda Paste: Make a paste of baking soda and water and apply it directly to the stubborn spots. Let it sit for a few minutes, then scrub with a non-abrasive sponge.
* Steel Wool (Use Sparingly): As a last resort, you can try using steel wool on the really tough spots. However, be very careful, as steel wool can scratch the racks. Use it sparingly and gently.
* Razor Blade Scraper: For extremely stubborn, hardened grime, you can try using a razor blade scraper. Hold the scraper at a shallow angle and gently scrape away the grime. Be very careful not to scratch the racks.
* Repeat the Soaking Process: Sometimes, all it takes is another soak to loosen the remaining grime. Repeat the soaking process for a shorter period, and then try scrubbing again.
Safety First!
* Hot Water: Be careful when handling hot water to avoid burns.
* Cleaning Solutions: Always follow the manufacturer’s instructions when using cleaning solutions.
* Ventilation: Ensure adequate ventilation when cleaning to avoid inhaling fumes.
* Gloves and Eye Protection: Wear gloves and eye protection when using harsh cleaning solutions.
Enjoy Your Sparkling Clean Oven Racks!
And there you have it! Sparkling clean oven racks without all the elbow grease. This bathtub soak method is a game-changer, and I hope it makes your oven cleaning chores a little less daunting. Happy cleaning!
Conclusion
So, there you have it! The bathtub oven rack cleaning soak – a simple, effective, and surprisingly satisfying way to tackle one of the kitchen’s most dreaded chores. Forget harsh chemicals, endless scrubbing, and aching arms. This method harnesses the power of readily available household ingredients and a little bit of time to deliver sparkling clean oven racks without the elbow grease.
Why is this DIY trick a must-try? Because it’s not just about clean oven racks; it’s about reclaiming your time and energy. It’s about avoiding the fumes and potential skin irritation associated with commercial oven cleaners. It’s about using what you already have in your home to achieve professional-level results. And, frankly, it’s about the sheer satisfaction of watching years of baked-on grime simply melt away.
But the beauty of this method lies in its adaptability. Feel free to experiment with variations to suit your specific needs and preferences. For instance, if you’re dealing with particularly stubborn grime, consider adding a cup of borax to the soaking solution for an extra boost of cleaning power. Or, if you’re sensitive to the scent of ammonia, you can substitute it with a stronger concentration of dish soap and hot water, although this may require a longer soaking time. You can also use washing soda instead of baking soda for a more powerful cleaning action. Remember to always wear gloves when handling cleaning solutions.
Another variation involves the soaking container. While a bathtub is ideal for its size, you can also use a large utility sink, a kiddie pool, or even a heavy-duty garbage bag lined with towels to protect your flooring. Just ensure that the container is large enough to fully submerge the oven racks.
Don’t be afraid to adjust the soaking time based on the level of grime on your racks. Heavily soiled racks may require an overnight soak for optimal results. And remember, a little bit of gentle scrubbing with a non-abrasive sponge or brush after soaking can help remove any remaining stubborn spots.
We truly believe that this bathtub oven rack cleaning soak will revolutionize your cleaning routine. It’s a game-changer for anyone who wants to maintain a clean and efficient kitchen without resorting to harsh chemicals or back-breaking labor.
So, what are you waiting for? Gather your supplies, prepare your soaking solution, and get ready to witness the magic unfold. We’re confident that you’ll be amazed by the results.
But don’t just take our word for it! We encourage you to try this DIY trick for yourself and share your experience with us. Let us know in the comments below how it worked for you, what variations you tried, and any tips or tricks you discovered along the way. Your feedback will not only help other readers but also contribute to a community of DIY enthusiasts who are passionate about finding simple and effective solutions for everyday challenges. Share your before and after photos on social media and tag us! We can’t wait to see your sparkling clean oven racks!
Frequently Asked Questions (FAQ)
1. Is it safe to use ammonia in the bathtub?
Yes, it is generally safe to use ammonia in the bathtub for cleaning oven racks, but with precautions. Always ensure the bathroom is well-ventilated by opening windows and turning on the exhaust fan. Never mix ammonia with bleach, as this creates toxic and dangerous fumes. Wear gloves to protect your skin and avoid splashing the solution. After soaking, thoroughly rinse the bathtub to remove any remaining ammonia residue. If you have a sensitive bathtub surface, test a small, inconspicuous area first to ensure the ammonia doesn’t cause any damage or discoloration. If you are concerned about using ammonia, consider alternative cleaning agents like baking soda, washing soda, or dish soap, although these may require longer soaking times and more scrubbing.
2. Can I use this method to clean other oven parts, like the oven door or interior?
While this method is primarily designed for oven racks, you can adapt it for other removable oven parts, such as broiler pans or drip trays. However, avoid using this method on the oven door or interior, as these parts cannot be easily submerged. For the oven door, you can create a paste of baking soda and water and apply it to the glass, letting it sit for a few hours before wiping it clean. For the oven interior, consider using a commercial oven cleaner or a homemade solution of vinegar and baking soda. Always follow the manufacturer’s instructions for cleaning your specific oven model.
3. How long should I soak the oven racks?
The soaking time depends on the level of grime on your oven racks. For lightly soiled racks, a few hours may be sufficient. For heavily soiled racks, an overnight soak (8-12 hours) is recommended. You can check the racks periodically to see if the grime is loosening. If the grime is still stubborn after the initial soaking time, you can extend the soaking time or add more cleaning agents to the solution. Remember to always wear gloves when handling the racks and the cleaning solution.
4. What if I don’t have a bathtub? What else can I use to soak the oven racks?
If you don’t have a bathtub, several alternatives can be used. A large utility sink is a good option if you have one. You can also use a kiddie pool, a large storage container, or even a heavy-duty garbage bag lined with towels. If using a garbage bag, make sure it is sturdy and leak-proof to prevent any spills. Place the bag inside a box or container for added support. Ensure that the chosen container is large enough to fully submerge the oven racks in the cleaning solution.
5. Can I use this method on self-cleaning oven racks?
Check your oven’s manual. Some self-cleaning oven racks are coated with a special material that can be damaged by harsh cleaning agents or prolonged soaking. If your oven racks are self-cleaning, it’s best to follow the manufacturer’s instructions for cleaning them. In many cases, self-cleaning oven racks can be cleaned by simply wiping them down with a damp cloth after the self-cleaning cycle. If you’re unsure, it’s always best to err on the side of caution and avoid using this method.
6. What kind of dish soap should I use?
Any grease-cutting dish soap will work for this method. However, for best results, choose a dish soap that is specifically designed to remove tough grease and grime. Some popular options include Dawn, Palmolive, and Joy. You can also use a concentrated dish soap for added cleaning power.
7. Is there a more eco-friendly alternative to ammonia?
Yes, there are several eco-friendly alternatives to ammonia. Baking soda and vinegar are two popular options. You can create a paste of baking soda and water and apply it to the oven racks, letting it sit for a few hours before scrubbing. You can also soak the racks in a solution of vinegar and water. Washing soda is another effective and more environmentally friendly option. It’s a stronger cleaner than baking soda but still less harsh than ammonia. Remember that eco-friendly alternatives may require longer soaking times and more scrubbing to achieve the same results as ammonia.
8. How do I prevent oven racks from getting so dirty in the first place?
Preventing oven racks from getting excessively dirty can save you time and effort in the long run. Consider using oven liners or baking sheets to catch drips and spills. Clean up spills immediately to prevent them from baking onto the racks. You can also try lining the bottom of your oven with aluminum foil to catch drips, but be sure to check your oven’s manual first, as some manufacturers advise against this. Regularly wiping down the oven racks with a damp cloth can also help prevent grime from building up.
9. What if the grime is still stuck after soaking and scrubbing?
If you’ve soaked and scrubbed your oven racks and some grime is still stubbornly clinging on, don’t despair! Try repeating the soaking process with a fresh batch of cleaning solution. You can also try using a more abrasive cleaning tool, such as a steel wool pad or a scouring pad, but be careful not to scratch the racks. For particularly stubborn spots, you can try applying a paste of baking soda and water directly to the grime and letting it sit for a few hours before scrubbing. As a last resort, you can consider using a commercial oven cleaner, but be sure to follow the manufacturer’s instructions carefully and wear appropriate safety gear.
10. How often should I clean my oven racks?
The frequency of cleaning your oven racks depends on how often you use your oven and how prone it is to spills. As a general rule, it’s a good idea to clean your oven racks at least every few months. If you frequently bake or roast messy foods, you may need to clean them more often. Regularly inspecting your oven racks for spills and grime can help you determine when it’s time for a cleaning.


Leave a Comment