

Growing Carrots at Home can seem like a daunting task, conjuring images of sprawling farms and endless rows of orange delights. But what if I told you that you could cultivate your own sweet, crunchy carrots right in your backyard, or even on your balcony? Forget those bland, store-bought carrots – imagine the satisfaction of harvesting vibrant, flavorful carrots that you nurtured from seed to table!
Carrots have a rich history, dating back thousands of years. Originally cultivated for their aromatic leaves and seeds, the vibrant orange root we know and love today is a relatively recent development. Throughout history, carrots have been prized for their nutritional value and medicinal properties, appearing in folklore and culinary traditions across the globe.
Why should you embark on this DIY adventure? Well, for starters, homegrown carrots taste infinitely better! Plus, you have complete control over what goes into your garden, ensuring that your carrots are free from harmful pesticides and chemicals. In today’s world, where we are increasingly conscious of what we consume, growing carrots at home offers a sustainable and rewarding way to connect with nature and nourish ourselves with fresh, healthy produce. This article will provide you with simple, effective DIY tricks and hacks to make growing carrots at home a breeze, even if you’re a complete beginner. Get ready to dig in and discover the joy of homegrown carrots!
Growing Carrots at Home: A Beginner’s Guide to Sweet Success
Hey there, fellow gardening enthusiasts! I’m so excited to share my experience and tips on growing carrots right in your own backyard (or even in containers!). Carrots are a fantastic addition to any garden – they’re delicious, nutritious, and surprisingly easy to grow once you get the hang of it. Let’s dive in!
Choosing the Right Carrot Variety
First things first, you need to decide what kind of carrots you want to grow. There are tons of varieties, each with its own unique characteristics. Here’s a quick rundown:
* Nantes: These are classic, cylindrical carrots with a sweet flavor and smooth skin. They’re a great all-around choice and mature relatively quickly.
* Danvers: These are longer and more tapered than Nantes carrots, with a slightly stronger flavor. They’re known for their good storage capabilities.
* Chantenay: These are shorter, thicker carrots that are perfect for heavier soils. They have a robust flavor and are often used for processing.
* Baby Carrots: These are small, round carrots that mature very quickly. They’re great for snacking and container gardening.
* Heirloom Varieties: Don’t be afraid to experiment with heirloom varieties like ‘Purple Haze’ or ‘Yellowstone’ for a unique and colorful harvest!
I personally love growing Nantes carrots because they’re so sweet and easy to eat fresh from the garden. But feel free to experiment and find your favorite!
Preparing Your Carrot Patch
Carrots need loose, well-drained soil to thrive. Rocky or compacted soil will result in stunted, misshapen carrots. Trust me, I’ve been there! Here’s how to prepare your soil for success:
* Choose a Sunny Spot: Carrots need at least 6 hours of sunlight per day.
* Clear the Area: Remove any rocks, weeds, or debris from the planting area.
* Loosen the Soil: Use a garden fork or tiller to loosen the soil to a depth of at least 12 inches. This is crucial for allowing the carrots to grow long and straight.
* Amend the Soil: Add plenty of compost or well-rotted manure to improve drainage and fertility. Carrots are heavy feeders, so they need a nutrient-rich soil.
* Create Raised Beds (Optional): If your soil is particularly heavy or poorly drained, consider creating raised beds. This will improve drainage and make it easier to control the soil quality.
Planting Your Carrot Seeds
Now for the fun part – planting! Carrot seeds are tiny, so it can be a bit tricky to get them evenly spaced. Here’s my method:
1. Create Shallow Furrows: Use a hoe or your finger to create shallow furrows about 1/4 inch deep and 1-2 inches apart.
2. Sow the Seeds: Sprinkle the carrot seeds evenly along the furrows. Don’t worry about being too precise – you can always thin them out later.
3. Cover the Seeds: Gently cover the seeds with a thin layer of soil or compost.
4. Water Gently: Water the area gently with a watering can or hose with a gentle spray nozzle. Be careful not to wash away the seeds.
5. Keep the Soil Moist: Keep the soil consistently moist until the seeds germinate, which usually takes about 1-3 weeks. You can cover the area with a piece of burlap or shade cloth to help retain moisture.
Important Tip: Carrot seeds are notoriously slow to germinate. Be patient and don’t give up!
Thinning Your Carrot Seedlings
Once your carrot seedlings emerge, you’ll need to thin them out to give them enough space to grow. This is a crucial step for getting good-sized carrots.
1. Wait Until Seedlings are 1-2 Inches Tall: Wait until the seedlings are about 1-2 inches tall before thinning them.
2. Thin to 1-2 Inches Apart: Thin the seedlings to about 1-2 inches apart. You can use small scissors or your fingers to gently pull out the extra seedlings.
3. Thin Again Later: As the carrots grow larger, you may need to thin them again to 3-4 inches apart.
4. Don’t Waste the Thinnings: You can eat the thinnings! They’re delicious in salads or as a garnish.
Caring for Your Carrot Plants
Carrots are relatively low-maintenance plants, but they do need regular watering and weeding.
* Water Regularly: Water your carrot plants regularly, especially during dry spells. Aim for about 1 inch of water per week.
* Weed Carefully: Keep the area around your carrot plants free of weeds. Weeds can compete with the carrots for nutrients and water. Be careful when weeding, as you don’t want to disturb the carrot roots.
* Fertilize (Optional): If your soil is poor, you can fertilize your carrot plants with a balanced fertilizer. Follow the instructions on the fertilizer package. I prefer using a liquid seaweed fertilizer diluted in water.
* Mulch (Optional): Mulching around your carrot plants can help retain moisture, suppress weeds, and regulate soil temperature. Use organic mulch such as straw, hay, or wood chips.
Dealing with Pests and Diseases
Carrots are generally resistant to pests and diseases, but there are a few things to watch out for:
* Carrot Rust Flies: These flies lay their eggs near the base of carrot plants, and the larvae burrow into the roots, causing damage. You can prevent carrot rust flies by covering your carrot plants with row covers.
* Nematodes: These microscopic worms can damage carrot roots. You can control nematodes by planting resistant varieties or by using a soil amendment such as neem cake.
* Leaf Spot Diseases: These diseases can cause spots on the leaves of carrot plants. You can prevent leaf spot diseases by providing good air circulation and avoiding overhead watering.
If you notice any signs of pests or diseases, take action promptly to prevent them from spreading.
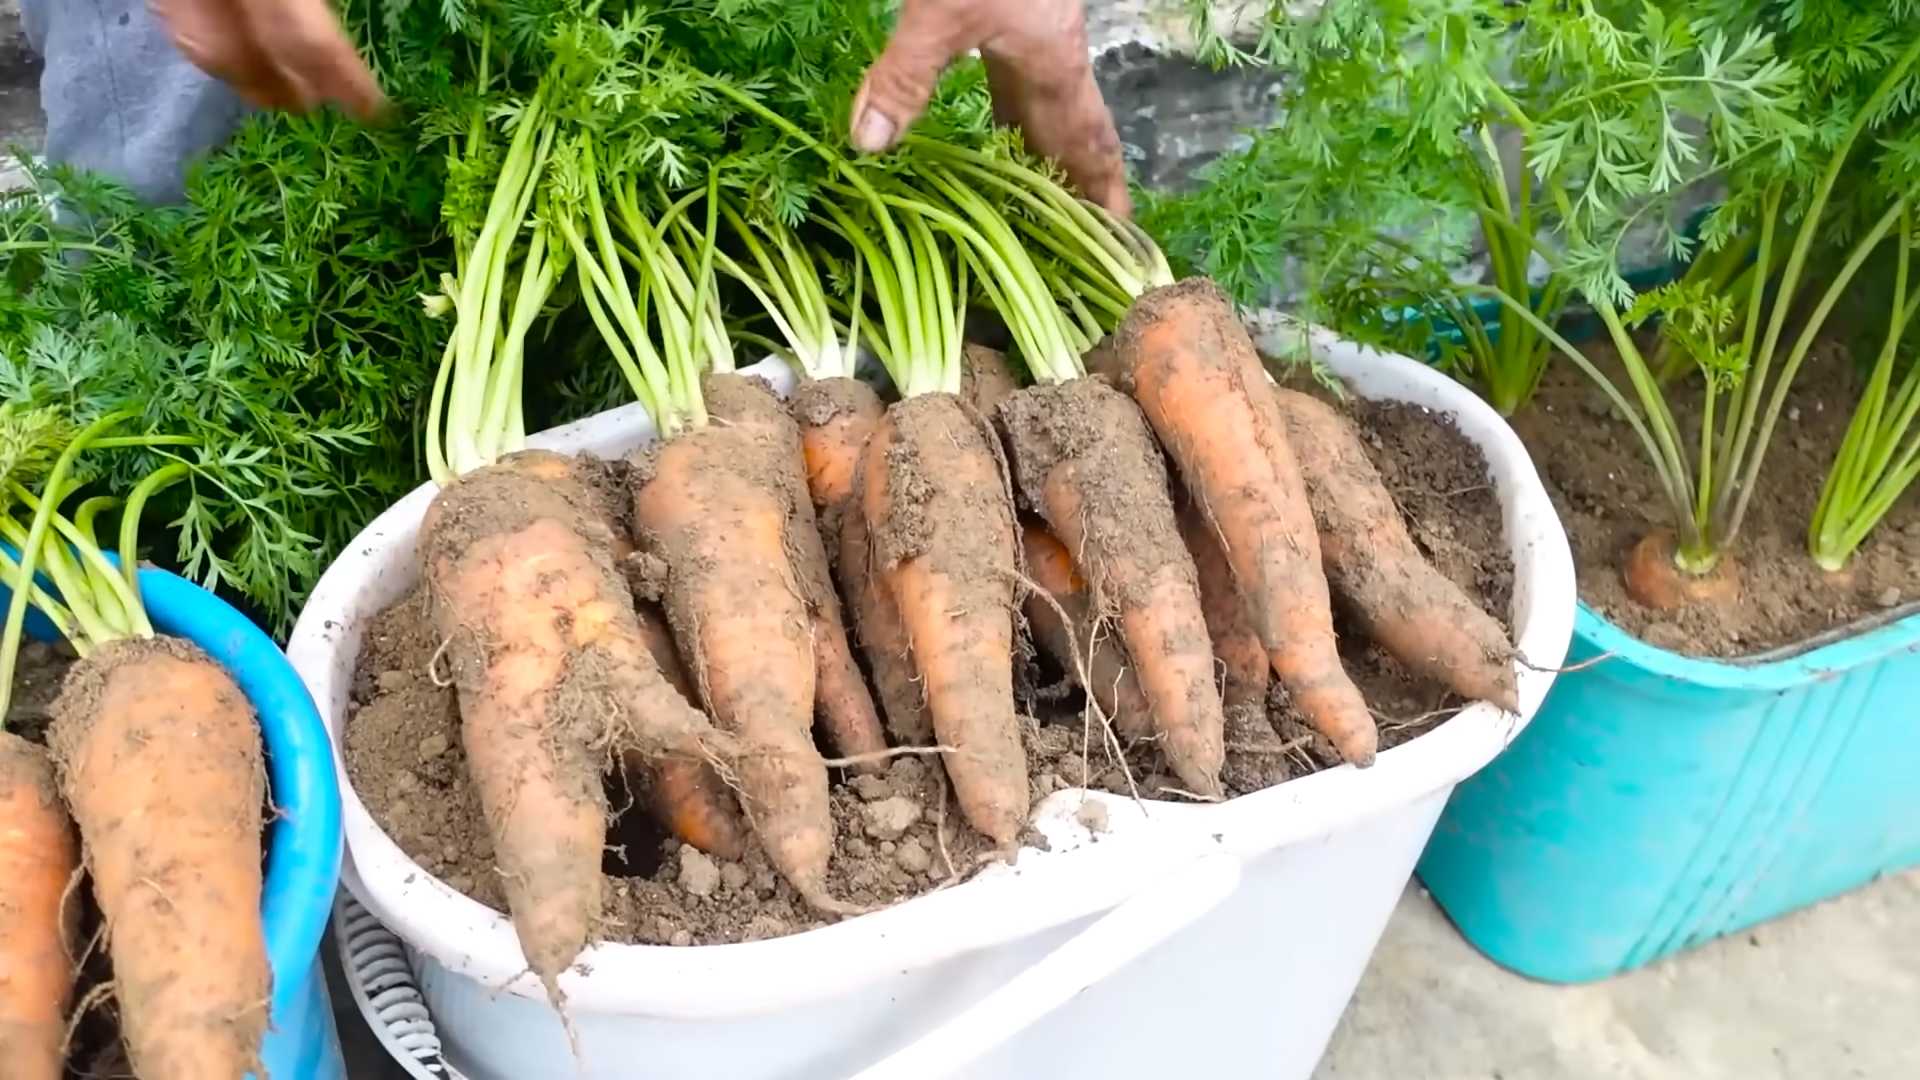
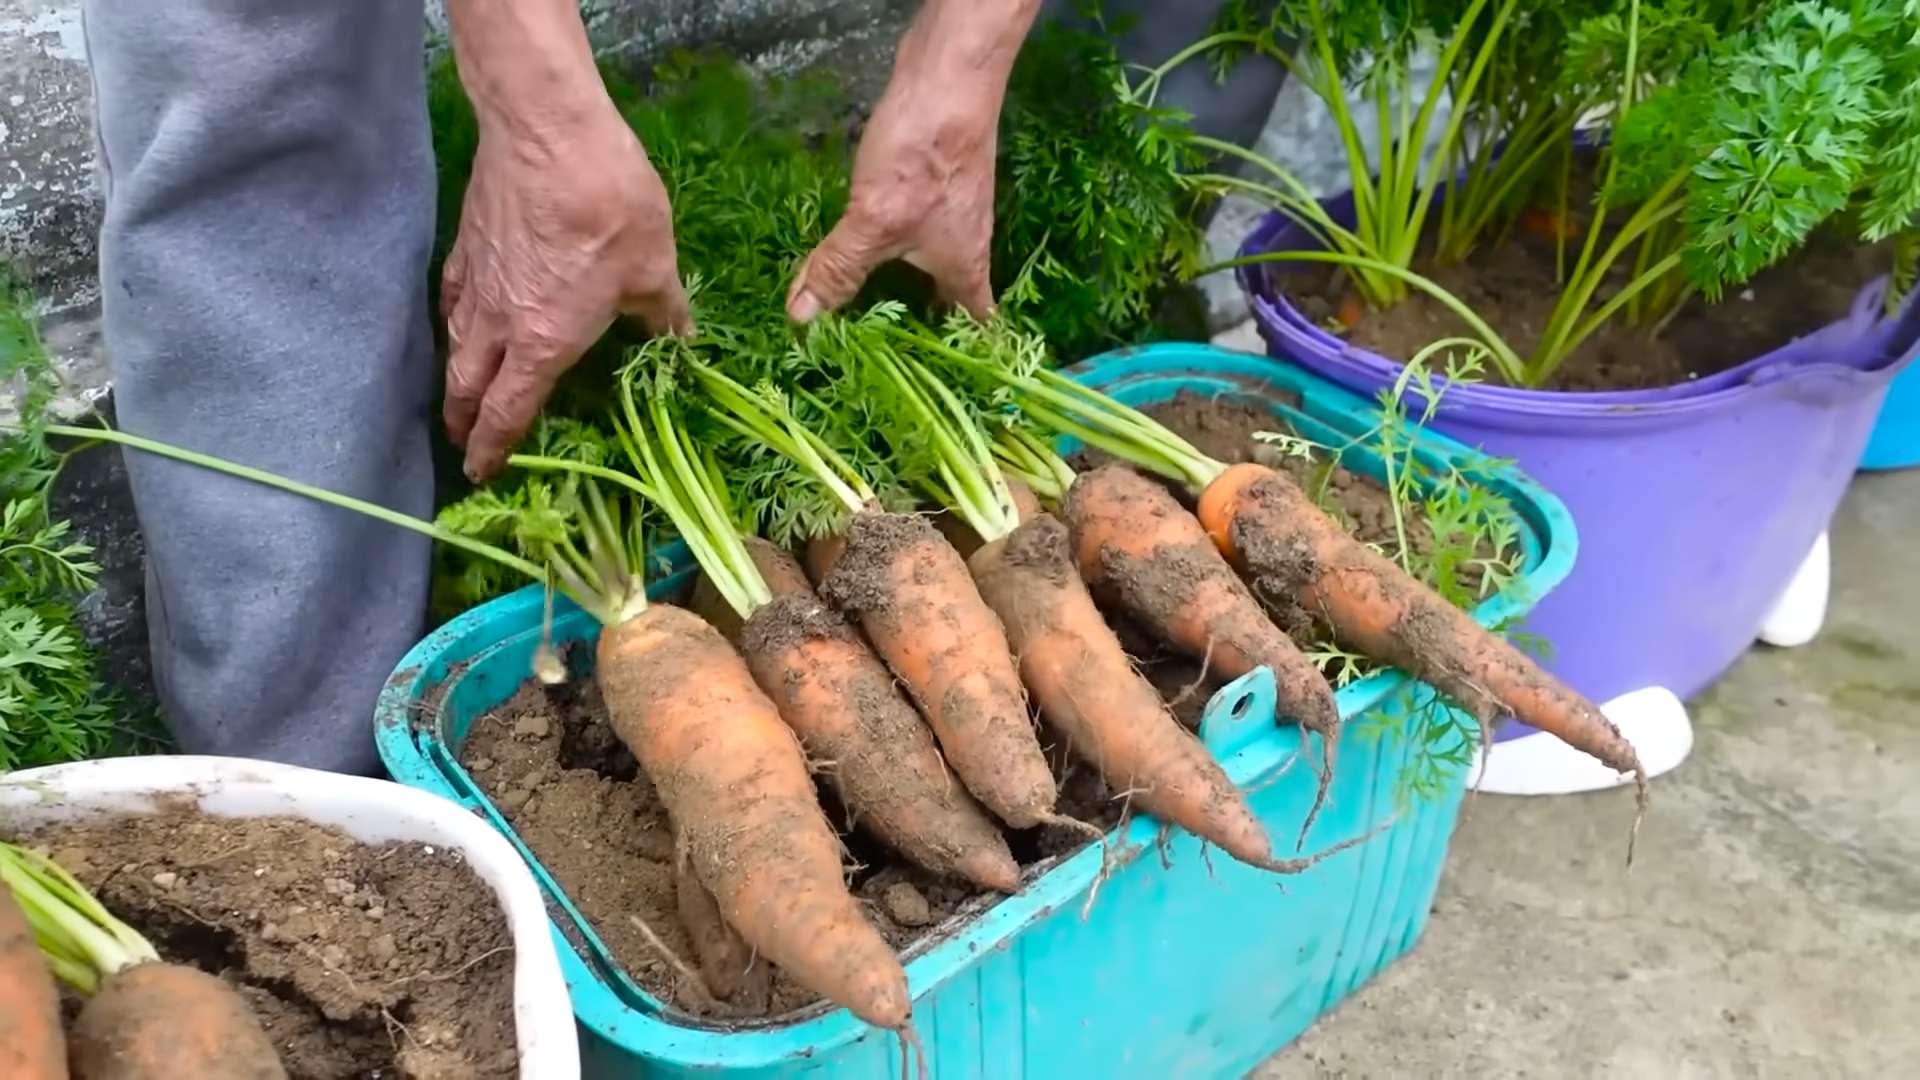
Harvesting Your Carrots
The moment you’ve been waiting for! Carrots are typically ready to harvest 60-80 days after planting, depending on the variety.
1. Check the Size: Check the size of the carrots by gently pulling back the soil around the tops.
2. Harvest When Ready: Harvest the carrots when they reach the desired size.
3. Loosen the Soil: Loosen the soil around the carrots with a garden fork or trowel.
4. Pull Gently: Gently pull the carrots out of the ground.
5. Wash and Enjoy: Wash the carrots and enjoy them fresh from the garden!
Harvesting Tip: Harvest your carrots on a cool, dry day to prevent them from rotting.
Storing Your Carrots
If you have a surplus of carrots, you can store them for several months.
* Trim the Tops: Trim the tops of the carrots, leaving about 1/2 inch of stem.
* Wash and Dry: Wash the carrots and dry them thoroughly.
* Store in a Cool, Dark Place: Store the carrots in a cool, dark place such as a root cellar or refrigerator.
* Layer with Sand or Sawdust: Layer the carrots in a container with sand or sawdust to help keep them moist and prevent them from rotting.
Storage Tip: Don’t store damaged or bruised carrots, as they will rot and spoil the other carrots.
Growing Carrots in Containers
Don’t have a garden? No problem! You can grow carrots in containers.
* Choose a Large Container: Choose a large container that is at least 12 inches deep.
* Use a Well-Draining Potting Mix: Use a well-draining potting mix that is rich in organic matter.
* Plant the Seeds: Plant the carrot seeds according to the instructions above.
* Water Regularly: Water the carrots regularly, especially during hot weather.
* Fertilize Regularly: Fertilize the carrots regularly with a balanced fertilizer.
* Thin the Seedlings: Thin the seedlings to 2-3 inches apart.
Growing carrots in containers is a great way to enjoy fresh carrots even if you don’t have a lot of space.
Troubleshooting Common Carrot Problems
Even with the best planning, you might encounter some challenges. Here are a few common problems and how to address them:
* Forked or Stunted Carrots: This is usually caused by rocky or compacted soil. Make sure to prepare your soil properly before planting.
* Bitter Carrots: This can be caused by hot weather or inconsistent watering. Keep the soil consistently moist and provide shade during the hottest part of the day.
* Cracked Carrots: This is often caused by uneven watering. Water deeply and consistently, especially during dry spells.
*
Conclusion
So, there you have it! Growing carrots at home isn’t just about saving money; it’s about experiencing the unparalleled joy of nurturing something from seed to table. The vibrant color, the satisfying crunch, and the burst of fresh, earthy sweetness – all amplified when you know you cultivated it yourself. This DIY trick, as simple as it seems, unlocks a world of flavor and connection to your food that you simply can’t find in store-bought carrots.
Think of the possibilities! You can experiment with different carrot varieties. Nantes carrots, with their cylindrical shape and sweet flavor, are perfect for slicing and snacking. Danvers carrots, known for their classic tapered shape and robust flavor, are ideal for roasting and juicing. And don’t forget the colorful heirlooms! Imagine pulling up purple, yellow, or even white carrots from your garden – a visual feast as well as a culinary delight.
Beyond variety, consider the soil amendments you use. Adding compost tea or bone meal can significantly impact the size and sweetness of your carrots. Companion planting with herbs like rosemary or sage can deter pests and enhance the flavor of your carrots. You can even try succession planting, sowing seeds every few weeks, to ensure a continuous harvest throughout the growing season.
This DIY carrot growing method is a game-changer for anyone who values fresh, flavorful produce and a deeper connection to their food. It’s a rewarding experience that will transform the way you think about carrots and gardening in general.
Don’t be intimidated if you’re a beginner. Start small, follow the steps outlined, and don’t be afraid to experiment. Every garden is unique, and every growing season brings new lessons. The most important thing is to get your hands dirty and enjoy the process.
We are confident that once you taste the difference between homegrown and store-bought carrots, you’ll be hooked. The superior flavor and texture are undeniable. Plus, you’ll have the satisfaction of knowing exactly where your food came from and how it was grown.
So, what are you waiting for? Grab some seeds, prepare your soil, and embark on your carrot-growing adventure today! We’re eager to hear about your experiences. Share your photos, tips, and triumphs in the comments below. Let’s build a community of carrot-loving gardeners and inspire others to discover the joy of growing their own food. Let us know what kind of DIY carrot growing methods you have tried!
Frequently Asked Questions (FAQ)
Q: What is the best time of year to plant carrots?
A: Carrots are a cool-season crop, so the best time to plant them is in early spring or late summer/early fall. For a spring crop, sow seeds as soon as the soil can be worked, typically 2-3 weeks before the last expected frost. For a fall crop, sow seeds 10-12 weeks before the first expected frost. This allows the carrots enough time to mature before the ground freezes. In warmer climates, you can often grow carrots throughout the winter.
Q: What kind of soil is best for growing carrots?
A: Carrots thrive in loose, well-drained soil that is free of rocks and clumps. Rocky or compacted soil can cause the carrots to become stunted, forked, or misshapen. Amend your soil with plenty of compost or well-rotted manure to improve drainage and fertility. A slightly acidic soil pH of 6.0 to 6.8 is ideal. Avoid using fresh manure, as it can encourage excessive foliage growth at the expense of root development.
Q: How deep should I plant carrot seeds?
A: Carrot seeds are very small and should be planted shallowly. Sow seeds about ¼ to ½ inch deep and space them about 1-2 inches apart. Gently cover the seeds with soil and water thoroughly. Keep the soil consistently moist until the seeds germinate, which typically takes 7-21 days depending on the soil temperature and moisture levels.
Q: How often should I water my carrots?
A: Carrots need consistent moisture to develop properly. Water deeply and regularly, especially during dry periods. Aim to keep the soil consistently moist but not waterlogged. A good rule of thumb is to water when the top inch of soil feels dry to the touch. Using a soaker hose or drip irrigation can help deliver water directly to the roots and prevent the foliage from getting wet, which can reduce the risk of fungal diseases.
Q: How much sunlight do carrots need?
A: Carrots need at least 6 hours of sunlight per day to thrive. Choose a location in your garden that receives full sun for optimal growth. If you live in a hot climate, providing some afternoon shade can help prevent the soil from drying out too quickly.
Q: How do I thin carrot seedlings?
A: Thinning is essential for giving carrots enough space to develop properly. Once the seedlings are a few inches tall, thin them to about 2-3 inches apart. Gently pull out the weaker seedlings, being careful not to disturb the roots of the remaining plants. You can eat the thinned seedlings as microgreens.
Q: What are some common pests and diseases that affect carrots?
A: Common pests that affect carrots include carrot rust flies, aphids, and nematodes. Carrot rust flies lay their eggs near the base of the plants, and the larvae burrow into the roots, causing damage. Aphids can suck the sap from the foliage, weakening the plants. Nematodes are microscopic worms that can damage the roots. Common diseases include leaf blight and root rot. Practice good garden hygiene, such as removing plant debris and rotating crops, to help prevent pest and disease problems. You can also use organic pest control methods, such as insecticidal soap or neem oil, to control pests.
Q: How do I know when my carrots are ready to harvest?
A: Carrots are typically ready to harvest when they reach the desired size, which varies depending on the variety. Check the seed packet for specific maturity dates. You can also gently brush away the soil around the top of the carrot to check its size. Carrots are generally ready to harvest when they are about ½ to 1 inch in diameter at the top.
Q: How do I store carrots after harvesting?
A: To store carrots, remove the greens, leaving about an inch of stem attached. Gently brush off any excess soil. Store the carrots in a cool, dark, and humid place, such as a refrigerator or root cellar. You can store them in a plastic bag or container with a damp paper towel to help maintain humidity. Carrots can typically be stored for several weeks or even months under the right conditions.
Q: Can I grow carrots in containers?
A: Yes, you can grow carrots in containers, but you’ll need to choose a container that is deep enough to accommodate the roots. A container that is at least 12 inches deep is ideal. Use a well-draining potting mix and follow the same planting and care instructions as you would for growing carrots in the ground. Container-grown carrots may need more frequent watering than those grown in the ground.
Q: What are some good companion plants for carrots?
A: Good companion plants for carrots include onions, garlic, rosemary, sage, and marigolds. Onions and garlic can help deter carrot rust flies. Rosemary and sage can also help repel pests and enhance the flavor of the carrots. Marigolds can attract beneficial insects that prey on pests. Avoid planting carrots near dill or fennel, as these plants can inhibit carrot growth.


Leave a Comment