

Baking Soda Hard Water Removal: Are you tired of battling stubborn hard water stains in your home? I know I was! Those unsightly white deposits on your faucets, showerheads, and even your precious plants can be incredibly frustrating. But don’t despair, because I’m about to share a simple, yet incredibly effective DIY trick that will have your home sparkling in no time, all thanks to the humble baking soda!
Using baking soda for cleaning isn’t a new concept. In fact, our grandmothers and great-grandmothers relied on this versatile powder for everything from baking to cleaning long before fancy, expensive cleaning products lined store shelves. It’s a testament to its effectiveness and affordability that baking soda remains a household staple today. Think of it as a return to simpler, more sustainable cleaning methods!
Hard water, with its high mineral content, can wreak havoc on your plumbing and appliances, not to mention leaving those annoying stains. But the real reason you need this DIY trick? It’s about more than just aesthetics. Hard water can reduce the efficiency of your appliances, leading to higher energy bills and premature wear and tear. Plus, those mineral deposits can actually hinder plant growth by affecting the soil’s pH balance. So, learning how to effectively tackle hard water using baking soda hard water removal is not just about a cleaner home, it’s about saving money, protecting your investments, and even helping your garden thrive. Let’s dive in and discover how this simple ingredient can make a world of difference!
DIY Hard Water Stain Removal with Baking Soda: A Sparkling Solution!
Hey there, fellow DIY enthusiasts! Are you tired of those unsightly hard water stains clinging to your faucets, showerheads, and even your precious glassware? I know I was! Hard water, with its high mineral content, leaves behind a stubborn residue that can make your bathroom and kitchen look perpetually grimy. But fear not! I’ve discovered a simple, effective, and budget-friendly solution using the magical power of baking soda. Let’s dive in and get those surfaces sparkling again!
What You’ll Need: Your Arsenal Against Hard Water
Before we get started, let’s gather our supplies. This is a pretty straightforward project, so you probably already have most of these items on hand.
* Baking Soda: The star of the show! Its mild abrasive properties and alkaline nature help break down mineral deposits.
* White Vinegar: A powerful cleaning agent that complements baking soda perfectly. The acidity helps dissolve hard water stains.
* Spray Bottle: For easy application of the vinegar solution.
* Old Toothbrush or Scrub Brush: To scrub away stubborn stains.
* Microfiber Cloths: For wiping and polishing surfaces.
* Gloves: To protect your hands from prolonged exposure to cleaning solutions.
* Lemon Juice (Optional): For extra cleaning power and a fresh scent.
* Water: For rinsing and diluting solutions.
* Small Bowl or Container: For mixing the baking soda paste.
* Plastic Wrap or Ziploc Bag (Optional): For soaking heavily stained showerheads or faucets.
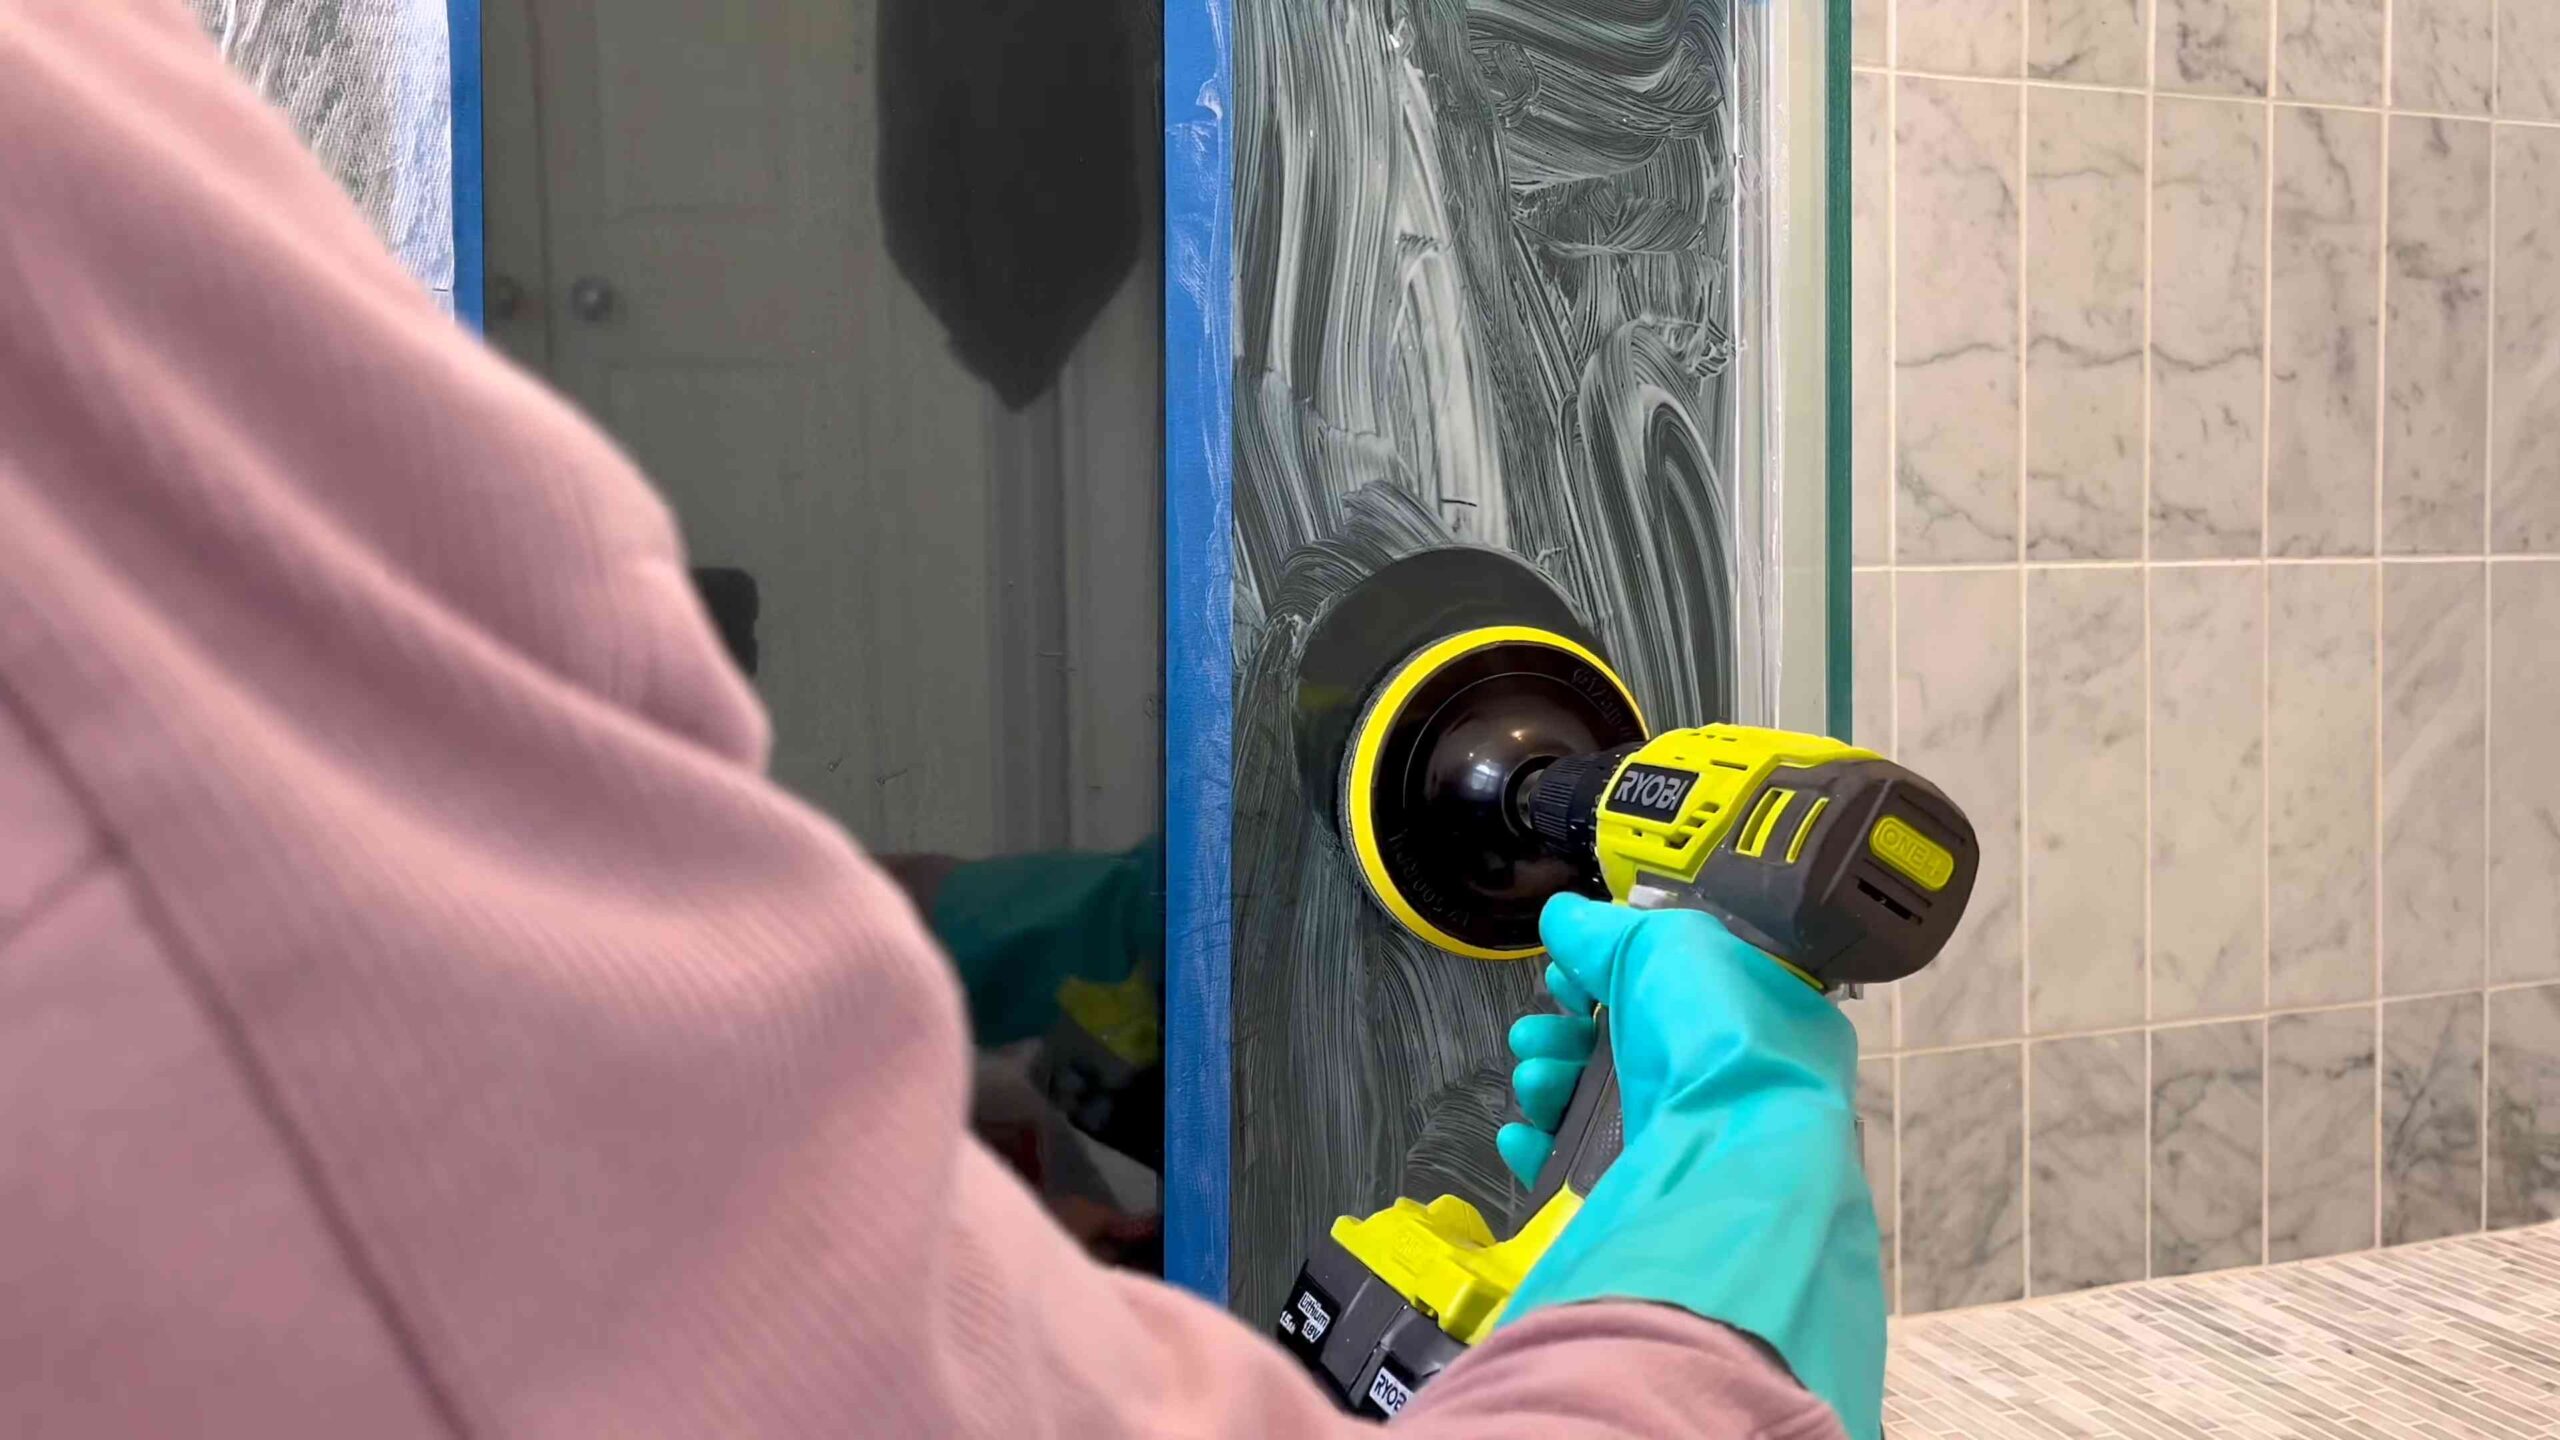
Section 1: Tackling Faucets and Fixtures
Faucets and fixtures are prime targets for hard water stains. The constant dripping and splashing leave behind a chalky buildup that can be tough to remove. But with our baking soda method, we’ll have them gleaming in no time!
Step 1: Prepare the Baking Soda Paste
In your small bowl, mix baking soda with a little water to form a thick paste. The consistency should be similar to toothpaste. You want it thick enough to stick to the surface you’re cleaning. I usually start with about ¼ cup of baking soda and add water a teaspoon at a time until I get the right consistency.
Step 2: Apply the Paste
Using your fingers or a small spoon, apply the baking soda paste generously to the affected areas of the faucet or fixture. Make sure to cover all the stained spots, especially around the base of the faucet and the handles.
Step 3: Let it Sit
This is where patience comes in. Allow the baking soda paste to sit on the stains for at least 15-20 minutes. For really stubborn stains, you can even let it sit for an hour or two. The longer it sits, the more time it has to break down the mineral deposits.
Step 4: Scrub Away the Stains
Grab your old toothbrush or scrub brush and start scrubbing! Use circular motions to gently loosen the hard water stains. You’ll likely see the paste turning a bit gray or brown as it lifts the minerals. Don’t scrub too hard, as you don’t want to scratch the finish of your fixtures.
Step 5: Rinse Thoroughly
Once you’ve scrubbed away the stains, rinse the faucet or fixture thoroughly with clean water. Make sure to remove all traces of the baking soda paste.
Step 6: Polish and Shine
Finally, use a clean microfiber cloth to dry and polish the faucet or fixture. This will remove any remaining residue and leave it sparkling clean.
Step 7: Vinegar Power-Up (For Stubborn Stains)
If you’re still seeing some stubborn stains after the baking soda treatment, don’t worry! We have a secret weapon: white vinegar. Fill your spray bottle with undiluted white vinegar and spray it directly onto the remaining stains. Let it sit for a few minutes, then scrub again with your toothbrush or scrub brush. Rinse and polish as before. The vinegar’s acidity will help dissolve any lingering mineral deposits.
Section 2: Reviving Your Showerhead
A clogged showerhead with mineral buildup can significantly reduce water pressure and make your shower less enjoyable. Here’s how to give your showerhead a new lease on life using baking soda and vinegar.
Step 1: The Vinegar Soak
This method works best if you can remove your showerhead. If you can, detach it and place it in a plastic bag or container filled with white vinegar. Make sure the entire showerhead is submerged. If you can’t remove the showerhead, you can still use this method. Fill a plastic bag with vinegar and secure it around the showerhead with a rubber band or twist tie, ensuring the showerhead is fully immersed in the vinegar.
Step 2: Let it Soak Overnight
The key to this method is time. Let the showerhead soak in the vinegar overnight, or for at least 8 hours. This will give the vinegar ample time to dissolve the mineral deposits inside the showerhead.
Step 3: Baking Soda Boost (Optional)
For extra cleaning power, you can add a few tablespoons of baking soda to the vinegar solution. This will create a fizzing action that helps to loosen the buildup. Be careful, though, as the fizzing can cause the bag or container to overflow.
Step 4: Scrub and Rinse
After soaking, remove the showerhead from the vinegar solution and scrub it with a toothbrush or scrub brush to remove any remaining residue. Pay close attention to the nozzles, as these are often the most clogged areas. Rinse the showerhead thoroughly with clean water.
Step 5: Reattach and Test
Reattach the showerhead to the shower arm and turn on the water. Let the water run for a few minutes to flush out any remaining debris. You should notice a significant improvement in water pressure and spray pattern.
Section 3: Sparkling Glassware
Hard water can leave a cloudy film on your glassware, making it look dull and unattractive. Here’s how to restore the sparkle to your glasses using baking soda.
Step 1: Baking Soda Bath
Fill your sink or a large bowl with warm water and add about ¼ cup of baking soda. Stir to dissolve the baking soda.
Step 2: Soak the Glassware
Place your glassware in the baking soda solution and let it soak for about 30 minutes. This will help to loosen the hard water film.
Step 3: Gentle Scrub
After soaking, gently scrub the glassware with a soft sponge or microfiber cloth. Pay close attention to any areas with stubborn film.
Step 4: Rinse and Dry
Rinse the glassware thoroughly with clean water and dry it with a clean microfiber cloth. For extra shine, you can use a glass cleaner after drying.
Step 5: Vinegar Rinse (For Extra Sparkle)
For an extra boost of sparkle, you can rinse your glassware with a solution of equal parts white vinegar and water after washing. This will help to remove any remaining mineral deposits and leave your glasses looking crystal clear.
Section 4: Preventing Future Hard Water Stains
Now that you’ve successfully removed the hard water stains, let’s talk about how to prevent them from coming back.
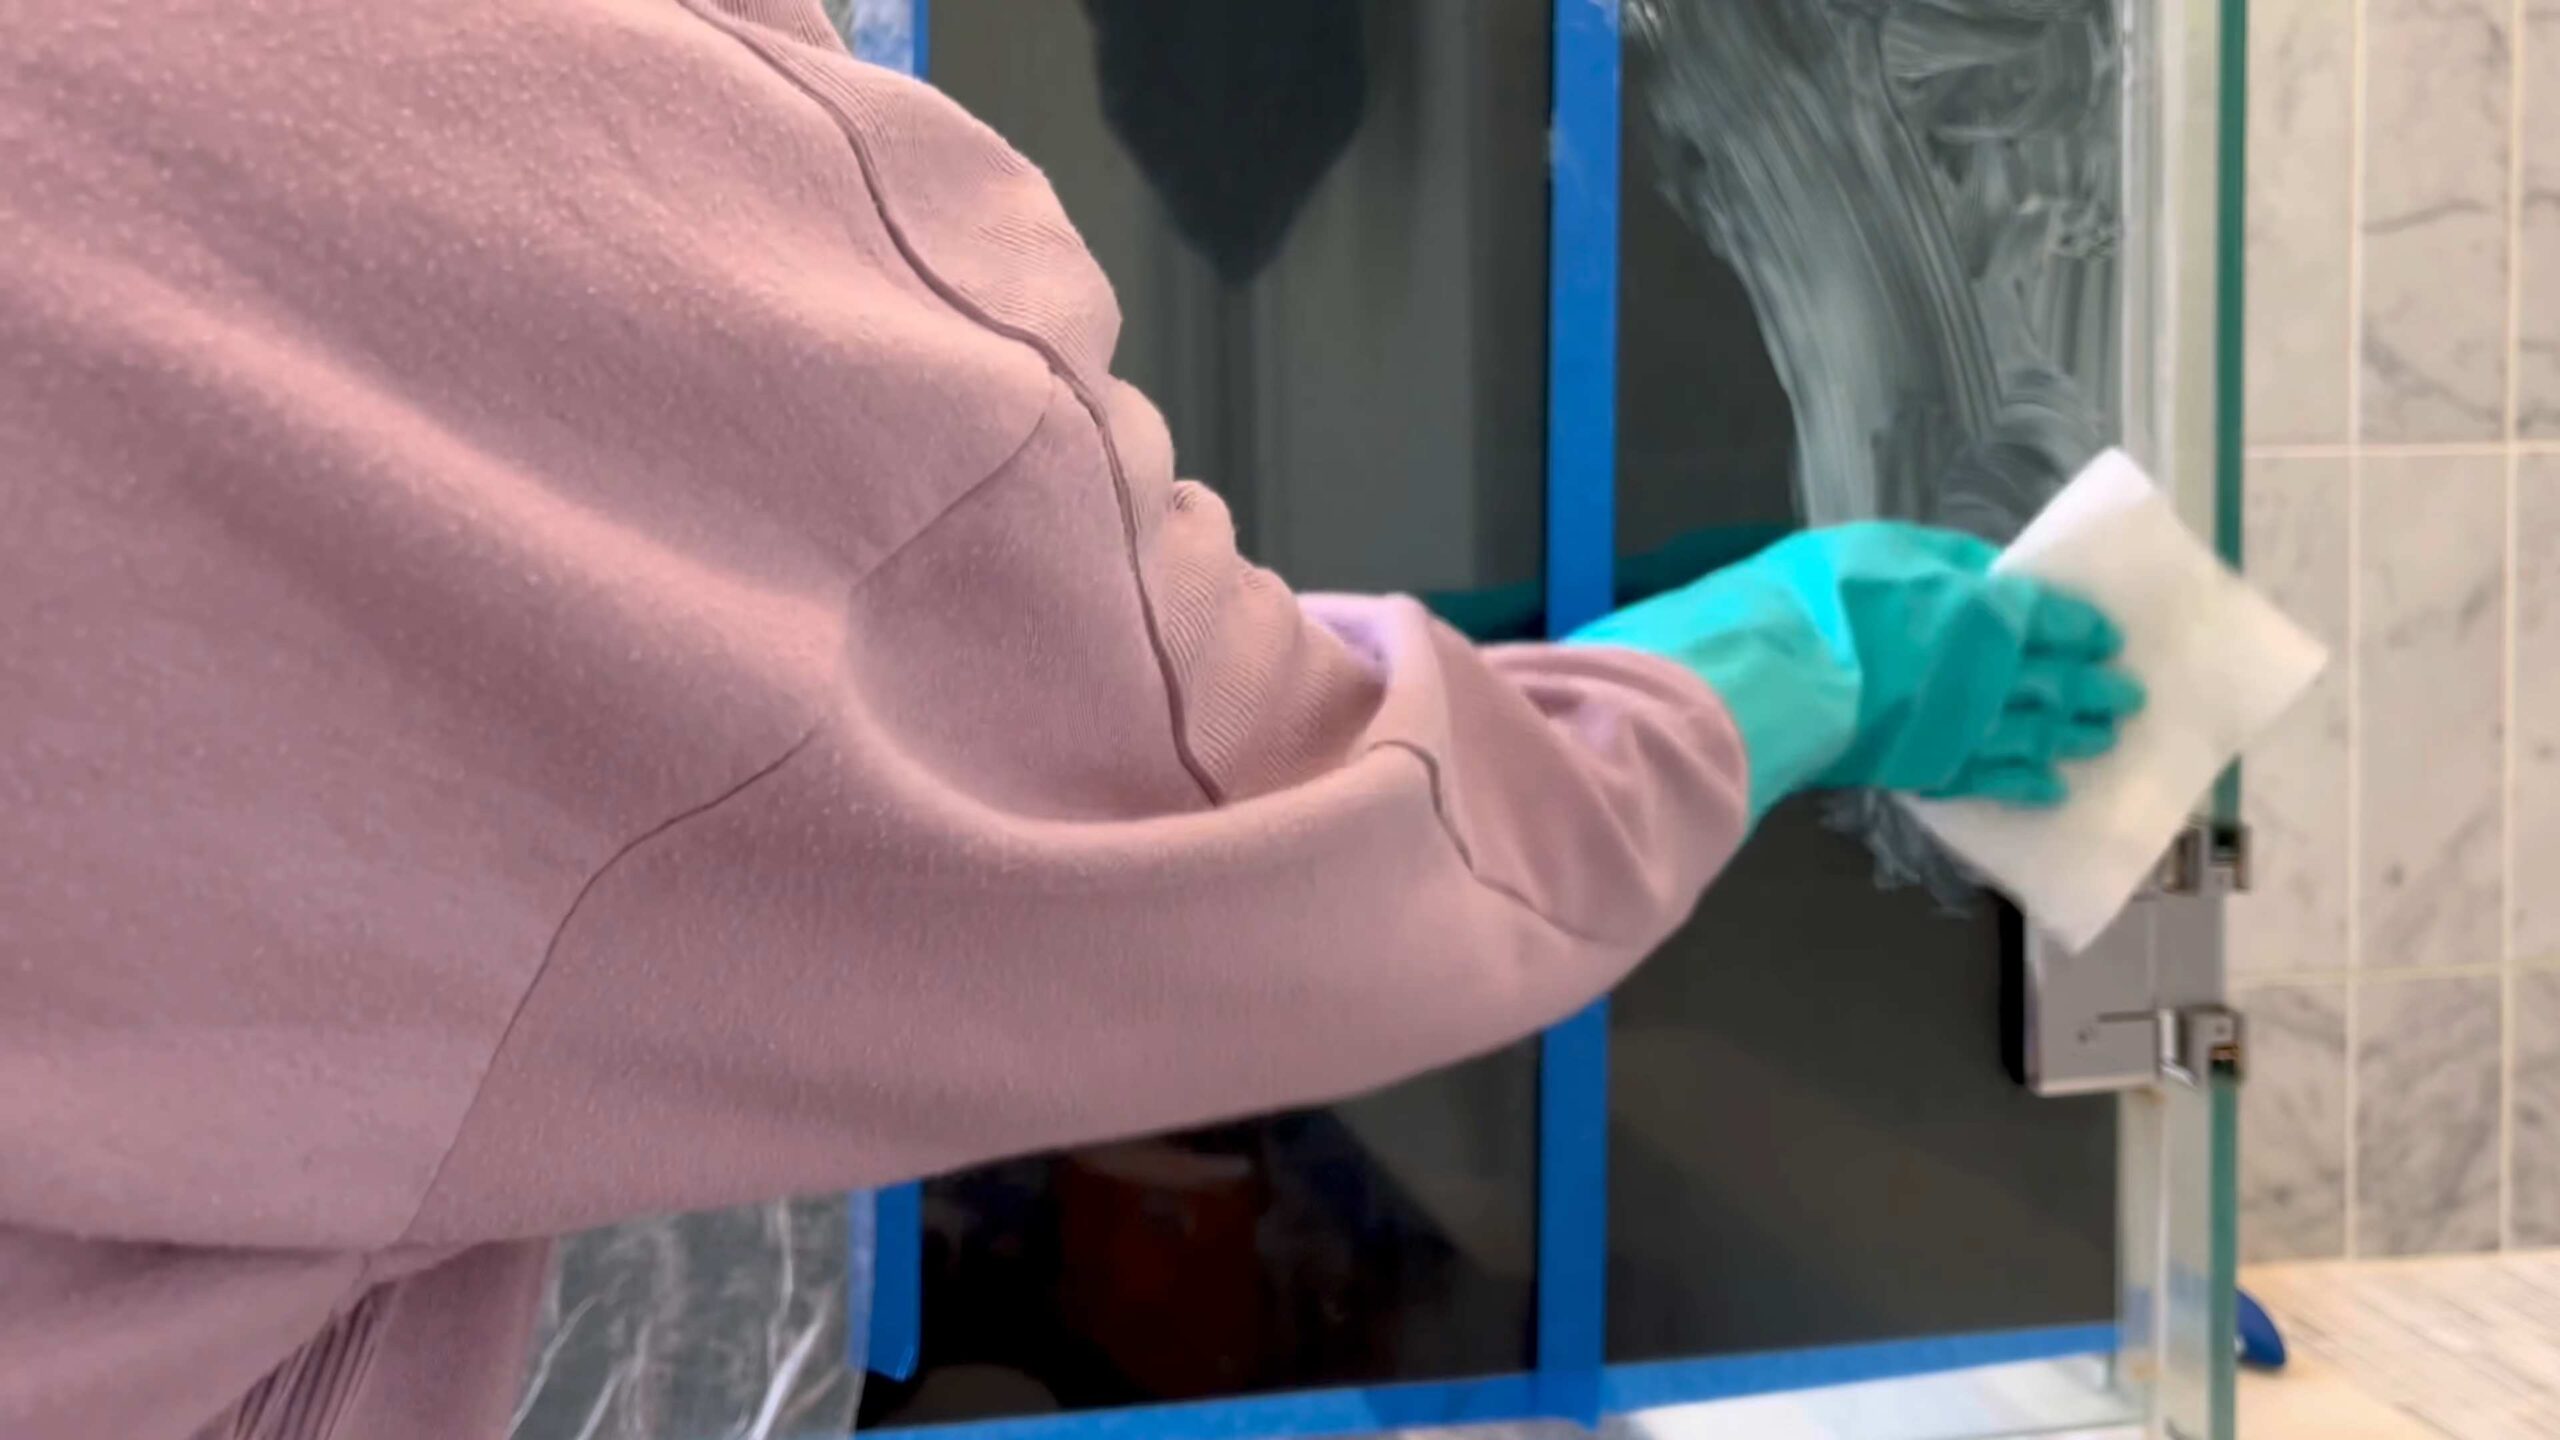
* Wipe Down Surfaces Regularly: The easiest way to prevent hard water stains is to wipe down your faucets, shower walls, and glassware after each use. This will prevent the minerals from building up and forming stubborn stains.
* Install a Water Softener: If you have particularly hard water, consider installing a water softener. This will remove the minerals from your water supply, preventing hard water stains throughout your home.
* Use a Squeegee in the Shower: After each shower, use a squeegee to remove water from the shower walls and door. This will help to prevent water spots and mineral buildup.
* Clean Showerhead Regularly: Regularly clean your showerhead to prevent mineral buildup. You can use the vinegar soaking method described above, or you can purchase a showerhead cleaning solution.
* Use a Dishwasher Rinse Aid: If you’re having trouble with hard water stains on your glassware, use a dishwasher rinse aid. This will help to prevent water spots and film from forming during the drying cycle.
* Lemon Juice Power: For a natural and refreshing cleaning boost, try using lemon juice. Its acidity helps dissolve mineral deposits and leaves a pleasant citrus scent. You can mix lemon juice with water in a spray bottle and use it to clean faucets, showerheads, and glassware.
By following these tips, you can keep your home sparkling clean and free from hard water stains. Remember, consistency is key! Regular cleaning and preventative measures will save you time and effort in the long run. Happy cleaning!
Conclusion
Tired of battling stubborn hard water stains and residue? This baking soda hard water removal trick is more than just a cleaning hack; it’s a game-changer for your home. It’s a simple, affordable, and eco-friendly way to reclaim your sparkling surfaces and say goodbye to the frustrating effects of hard water. The beauty of this method lies in its versatility and the readily available nature of its key ingredient: baking soda.
Why is this a must-try? Because it works! Hard water, with its high mineral content, leaves behind unsightly deposits on everything from faucets and showerheads to glassware and tiles. These deposits not only look bad but can also reduce the efficiency of appliances and even affect the taste of your water. Commercial hard water cleaners can be expensive and often contain harsh chemicals. Baking soda, on the other hand, offers a gentle yet effective alternative that’s safe for your family and the environment.
Beyond its cleaning prowess, this method is incredibly adaptable. For tougher stains, consider creating a paste of baking soda and white vinegar. The fizzing action helps to loosen stubborn mineral deposits. You can also add a few drops of your favorite essential oil, like lemon or tea tree, for a fresh, clean scent. For delicate surfaces, always test the baking soda solution in an inconspicuous area first to ensure it doesn’t cause any damage.
Think about the possibilities: sparkling faucets, gleaming shower doors, and spotless glassware, all achieved with a simple pantry staple. No more endless scrubbing or expensive specialty cleaners. This baking soda hard water removal method is a cost-effective and efficient solution to a common household problem.
We encourage you to give this DIY trick a try. You’ll be amazed at the results. And once you’ve experienced the magic of baking soda, we’d love to hear about it! Share your before-and-after photos, your tips and tricks, and any variations you’ve discovered in the comments below. Let’s build a community of sparkling clean homes, one baking soda solution at a time. Your experiences will not only inspire others but also help us refine and improve this already fantastic method. So, grab your baking soda, get cleaning, and let us know how it goes! You might just find that this simple solution becomes your go-to for tackling hard water woes.
Frequently Asked Questions (FAQ)
What exactly is hard water, and how do I know if I have it?
Hard water is water that contains a high concentration of minerals, primarily calcium and magnesium. You can often identify hard water by the following signs:
* **Scale buildup:** White, chalky deposits on faucets, showerheads, and inside appliances like kettles and coffee makers.
* **Spotty dishes:** Dishes and glassware that come out of the dishwasher with spots and streaks.
* **Dry skin and hair:** Hard water can make it difficult for soap to lather properly, leaving a residue on your skin and hair, leading to dryness and irritation.
* **Reduced soap efficiency:** Soap may not lather well, requiring you to use more product.
* **Cloudy water:** Sometimes, hard water can appear slightly cloudy.
If you suspect you have hard water, you can purchase a water hardness test kit from most hardware stores or online retailers. You can also contact your local water utility company for information about water hardness levels in your area.
How does baking soda work to remove hard water stains?
Baking soda, also known as sodium bicarbonate, is a mild alkali. It works to remove hard water stains through a few key mechanisms:
* **Abrasive action:** Baking soda has a slightly abrasive texture, which helps to gently scrub away mineral deposits without scratching surfaces.
* **Neutralizing acidity:** Hard water stains are often alkaline. Baking soda helps to neutralize these alkaline deposits, making them easier to dissolve and remove.
* **Softening water:** While baking soda doesn’t completely soften hard water, it can help to bind to some of the minerals, making them less likely to cling to surfaces.
What surfaces can I safely use baking soda on for hard water removal?
Baking soda is generally safe for use on a wide variety of surfaces, including:
* **Stainless steel:** Faucets, sinks, and appliances.
* **Ceramic and porcelain:** Tiles, toilets, and sinks.
* **Glass:** Shower doors, windows, and glassware.
* **Chrome:** Faucets and fixtures.
* **Plastic:** Shower curtains and some appliance parts.
However, it’s always a good idea to test the baking soda solution in an inconspicuous area first, especially on delicate or painted surfaces. Avoid using baking soda on:
* **Gold-plated fixtures:** The abrasive nature of baking soda can scratch the plating.
* **Unsealed granite or marble:** Baking soda can etch these surfaces.
* **Wood:** Prolonged exposure to moisture can damage wood.
What are some variations of the baking soda hard water removal method?
Here are a few variations you can try:
* **Baking soda and vinegar paste:** For stubborn stains, mix baking soda with white vinegar to form a paste. Apply the paste to the stain, let it sit for 15-20 minutes, then scrub and rinse. Be cautious when using vinegar on certain surfaces, as it can be acidic.
* **Baking soda and lemon juice:** Lemon juice is a natural acid that can help to dissolve mineral deposits. Mix baking soda with lemon juice to form a paste, apply to the stain, let it sit, then scrub and rinse.
* **Baking soda soak:** For showerheads or faucet aerators, remove them and soak them in a solution of baking soda and water overnight. This will help to loosen mineral deposits.
* **Baking soda and essential oils:** Add a few drops of your favorite essential oil, such as lemon, tea tree, or lavender, to your baking soda solution for a fresh, clean scent.
How often should I use baking soda to remove hard water stains?
The frequency of cleaning depends on the severity of your hard water and how quickly stains accumulate. For areas prone to heavy staining, such as shower doors and faucets, you may need to clean them once a week. For other areas, such as glassware, you may only need to clean them as needed. Regular cleaning will help to prevent stains from becoming too difficult to remove.
Can baking soda damage my pipes or plumbing?
No, baking soda is generally safe for your pipes and plumbing. It’s a mild alkali and won’t corrode or damage your pipes like some harsh chemical cleaners can. In fact, baking soda can even help to deodorize drains and prevent clogs.
What if the baking soda doesn’t completely remove the hard water stains?
If the baking soda alone isn’t enough to remove stubborn hard water stains, try the following:
* **Increase the concentration of baking soda:** Use a thicker paste or a more concentrated solution.
* **Increase the dwell time:** Let the baking soda solution or paste sit on the stain for a longer period of time before scrubbing.
* **Use a more abrasive scrubbing tool:** Try using a scrub brush or a non-scratch scouring pad.
* **Combine baking soda with vinegar or lemon juice:** As mentioned earlier, these acidic ingredients can help to dissolve mineral deposits.
* **Consider a commercial hard water cleaner:** If all else fails, you may need to resort to a commercial hard water cleaner. Be sure to follow the manufacturer’s instructions carefully and wear appropriate safety gear.
How can I prevent hard water stains from forming in the first place?
Preventing hard water stains is often easier than removing them. Here are a few tips:
* **Wipe down surfaces after each use:** After showering or using the sink, wipe down surfaces with a dry cloth to remove water droplets.
* **Use a water softener:** A water softener can remove minerals from your water, preventing hard water stains from forming.
* **Install a water filter:** A water filter can help to reduce the mineral content of your water.
* **Use a squeegee:** Use a squeegee to remove water from shower doors and walls after each shower.
* **Dry dishes immediately:** Don’t let dishes air dry, as this can leave behind water spots.
Is baking soda safe for septic systems?
Yes, baking soda is safe for septic systems. It’s a natural substance that won’t harm the bacteria in your septic tank. In fact, baking soda can even help to balance the pH levels in your septic system.

Leave a Comment