

Grow Mustard Greens, and unlock a world of peppery flavor right in your backyard! Have you ever dreamt of snipping fresh, vibrant greens just moments before adding them to your salad or stir-fry? Well, dream no more! This DIY guide is your key to cultivating a thriving mustard green patch, even if you’ve never gardened before.
Mustard greens have a rich history, gracing tables for centuries across various cultures. From ancient Rome, where they were prized for their medicinal properties, to Southern American cuisine, where they’re a soul food staple, these leafy greens have proven their versatility and nutritional value. But beyond their historical significance, why should you bother to grow mustard greens?
In today’s world, we’re all looking for ways to eat healthier, save money, and connect with nature. Growing your own mustard greens ticks all those boxes! Imagine the satisfaction of harvesting your own food, knowing exactly where it came from and what went into it. Plus, store-bought greens can’t compare to the fresh, zesty taste of homegrown mustard. So, let’s dive in and discover the simple secrets to a bountiful mustard green harvest. I’m excited to share these easy-to-follow tips and tricks that will have you enjoying delicious, homegrown mustard greens in no time!
Grow Your Own Mustard Greens: A Beginner’s Guide
Hey there, fellow gardening enthusiasts! I’m so excited to share my experience with growing mustard greens – they’re incredibly easy to cultivate, packed with flavor, and add a vibrant touch to any garden. Plus, you can harvest them in just a few weeks! This guide will walk you through everything you need to know, from seed to table.
Choosing Your Mustard Green Variety
First things first, let’s talk about variety. There are tons of different mustard green types, each with its own unique flavor profile and appearance. Here are a few popular choices:
* Southern Giant Curled: This is a classic, known for its large, frilly leaves and slightly pungent flavor. It’s a reliable and easy-to-grow option.
* Florida Broadleaf: As the name suggests, this variety has broad, smooth leaves and a milder, more subtle flavor than Southern Giant Curled. It’s a great choice if you’re not a fan of intense spiciness.
* Red Giant: This one’s a showstopper! It boasts beautiful, deep reddish-purple leaves that add a pop of color to your garden and your plate. The flavor is similar to Southern Giant Curled, but with a slightly sweeter undertone.
* Mizuna: This Japanese mustard green has feathery, serrated leaves and a peppery, slightly tangy flavor. It’s a great addition to salads and stir-fries.
I personally love growing a mix of varieties to get a range of flavors and textures. Experiment and see which ones you like best!
Preparing for Planting
Before you even think about planting, you’ll need to get your garden ready. Here’s what you need to consider:
* Timing: Mustard greens are cool-season crops, which means they thrive in cooler temperatures. The best time to plant them is in early spring or late summer/early fall. In the spring, plant them as soon as the soil can be worked. For a fall harvest, sow seeds about 4-6 weeks before the first expected frost. I usually aim for late August for a fall crop in my area.
* Location: Mustard greens need at least 4-6 hours of sunlight per day. Choose a spot in your garden that gets plenty of sun, but is also sheltered from strong winds.
* Soil: Mustard greens prefer well-drained soil that’s rich in organic matter. Before planting, amend your soil with compost or well-rotted manure to improve its fertility and drainage. I like to add a generous layer of compost to my garden beds each year.
* pH: The ideal soil pH for mustard greens is between 6.0 and 7.5. You can test your soil pH with a soil testing kit, which you can find at most garden centers. If your soil is too acidic, you can add lime to raise the pH. If it’s too alkaline, you can add sulfur to lower the pH.
Planting Your Mustard Greens
Now for the fun part – planting! Here’s a step-by-step guide:
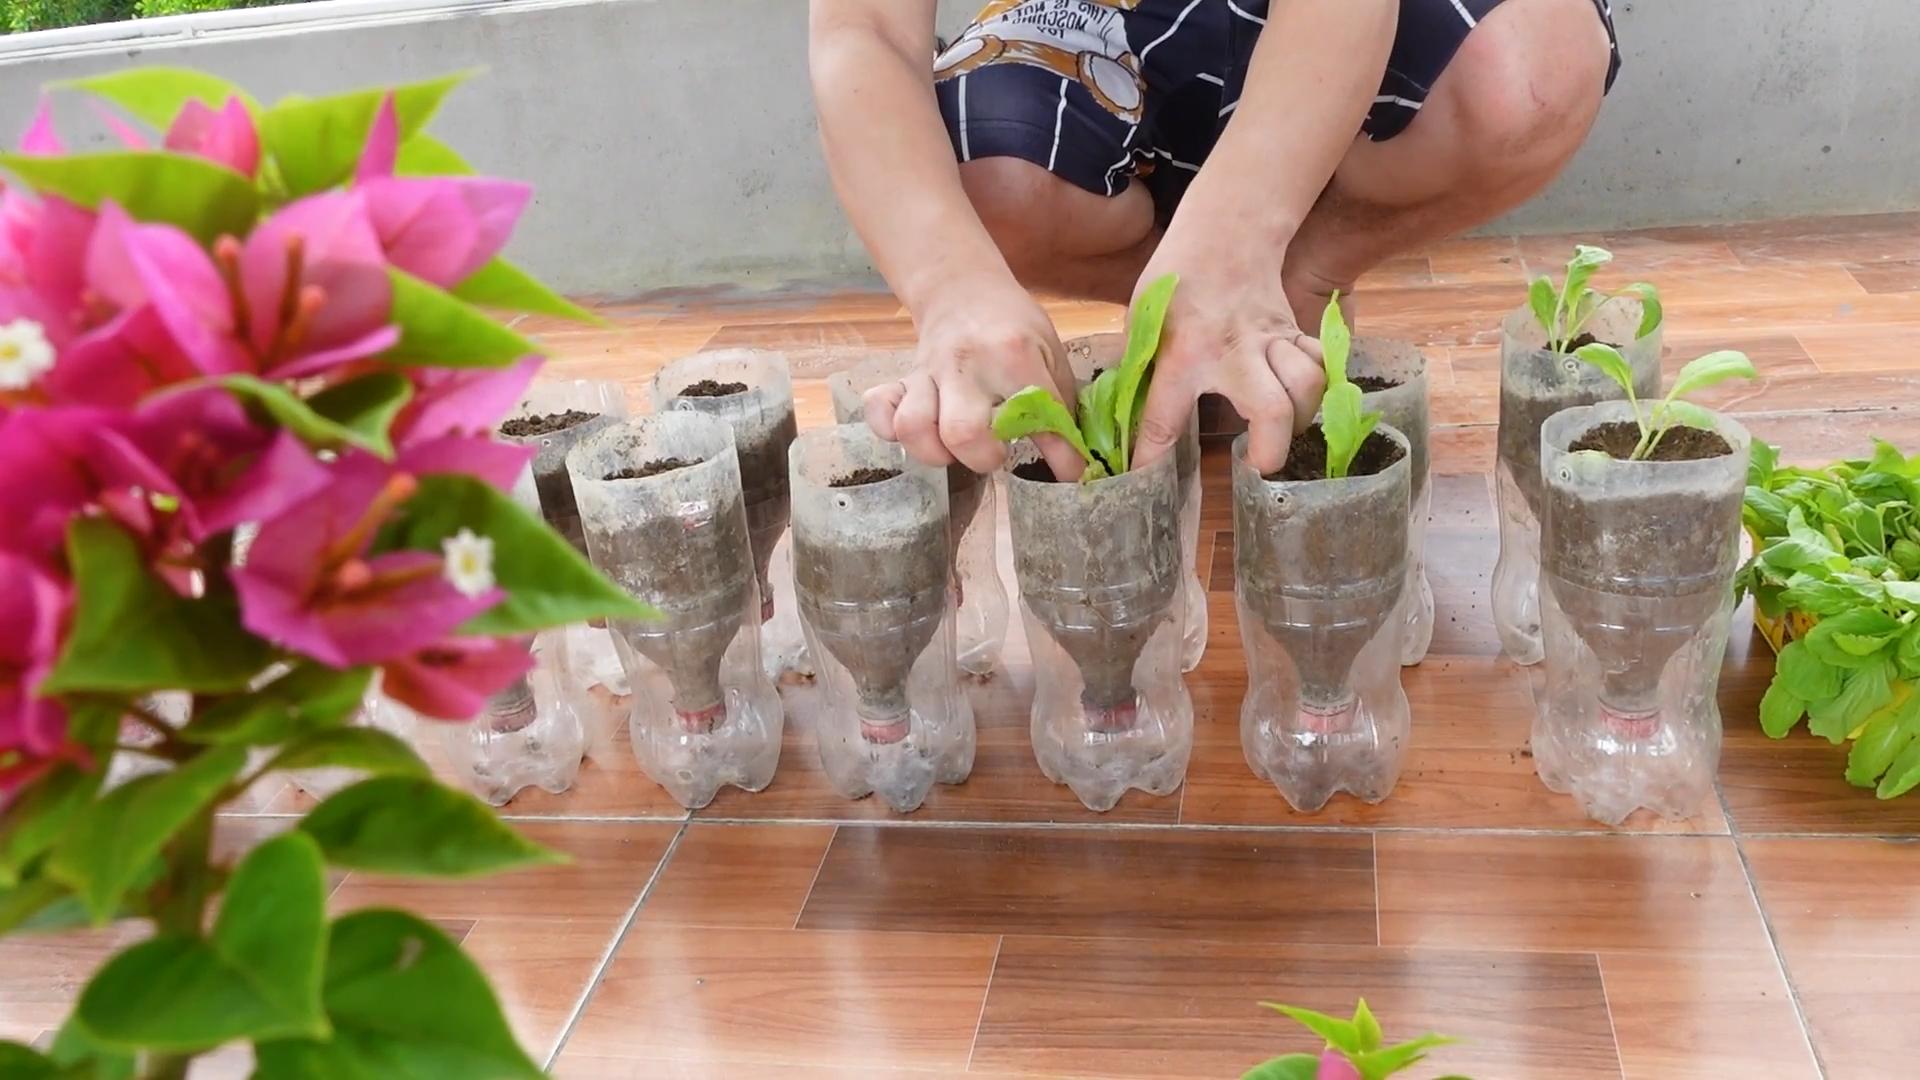
1. Prepare the soil: Rake the soil to create a smooth, even surface. Remove any rocks, weeds, or debris.
2. Sow the seeds: Mustard green seeds are tiny, so be careful not to sow them too thickly. You can either broadcast the seeds over the soil surface or sow them in rows. If you’re sowing in rows, space the rows about 12 inches apart.
3. Cover the seeds: Lightly cover the seeds with about ¼ inch of soil. You can use a rake or your hands to do this.
4. Water gently: Water the soil gently with a watering can or hose. Be careful not to wash away the seeds.
5. Keep the soil moist: Keep the soil consistently moist until the seeds germinate. This usually takes about 5-7 days.
Caring for Your Mustard Greens
Once your mustard greens have sprouted, it’s important to provide them with the care they need to thrive. Here are a few tips:
* Thinning: When the seedlings are about 2 inches tall, thin them out so that they’re spaced about 4-6 inches apart. This will give them enough room to grow and prevent overcrowding. I know it feels brutal to pull out those tiny plants, but it’s essential for a healthy harvest!
* Watering: Water your mustard greens regularly, especially during dry periods. They need about 1 inch of water per week. Water deeply and infrequently, rather than shallowly and frequently.
* Weeding: Keep your garden free of weeds, which can compete with your mustard greens for nutrients and water. Hand-pull weeds regularly, or use a hoe to cultivate the soil.
* Fertilizing: Mustard greens are heavy feeders, so they benefit from regular fertilization. You can use a balanced fertilizer, such as 10-10-10, or a fertilizer that’s specifically formulated for leafy greens. Follow the instructions on the fertilizer label. I personally prefer using organic fertilizers like fish emulsion or compost tea.
* Pest Control: Mustard greens can be susceptible to pests such as aphids, flea beetles, and cabbage worms. Inspect your plants regularly for signs of pests. If you find any, you can try spraying them with insecticidal soap or neem oil. You can also cover your plants with row covers to prevent pests from reaching them. I’ve found that a strong blast of water from the hose can often dislodge aphids.
Harvesting Your Mustard Greens
The best part of growing mustard greens is, of course, harvesting them! You can start harvesting your mustard greens when the leaves are about 6-8 inches long.
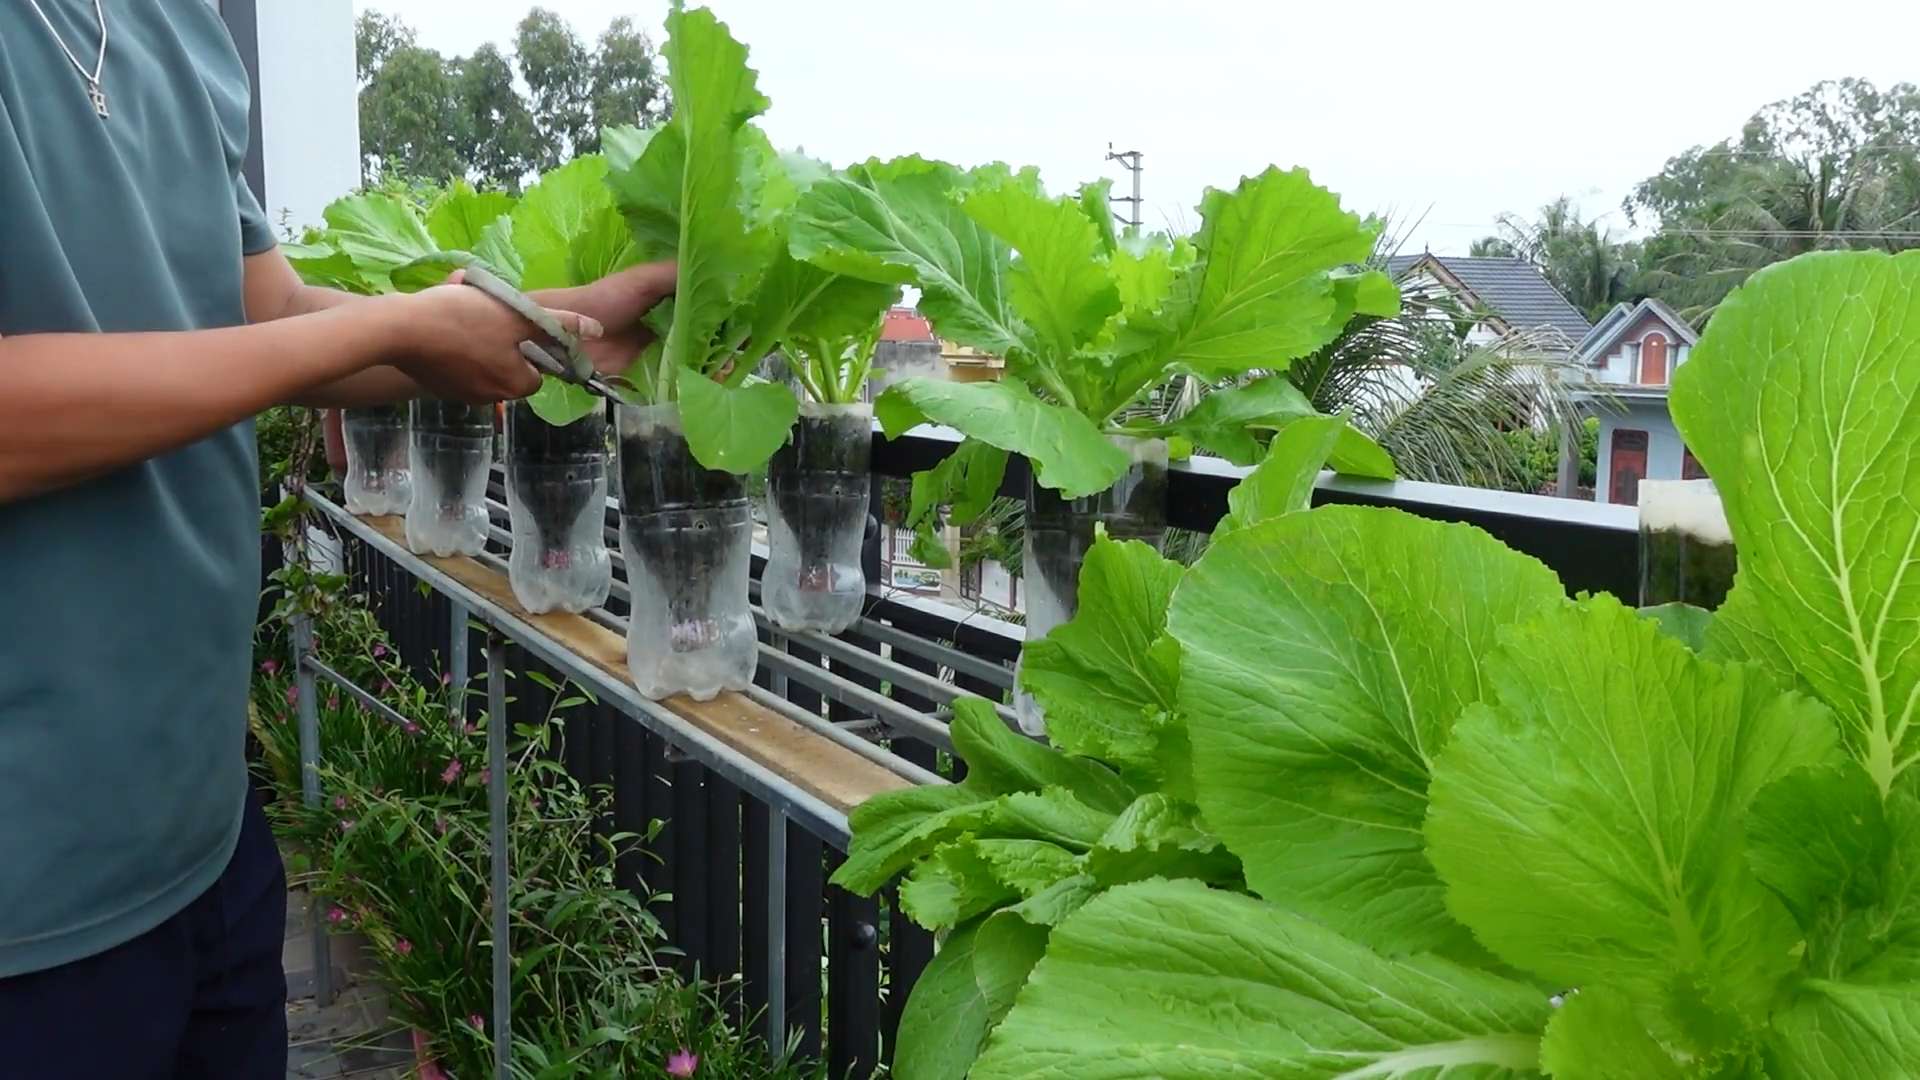
1. Harvesting Individual Leaves: You can harvest individual leaves as needed, starting with the outer leaves. This is called “cut-and-come-again” harvesting, and it allows you to enjoy fresh mustard greens for several weeks. Simply snip off the outer leaves with scissors or a knife, leaving the inner leaves to continue growing.
2. Harvesting the Whole Plant: If you want to harvest the entire plant, cut it off at the base with a knife.
3. Timing: Harvest your mustard greens in the morning, after the dew has dried. This is when the leaves are at their freshest and most flavorful.
4. Washing: Wash your mustard greens thoroughly before eating them.
Using Your Mustard Greens
Mustard greens are incredibly versatile and can be used in a variety of dishes. Here are a few ideas:
* Salads: Add mustard greens to your salads for a peppery kick. They pair well with other greens, such as lettuce, spinach, and arugula.
* Stir-fries: Mustard greens are a great addition to stir-fries. They add a slightly bitter and spicy flavor that complements other vegetables and proteins.
* Soups and stews: Add mustard greens to your soups and stews for a boost of flavor and nutrients.
* Sautéed: Sauté mustard greens with garlic, olive oil, and a pinch of red pepper flakes for a simple and delicious side dish.
* Braised: Braise mustard greens with bacon or ham hocks for a classic Southern dish.
* Smoothies: Believe it or not, you can even add mustard greens to your smoothies! They add a nutritional boost and a slightly peppery flavor.
Troubleshooting
Even with the best planning, sometimes things don’t go exactly as expected. Here are a few common problems you might encounter when growing mustard greens and how to fix them:
* Bolting: Bolting is when a plant prematurely flowers and goes to seed. This can happen when mustard greens are exposed to hot weather or stress. To prevent bolting, plant your mustard greens in early spring or late summer/early fall, and keep them well-watered. If your mustard greens do bolt, you can still eat the leaves, but they may be more bitter.
* Yellowing Leaves: Yellowing leaves can be a sign of nutrient deficiency, overwatering, or underwatering. Make sure your mustard greens are getting enough fertilizer and water, and that the soil is well-drained.
* Pest Infestations: As mentioned earlier, mustard greens can be susceptible to pests. Inspect your plants regularly for signs of pests and take action to control them if necessary.
Saving Seeds (Optional)
If you want to save seeds from your mustard greens, allow a few plants to bolt and flower. Once the seed pods have dried and turned brown, you can harvest them.
1. Harvesting Seed Pods: Cut the entire stalk with the dried seed pods.
2. Drying: Place the stalks in a paper bag and let them dry completely in a cool, dry place.
3. Threshing: Once the seed pods are dry, you can thresh them to release the seeds. You can do this by gently rubbing the seed pods between your hands or by stomping on them.
4.
Conclusion
So, there you have it! Growing your own mustard greens is not only surprisingly simple, but it’s also incredibly rewarding. From seed to salad, the entire process is a testament to the power of DIY and the joy of fresh, homegrown produce. We’ve walked you through the steps, highlighted the benefits, and hopefully, inspired you to give it a try.
Why is this DIY trick a must-try? Because it puts you in control. You know exactly what’s going into your food – no pesticides, no hidden ingredients, just pure, unadulterated mustard greens goodness. Plus, the flavor of freshly harvested mustard greens is simply unmatched. Store-bought varieties often lack the vibrant, peppery kick that you get from growing your own. And let’s not forget the cost savings! A packet of seeds is far cheaper than buying bunches of mustard greens week after week.
But the real magic lies in the versatility of this leafy green. While we’ve focused on the basic method, there are countless ways to customize your mustard greens growing experience. Consider experimenting with different varieties – some are milder, some are spicier, and some have unique leaf shapes and colors. You can also adjust the growing conditions to influence the flavor. For example, cooler temperatures tend to produce milder greens, while warmer temperatures can intensify the peppery taste.
Don’t be afraid to get creative! Try growing your mustard greens in containers on your balcony or patio if you’re short on space. Or, if you have a larger garden, dedicate a raised bed specifically to mustard greens and other leafy greens. You can even succession plant, sowing new seeds every few weeks, to ensure a continuous harvest throughout the growing season.
Beyond the garden, the possibilities are endless in the kitchen. Mustard greens are delicious sautéed with garlic and olive oil, added to soups and stews, or even blended into smoothies for a nutrient boost. They’re also a fantastic addition to salads, providing a zesty counterpoint to milder greens. And if you’re feeling adventurous, try pickling or fermenting your mustard greens for a unique and flavorful condiment.
Ultimately, the best way to discover the joys of growing your own mustard greens is to simply dive in and give it a try. Don’t worry if you make mistakes along the way – that’s all part of the learning process. The important thing is to get your hands dirty, connect with nature, and enjoy the fruits (or rather, the greens!) of your labor.
We’re confident that once you experience the satisfaction of harvesting your own fresh, flavorful mustard greens, you’ll be hooked. So, grab a packet of seeds, find a sunny spot, and get growing! And most importantly, we want to hear about your experience. Share your tips, tricks, and photos with us in the comments below. Let’s build a community of mustard greens enthusiasts and inspire others to embrace the joys of DIY gardening. We are eager to see how you grow your own mustard greens!
Frequently Asked Questions (FAQ)
What are the best varieties of mustard greens to grow?
Choosing the right variety depends on your taste preferences and growing conditions. For a milder flavor, consider ‘Florida Broadleaf’ or ‘Tendergreen’. If you prefer a spicier kick, ‘Red Giant’ or ‘Southern Giant Curled’ are excellent choices. ‘Osaka Purple’ is a visually appealing variety with purple-tinged leaves. Research the specific characteristics of each variety to find one that suits your needs. Also, consider your local climate and growing season when making your selection. Some varieties are more heat-tolerant than others, while some are better suited for cooler temperatures.
How much sunlight do mustard greens need?
Mustard greens thrive in full sun, which means at least 6 hours of direct sunlight per day. However, they can also tolerate partial shade, especially in hotter climates. If you’re growing mustard greens indoors, provide them with supplemental lighting, such as grow lights, to ensure they receive enough light. Insufficient sunlight can result in leggy growth and reduced flavor. Observe your plants closely and adjust their position as needed to maximize sunlight exposure.
What type of soil is best for growing mustard greens?
Mustard greens prefer well-drained, fertile soil with a pH between 6.0 and 7.5. Amend your soil with compost or other organic matter to improve its drainage and fertility. Avoid heavy clay soils, as they can become waterlogged and inhibit root growth. If you’re growing mustard greens in containers, use a high-quality potting mix that is specifically formulated for vegetables. Regularly test your soil pH and adjust it as needed to maintain the optimal range.
How often should I water my mustard greens?
Mustard greens need consistent moisture to thrive. Water them deeply whenever the top inch of soil feels dry to the touch. Avoid overwatering, as this can lead to root rot. Mulching around your plants can help to retain moisture and suppress weeds. During hot, dry weather, you may need to water your mustard greens more frequently. Check the soil moisture levels regularly and adjust your watering schedule accordingly.
When is the best time to harvest mustard greens?
You can begin harvesting mustard greens as soon as the leaves are large enough to eat, typically about 3-4 weeks after planting. Harvest the outer leaves first, leaving the inner leaves to continue growing. This will allow you to enjoy a continuous harvest over several weeks. For the best flavor, harvest mustard greens in the morning, before the heat of the day. Avoid harvesting during hot, dry weather, as the leaves may be bitter.
How do I prevent pests and diseases from affecting my mustard greens?
Several pests and diseases can affect mustard greens, including aphids, flea beetles, and downy mildew. To prevent these problems, practice good garden hygiene, such as removing weeds and debris that can harbor pests and diseases. Use row covers to protect your plants from insect infestations. Inspect your plants regularly for signs of pests or diseases and take action promptly. Organic pest control methods, such as insecticidal soap or neem oil, can be effective in controlling many common pests. Ensure good air circulation around your plants to prevent fungal diseases.
Can I grow mustard greens indoors?
Yes, you can grow mustard greens indoors, especially if you have a sunny windowsill or grow lights. Use a well-draining potting mix and provide your plants with consistent moisture and fertilizer. Rotate your plants regularly to ensure even growth. Indoor-grown mustard greens may not be as large or flavorful as those grown outdoors, but they can still provide a fresh and nutritious addition to your meals.
How do I store harvested mustard greens?
To store harvested mustard greens, wash them thoroughly and dry them with a salad spinner or paper towels. Wrap the greens in a damp paper towel and store them in a plastic bag in the refrigerator. They should keep for up to a week. Avoid storing mustard greens near ethylene-producing fruits, such as apples and bananas, as this can cause them to spoil more quickly.
Can I freeze mustard greens?
Yes, you can freeze mustard greens, but they will need to be blanched first to preserve their color and flavor. To blanch mustard greens, boil them for 2-3 minutes, then immediately plunge them into ice water to stop the cooking process. Drain the greens thoroughly and squeeze out any excess water. Pack the blanched greens into freezer bags or containers and store them in the freezer for up to 6 months.
What are the nutritional benefits of mustard greens?
Mustard greens are a nutritional powerhouse, packed with vitamins, minerals, and antioxidants. They are an excellent source of vitamins A, C, and K, as well as folate, calcium, and potassium. Mustard greens are also a good source of fiber, which can help to promote digestive health. Eating mustard greens can help to boost your immune system, protect against chronic diseases, and improve overall health.


Leave a Comment