

Container gardening tomatoes: Imagine plucking a sun-ripened, juicy tomato straight from your patio, bursting with flavor that no store-bought variety can match. Sounds idyllic, right? Well, it’s absolutely achievable, even if you don’t have acres of land! For centuries, people have cultivated edible plants in containers, from the hanging gardens of Babylon to the humble window boxes of today. This practice allows us to connect with nature, nurture our food, and beautify our living spaces, regardless of our square footage.
But let’s be honest, growing tomatoes in containers can sometimes feel like a battle against the elements, pests, and nutrient deficiencies. That’s where this DIY guide comes in! I’m going to share some of my favorite, tried-and-true tricks and hacks for successful container gardening tomatoes. Whether you’re a seasoned gardener or a complete beginner, these tips will help you maximize your yield, minimize your headaches, and enjoy a bountiful harvest of delicious, homegrown tomatoes. Get ready to transform your balcony, patio, or even your windowsill into a thriving tomato paradise!
Container Gardening Tomatoes: A Bumper Crop on Your Patio!
Hey there, fellow gardening enthusiasts! I’m so excited to share my tried-and-true method for growing juicy, delicious tomatoes right in containers. Whether you have a sprawling backyard or just a sunny balcony, you can absolutely enjoy homegrown tomatoes. I’ve been doing this for years, and trust me, the taste of a sun-ripened tomato you grew yourself is unbeatable! Let’s dive in!
Choosing the Right Tomato Variety
First things first, not all tomato varieties are created equal when it comes to container gardening. You’ll want to choose determinate or dwarf varieties.
* Determinate Tomatoes: These are bush-type tomatoes that grow to a certain size and then stop, producing most of their fruit at once. They’re perfect for smaller spaces and require less staking. Examples include Roma, Celebrity, and Patio.
* Indeterminate Tomatoes: These are vine-type tomatoes that keep growing and producing fruit throughout the season. While you *can* grow them in containers, they require much larger pots and more support. I generally avoid them for container gardening unless I have a really big container.
* Dwarf Tomatoes: These are specifically bred for small spaces and containers. They stay compact and produce smaller fruits. Look for varieties like Tiny Tim or Bush Early Girl.
I personally love growing Roma tomatoes in containers because they’re perfect for sauces and canning, and they produce a good yield in a relatively small space.
Gathering Your Supplies
Okay, now that we’ve chosen our tomato variety, let’s gather everything we need. Here’s my essential supply list:
* Large Containers: This is crucial! For determinate varieties, I recommend at least a 15-gallon container. For indeterminate, go even bigger – 20 gallons or more. Make sure your container has drainage holes!
* High-Quality Potting Mix: Don’t skimp on this! Use a well-draining potting mix specifically formulated for containers. Garden soil is too heavy and compacts easily, which can suffocate the roots.
* Tomato Cage or Stake: Even determinate tomatoes can get a bit unruly, so some support is necessary. I prefer tomato cages because they provide all-around support.
* Slow-Release Fertilizer: This will provide your tomato plants with a steady supply of nutrients throughout the growing season. Look for a fertilizer specifically formulated for tomatoes.
* Watering Can or Hose: Essential for keeping your plants hydrated.
* Hand Trowel: For planting and transplanting.
* Gardening Gloves: To keep your hands clean and protected.
* Optional: Mulch (straw or wood chips) to help retain moisture and suppress weeds.
Planting Your Tomato Seedlings
Alright, let’s get our hands dirty! Here’s how I plant my tomato seedlings in containers:
1. Prepare the Container: Fill your container with potting mix, leaving a few inches of space at the top.
2. Dig a Hole: Dig a hole in the center of the container that’s deep enough to accommodate the root ball of your tomato seedling.
3. Plant the Seedling: Gently remove the tomato seedling from its nursery pot. If the roots are circling around the bottom, gently loosen them up. Place the seedling in the hole and backfill with potting mix.
4. Bury Deep (Optional but Recommended): This is a trick I learned years ago, and it makes a huge difference! Tomatoes can grow roots along their stems, so burying the stem deeper encourages a stronger root system. Remove the lower leaves of the seedling and bury the stem up to the first set of leaves.
5. Water Thoroughly: Water the newly planted seedling thoroughly until water drains out of the bottom of the container.
6. Add Fertilizer: Sprinkle a slow-release fertilizer around the base of the plant, following the instructions on the fertilizer package.
7. Add Support: Place the tomato cage or stake around the seedling.
8. Mulch (Optional): Add a layer of mulch around the base of the plant to help retain moisture and suppress weeds.
Caring for Your Container Tomatoes
Now that your tomato seedlings are planted, it’s time to provide them with the care they need to thrive.
1. Watering: Tomatoes need consistent watering, especially when they’re actively growing and producing fruit. Water deeply whenever the top inch of soil feels dry to the touch. Avoid overhead watering, as this can lead to fungal diseases. I prefer to water at the base of the plant.
2. Fertilizing: In addition to the slow-release fertilizer you added at planting, you may need to supplement with liquid fertilizer every few weeks, especially once the plants start producing fruit. Look for a tomato-specific fertilizer that’s high in phosphorus and potassium.
3. Sunlight: Tomatoes need at least 6-8 hours of sunlight per day. Place your containers in a sunny location. If you live in a very hot climate, you may need to provide some afternoon shade to prevent the plants from getting scorched.
4. Pruning: Pruning is important for indeterminate tomato varieties, but less so for determinate varieties. For indeterminate tomatoes, you’ll want to remove suckers (the small shoots that grow between the main stem and the branches). This will help the plant focus its energy on producing fruit. I usually don’t prune determinate varieties unless they’re getting overly crowded.
5. Pest and Disease Control: Keep an eye out for common tomato pests like aphids, whiteflies, and tomato hornworms. You can usually control these pests with insecticidal soap or neem oil. Also, watch out for diseases like early blight and blossom end rot. Proper watering and good air circulation can help prevent these diseases. If you do notice signs of disease, remove the affected leaves and treat the plant with a fungicide.
6. Support: As your tomato plants grow, make sure they have adequate support from the tomato cage or stake. Tie the stems to the support as needed to prevent them from breaking under the weight of the fruit.
Harvesting Your Tomatoes
This is the best part! Harvesting your own homegrown tomatoes is incredibly rewarding.
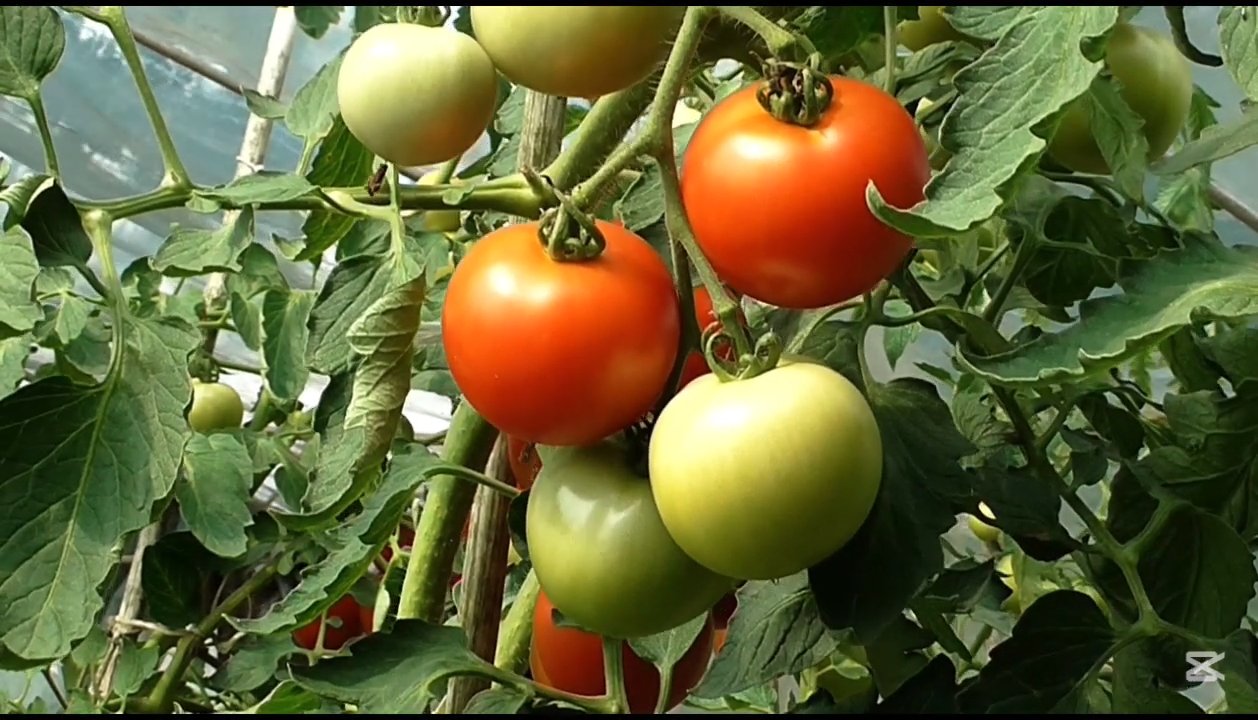
1. Ripeness: Tomatoes are ready to harvest when they’re fully colored and slightly soft to the touch. The color will depend on the variety you’re growing.
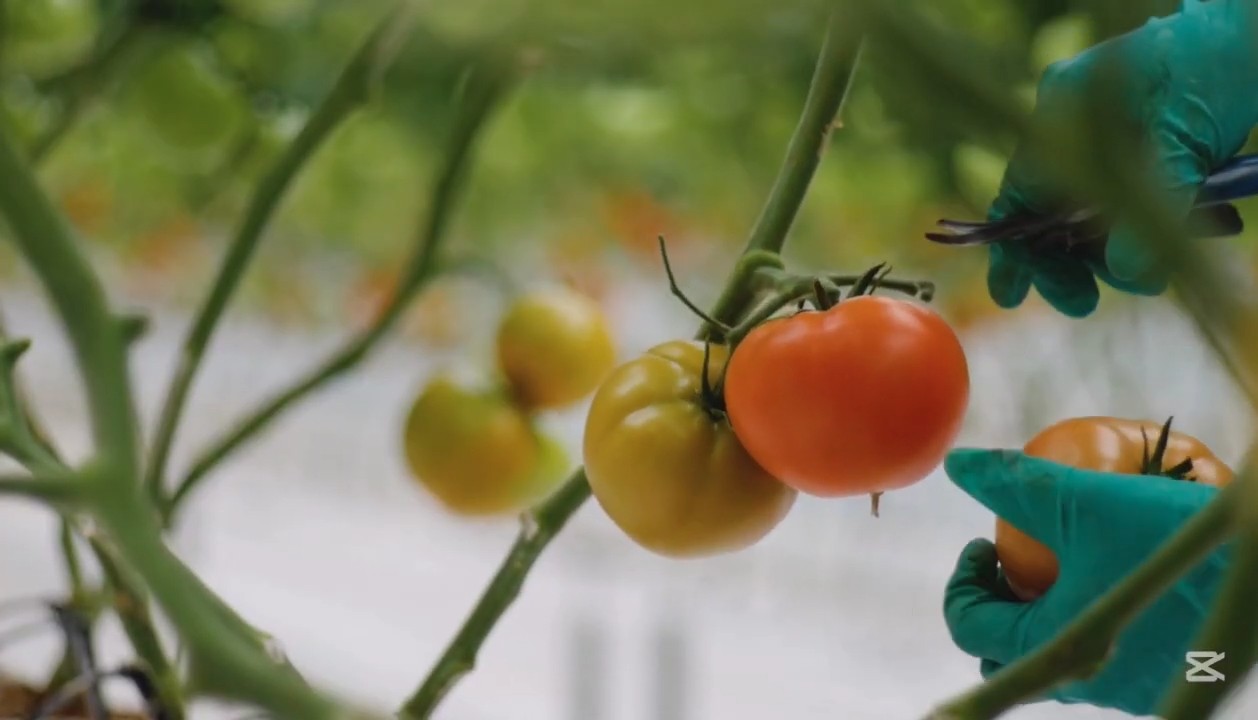
2. Harvesting Technique: Gently twist the tomato off the vine. If it doesn’t come off easily, use pruning shears to cut the stem just above the tomato.
3. Storage: Store your harvested tomatoes at room temperature. Refrigerating them can affect their flavor and texture.
Troubleshooting Common Problems
Even with the best care, you might encounter some problems along the way. Here are a few common issues and how to address them:
* Blossom End Rot: This is caused by a calcium deficiency and results in a dark, leathery spot on the bottom of the tomato. To prevent blossom end rot, make sure your soil is rich in calcium and water consistently. You can also add calcium to the soil by mixing in crushed eggshells or bone meal.
* Cracking: This is caused by inconsistent watering. To prevent cracking, water your tomato plants regularly and deeply.
* Sunscald: This occurs when tomatoes are exposed to too much direct sunlight, causing them to develop white or yellow patches. To prevent sunscald, provide some afternoon shade during the hottest part of the day.
* Pests: As mentioned earlier, keep an eye out for common tomato pests and treat them promptly with insecticidal soap or neem oil.
Extra Tips for Success
Here are a few extra tips that I’ve learned over the years:
* Rotate Your Crops: Don’t plant tomatoes in the same container year after year. This can deplete the soil of nutrients and increase the risk of disease.
* Use Companion Plants: Planting certain herbs and flowers alongside your tomatoes can help deter pests and attract beneficial insects. Good companion plants for tomatoes include basil, marigolds, and nasturtiums.
* Water in the Morning: Watering in the morning allows the foliage to dry out during the day, which can help prevent fungal diseases.
* Don’t Overwater: Overwatering can lead to root rot and other problems. Make sure your containers have good drainage and only water when the top inch of soil feels dry.
* Be Patient: Growing tomatoes takes time and patience. Don’t get discouraged if you don’t see results right away. Just keep providing your plants with the care they need, and you’ll be rewarded with a bountiful harvest.
I hope this guide has been helpful! Growing tomatoes in containers is a fun and rewarding experience. With a little bit of effort, you can enjoy fresh, delicious tomatoes all season long. Happy gardening!
Conclusion
So, there you have it! Mastering container gardening tomatoes doesn’t have to be an intimidating endeavor. With a few simple tricks and a little bit of patience, you can transform your balcony, patio, or even a sunny windowsill into a thriving tomato haven. We’ve explored a cost-effective and environmentally friendly method for creating your own nutrient-rich tomato feed, bypassing the need for expensive store-bought fertilizers. This DIY approach not only saves you money but also gives you complete control over what goes into nourishing your precious tomato plants.
The beauty of this DIY tomato feed lies in its adaptability. Feel free to experiment with different ingredients based on what you have readily available. For instance, if you don’t have access to banana peels, consider using coffee grounds, which are also rich in potassium and nitrogen. Just remember to use them sparingly, as they can increase the acidity of the soil. Another variation involves adding crushed eggshells to the mix, providing a boost of calcium that helps prevent blossom-end rot, a common problem in container-grown tomatoes. You can also add Epsom salts to the mix to provide magnesium, which is essential for chlorophyll production and overall plant health.
The key takeaway is that you’re not limited to a rigid formula. Observe your plants closely and adjust the feed accordingly. Are the leaves turning yellow? They might need more nitrogen. Are the fruits developing blossom-end rot? They likely need more calcium. This hands-on approach allows you to become intimately familiar with your plants’ needs and tailor your feeding strategy for optimal results.
We understand that venturing into the world of DIY gardening can be a bit daunting, but we wholeheartedly encourage you to give this trick a try. The satisfaction of nurturing your own tomato plants from seedling to harvest is incredibly rewarding, and knowing that you’re doing it with a homemade, sustainable solution makes it even more special.
Don’t be afraid to experiment, adapt, and most importantly, have fun! We’re confident that you’ll be amazed by the results. Once you’ve tried this DIY tomato feed, we’d love to hear about your experience. Share your successes, your challenges, and any variations you’ve discovered in the comments below. Let’s build a community of container gardening enthusiasts and learn from each other’s experiences. Happy gardening!
Frequently Asked Questions (FAQ)
What exactly are the benefits of using a DIY tomato feed for container gardening?
Using a DIY tomato feed offers a multitude of benefits compared to commercially produced fertilizers. Firstly, it’s significantly more cost-effective. You’re utilizing readily available household waste products, such as banana peels and eggshells, which would otherwise end up in the landfill. Secondly, it’s environmentally friendly. You’re reducing your reliance on synthetic fertilizers, which can contribute to water pollution and soil degradation. Thirdly, you have complete control over the ingredients. You know exactly what’s going into your plants, avoiding potentially harmful chemicals or additives. Finally, it allows you to tailor the feed to your specific plants’ needs, ensuring they receive the optimal balance of nutrients for healthy growth and abundant fruit production. This is especially important for container gardening tomatoes, as the limited soil volume requires careful nutrient management.
How often should I apply this DIY tomato feed to my container tomatoes?
The frequency of application depends on several factors, including the size of your container, the age of your plants, and the weather conditions. As a general guideline, you should start feeding your tomato plants about two weeks after transplanting them into their final containers. Initially, feed them every two weeks. As the plants mature and begin to produce fruit, increase the frequency to once a week. During periods of heavy rainfall, you may need to reapply the feed more often, as the nutrients can be leached out of the soil. Always observe your plants closely for signs of nutrient deficiencies or excesses and adjust the feeding schedule accordingly. A good rule of thumb is to err on the side of caution and start with smaller doses, gradually increasing the amount as needed.
Can I use this DIY tomato feed for other plants besides tomatoes?
Yes, this DIY tomato feed can be beneficial for other fruiting and flowering plants that require similar nutrients. Plants like peppers, eggplants, and cucumbers can also benefit from the potassium, phosphorus, and calcium provided by this feed. However, it’s important to note that different plants have different nutrient requirements. For example, leafy greens like lettuce and spinach require more nitrogen than tomatoes. Therefore, you may need to adjust the recipe or supplement it with other nutrients to meet the specific needs of your other plants. Research the nutrient requirements of each plant before applying the feed.
What if I don’t have banana peels or eggshells? Are there any alternatives?
Absolutely! The beauty of DIY gardening is its flexibility. If you don’t have banana peels, you can use coffee grounds, which are rich in nitrogen and potassium. However, use them sparingly, as they can increase the acidity of the soil. If you don’t have eggshells, you can use bone meal or agricultural lime as a source of calcium. Another option is to purchase a commercially available organic fertilizer that is specifically formulated for tomatoes. Just be sure to choose a fertilizer that is low in nitrogen and high in phosphorus and potassium. The key is to provide your plants with the essential nutrients they need, regardless of the source.
How do I store the DIY tomato feed?
The best way to store your DIY tomato feed is in a cool, dark place in an airtight container. This will help to prevent the nutrients from degrading and keep the feed fresh for longer. You can store the feed in a plastic container, a glass jar, or even a resealable bag. Be sure to label the container with the date you made the feed so you know how long it has been stored. Properly stored, the feed should last for several weeks. If you notice any signs of mold or spoilage, discard the feed immediately.
My tomato plants are already showing signs of blossom-end rot. Will this DIY feed help?
Yes, the calcium in the eggshells (or alternative calcium source) can help prevent and even reverse blossom-end rot. However, it’s important to understand that blossom-end rot is often caused by inconsistent watering, which prevents the plant from absorbing calcium properly. Therefore, in addition to providing calcium through the DIY feed, you also need to ensure that your plants are receiving consistent and adequate watering. Avoid letting the soil dry out completely between waterings, and water deeply whenever you do water. Mulching around the base of the plants can also help to retain moisture in the soil.
Can I use this DIY feed for hydroponic tomato gardening?
While the ingredients themselves are beneficial, this particular method of preparation is not ideal for hydroponics. Hydroponic systems require nutrients to be readily available in a water-soluble form. The slow-release nature of the DIY feed, where nutrients are gradually released as the materials decompose, isn’t suitable for the immediate uptake needed in hydroponics. For hydroponic container gardening tomatoes, you’ll need to use commercially available hydroponic nutrient solutions specifically formulated for tomatoes. These solutions contain all the essential nutrients in a readily available form.
What are some common mistakes to avoid when using DIY tomato feed?
One common mistake is over-fertilizing. Too much fertilizer can burn the roots of your plants and lead to nutrient toxicity. Always start with smaller doses and gradually increase the amount as needed. Another mistake is using ingredients that are contaminated with pesticides or herbicides. Be sure to use organic ingredients whenever possible. Finally, don’t forget to monitor your plants closely for signs of nutrient deficiencies or excesses. Yellowing leaves, stunted growth, and blossom-end rot are all signs that something is not right. Adjust your feeding schedule and nutrient levels accordingly.
Leave a Comment