

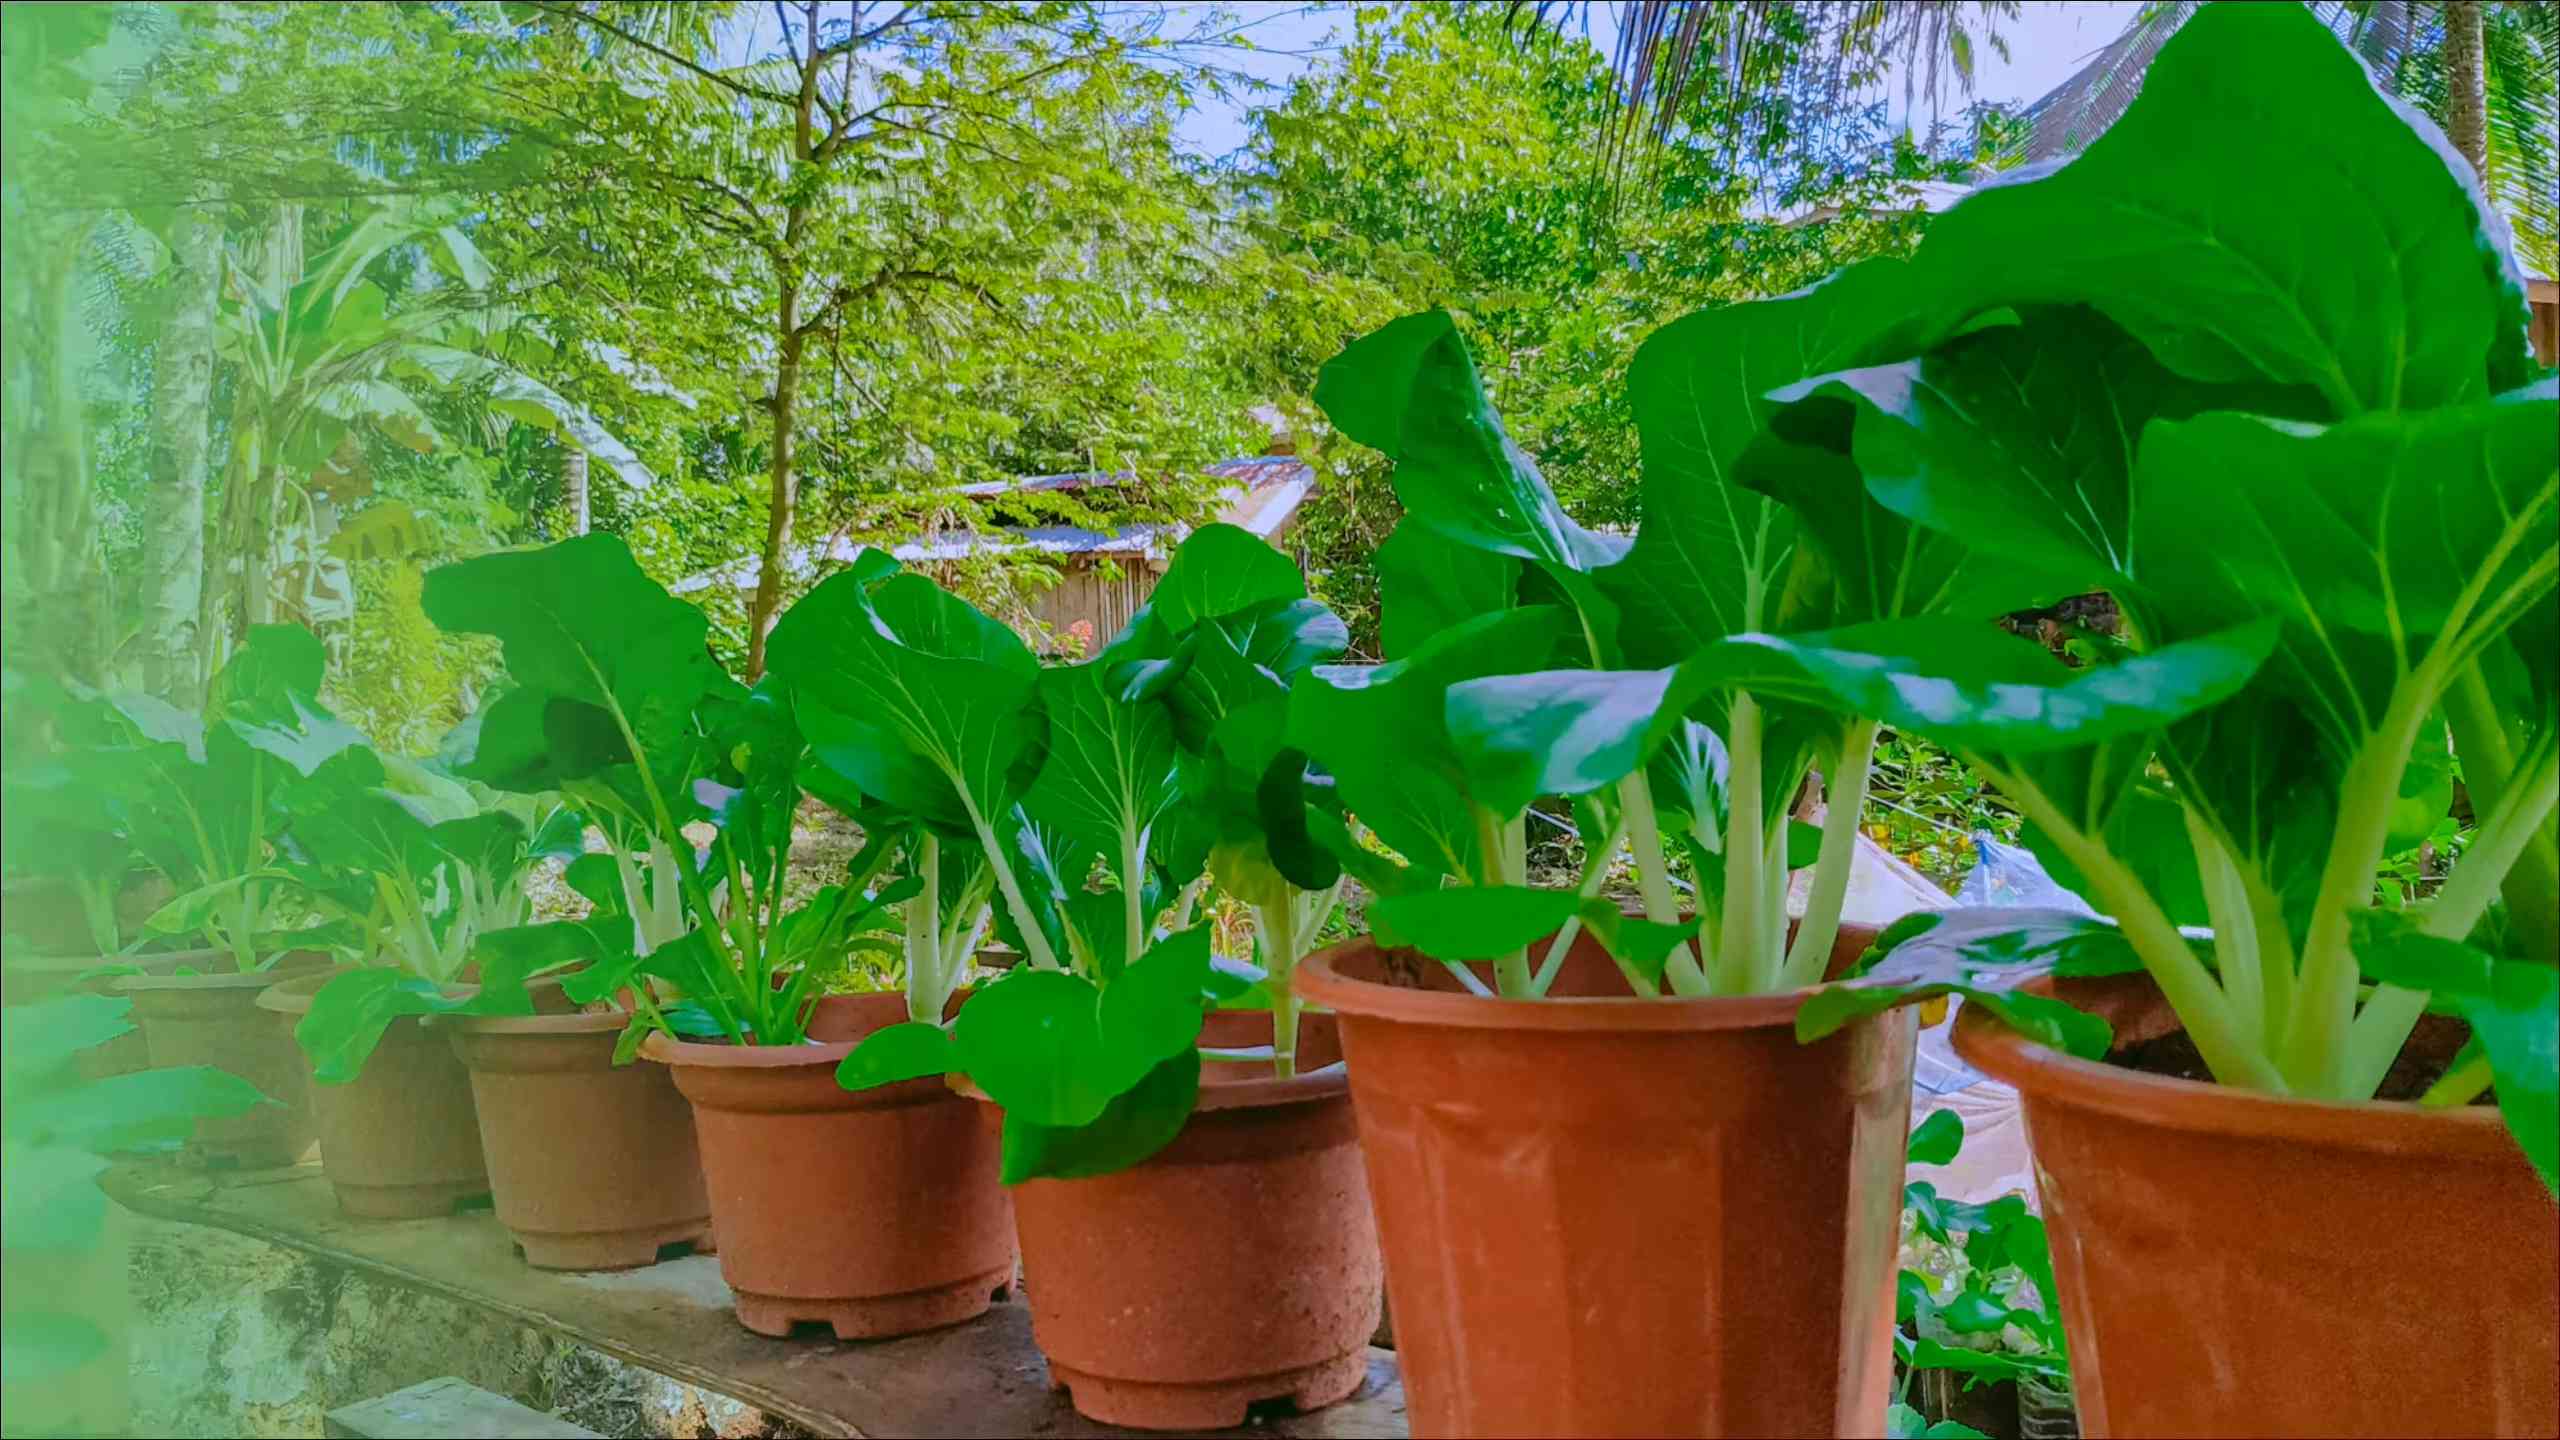
Growing Pechay in Pots: Imagine stepping outside your door and harvesting fresh, crisp pechay for your dinner, all grown with your own two hands! Sounds idyllic, right? Well, it’s more achievable than you think! For centuries, cultivating food in small spaces has been a vital practice, particularly in densely populated areas of Asia, where pechay (also known as bok choy) is a staple. This leafy green isn’t just delicious; it’s packed with vitamins and incredibly versatile in the kitchen.
But let’s be honest, not everyone has a sprawling garden. That’s where the magic of container gardening comes in! I’m here to show you that you don’t need acres of land to enjoy the satisfaction of growing your own food. This DIY guide is packed with simple, effective tricks and hacks that will empower you to successfully grow pechay in pots, even if you’re a complete beginner.
Why is this so important? Because in today’s world, knowing where your food comes from is more crucial than ever. Plus, growing pechay in pots is a fantastic way to reduce your grocery bills, enjoy fresher produce, and connect with nature, all from the comfort of your balcony or patio. So, grab your gardening gloves, and let’s get started on this exciting journey to homegrown goodness!
Growing Pechay in Pots: A Beginner’s Guide
Hey there, fellow gardening enthusiasts! Ever dreamt of having fresh, crisp pechay right at your fingertips? Well, you’re in luck! Growing pechay in pots is surprisingly easy and rewarding, even if you’re a complete newbie. I’m going to walk you through every step, from choosing the right pot to harvesting your delicious leafy greens. Let’s get started!
Choosing the Right Pot and Soil
First things first, we need to set the stage for our pechay to thrive. The right pot and soil are crucial for success.
* Pot Size: Pechay doesn’t need a huge amount of space, but it does need enough room for its roots to spread. I recommend using pots that are at least 6-8 inches deep and wide. You can grow one plant per pot of this size, or if you’re using a larger container, space them about 6 inches apart.
* Drainage: This is super important! Make sure your pot has drainage holes. Pechay hates sitting in soggy soil, which can lead to root rot. If your pot doesn’t have drainage holes, you can drill some yourself.
* Material: Plastic, terracotta, or even repurposed containers will work just fine. Just make sure they’re clean and free of any harmful chemicals.
* Soil: Pechay loves well-draining, nutrient-rich soil. I usually go for a good quality potting mix. You can also amend your potting mix with compost or aged manure to give your pechay an extra boost. Avoid using garden soil directly in pots, as it can become compacted and doesn’t drain well.
Planting Your Pechay Seeds
Now for the fun part – planting those tiny seeds!
1. Prepare the Soil: Fill your pot with the potting mix, leaving about an inch of space at the top. Gently pat down the soil to remove any large air pockets.
2. Sowing the Seeds: Pechay seeds are small, so you don’t need to plant them too deep. Sprinkle the seeds evenly over the surface of the soil. Aim for about 2-3 seeds per pot (if you’re using smaller pots) or space them about an inch apart in larger containers.
3. Cover the Seeds: Lightly cover the seeds with a thin layer of soil (about ¼ inch).
4. Water Gently: Use a watering can with a gentle rose attachment or a spray bottle to water the soil. You want to moisten the soil without disturbing the seeds.
5. Provide Warmth and Light: Place your pot in a warm, sunny location. Pechay needs at least 4-6 hours of sunlight per day. If you’re starting your seeds indoors, you can use a grow light.
6. Keep the Soil Moist: The soil should be consistently moist, but not waterlogged. Check the soil moisture daily and water as needed.
Caring for Your Pechay Plants
Once your seeds have germinated and your pechay seedlings are growing, it’s time to provide them with the care they need to flourish.
* Thinning: If more than one seed germinates in a pot, you’ll need to thin them out. Once the seedlings have a few true leaves (the leaves that appear after the initial seed leaves), choose the strongest seedling and gently remove the others. You can transplant the extra seedlings to other pots if you like.
* Watering: Water your pechay plants regularly, especially during hot, dry weather. Check the soil moisture daily and water when the top inch of soil feels dry to the touch. Avoid overwatering, as this can lead to root rot.
* Fertilizing: Pechay is a fast-growing plant, so it needs regular feeding. I like to use a balanced liquid fertilizer diluted to half strength every 2-3 weeks. You can also use a slow-release fertilizer at planting time.
* Sunlight: As I mentioned earlier, pechay needs at least 4-6 hours of sunlight per day. If you’re growing your pechay indoors, make sure to provide them with adequate artificial light.
* Pest Control: Keep an eye out for pests like aphids, cabbage worms, and slugs. You can usually control these pests with organic methods, such as handpicking, insecticidal soap, or neem oil. I always prefer to use organic methods whenever possible to keep my garden healthy and safe.
* Weed Control: Keep your pots free of weeds, as they can compete with your pechay plants for nutrients and water. Hand-pull any weeds that appear.
Harvesting Your Pechay
The best part of growing your own pechay is, of course, harvesting and enjoying your fresh, homegrown greens!
1. When to Harvest: You can start harvesting your pechay leaves when they are about 6-8 inches long. This usually takes about 4-6 weeks after planting.
2. How to Harvest: You can harvest the entire plant at once, or you can harvest individual leaves as needed. To harvest the entire plant, simply cut it off at the base. To harvest individual leaves, start with the outer leaves and work your way inwards.
3. Succession Planting: To ensure a continuous supply of pechay, you can practice succession planting. This means planting new seeds every 2-3 weeks.
Troubleshooting Common Problems
Even with the best care, you might encounter some problems while growing your pechay. Here are a few common issues and how to address them:
* Yellowing Leaves: This can be caused by overwatering, underwatering, nutrient deficiencies, or pests. Check the soil moisture and adjust your watering accordingly. Fertilize your plants with a balanced fertilizer. Inspect your plants for pests and treat them as needed.
* Stunted Growth: This can be caused by insufficient sunlight, poor soil, or pests. Make sure your plants are getting enough sunlight. Amend your soil with compost or aged manure. Inspect your plants for pests and treat them as needed.
* Holes in Leaves: This is usually caused by pests like cabbage worms or slugs. Handpick the pests off your plants. Use insecticidal soap or neem oil to control pests.
* Bolting: Bolting is when the plant prematurely flowers and goes to seed. This is usually caused by hot weather or stress. To prevent bolting, keep your plants well-watered and provide them with some shade during the hottest part of the day.
Section: Detailed Step-by-Step Instructions
Let’s break down the entire process into numbered steps for absolute clarity.
1. Gather Your Supplies: You’ll need pechay seeds, a pot (at least 6-8 inches deep and wide), potting mix, a watering can or spray bottle, and fertilizer.
2. Prepare the Pot: Ensure your pot has drainage holes. If not, drill some. Fill the pot with potting mix, leaving about an inch of space at the top.
3. Sow the Seeds: Sprinkle 2-3 seeds per pot, or space them about an inch apart in a larger container.
4. Cover the Seeds: Lightly cover the seeds with about ¼ inch of soil.
5. Water Gently: Moisten the soil thoroughly but gently.
6. Find a Sunny Spot: Place the pot in a location that receives at least 4-6 hours of sunlight daily.
7. Maintain Moisture: Keep the soil consistently moist, but not soggy. Check daily.
8. Thin Seedlings (If Necessary): Once seedlings have true leaves, thin to one strong seedling per pot.
9. Fertilize Regularly: Feed your pechay every 2-3 weeks with a diluted balanced liquid fertilizer.
10. Monitor for Pests: Regularly inspect your plants for pests and address them promptly with organic methods.
11. Harvest When Ready: Harvest leaves when they are 6-8 inches long, either the entire plant or individual leaves.
12. Succession Plant (Optional): Plant new seeds every 2-3 weeks for a continuous harvest.
Section: Advanced Tips for Bumper Crops
Want to take your pechay growing to the next level? Here are some advanced tips I’ve learned over the years:
* Companion Planting: Plant your pechay alongside other beneficial plants like marigolds (to deter pests) or herbs like dill and chamomile (to attract beneficial insects).
* Soil Testing: If you’re serious about your gardening, consider getting your soil tested. This will tell you exactly what nutrients your soil is lacking and allow you to amend it accordingly.
* Composting: Composting is a great way to recycle kitchen scraps and yard waste into nutrient-rich soil for your plants.
* Watering Techniques: Water deeply and less frequently, rather than shallowly and often. This encourages deeper root

Conclusion
So, there you have it! Growing your own pechay in pots is not only achievable, but it’s also incredibly rewarding. From the vibrant green leaves gracing your balcony or patio to the fresh, crisp taste enhancing your meals, the benefits are undeniable. This DIY trick transforms even the smallest spaces into productive gardens, offering a sustainable and cost-effective way to enjoy this nutritious vegetable.
Why is this a must-try? Because it puts you in control. You dictate the quality of the soil, the amount of sunlight, and the absence of harmful pesticides. You nurture your pechay from seed to harvest, experiencing the satisfaction of growing your own food. Plus, it’s a fantastic way to connect with nature, even in an urban environment.
But don’t stop there! Experiment with different varieties of pechay. Try growing the dwarf varieties for smaller pots or the larger, more robust types if you have ample space. You can also explore companion planting. Marigolds, for example, are known to deter pests and add a splash of color to your pechay garden. Consider adding a thin layer of mulch, like straw or wood chips, to help retain moisture in the soil and suppress weeds.
For a spicier kick, try adding a few chili pepper plants nearby. While not directly affecting the pechay’s flavor, the presence of chili peppers can sometimes deter certain pests that might otherwise be attracted to your leafy greens. Remember to research companion planting thoroughly to ensure the plants you choose are beneficial to your pechay.
Another variation involves adjusting the fertilizer schedule based on your pechay’s growth. If you notice the leaves are pale or yellowing, it could indicate a nutrient deficiency. In this case, consider supplementing with a liquid fertilizer rich in nitrogen. Conversely, if the leaves are a deep green and growing rapidly, you may need to reduce the frequency of fertilization.
Growing pechay in pots is a journey of discovery. Don’t be afraid to experiment and adapt your techniques based on your local climate and growing conditions. The most important thing is to have fun and enjoy the process.
We wholeheartedly encourage you to give this DIY trick a try. It’s easier than you think, and the rewards are well worth the effort. Once you’ve harvested your first batch of homegrown pechay, we’d love to hear about your experience! Share your photos, tips, and challenges in the comments below. Let’s build a community of pechay enthusiasts and inspire others to embrace the joy of growing their own food. What are you waiting for? Get planting!
Frequently Asked Questions (FAQ)
What size pot is best for growing pechay?
The ideal pot size for growing pechay is at least 6 inches in diameter and 6 inches deep per plant. However, larger pots (8-12 inches in diameter) are generally recommended, especially if you plan to grow multiple pechay plants in the same container. Larger pots provide more room for root development, which leads to healthier and more productive plants. If you’re growing dwarf varieties, you might get away with slightly smaller pots, but always err on the side of providing ample space. Remember to ensure the pot has adequate drainage holes to prevent waterlogging.
How much sunlight does pechay need?
Pechay thrives in full sun, requiring at least 6 hours of direct sunlight per day. However, in hotter climates, it can benefit from some afternoon shade to prevent the leaves from scorching. If you’re growing pechay indoors, supplement with grow lights to ensure they receive sufficient light. Insufficient sunlight can result in leggy growth and reduced yields. Observe your plants closely and adjust their position as needed to maximize sunlight exposure.
What type of soil is best for growing pechay in pots?
Pechay prefers well-draining, fertile soil that is rich in organic matter. A good potting mix for pechay should consist of a combination of compost, peat moss (or coconut coir), and perlite or vermiculite. Compost provides essential nutrients, peat moss (or coconut coir) helps retain moisture, and perlite or vermiculite improves drainage. Avoid using garden soil in pots, as it can become compacted and hinder root growth. The ideal soil pH for pechay is between 6.0 and 7.5. You can test your soil pH using a soil testing kit and amend it as needed with lime (to raise pH) or sulfur (to lower pH).
How often should I water my pechay plants?
Water your pechay plants regularly, keeping the soil consistently moist but not waterlogged. The frequency of watering will depend on factors such as the weather, the size of the pot, and the type of soil. Check the soil moisture level daily by sticking your finger about an inch into the soil. If the soil feels dry to the touch, it’s time to water. Water deeply, allowing the water to drain out of the drainage holes. Avoid overhead watering, as this can increase the risk of fungal diseases. Instead, water at the base of the plants. During hot, dry weather, you may need to water your pechay plants more frequently.
What kind of fertilizer should I use for pechay?
Pechay is a heavy feeder and benefits from regular fertilization. Use a balanced fertilizer (e.g., 10-10-10) or a fertilizer specifically formulated for leafy greens. Apply the fertilizer according to the package instructions. You can also supplement with organic fertilizers such as compost tea or fish emulsion. Avoid over-fertilizing, as this can lead to excessive vegetative growth and reduced yields. Monitor your plants closely and adjust the fertilizer schedule as needed based on their growth and appearance.
How do I protect my pechay from pests and diseases?
Pechay can be susceptible to pests such as aphids, cabbage worms, and slugs. To prevent pest infestations, inspect your plants regularly and remove any pests you find by hand. You can also use organic pest control methods such as insecticidal soap or neem oil. To prevent diseases, ensure good air circulation around your plants and avoid overhead watering. If you notice any signs of disease, such as yellowing leaves or spots, remove the affected leaves immediately. You can also use organic fungicides to control fungal diseases. Companion planting with herbs like rosemary or basil can also help deter pests.
When is the best time to harvest pechay?
Pechay can be harvested at any stage of growth, depending on your preference. For baby greens, harvest when the leaves are about 4-6 inches long. For mature leaves, harvest when they are about 8-12 inches long. To harvest, simply cut the leaves at the base of the plant, leaving the central stem intact. This will allow the plant to continue producing new leaves. You can also harvest the entire plant at once by cutting it off at the base. Harvest in the morning when the leaves are crisp and fresh.
Can I grow pechay indoors?
Yes, you can grow pechay indoors, but you’ll need to provide adequate light. Place your pechay plants near a sunny window that receives at least 6 hours of direct sunlight per day. If you don’t have enough natural light, supplement with grow lights. Use a full-spectrum grow light and position it about 6-12 inches above the plants. Rotate the plants regularly to ensure even light exposure. Maintain a consistent temperature and humidity level. Indoor growing is a great way to enjoy fresh pechay year-round, regardless of the outdoor weather conditions.
How long does it take for pechay to grow?
Pechay is a fast-growing vegetable. From seed to harvest, it typically takes about 45-60 days for mature leaves. Baby greens can be harvested in as little as 30 days. The exact time will depend on factors such as the variety of pechay, the growing conditions, and the climate. Provide optimal growing conditions, including adequate sunlight, water, and fertilizer, to ensure rapid growth.
Can I save seeds from my pechay plants?
Yes, you can save seeds from your pechay plants, but it requires allowing the plant to bolt (flower and produce seeds). This typically happens after the plant has matured and experienced a period of stress, such as hot weather or drought. Allow the flowers to dry on the plant, then harvest the seed pods. Dry the seed pods completely and then thresh them to release the seeds. Store the seeds in a cool, dry place. Keep in mind that pechay can cross-pollinate with other members of the Brassica family, so the seeds may not be true to type.
Leave a Comment