

Tennis ball scuff mark removal – sounds like a niche problem, right? But trust me, if you’ve ever had a rogue tennis ball (or energetic kids!) wreak havoc on your walls, you know the frustration is real. I’ve been there, staring at those unsightly black streaks, wondering if I’d have to repaint the entire room.
The good news is, you don’t! Before you reach for the paint can, let’s explore some incredibly effective and surprisingly simple DIY tricks to banish those blemishes. Think of it as a modern-day cleaning ritual. While our ancestors might have used elbow grease and harsh chemicals, we’re armed with clever hacks and everyday household items.
Why is mastering tennis ball scuff mark removal so important? Because those marks aren’t just unsightly; they can diminish the overall look and feel of your home. A clean, well-maintained space contributes to a sense of calm and well-being. Plus, learning these DIY techniques saves you time, money, and the hassle of repainting. So, let’s dive in and discover the secrets to restoring your walls to their former glory!
DIY Tennis Ball Scuff Mark Removal: A Comprehensive Guide
Hey there! Are you tired of those unsightly tennis ball scuff marks ruining the look of your walls? As a tennis enthusiast myself, I totally get it. Those fuzzy green projectiles can leave their mark, literally! But don’t worry, you don’t need to repaint your entire house. I’m going to walk you through several effective methods to remove those scuffs and restore your walls to their former glory. Let’s get started!
Understanding the Enemy: Tennis Ball Scuff Marks
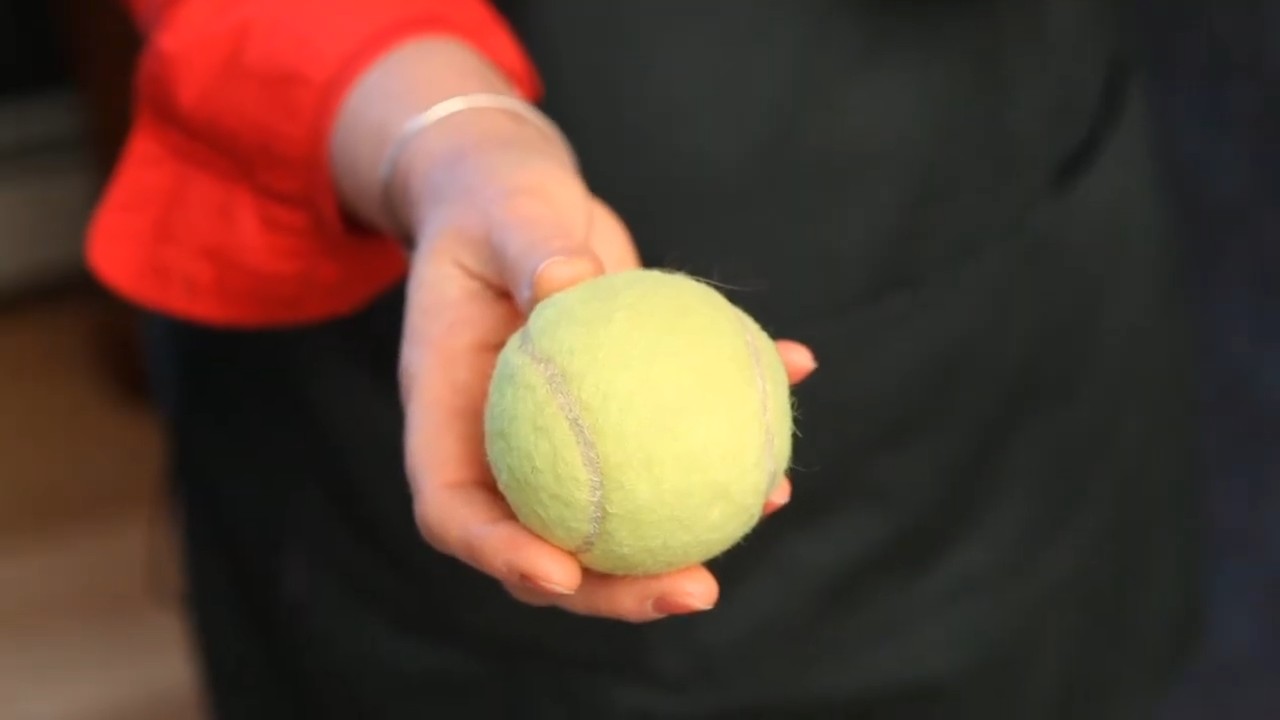
Before we dive into the removal process, it’s helpful to understand what we’re dealing with. Tennis ball scuff marks are typically caused by the felt fibers of the ball rubbing against the wall’s surface. These fibers can leave behind a residue, often accompanied by a slight discoloration. The severity of the mark depends on factors like the force of impact, the type of paint on your wall, and the age of the scuff.
Gathering Your Arsenal: Essential Supplies
To tackle these scuffs effectively, you’ll need a few basic supplies. I always recommend starting with the gentlest methods first and working your way up to more aggressive techniques if necessary. Here’s a list of what you’ll likely need:
* Soft cloths or microfiber towels: These are essential for wiping and cleaning.
* Warm water: The foundation of many cleaning solutions.
* Mild dish soap: A gentle yet effective cleaner for most surfaces.
* Baking soda: A mild abrasive that can help lift stubborn marks.
* Magic Eraser (Melamine sponge): A slightly more abrasive option for tougher scuffs.
* Pencil eraser: Surprisingly effective for light scuff marks.
* Soft-bristled brush (optional): For scrubbing textured surfaces.
* White vinegar (optional): For stubborn stains, but test in an inconspicuous area first.
* Rubbing alcohol (isopropyl alcohol) (optional): For very stubborn stains, but test in an inconspicuous area first.
* Spray bottle (optional): For applying cleaning solutions.
* Clean, dry sponge: For rinsing.
* Painter’s tape (optional): To protect trim or adjacent surfaces.
Method 1: The Gentle Approach – Soap and Water
This is always my first line of defense. It’s gentle, readily available, and often does the trick for fresh or light scuff marks.
1. Prepare your solution: Mix a few drops of mild dish soap into a bowl of warm water. Don’t overdo it with the soap; you just want a slightly sudsy solution.
2. Dampen your cloth: Dip a soft cloth or microfiber towel into the soapy water and wring it out thoroughly. You want the cloth to be damp, not soaking wet.
3. Gently wipe the scuff mark: Using a circular motion, gently wipe the scuff mark. Avoid applying too much pressure, as this could damage the paint.
4. Rinse with a clean sponge: Dampen a clean sponge with plain water and gently wipe the area to remove any soap residue.
5. Dry with a clean cloth: Use a clean, dry cloth to dry the area thoroughly.
6. Inspect and repeat: Check the area to see if the scuff mark is gone. If not, repeat steps 2-5.
Method 2: Baking Soda Paste – A Mild Abrasive
If soap and water aren’t enough, baking soda can provide a gentle abrasive action to lift the scuff mark.
1. Make a paste: Mix baking soda with a small amount of water to create a thick paste. The consistency should be similar to toothpaste.
2. Apply the paste: Apply a small amount of the baking soda paste to a clean, damp cloth.
3. Gently rub the scuff mark: Using a circular motion, gently rub the scuff mark with the cloth. Be careful not to apply too much pressure, as baking soda can be abrasive.
4. Rinse with a clean sponge: Dampen a clean sponge with plain water and gently wipe the area to remove the baking soda residue.
5. Dry with a clean cloth: Use a clean, dry cloth to dry the area thoroughly.
6. Inspect and repeat: Check the area to see if the scuff mark is gone. If not, repeat steps 2-5, but be extra cautious about applying too much pressure.
Method 3: The Magic Eraser – Proceed with Caution!
Magic Erasers (melamine sponges) are incredibly effective at removing scuff marks, but they are also abrasive and can potentially damage your paint if used improperly. Always test in an inconspicuous area first!
1. Dampen the Magic Eraser: Lightly dampen the Magic Eraser with water. Do not soak it.
2. Gently rub the scuff mark: Using very light pressure, gently rub the scuff mark with the Magic Eraser. Avoid scrubbing vigorously.
3. Rinse with a clean sponge: Dampen a clean sponge with plain water and gently wipe the area to remove any residue from the Magic Eraser.
4. Dry with a clean cloth: Use a clean, dry cloth to dry the area thoroughly.
5. Inspect and repeat (sparingly): Check the area to see if the scuff mark is gone. If not, repeat steps 2-4, but be extremely cautious about applying too much pressure. If you notice any paint coming off, stop immediately.
Method 4: The Humble Pencil Eraser
This might sound strange, but a regular pencil eraser can sometimes work wonders on light scuff marks, especially on matte or flat paint finishes.
1. Use a clean eraser: Make sure your pencil eraser is clean and free of any dirt or debris.
2. Gently rub the scuff mark: Gently rub the scuff mark with the eraser, using a back-and-forth motion.
3. Wipe away eraser shavings: Use a clean, dry cloth to wipe away any eraser shavings.
4. Inspect and repeat: Check the area to see if the scuff mark is gone. If not, repeat steps 2-3.
Method 5: White Vinegar – For Stubborn Stains (Test First!)
White vinegar is a natural cleaning agent that can be effective for removing stubborn stains, but it can also damage certain types of paint. Always test in an inconspicuous area before applying it to the scuff mark.
1. Dilute the vinegar: Mix equal parts white vinegar and water in a spray bottle or bowl.
2. Apply the solution: If using a spray bottle, lightly spray the solution onto the scuff mark. If using a bowl, dampen a clean cloth with the solution and gently apply it to the scuff mark.
3. Let it sit for a few minutes: Allow the solution to sit on the scuff mark for a few minutes to help loosen the stain.
4. Gently wipe the scuff mark: Using a clean cloth, gently wipe the scuff mark.
5. Rinse with a clean sponge: Dampen a clean sponge with plain water and gently wipe the area to remove any vinegar residue.
6. Dry with a clean cloth: Use a clean, dry cloth to dry the area thoroughly.
7. Inspect and repeat: Check the area to see if the scuff mark is gone. If not, repeat steps 2-6, but be extra cautious about leaving the vinegar on for too long.
Method 6: Rubbing Alcohol (Isopropyl Alcohol) – Use with Extreme Caution!
Rubbing alcohol is a powerful solvent that can remove even the most stubborn stains, but it can also strip paint and damage surfaces. This should be your last resort, and you must test it in an inconspicuous area first!
1. Dampen a cotton ball or cloth: Lightly dampen a cotton ball or clean cloth with rubbing alcohol.
2. Gently dab the scuff mark: Gently dab the scuff mark with the cotton ball or cloth. Do not rub or scrub.
3. Immediately wipe with a clean, damp cloth: Immediately wipe the area with a clean, damp cloth to remove any alcohol residue.
4. Dry with a clean cloth: Use a clean, dry cloth to dry the area thoroughly.
5. Inspect and repeat (very sparingly): Check the area to see if the scuff mark is gone. If not, repeat steps 2-4, but be extremely cautious about applying too much alcohol or leaving it on for too long. If you notice any paint coming off, stop immediately.
Important Considerations and Pro Tips
* Test in an inconspicuous area: I can’t stress this enough! Before using any cleaning solution, test it in a hidden area of the wall to ensure it doesn’t damage the paint.

Conclusion
So there you have it! Removing those unsightly tennis ball scuff marks from your walls doesn’t require harsh chemicals, expensive cleaners, or a complete repaint. This simple, DIY trick, utilizing just a clean tennis ball, is a game-changer for maintaining the pristine look of your home. It’s quick, effective, and surprisingly satisfying to watch those marks disappear with minimal effort.
Why is this a must-try? Because it saves you time, money, and the headache of dealing with more complicated cleaning methods. Think about it: no more scrubbing until your arms ache, no more worrying about damaging your paint, and no more trips to the store for specialized cleaners. This method is gentle enough for most painted surfaces, making it a versatile solution for scuff marks throughout your home.
But the beauty of this DIY trick lies in its adaptability. While a standard tennis ball works wonders, you can experiment with slightly different approaches depending on the severity of the scuff marks and the type of paint on your walls. For instance, if you’re dealing with particularly stubborn marks, try dampening the tennis ball very slightly with water before rubbing. Just be sure to wring out any excess moisture to avoid damaging the paint.
Another variation involves using a clean, dry microfiber cloth after using the tennis ball. This can help to buff the area and remove any remaining residue, leaving your walls looking spotless. You could also try using a magic eraser for particularly stubborn marks, but be cautious as these can sometimes remove paint if used too aggressively. Always test in an inconspicuous area first.
Furthermore, consider the type of tennis ball you’re using. A newer tennis ball might be slightly more abrasive, while an older, slightly worn tennis ball might be gentler on delicate surfaces. Experiment to find what works best for your specific needs.
Ultimately, the goal is to find a method that effectively removes the scuff marks without damaging your walls. This tennis ball scuff mark removal technique offers a safe and efficient way to achieve that goal. It’s a testament to the power of simple solutions and a reminder that sometimes, the best cleaning tools are already right at your fingertips.
We wholeheartedly encourage you to try this DIY trick and see the results for yourself. It’s a small effort that yields a big impact on the overall appearance of your home. And once you’ve experienced the magic of the tennis ball, we’d love to hear about your experience! Share your before-and-after photos, tips, and variations in the comments below. Let’s build a community of clean-wall enthusiasts and help each other keep our homes looking their best! Your insights could be invaluable to others who are struggling with the same problem. So, grab a tennis ball, tackle those scuff marks, and let us know how it goes!
Frequently Asked Questions (FAQ)
1. Will this tennis ball trick work on all types of walls?
The tennis ball trick is generally safe and effective on most painted walls, especially those with a satin, eggshell, or semi-gloss finish. These finishes are more durable and can withstand gentle rubbing. However, it’s always a good idea to test the method in an inconspicuous area first, such as behind a piece of furniture or in a closet, to ensure that it doesn’t damage the paint. Matte paint, for example, can be more delicate and may require a lighter touch. If you’re unsure about the type of paint on your walls, err on the side of caution and test the method thoroughly before applying it to a larger area. Also, avoid using this method on wallpaper, as it could damage the surface.
2. What if the scuff marks are really stubborn and don’t come off easily?
If the scuff marks are particularly stubborn, there are a few things you can try. First, make sure you’re applying enough pressure with the tennis ball. You don’t want to scrub aggressively, but a firm, consistent pressure is necessary. Second, try dampening the tennis ball very slightly with water. The moisture can help to loosen the scuff marks. Be sure to wring out any excess water to avoid damaging the paint. Another option is to use a magic eraser, but be extremely cautious as these can sometimes remove paint. Always test in an inconspicuous area first. If all else fails, you may need to resort to touching up the paint.
3. Can I use any type of tennis ball for this trick?
While any tennis ball will generally work, it’s best to use a clean, relatively new tennis ball. An older, heavily used tennis ball might be dirty or have lost some of its texture, making it less effective. A newer tennis ball will have a slightly more abrasive surface, which can help to remove the scuff marks more easily. However, be mindful of using a brand new, very abrasive tennis ball on delicate surfaces, as it could potentially damage the paint. Experiment to find what works best for your specific needs.
4. Will this trick remove all types of marks from my walls?
The tennis ball trick is most effective for removing scuff marks caused by shoes, furniture, or other objects rubbing against the wall. It may not be as effective for removing other types of marks, such as crayon, pen, or grease stains. For those types of marks, you may need to use a different cleaning method, such as a mild detergent solution or a specialized stain remover. Always test any cleaning solution in an inconspicuous area first to ensure that it doesn’t damage the paint.
5. How often should I use this trick to clean my walls?
You can use the tennis ball trick as often as needed to remove scuff marks and keep your walls looking clean. There’s no harm in using it regularly, as it’s a gentle and non-abrasive method. However, it’s important to avoid over-cleaning your walls, as this can eventually damage the paint. A good rule of thumb is to clean your walls as needed, rather than on a strict schedule. Pay attention to areas that are prone to scuff marks, such as hallways, entryways, and around furniture.
6. Is this method safe for children and pets?
Yes, the tennis ball trick is generally safe for children and pets, as it doesn’t involve the use of any harsh chemicals or toxic substances. However, it’s always a good idea to keep cleaning supplies out of reach of children and pets, regardless of how safe they may seem. Additionally, be sure to supervise children and pets while you’re cleaning to prevent them from accidentally ingesting any cleaning products or damaging the walls.
7. What are some other DIY cleaning tricks for walls?
Besides the tennis ball trick, there are several other DIY cleaning tricks you can use to keep your walls looking their best. For example, you can use a mixture of warm water and dish soap to clean general dirt and grime. You can also use baking soda paste to remove stubborn stains. For grease stains, try using a mixture of cornstarch and water. Always test any cleaning solution in an inconspicuous area first to ensure that it doesn’t damage the paint.
8. Can I use this trick on textured walls?
The effectiveness of the tennis ball trick on textured walls may vary depending on the type and severity of the texture. On lightly textured walls, it may work just as well as on smooth walls. However, on heavily textured walls, the tennis ball may not be able to reach into all the crevices and remove the scuff marks effectively. In this case, you may need to use a different cleaning method, such as a soft brush or a sponge. Always test the method in an inconspicuous area first to ensure that it doesn’t damage the texture.
9. What if the tennis ball leaves a mark on my wall?
In rare cases, the tennis ball may leave a slight mark on your wall, especially if the ball is dirty or the paint is delicate. If this happens, try using a clean, damp microfiber cloth to gently buff the area. This should help to remove any remaining residue and restore the paint to its original condition. If the mark persists, you may need to touch up the paint.
10. Where can I find more information about DIY cleaning tips?
There are many resources available online and in libraries that offer information about DIY cleaning tips. You can search for articles, videos, and forums that discuss various cleaning methods and techniques. You can also consult with professional cleaners or home improvement experts for advice. Remember to always research and test any cleaning method before applying it to a large area.
Leave a Comment