

Hydroponic water spinach growing might sound intimidating, but trust me, it’s easier than you think! Forget battling weeds and soil pests; we’re diving into the world of soilless gardening, a method that’s been around for centuries. Did you know that the Hanging Gardens of Babylon, one of the Seven Wonders of the Ancient World, are believed to have utilized hydroponic principles? While we might not be building towering gardens, we can bring a touch of that ancient ingenuity to our own homes.
Why should you try this DIY trick? Well, for starters, it’s incredibly efficient. You’ll use less water than traditional gardening, and you can grow delicious, nutritious water spinach right in your kitchen, balcony, or even a small apartment! Imagine having fresh, crisp greens readily available for your stir-fries, salads, and soups. Plus, hydroponic water spinach growing allows you to control the growing environment, leading to faster growth and higher yields.
In this article, I’m going to walk you through a simple, step-by-step guide to setting up your own hydroponic water spinach system. We’ll cover everything from choosing the right container to providing the perfect nutrient solution. Get ready to unleash your inner gardener and enjoy the satisfaction of growing your own food, the modern way!
DIY Hydroponic Water Spinach: A Beginner’s Guide
Hey there, fellow plant enthusiasts! Ever wanted to grow your own fresh, crunchy water spinach (also known as kangkong or ong choy) right in your kitchen? Well, you’re in the right place! I’m going to walk you through a super simple DIY hydroponic setup that even a complete beginner can handle. Trust me, it’s easier than you think, and the reward of harvesting your own delicious greens is totally worth it.
What You’ll Need
Before we dive in, let’s gather our supplies. Don’t worry, you probably have a lot of this stuff lying around already!
* Containers: We’ll need two containers. One should be opaque (to block light and prevent algae growth) and slightly larger than the other. Think a plastic storage bin and a smaller plastic tub that can fit inside.
* Net Pots: These are small, slotted pots that will hold your water spinach seedlings. You can find them at most garden centers or online. I usually go for the 2-inch size.
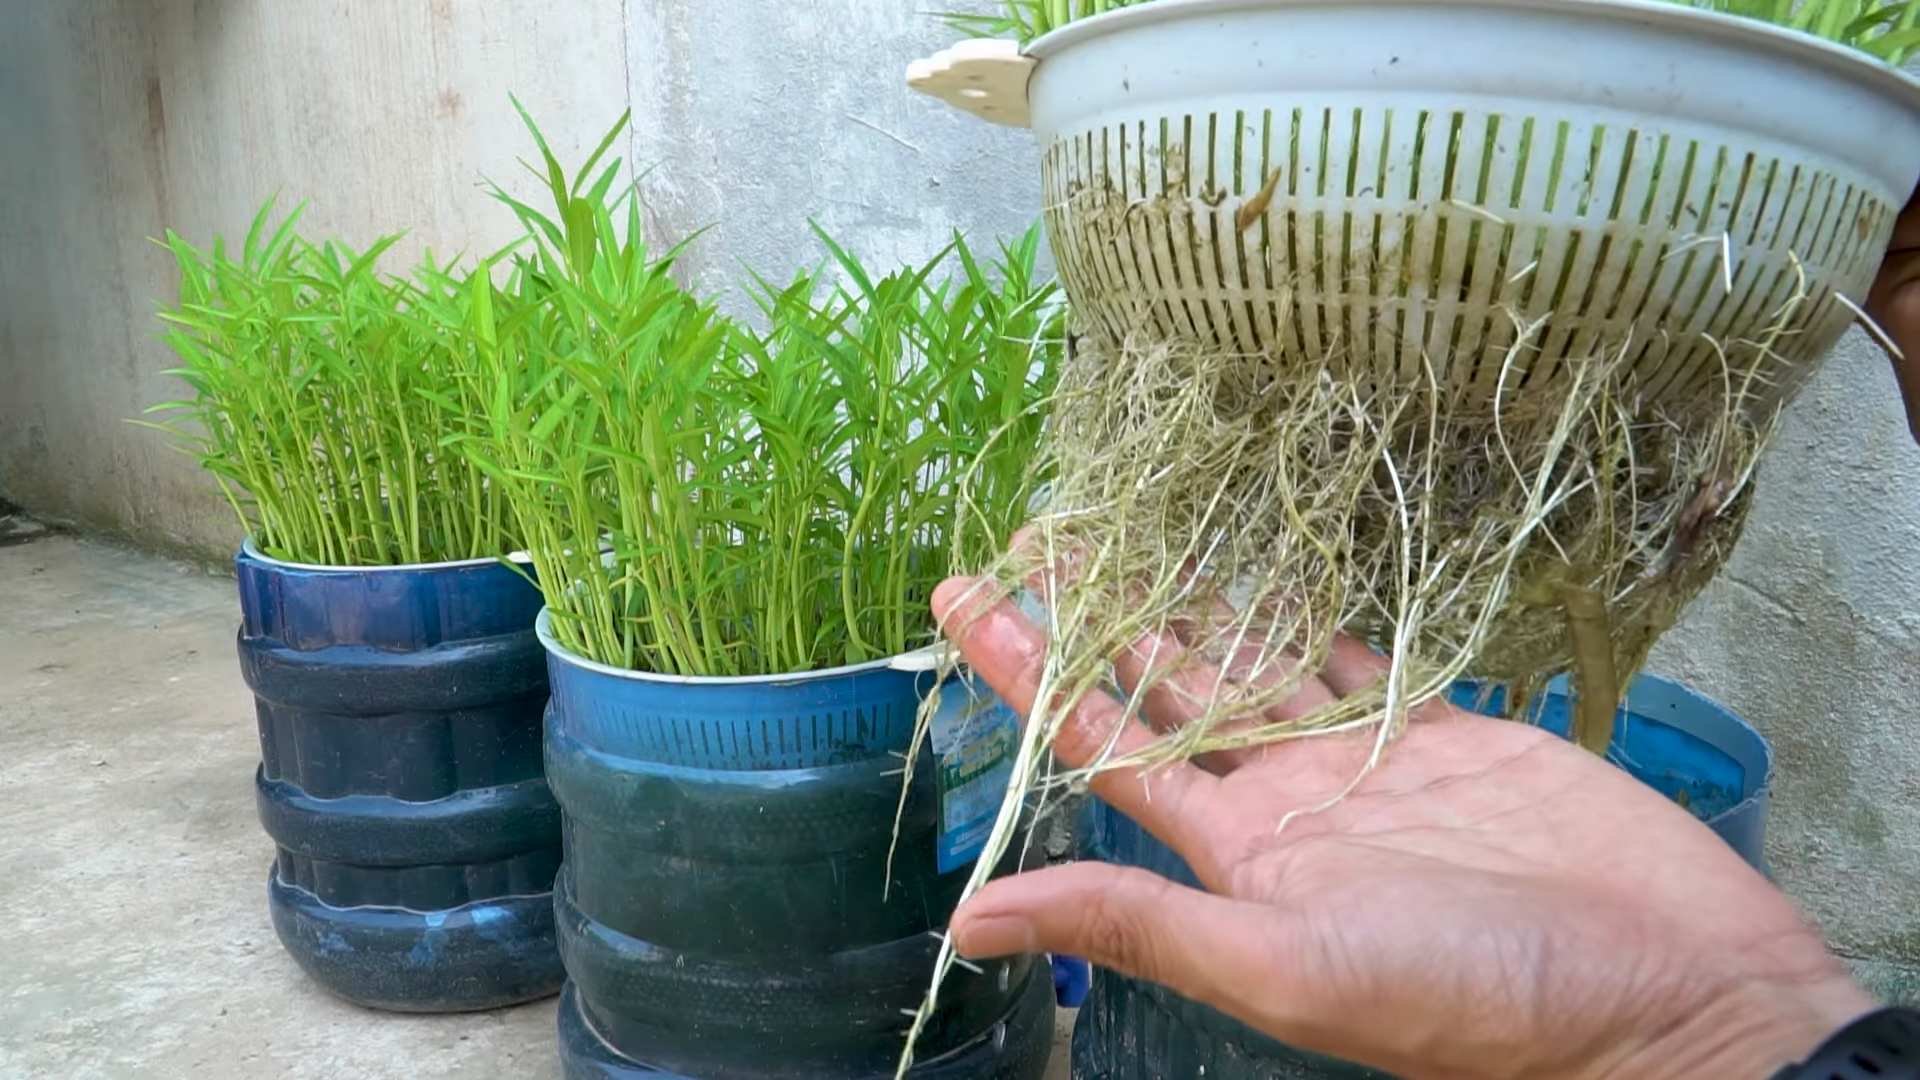
* Growing Medium: This is what will support your plants’ roots. I recommend using coco coir or rockwool cubes. They’re both excellent at retaining moisture and providing good aeration.
* Hydroponic Nutrients: This is essential! Water alone won’t provide your water spinach with the nutrients it needs to thrive. Look for a balanced hydroponic nutrient solution specifically formulated for leafy greens.
* Air Pump and Air Stone: These will oxygenate the nutrient solution, which is crucial for healthy root development. A small aquarium air pump will do the trick.
* Timer: To control the air pump.
* Water Spinach Seeds: Of course! You can find these at Asian grocery stores or online seed suppliers.
* Drill or Hole Saw: To make holes in the lid of your container for the net pots.
* Measuring Cups and Spoons: For mixing the nutrient solution.
* pH Meter (Optional but Recommended): To monitor the pH of your nutrient solution. Water spinach prefers a slightly acidic pH of around 6.0-6.5.
* pH Up and pH Down (Optional): To adjust the pH of your nutrient solution if needed.
* Grow Light (Optional): If you don’t have a sunny spot, a grow light will provide the necessary light for your water spinach to grow.
Setting Up Your Hydroponic System
Okay, let’s get our hands dirty (well, not really, since it’s hydroponics!). This is where we’ll assemble our system.
1. Prepare the Outer Container: This is the larger, opaque container. Make sure it’s clean and free of any debris. This will hold your nutrient solution.
2. Prepare the Lid: This is where the magic happens! Take the lid of your outer container and use your drill or hole saw to create holes that are slightly smaller than the diameter of your net pots. The number of holes you make will depend on the size of your container and how much water spinach you want to grow. I usually space them about 4-6 inches apart. Make sure the holes are evenly spaced and that the net pots will sit securely in them.
3. Prepare the Inner Container (Optional): If your inner container is clear or translucent, you’ll need to make it opaque to prevent algae growth. You can do this by painting it with non-toxic paint, wrapping it in black plastic, or covering it with aluminum foil. This step is only necessary if light can penetrate the inner container.
4. Assemble the System: Place the inner container inside the outer container. The inner container should be elevated slightly off the bottom of the outer container. You can achieve this by placing bricks, rocks, or small plastic containers inside the outer container before placing the inner container on top. This creates a reservoir for the nutrient solution. Place the lid with the holes on top of the outer container.
5. Install the Air Pump and Air Stone: Connect the air tubing to the air pump and the air stone. Place the air stone at the bottom of the outer container, inside the nutrient solution reservoir. Plug in the air pump and make sure it’s bubbling vigorously. Set the timer to run the air pump for 15 minutes every hour. This will provide the roots with the oxygen they need.
Germinating Your Water Spinach Seeds
Now, let’s get those seeds sprouting! This is a crucial step for success.
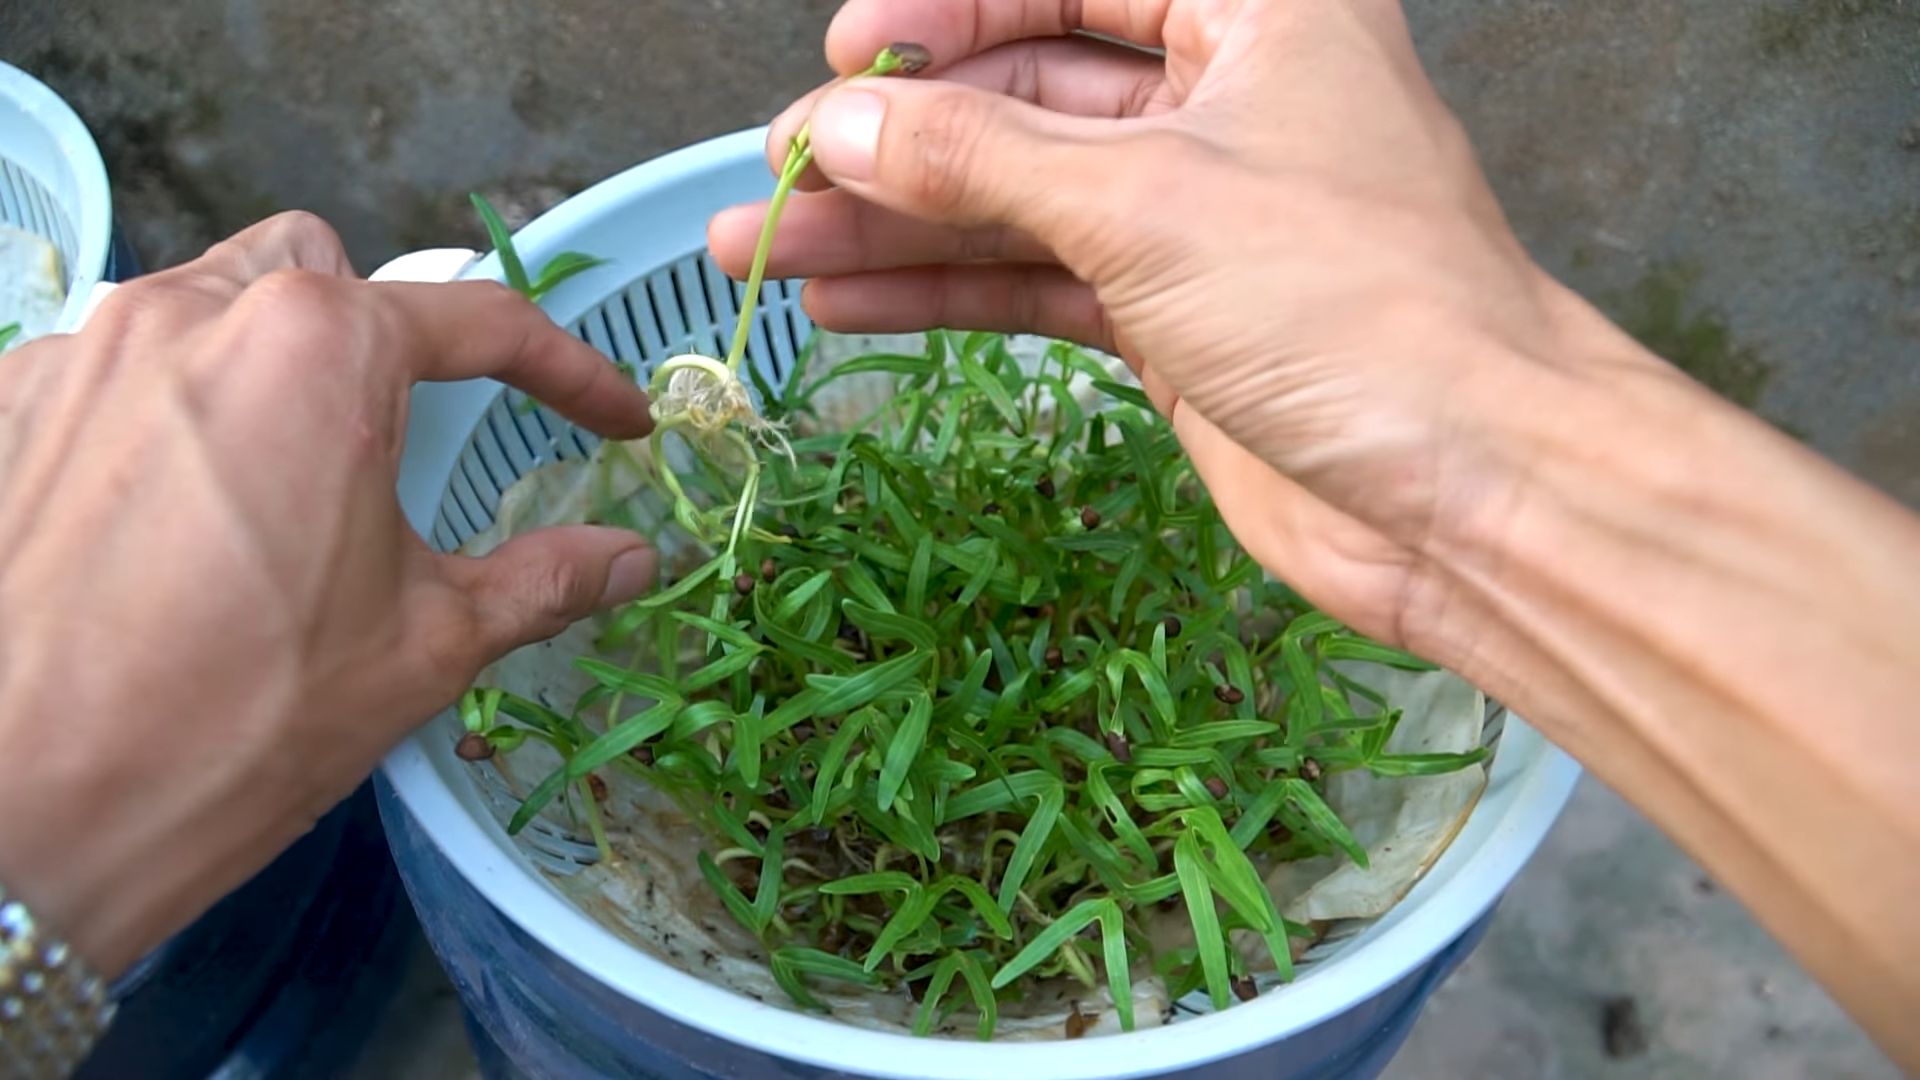
1. Soak the Seeds: Place your water spinach seeds in a small bowl of warm water and let them soak for 24 hours. This will help soften the seed coat and improve germination rates.
2. Prepare the Growing Medium: Moisten your coco coir or rockwool cubes with water. You want them to be damp but not soaking wet.
3. Sow the Seeds: Place 2-3 seeds in each net pot, on top of the moistened growing medium. Gently press the seeds into the medium.
4. Provide Humidity: Cover the net pots with a clear plastic dome or plastic wrap to create a humid environment. This will help the seeds germinate.
5. Provide Light: Place the net pots in a warm, bright location. If you don’t have a sunny spot, use a grow light.
6. Maintain Moisture: Keep the growing medium moist by misting it with water as needed.
7. Wait for Germination: Water spinach seeds typically germinate in 2-5 days. Once the seedlings emerge, remove the plastic dome or plastic wrap.
Transplanting and Growing Your Water Spinach
Alright, the seedlings are up! Time to get them into the hydroponic system.
1. Prepare the Nutrient Solution: Fill the outer container with water. Add the hydroponic nutrient solution according to the manufacturer’s instructions. Use a measuring cup and spoon to ensure accurate measurements.
2. Check the pH (Optional): Use your pH meter to check the pH of the nutrient solution. Adjust the pH to 6.0-6.5 using pH Up or pH Down if necessary.
3. Transplant the Seedlings: Gently remove the seedlings from their germination trays or containers. Place each net pot containing the seedlings into the holes in the lid of the outer container. The roots should be submerged in the nutrient solution.
4. Provide Light: Water spinach needs plenty of light to grow. If you’re growing indoors, provide at least 6-8 hours of light per day using a grow light. If you’re growing outdoors, place the system in a sunny location.
5. Monitor the Nutrient Solution: Check the nutrient solution every few days and replenish it as needed. You’ll also need to change the nutrient solution completely every 1-2 weeks to prevent nutrient imbalances and the buildup of harmful bacteria.
6. Maintain Air Circulation: Ensure good air circulation around the plants to prevent fungal diseases. You can use a small fan to circulate the air.
Harvesting Your Water Spinach
The best part! Get ready to enjoy the fruits (or rather, vegetables) of your labor.
1. Harvest When Ready: You can start harvesting your water spinach when it reaches about 6-8 inches in height. This usually takes about 3-4 weeks after transplanting.
2. Harvesting Technique: Use scissors or a sharp knife to cut the stems about 2 inches above the base of the plant. This will allow the plant to regrow and produce more leaves.
3. Enjoy Your Harvest: Wash the harvested water spinach thoroughly and enjoy it in stir-fries, soups, salads, or any other dish you like!
Troubleshooting
Even with the best planning, things can sometimes go wrong. Here are a few common problems and how to fix them:
* Yellowing Leaves: This could be a sign of nutrient deficiency. Make sure you’re using a balanced hydroponic nutrient solution and that you’re changing it regularly. It could also be a sign of overwatering.
* Slow Growth: This could be due to insufficient light. Make sure your water spinach is getting enough light, either from the sun or a grow light. It could also be due to low temperatures. Water spinach prefers warm temperatures.
* Algae Growth: This is a common problem in hydroponic systems. To prevent algae growth, make sure your containers are opaque and that you’re not exposing the nutrient solution to direct sunlight. You can also add a small amount of hydrogen peroxide to the nutrient solution to kill algae.
* Root Rot: This is a fungal disease that can cause the roots to rot. To prevent root rot, make sure the nutrient solution is well-oxygenated and that you’re not overwatering the plants.
Tips for Success
Here are a few extra tips to help you grow the best water spinach possible:
* Start with High-Quality Seeds: Using high-quality seeds will increase your chances of success.
* Maintain a Consistent Environment: Water spinach prefers a warm,
Conclusion
So, there you have it! Growing your own hydroponic water spinach is not only surprisingly simple, but it’s also incredibly rewarding. Imagine fresh, crisp, and nutrient-packed water spinach readily available right in your home, free from pesticides and the uncertainties of grocery store produce. This DIY hydroponic method offers a sustainable and efficient way to enjoy this delicious leafy green, regardless of your gardening experience or available space.
Why is this a must-try? Because it empowers you to take control of your food source, reduces your environmental footprint, and provides a constant supply of fresh vegetables. Forget about wilted spinach from the supermarket; with hydroponics, you’ll always have vibrant, healthy water spinach at your fingertips.
But the fun doesn’t stop there! Feel free to experiment with different nutrient solutions to see which yields the best results for your specific setup. You can also try varying the light intensity or duration to optimize growth. Consider adding a small air pump and air stone to your reservoir for enhanced oxygenation, which can further boost the health and vigor of your plants. For those with limited space, vertical hydroponic systems are an excellent option for maximizing your yield. You can also try growing other leafy greens alongside your water spinach, like lettuce or kale, to create a diverse and thriving hydroponic garden.
Don’t be intimidated by the term “hydroponics.” This method is far more accessible than you might think. With just a few basic materials and a little bit of patience, you can be harvesting your own delicious water spinach in no time. The satisfaction of nurturing your plants from seed to harvest is truly unparalleled.
We wholeheartedly encourage you to give this DIY hydroponic water spinach growing trick a try. It’s a fantastic project for individuals, families, and anyone interested in sustainable food production. And most importantly, don’t forget to share your experiences with us! We’d love to hear about your successes, challenges, and any variations you’ve tried. Post pictures of your hydroponic setups, share your favorite water spinach recipes, and let’s build a community of hydroponic enthusiasts. Your insights could inspire others to embark on their own hydroponic journey and discover the joys of growing their own food. So, get started today and experience the magic of hydroponic water spinach!
Frequently Asked Questions (FAQ)
What exactly is hydroponics, and why is it good for growing water spinach?
Hydroponics is a method of growing plants without soil, using mineral nutrient solutions in water. It’s excellent for water spinach because it allows for faster growth, higher yields, and reduced risk of soilborne diseases. Water spinach thrives in moist environments, making hydroponics a perfect match. The controlled environment also allows you to optimize nutrient levels and lighting, leading to healthier and more productive plants.
What kind of nutrient solution should I use for hydroponic water spinach?
A balanced hydroponic nutrient solution specifically formulated for leafy greens is ideal. Look for solutions that contain essential macronutrients like nitrogen, phosphorus, and potassium, as well as micronutrients like iron, manganese, and zinc. You can find these solutions at most garden centers or online retailers. Follow the instructions on the nutrient solution packaging carefully to ensure you’re providing the correct concentration for your plants. Experimenting with different brands and formulations can help you find the one that works best for your specific setup and water quality.
How much light does hydroponic water spinach need?
Water spinach needs at least 6-8 hours of light per day. If you’re growing indoors, you’ll likely need to supplement natural light with artificial grow lights. LED grow lights are a popular choice due to their energy efficiency and long lifespan. Position the lights close enough to the plants to provide adequate illumination, but not so close that they burn the leaves. Observe your plants closely for signs of light stress, such as yellowing or browning leaves, and adjust the light accordingly.
How often should I change the nutrient solution?
The frequency of nutrient solution changes depends on the size of your reservoir and the growth rate of your plants. As a general rule, you should change the nutrient solution every 1-2 weeks. This helps prevent the buildup of salts and other impurities that can harm your plants. Regularly monitor the pH and EC (electrical conductivity) of your nutrient solution. A pH of 6.0-6.5 is ideal for water spinach. EC measures the concentration of nutrients in the solution; adjust it according to the recommendations on your nutrient solution packaging.
What are some common problems I might encounter when growing hydroponic water spinach, and how can I fix them?
Some common problems include nutrient deficiencies, algae growth, and pest infestations. Nutrient deficiencies can manifest as yellowing leaves, stunted growth, or other abnormalities. Ensure you’re using a balanced nutrient solution and adjusting the pH and EC as needed. Algae growth can be prevented by keeping the reservoir covered and using opaque containers. If algae does appear, you can try adding a small amount of hydrogen peroxide to the nutrient solution. Pest infestations can be controlled with organic pesticides or by introducing beneficial insects. Regularly inspect your plants for signs of pests or diseases and take action promptly to prevent them from spreading.
Can I grow hydroponic water spinach from seeds or cuttings?
You can grow hydroponic water spinach from both seeds and cuttings. Starting from seeds is a more common approach, as it allows you to select the specific variety you want to grow. Soak the seeds in water for 24 hours before planting them in a seed starting medium like rockwool or coco coir. Once the seedlings have developed a few true leaves, you can transplant them into your hydroponic system. Growing from cuttings is also possible, but it requires more attention to ensure the cuttings root properly. Take cuttings from healthy, mature plants and place them in water or a rooting hormone solution until roots develop. Then, transplant the rooted cuttings into your hydroponic system.
How long does it take to harvest hydroponic water spinach?
Hydroponic water spinach typically takes about 3-4 weeks to mature from seed to harvest. You can start harvesting the leaves when they reach a desired size, usually around 6-8 inches long. Harvest the outer leaves first, allowing the inner leaves to continue growing. This cut-and-come-again method allows you to harvest multiple times from the same plants.
Is hydroponic water spinach more nutritious than soil-grown water spinach?
Hydroponic water spinach can be just as nutritious, if not more so, than soil-grown water spinach. Because you have precise control over the nutrient solution, you can ensure that your plants are receiving all the essential nutrients they need to thrive. This can result in higher levels of vitamins, minerals, and antioxidants in the harvested leaves.
What are some delicious ways to use my homegrown hydroponic water spinach?
Hydroponic water spinach is incredibly versatile and can be used in a variety of dishes. It’s delicious stir-fried with garlic and soy sauce, added to soups and stews, or used as a base for salads. You can also use it in smoothies or juices for a nutrient boost. Experiment with different recipes and find your favorite ways to enjoy this healthy and flavorful leafy green.
Where can I find more information about hydroponic water spinach growing?
There are many resources available online and in libraries that can provide more information about hydroponic water spinach growing. Search for articles, videos, and forums dedicated to hydroponics and urban gardening. You can also consult with local gardening experts or join a hydroponics club to learn from experienced growers. Don’t be afraid to experiment and learn from your own experiences. The more you learn, the more successful you’ll be at growing your own delicious hydroponic water spinach.


Leave a Comment