

Toothpaste ink stain removal clothes – sounds too good to be true, right? I get it! We’ve all been there, staring in horror at that rogue ink blotch spreading across our favorite shirt. Before you resign yourself to relegating that garment to the “painting clothes” pile, let me tell you about a simple, surprisingly effective DIY trick that might just save the day (and your wardrobe!).
While I can’t pinpoint the exact moment someone discovered this stain-fighting magic, the use of toothpaste for cleaning purposes has roots that stretch back surprisingly far. Think about it – toothpaste is designed to gently polish and remove stains from our teeth. Applying that same principle to fabric, with a few tweaks, can work wonders. It’s a testament to the ingenuity of everyday solutions!
Why is this DIY trick so essential? Because life happens! Pens leak, kids get creative, and sometimes, disaster strikes. Instead of rushing out to buy expensive stain removers filled with harsh chemicals, you can use something you likely already have in your bathroom. This method is not only cost-effective but also gentler on your clothes and the environment. Plus, mastering toothpaste ink stain removal clothes technique gives you a sense of empowerment – you’re taking control of those pesky stains and saying, “Not today, ink blot!” So, let’s dive in and learn how to banish those ink stains for good!

DIY: Banishing Ink Stains from Clothes with Toothpaste!
Hey there, fellow DIY enthusiasts! Ever had that heart-stopping moment when you realize a rogue pen has attacked your favorite shirt? Ink stains are the bane of every wardrobe, but fear not! I’m here to share a simple, effective, and surprisingly affordable trick: using toothpaste to remove those pesky ink marks. Yes, you read that right – the same stuff you use to keep your pearly whites sparkling can also rescue your clothes.
This method works best on fresh ink stains, but it’s worth a shot even on older ones. Just remember, patience is key!
What You’ll Need:
Before we dive in, let’s gather our supplies. This is a pretty low-key project, so you probably have most of these items already:
* Non-gel toothpaste: This is crucial! You need a plain, white toothpaste. Gel toothpastes often contain ingredients that can actually set the stain further. Think classic, old-school toothpaste.
* Clean, soft cloth or sponge: Microfiber cloths work wonders, but any clean cloth will do. Avoid anything abrasive that could damage the fabric.
* Water: For rinsing and dampening the cloth.
* Old toothbrush (optional): For gently working the toothpaste into the stain, especially on textured fabrics.
* Laundry detergent: To wash the garment after the toothpaste treatment.
* Cotton swabs (optional): For precise application on small stains.
* Hairdryer (optional): To speed up the drying process after rinsing.
* Patience: This might take a few tries, so don’t get discouraged!
Step-by-Step Ink Stain Removal Guide
Okay, let’s get down to business! Here’s how to use toothpaste to tackle those dreaded ink stains:
1. Act Fast!
The sooner you treat the stain, the better your chances of success. Fresh ink is much easier to remove than ink that has had time to set. So, as soon as you notice the stain, jump into action!
2. Test in an Inconspicuous Area
Before applying toothpaste directly to the stain, it’s always a good idea to test it on a hidden part of the garment, like an inside seam or hem. This will ensure that the toothpaste doesn’t discolor or damage the fabric. Apply a small amount of toothpaste, let it sit for a few minutes, and then rinse it off. If everything looks good, you can proceed to the next step.
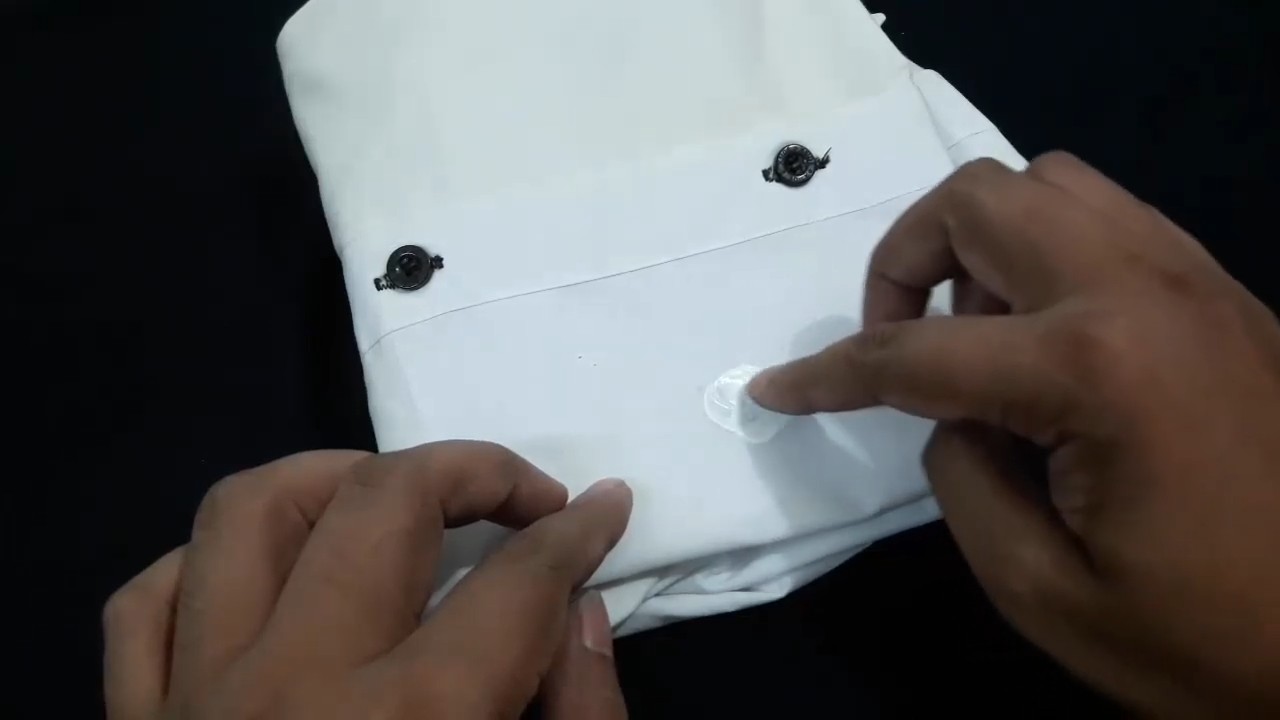
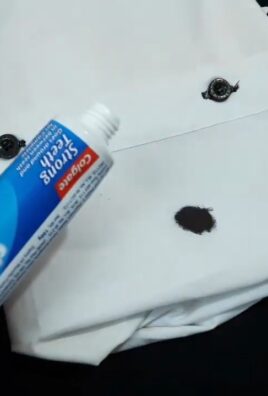
3. Apply the Toothpaste
Now for the main event! Squeeze a generous amount of non-gel toothpaste directly onto the ink stain. Make sure the entire stain is covered. Don’t be shy – you want a good layer of toothpaste to work its magic.
4. Gently Work the Toothpaste In
Using your clean, soft cloth or sponge, gently rub the toothpaste into the stain. Use small, circular motions. If you’re dealing with a delicate fabric, be extra careful not to rub too hard. An old toothbrush can be helpful for working the toothpaste into textured fabrics or stubborn stains. Just be sure to use a soft-bristled brush and apply gentle pressure.
5. Let it Sit
Once you’ve worked the toothpaste into the stain, let it sit for about 10-30 minutes. This gives the toothpaste time to absorb the ink. The longer you let it sit, the better the chances of the stain lifting. However, don’t let it dry completely, as this can make it harder to remove.
6. Rinse Thoroughly
After the toothpaste has had time to work, rinse the treated area thoroughly with cool water. Make sure to remove all traces of the toothpaste. You can use your fingers to gently rub the fabric while rinsing to help dislodge any remaining ink.
7. Check the Stain
After rinsing, take a close look at the stain. Has it faded? If so, great! You’re on the right track. If the stain is still visible, repeat steps 3-6. You may need to repeat the process several times to completely remove the stain, especially if it’s an older or more stubborn one.
8. Wash the Garment
Once you’re satisfied with the stain removal, wash the garment as usual, following the care instructions on the label. This will remove any remaining toothpaste residue and ensure that the stain is completely gone.
9. Air Dry (Important!)
Do not put the garment in the dryer until you’re absolutely sure the stain is gone. The heat from the dryer can set the stain permanently, making it impossible to remove. Instead, air dry the garment. If you notice any remaining traces of the stain after air drying, repeat the toothpaste treatment and washing process.
10. Speeding Up the Drying Process (Optional)
If you’re in a hurry, you can use a hairdryer to speed up the drying process after rinsing. Just be sure to use a low heat setting and keep the hairdryer moving to avoid damaging the fabric.
Tips and Tricks for Stubborn Stains
Sometimes, ink stains are particularly stubborn and require a little extra effort. Here are a few tips and tricks to try:
* Pre-treat with a stain remover: Before applying the toothpaste, try pre-treating the stain with a commercial stain remover. Follow the instructions on the product label. This can help to loosen the ink and make it easier to remove with toothpaste.
* Use a stronger toothpaste: If plain white toothpaste isn’t doing the trick, you can try using a toothpaste that contains baking soda or hydrogen peroxide. These ingredients have extra stain-fighting power. However, be sure to test the toothpaste on an inconspicuous area first to make sure it doesn’t damage the fabric.
* Soak the garment: For older or more stubborn stains, try soaking the garment in a solution of cool water and laundry detergent for a few hours before applying the toothpaste. This can help to loosen the ink and make it easier to remove.
* Try rubbing alcohol: If toothpaste alone isn’t working, you can try dabbing the stain with rubbing alcohol before applying the toothpaste. Rubbing alcohol is a strong solvent that can help to dissolve the ink. However, be sure to test the rubbing alcohol on an inconspicuous area first to make sure it doesn’t damage the fabric. Use a cotton swab to apply the rubbing alcohol and blot the stain gently.
* Professional help: If you’ve tried everything and the stain is still there, it may be time to call in the professionals. A dry cleaner may have specialized equipment and techniques that can remove even the most stubborn ink stains.
Important Considerations
* Fabric type: This method works best on cotton, linen, and synthetic fabrics. Be extra careful when using it on delicate fabrics like silk or wool. Always test in an inconspicuous area first.
* Ink type: Different types of ink respond differently to toothpaste. Ballpoint pen ink is usually easier to remove than permanent marker ink.
* Color of the garment: Be careful when using toothpaste on colored garments, as it may cause fading. Always test in an inconspicuous area first.
* Don’t give up! Sometimes, it takes several attempts to completely remove an ink stain. Don’t get discouraged if the stain doesn’t come out right away. Just keep trying, and eventually, you’ll get there.
Why This Works: The Science Behind the Magic
You might be wondering, “Why toothpaste? What’s the secret?” Well, the magic lies in the mild abrasives and detergents found in toothpaste. These ingredients help to lift the ink particles from the fabric fibers. The abrasives gently scrub away the stain, while the detergents help to dissolve and suspend the ink, making it easier to rinse away.
A Final Word of Encouragement
Removing ink stains can be frustrating, but with a little patience and the right technique, you can save your favorite clothes from the trash bin. I hope this guide has been helpful! Remember to act fast, test in an inconspicuous area, and don’t be afraid to repeat the process if necessary. Good luck, and happy stain fighting!
Conclusion
So, there you have it! This simple yet incredibly effective DIY trick using toothpaste for ink stain removal on clothes is a game-changer. Forget expensive stain removers filled with harsh chemicals. This method is gentle on your fabrics, readily available (you probably already have toothpaste in your bathroom!), and, most importantly, it works!
Why is this a must-try? Because ink stains are notoriously stubborn. They can ruin your favorite shirt, your child’s school uniform, or even a cherished piece of linen. This toothpaste method offers a cost-effective and accessible solution to salvage those items and avoid the frustration of permanent stains. It’s a lifesaver for parents, artists, students, and anyone who deals with pens and ink on a regular basis.
But the beauty of this DIY trick lies not only in its simplicity but also in its adaptability. While plain white toothpaste is generally recommended, you can experiment with variations to suit different fabric types and stain severities. For instance, for delicate fabrics like silk or lace, consider using a gel toothpaste without abrasive ingredients and test it on an inconspicuous area first. For particularly stubborn stains, you might try pre-treating the area with a mixture of baking soda and water before applying the toothpaste. Another variation involves using a soft-bristled toothbrush to gently work the toothpaste into the stain, ensuring thorough coverage without damaging the fabric.
Remember, patience is key. Don’t expect the stain to disappear instantly. It may require multiple applications and gentle scrubbing to achieve the desired results. And always, always test the toothpaste on a hidden area of the garment before applying it to the stain, especially with colored fabrics. This will help you ensure that the toothpaste doesn’t cause any discoloration or damage.
We’ve armed you with the knowledge and the method, now it’s your turn to put it to the test! We are confident that this toothpaste ink stain removal technique will become your go-to solution for tackling those pesky ink marks. Don’t let ink stains ruin your clothes any longer. Embrace this simple DIY trick and reclaim your wardrobe!
We’re eager to hear about your experiences! Did this method work for you? Did you try any variations? Share your tips, tricks, and success stories in the comments below. Your feedback will not only help other readers but also contribute to refining this already effective technique. Let’s build a community of stain-fighting experts together! So go ahead, give it a try, and let us know how it goes. Happy stain removing!
Frequently Asked Questions (FAQ)
What kind of toothpaste works best for ink stain removal?
The best type of toothpaste for removing ink stains is plain white toothpaste, not gel toothpaste or those with added colors or stripes. These additives can sometimes stain the fabric further. Look for a toothpaste that contains baking soda, as this can help to lift the stain. Avoid using whitening toothpastes, as they may contain bleaching agents that could damage or discolor your clothes. The key is to use a simple, non-gel, white toothpaste for the most effective and safest results.
Can I use this method on all types of fabric?
While this method is generally safe for most fabrics, it’s always best to test it on an inconspicuous area first, especially for delicate fabrics like silk, wool, or lace. Apply a small amount of toothpaste to a hidden seam or hem, let it sit for a few minutes, and then rinse it off. If there’s no discoloration or damage, you can proceed with treating the stain. For very delicate fabrics, consider using a gel toothpaste without abrasive ingredients and applying it very gently. If you’re unsure, it’s always best to consult a professional dry cleaner.
How long should I leave the toothpaste on the stain?
The amount of time you leave the toothpaste on the stain depends on the severity of the stain and the type of fabric. Generally, you should leave it on for at least 30 minutes, but for stubborn stains, you can leave it on for up to a few hours. Check the stain periodically to see if it’s lifting. If the toothpaste starts to dry out, you can dampen it with a little water. Remember to always rinse the area thoroughly after removing the toothpaste.
What if the ink stain doesn’t come out after the first try?
Ink stains can be particularly stubborn, so it may take multiple applications of toothpaste to completely remove the stain. After rinsing the toothpaste off, check to see if the stain has lightened. If it’s still visible, repeat the process. You can also try gently scrubbing the area with a soft-bristled toothbrush to help lift the stain. If the stain persists after several attempts, you may want to try a different stain removal method or consult a professional dry cleaner.
Will this method work on dried ink stains?
This method is most effective on fresh ink stains, but it can also work on dried ink stains, although it may require more effort. Before applying the toothpaste, try soaking the stained area in cold water for a few hours or overnight. This will help to loosen the dried ink and make it easier to remove. You may also need to apply the toothpaste multiple times and gently scrub the area to lift the stain.
Can I use this method on colored clothing?
Yes, you can use this method on colored clothing, but it’s crucial to test the toothpaste on an inconspicuous area first to ensure that it doesn’t cause any discoloration. Apply a small amount of toothpaste to a hidden seam or hem, let it sit for a few minutes, and then rinse it off. If there’s no color change, you can proceed with treating the stain. Avoid using whitening toothpastes on colored clothing, as they may contain bleaching agents that could fade the fabric.
What other DIY stain removal methods can I try?
Besides toothpaste, there are several other DIY stain removal methods you can try. For ink stains, you can try using rubbing alcohol, hairspray, or a mixture of vinegar and water. Always test these methods on an inconspicuous area first to ensure they don’t damage the fabric. For other types of stains, you can try using baking soda, lemon juice, or hydrogen peroxide. There are many resources online that provide detailed instructions for removing different types of stains using common household ingredients.
Is there anything I should avoid when trying to remove ink stains?
Yes, there are a few things you should avoid when trying to remove ink stains. First, avoid using hot water, as it can set the stain and make it more difficult to remove. Second, avoid rubbing the stain vigorously, as this can spread the ink and damage the fabric. Instead, gently blot or dab the stain with a clean cloth. Third, avoid using harsh chemicals or bleach, as they can damage or discolor the fabric. Finally, avoid putting the garment in the dryer until you’re sure the stain is completely removed, as the heat can set the stain permanently.


Leave a Comment