

Growing Artichokes at Home might seem like a culinary dream reserved for seasoned gardeners, but I’m here to tell you it’s absolutely achievable, even if you’re a beginner! Forget those expensive grocery store prices and imagine plucking your own plump, delicious artichokes straight from your backyard.
Artichokes, with their architectural beauty and delectable hearts, have a rich history. Originating in the Mediterranean, they were prized by the ancient Greeks and Romans for their culinary and medicinal properties. For centuries, they’ve been a symbol of abundance and sophistication, gracing tables from humble homes to royal feasts.
But why should you consider growing artichokes at home? Well, beyond the bragging rights (which are considerable!), you’ll enjoy fresher, more flavorful artichokes than you can typically find in stores. Plus, you’ll know exactly what’s gone into growing them – no mystery pesticides or long-distance transportation. In this article, I’m going to share some simple DIY tricks and hacks that will make growing artichokes at home a breeze. From choosing the right variety to protecting your plants from pests, I’ll guide you through every step of the process. Get ready to transform your garden into an artichoke haven!
Growing Artichokes: A DIY Guide to Bountiful Blooms (and Delicious Hearts!)
Okay, artichoke lovers, listen up! I’m going to walk you through everything you need to know to grow these gorgeous, architectural vegetables right in your own backyard. It might seem intimidating, but trust me, with a little patience and the right know-how, you’ll be harvesting your own delicious artichokes in no time.
Choosing Your Artichoke Variety
First things first, let’s talk varieties. Not all artichokes are created equal, and some are better suited for certain climates than others. Here are a few popular choices:
* Green Globe: This is the classic artichoke, known for its large, round, green heads. It’s a reliable producer and a great choice for beginners.
* Violetta: If you’re looking for something a little different, Violetta artichokes have beautiful purple-tinged heads. They’re also known for their tender hearts.
* Imperial Star: This variety is a good choice for cooler climates, as it matures relatively quickly.
* Big Heart: As the name suggests, this variety produces large, meaty hearts.
Consider your local climate and growing conditions when making your selection. Your local nursery can also provide valuable advice on which varieties thrive in your area.
Getting Started: Seeds vs. Starts
You have two main options for starting your artichoke journey: seeds or starts (small, established plants).
* Seeds: Starting from seed is more economical, but it requires more patience. Artichokes grown from seed may not produce true to type, meaning the artichokes might not look exactly like the parent plant.
* Starts: Buying starts is more expensive upfront, but it’s a faster and more reliable way to get a harvest. You’ll also know exactly what kind of artichoke you’re getting.
For this guide, I’m going to focus on growing from starts, as it’s the easier and more common method for home gardeners.
Preparing Your Artichoke Bed
Artichokes are hungry plants, so soil preparation is key. They need well-drained soil that’s rich in organic matter.
* Sunlight: Artichokes need at least 6-8 hours of sunlight per day. Choose a location in your garden that gets plenty of sun.
* Soil: Artichokes prefer a slightly acidic to neutral soil pH (around 6.0-7.0). Amend your soil with compost, well-rotted manure, or other organic matter to improve drainage and fertility.
* Drainage: Good drainage is crucial to prevent root rot. If your soil is heavy clay, consider building raised beds or amending it with sand and perlite.
* Space: Artichokes can get quite large, so give them plenty of space. Allow at least 3-4 feet between plants and 4-6 feet between rows.
Planting Your Artichoke Starts
Now for the fun part – planting!
1. Dig the Hole: Dig a hole that’s twice as wide as the root ball of your artichoke start and just as deep.
2. Amend the Soil: Mix some compost or well-rotted manure into the soil you removed from the hole.
3. Remove the Plant: Gently remove the artichoke start from its container, being careful not to damage the roots.
4. Loosen the Roots: Gently loosen the roots of the plant. If the roots are circling the pot, gently tease them apart.
5. Plant the Start: Place the artichoke start in the hole, making sure the top of the root ball is level with the surrounding soil.
6. Backfill the Hole: Backfill the hole with the amended soil, gently firming it around the plant.
7. Water Thoroughly: Water the newly planted artichoke start thoroughly.
8. Mulch: Apply a layer of mulch around the plant to help retain moisture and suppress weeds. I like to use straw or wood chips.
Caring for Your Artichoke Plants
Once your artichoke plants are in the ground, they’ll need regular care to thrive.
* Watering: Artichokes need consistent moisture, especially during dry periods. Water deeply and regularly, especially when the plants are actively growing and producing buds. Aim for about 1-2 inches of water per week.
* Fertilizing: Feed your artichoke plants regularly with a balanced fertilizer. I like to use a slow-release fertilizer in the spring and then supplement with liquid fertilizer every few weeks during the growing season.
* Weeding: Keep the area around your artichoke plants free of weeds. Weeds compete with the artichokes for water and nutrients.
* Pest Control: Artichokes can be susceptible to certain pests, such as aphids, snails, and slugs. Inspect your plants regularly and take action if you see any signs of infestation. You can use organic pest control methods, such as insecticidal soap or diatomaceous earth.
* Pruning: After harvesting the main artichoke bud, you can encourage the plant to produce more side shoots by cutting back the stem. Remove any dead or damaged leaves to keep the plant healthy.
* Overwintering: In colder climates, artichokes need to be protected from frost. You can either dig up the plants and store them in a cool, dark place over the winter, or you can mulch them heavily to protect the roots. I usually opt for the heavy mulching method, as it’s less work. Cut back the foliage to about 6 inches and then pile on a thick layer of straw or leaves.
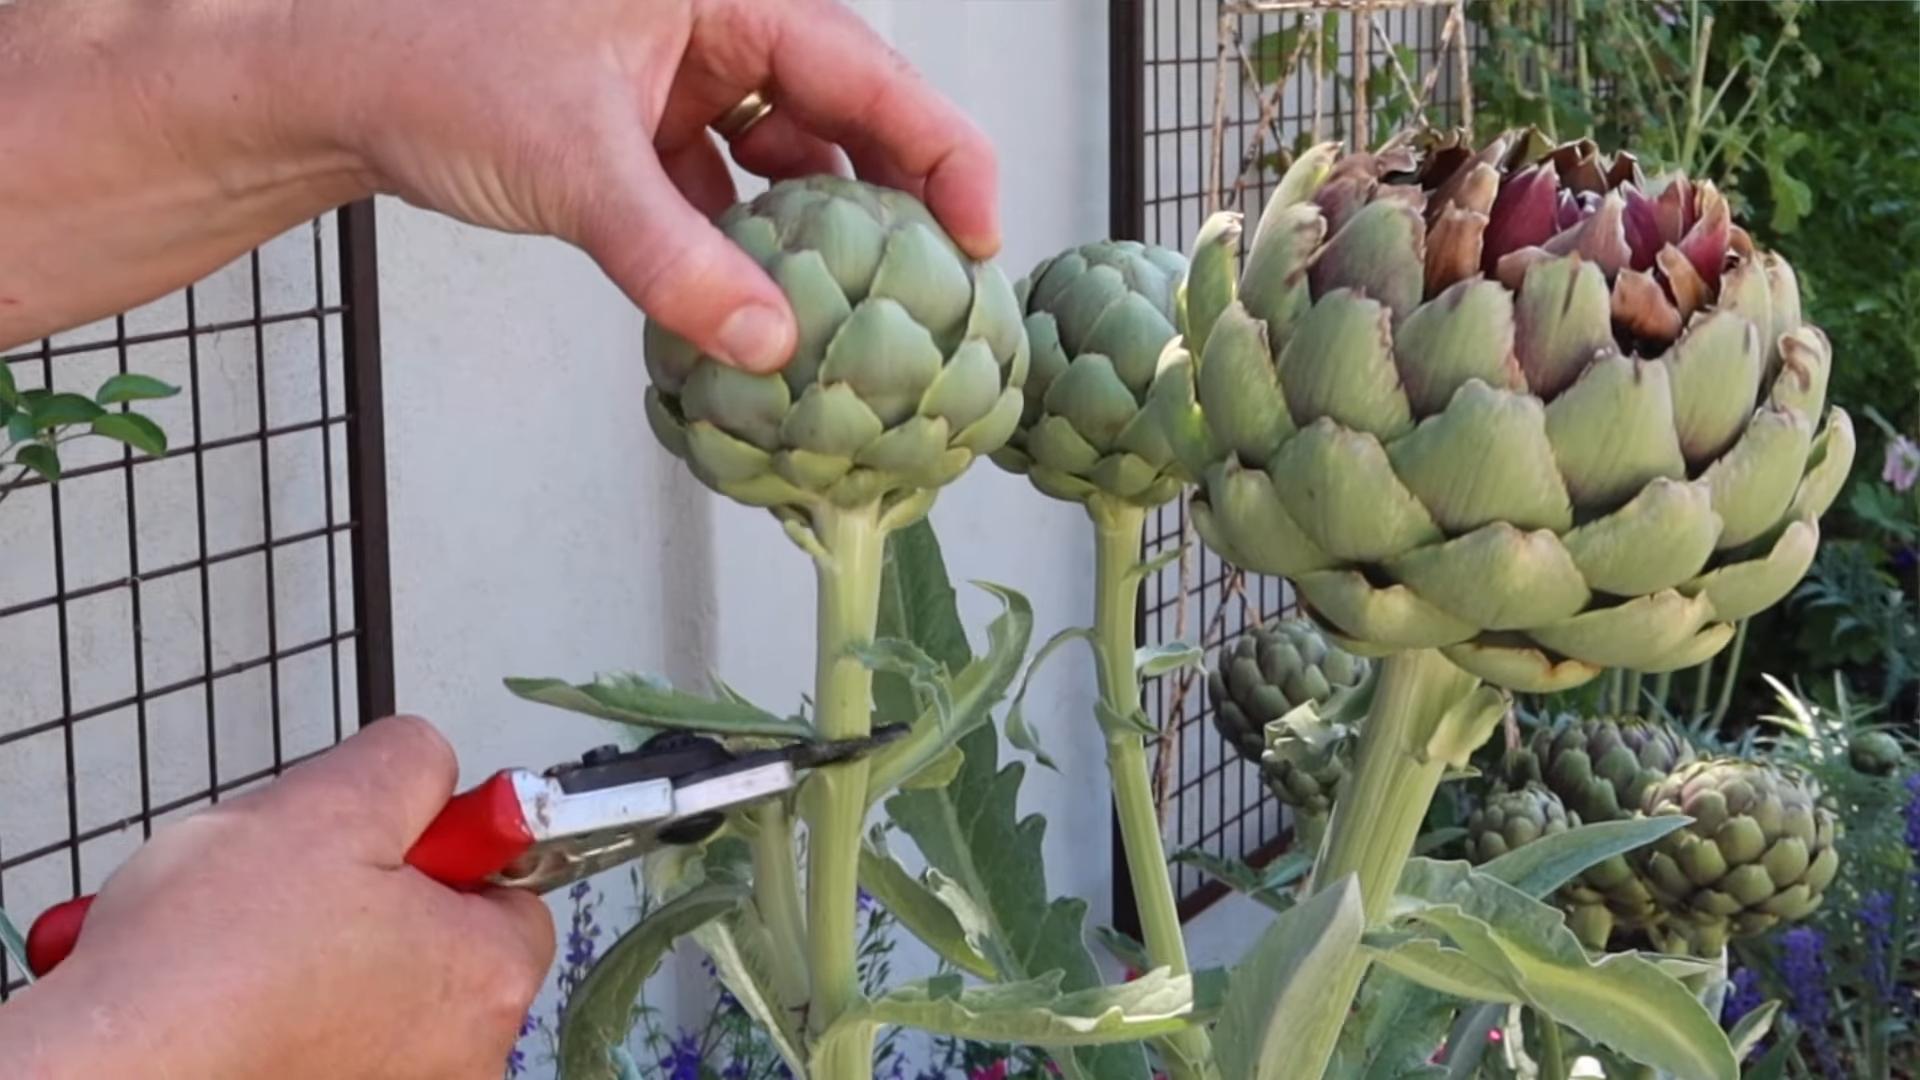
Harvesting Your Artichokes
The moment you’ve been waiting for! Harvesting artichokes is all about timing.
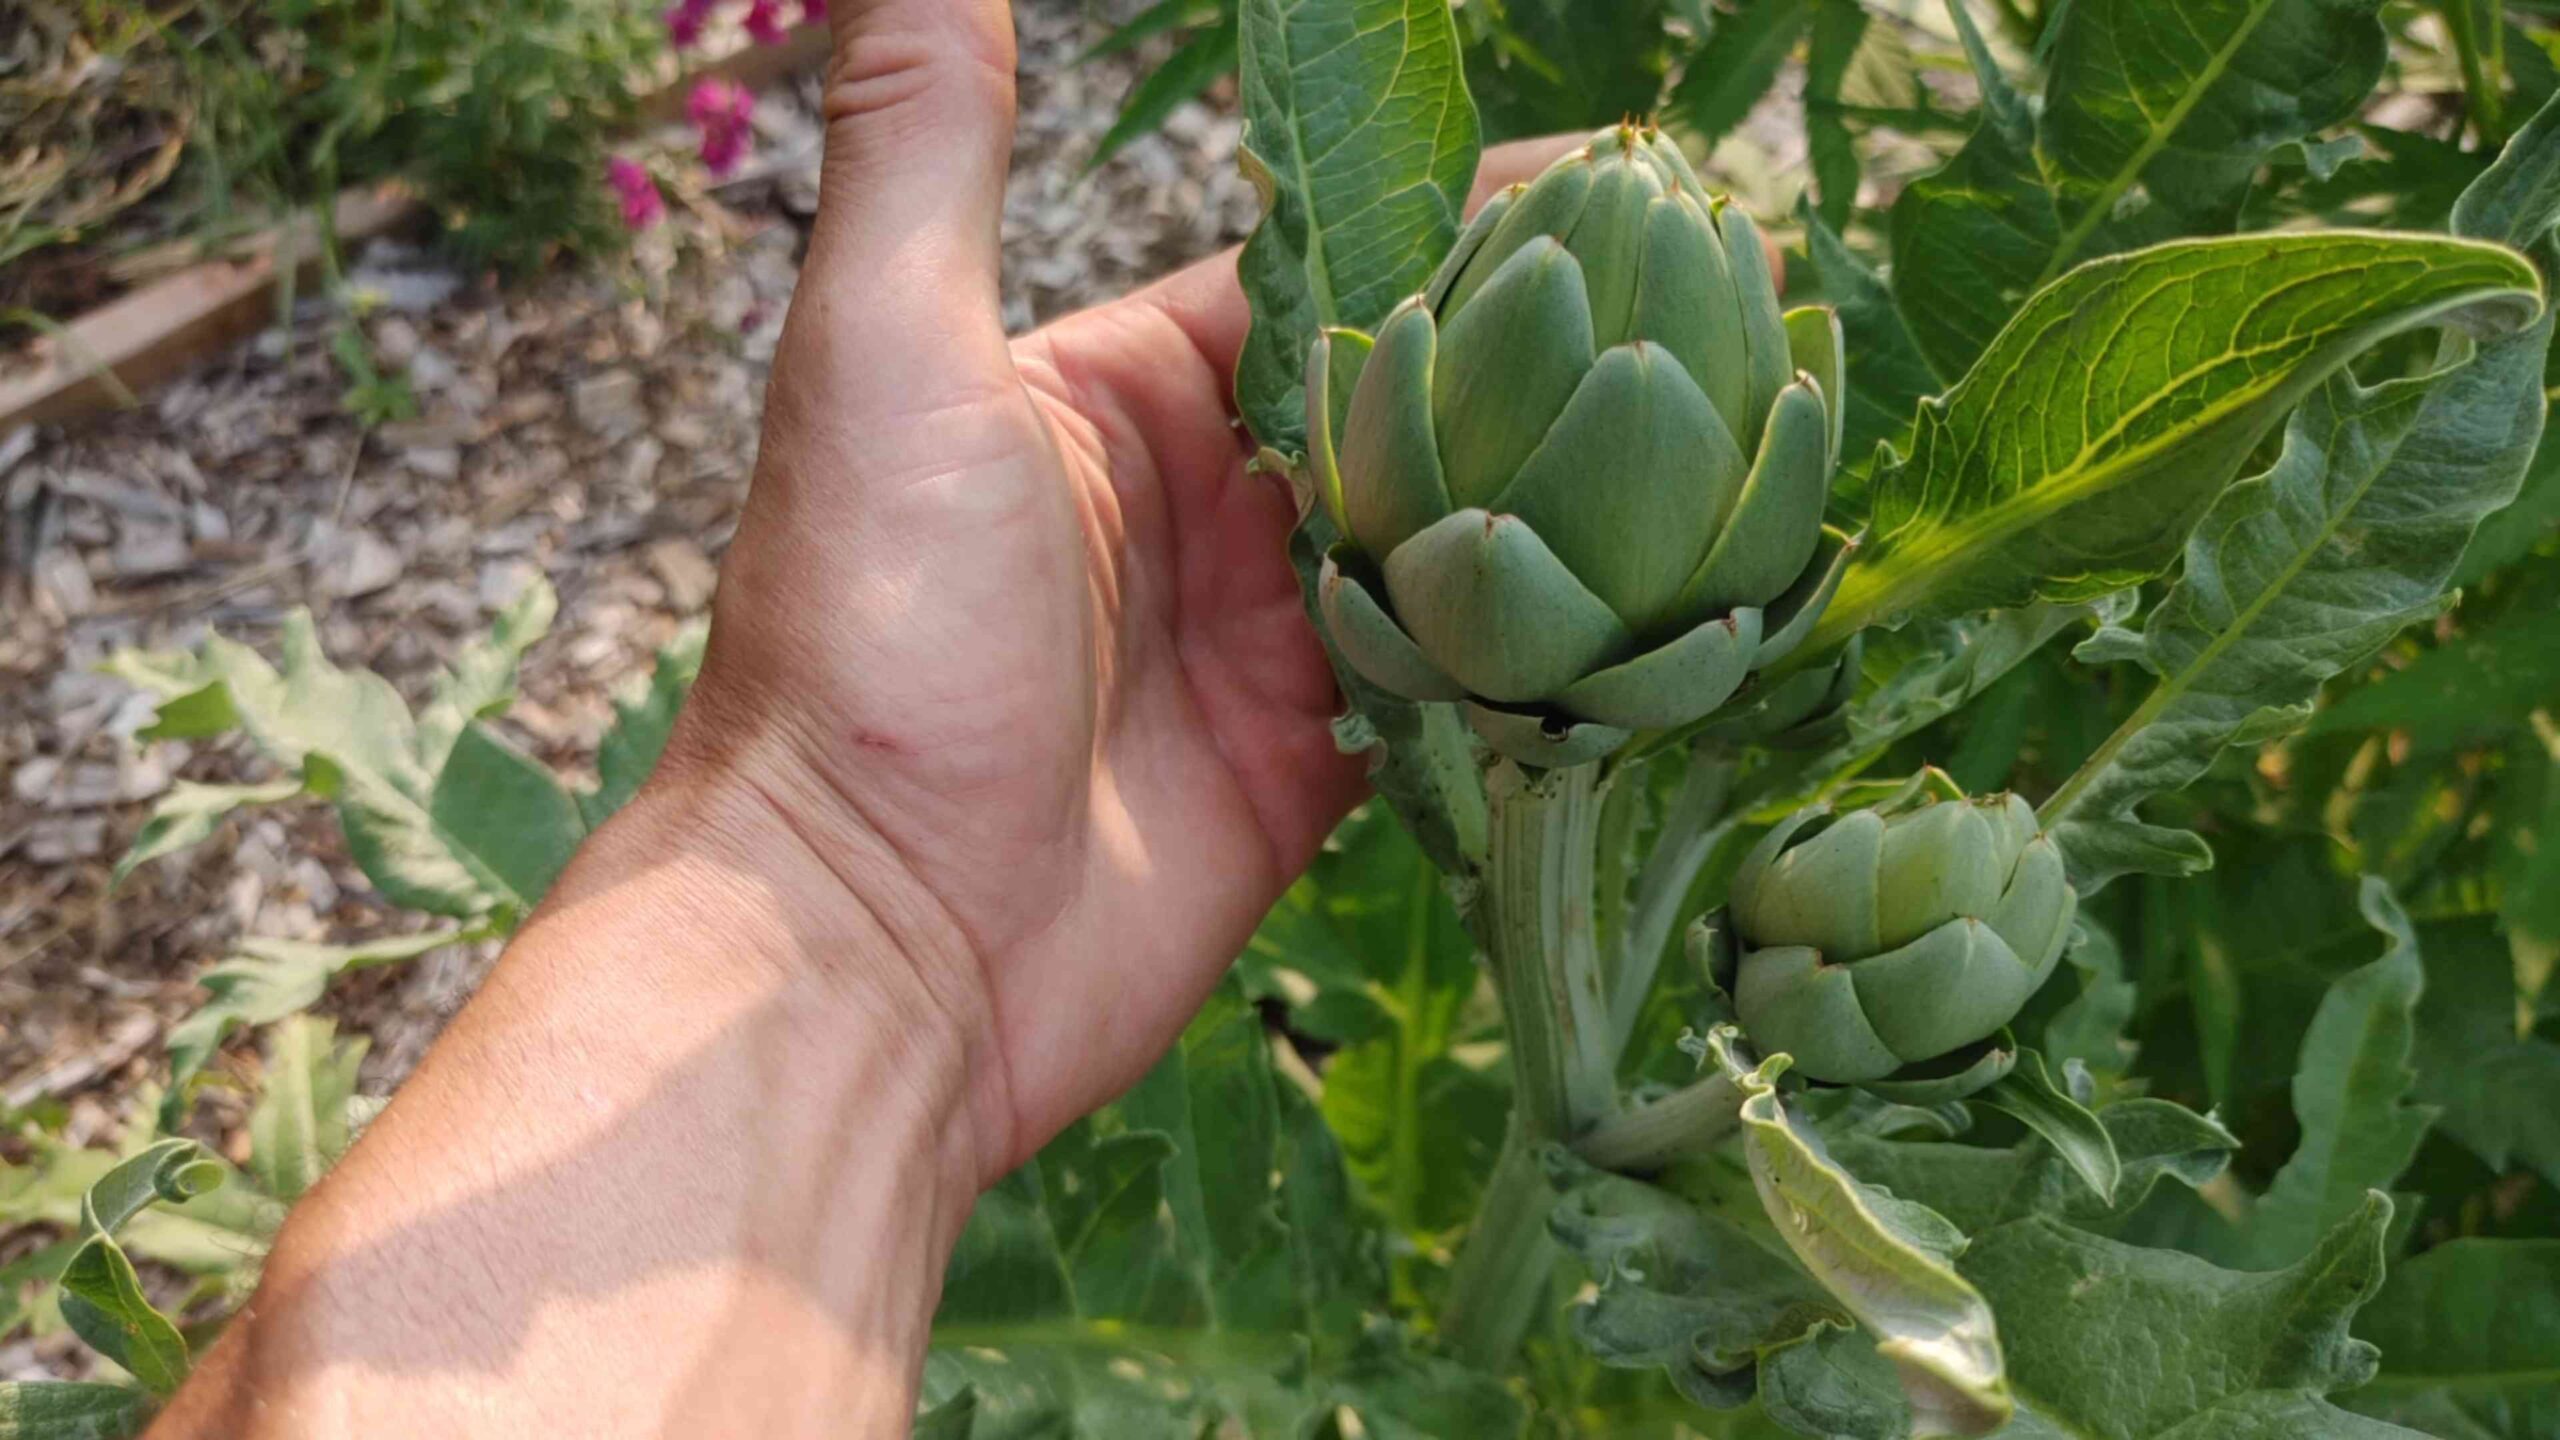
* Timing: Harvest artichokes when the buds are still tight and firm, before the scales start to open. The size of the bud will vary depending on the variety, but generally, you want to harvest when the bud is about 3-4 inches in diameter.
* Cutting: Use a sharp knife to cut the artichoke stem about 2-3 inches below the bud.
* Storage: Artichokes can be stored in the refrigerator for up to a week. Wrap them loosely in plastic wrap to prevent them from drying out.
Troubleshooting Common Artichoke Problems
Even with the best care, you might encounter some problems along the way. Here are a few common issues and how to address them:
* Aphids: These tiny pests can suck the sap from artichoke leaves, causing them to curl and distort. Spray aphids with insecticidal soap or blast them off with a strong stream of water.
* Snails and Slugs: These slimy creatures can munch on artichoke leaves and buds. Use snail bait or handpick them off the plants.
* Root Rot: This fungal disease can occur in poorly drained soil. Make sure your soil is well-drained and avoid overwatering.
* Lack of Buds: If your artichoke plants aren’t producing buds, it could be due to a lack of sunlight, nutrients, or water. Make sure your plants are getting enough of all three.
Enjoying Your Homegrown Artichokes
Now that you’ve harvested your own artichokes, it’s time to enjoy them! There are countless ways to prepare and eat artichokes. Here are a few of my favorites:
* Steamed Artichokes: This is the classic way to enjoy artichokes. Steam them until the leaves are tender and then dip them in melted butter or aioli.
* Grilled Artichokes: Grilling artichokes gives them a smoky flavor. Cut them in half, brush them with olive oil, and grill them until tender.
* Artichoke Hearts: Artichoke hearts are delicious in salads, pasta dishes, and dips. You can buy them canned or jarred, but they’re even better when you make them yourself.
* Artichoke Dip: This creamy, cheesy dip is always a crowd-pleaser.
Growing artichokes is a rewarding experience that will provide you with delicious and nutritious vegetables for years to come. With a little patience and effort, you can enjoy the taste of homegrown artichokes right from your own backyard. Happy gardening!
Conclusion
So, there you have it! Growing artichokes at home might seem daunting at first, but with a little patience and the right approach, you can cultivate these architectural beauties and enjoy their delicious hearts straight from your own garden. This DIY trick – starting your artichokes from seed or transplanting healthy starts – is a must-try for any gardener looking to add a touch of the Mediterranean to their backyard. Not only will you save money compared to buying artichokes at the grocery store, but you’ll also experience the immense satisfaction of nurturing these plants from seedling to harvest.
Think of the possibilities! You could experiment with different varieties, like the classic ‘Green Globe’ or the striking ‘Violetto’. Perhaps you’ll want to dedicate a raised bed specifically to your artichoke patch, ensuring optimal drainage and soil conditions. Or maybe you’ll interplant them with companion plants like marigolds or lavender to deter pests and attract pollinators. The beauty of growing your own food is the freedom to customize the process to your liking.
Beyond the culinary rewards, artichokes are simply stunning plants. Their silvery-green foliage and dramatic flower buds add a unique visual element to any garden. Even if you don’t end up harvesting every single artichoke, allowing some to bloom into their magnificent purple thistle flowers is a treat for the eyes and a boon for local bees.
Don’t be afraid to experiment with different growing techniques. Some gardeners swear by starting their seeds indoors several weeks before the last frost, while others prefer direct sowing once the soil has warmed up. The key is to find what works best for your climate and growing conditions.
We truly believe that this DIY approach to growing artichokes at home is accessible to gardeners of all skill levels. It’s a rewarding experience that connects you to the food you eat and allows you to appreciate the beauty of nature. So, grab your gardening gloves, prepare your soil, and embark on this exciting adventure. We’re confident that you’ll be delighted with the results.
We encourage you to try this DIY trick and share your experiences with us! Let us know what varieties you’re growing, what challenges you’ve encountered, and what successes you’ve celebrated. Share your photos and tips in the comments below – we’d love to hear from you! Happy gardening!
Frequently Asked Questions (FAQs)
Q: How long does it take to grow artichokes from seed to harvest?
A: Growing artichokes from seed can take anywhere from 100 to 180 days, depending on the variety and your local climate. Starting seeds indoors 8-10 weeks before the last expected frost can give you a head start. Transplanting established starts will shorten the time to harvest considerably, often allowing you to harvest in the first year. Be patient, as artichokes are perennials and will often produce more abundantly in subsequent years.
Q: What are the best growing conditions for artichokes?
A: Artichokes thrive in full sun (at least 6-8 hours of direct sunlight per day) and well-drained soil. They prefer a slightly acidic to neutral soil pH (around 6.0 to 7.0). Amend your soil with plenty of compost or well-rotted manure before planting to improve drainage and fertility. Artichokes are heavy feeders, so regular fertilization is essential for optimal growth and bud production.
Q: How often should I water my artichoke plants?
A: Artichokes need consistent moisture, especially during hot, dry periods. Water deeply and regularly, ensuring that the soil remains consistently moist but not waterlogged. A good rule of thumb is to water when the top inch of soil feels dry to the touch. Mulching around the plants can help retain moisture and suppress weeds.
Q: What are some common pests and diseases that affect artichokes?
A: Common pests that can affect artichokes include aphids, snails, slugs, and artichoke plume moths. Aphids can be controlled with insecticidal soap or a strong blast of water. Snails and slugs can be handpicked or trapped. Artichoke plume moths can be difficult to control, but regular monitoring and removal of infested buds can help. Diseases that can affect artichokes include powdery mildew and root rot. Powdery mildew can be prevented by ensuring good air circulation and avoiding overhead watering. Root rot can be prevented by planting in well-drained soil and avoiding overwatering.
Q: How do I know when my artichokes are ready to harvest?
A: Artichokes are ready to harvest when the buds are plump and firm, and the bracts (the outer leaves of the bud) are still tightly closed. The size of the bud will vary depending on the variety, but generally, you should harvest before the bracts begin to open and the thistle flower starts to emerge. To harvest, cut the stem about 2-3 inches below the base of the bud using a sharp knife.
Q: Can I grow artichokes in containers?
A: Yes, you can grow artichokes in containers, but you’ll need a large container (at least 20 gallons) to accommodate their extensive root system. Choose a well-draining potting mix and ensure that the container has drainage holes. Container-grown artichokes will need more frequent watering and fertilization than those grown in the ground.
Q: How do I overwinter artichoke plants in cold climates?
A: Artichokes are perennial in warmer climates (zones 7-10), but in colder climates, they need protection during the winter. After the first frost, cut back the foliage to a few inches above the ground. Mulch heavily around the base of the plant with straw, leaves, or other organic material to insulate the roots. In very cold climates, you may need to dig up the plants and store them in a cool, dark place until spring.
Q: Are there any companion plants that are beneficial for artichokes?
A: Yes, several companion plants can benefit artichokes. Marigolds and lavender can help deter pests. Legumes like beans and peas can fix nitrogen in the soil, which benefits artichokes. Yarrow attracts beneficial insects that prey on pests. Avoid planting artichokes near fennel, as it can inhibit their growth.
Q: Can I eat the leaves of the artichoke plant?
A: While the heart of the artichoke is the most commonly eaten part, the base of the bracts (the outer leaves) is also edible. Scrape the fleshy part of the bracts off with your teeth. The leaves themselves are quite bitter and not typically eaten.
Q: What are some delicious ways to prepare artichokes?
A: There are countless ways to enjoy artichokes! They can be steamed, boiled, grilled, or baked. Steamed artichokes are often served with melted butter or a dipping sauce like aioli. Grilled artichokes have a smoky flavor that is delicious. Baked artichokes can be stuffed with breadcrumbs, cheese, and herbs. Artichoke hearts can be added to salads, pasta dishes, and pizzas. Don’t be afraid to experiment and find your favorite way to enjoy this versatile vegetable!

Leave a Comment