

Growing Shallots for Beginners doesn’t have to be intimidating! Have you ever dreamt of snipping fresh, flavorful shallots right from your own backyard to elevate your culinary creations? I know I have! Imagine the satisfaction of adding that delicate, oniony-garlic taste to your favorite dishes, knowing you nurtured them from tiny bulbs to culinary gold. This isn’t just about gardening; it’s about connecting with your food and experiencing the joy of homegrown goodness.
Shallots, with their intriguing history tracing back to ancient Asia, have been prized for centuries for their unique flavor profile and medicinal properties. From the kitchens of emperors to humble family meals, shallots have consistently added a touch of sophistication and depth. But you don’t need to be a seasoned gardener to enjoy the benefits of these versatile bulbs.
In today’s world, where we’re increasingly conscious of where our food comes from and the impact it has on our planet, growing shallots for beginners offers a sustainable and rewarding alternative to store-bought produce. Plus, let’s be honest, who wouldn’t want to save a few bucks while enjoying fresher, tastier ingredients? This DIY guide will break down the process into simple, manageable steps, ensuring even the most novice gardener can successfully cultivate a thriving shallot patch. Get ready to dig in and discover the secrets to a bountiful shallot harvest!
Growing Shallots: A Beginner’s Guide to Bountiful Harvests
Hey there, fellow garden enthusiasts! I’m so excited to share my experience with growing shallots. They’re like onions and garlic’s sophisticated cousin, adding a delicate, slightly sweet flavor to everything from soups and stews to salads and sauces. And the best part? They’re surprisingly easy to grow, even if you’re a complete beginner like I was! So, grab your gardening gloves, and let’s dive in!
Choosing Your Shallot Variety
Before we get our hands dirty, let’s talk about shallot varieties. Just like with tomatoes or peppers, there are different types of shallots, each with its own unique flavor and characteristics. Here are a few popular options:
* French Red Shallots: These are my personal favorite! They have a beautiful reddish-purple skin and a mild, sweet flavor that’s perfect for raw applications like salads.
* Dutch Yellow Shallots: These are known for their excellent storage capabilities. They have a golden-brown skin and a slightly stronger flavor than French Red shallots.
* Gray Shallots (Griselle): These are considered by many to be the “true” shallot. They have a grayish skin and a pungent, almost garlic-like flavor. They can be harder to find than other varieties.
* Jersey Shallots: These are a popular variety known for their good yields and relatively mild flavor.
I recommend starting with French Red or Dutch Yellow shallots, as they’re readily available and relatively easy to grow. You can usually find shallot sets (small, immature bulbs) at your local garden center or online.
Preparing Your Garden Bed
Shallots need a sunny spot with well-drained soil. They don’t like to sit in soggy soil, so good drainage is crucial. Here’s how I prepare my garden bed:
* Sunlight: Choose a location that gets at least 6-8 hours of direct sunlight per day.
* Soil: Shallots prefer loose, fertile soil with a pH between 6.0 and 7.0. If your soil is heavy clay or sandy, amend it with compost or other organic matter to improve drainage and fertility.
* Weed Removal: Clear the area of any weeds, grass, or rocks. Weeds compete with shallots for nutrients and water, so it’s important to get rid of them before planting.
* Soil Amendment: Dig in plenty of compost or well-rotted manure to enrich the soil. I usually add about 2-3 inches of compost to my garden bed.
* Fertilizer (Optional): If your soil is particularly poor, you can add a balanced fertilizer (like 10-10-10) according to the package directions. I usually skip this step if I’ve added plenty of compost.
Planting Your Shallots
Now for the fun part – planting! The best time to plant shallots is in the fall (September-October) in mild-winter climates or in early spring (March-April) in colder climates. I live in a mild-winter area, so I plant mine in the fall.
Step-by-Step Planting Guide:
1. Prepare the Soil: Make sure your soil is loose and well-drained. Rake the surface smooth.
2. Spacing: Plant shallot sets about 6-8 inches apart in rows that are 12-18 inches apart. This gives them enough room to grow and develop.
3. Planting Depth: Push the shallot sets into the soil so that only the very tip is showing. You don’t want to bury them too deep, as this can prevent them from sprouting.
4. Orientation: Plant the shallot sets with the root end (the flatter end) facing down.
5. Watering: Water the newly planted shallots thoroughly. This helps to settle the soil and encourages root growth.
6. Mulching (Optional): Apply a layer of mulch around the shallots to help retain moisture, suppress weeds, and regulate soil temperature. I like to use straw or shredded leaves.
Caring for Your Shallots
Once your shallots are planted, it’s important to provide them with proper care to ensure a bountiful harvest. Here’s what I do:
* Watering: Water regularly, especially during dry periods. Shallots need consistent moisture to thrive, but avoid overwatering, as this can lead to rot. I usually water them deeply once or twice a week, depending on the weather.
* Weeding: Keep the area around your shallots free of weeds. Weeds compete with shallots for nutrients and water, so it’s important to remove them regularly. I like to hand-weed my garden bed, but you can also use a hoe or other gardening tool.
* Fertilizing (Optional): If your shallots are not growing vigorously, you can fertilize them with a balanced fertilizer (like 10-10-10) according to the package directions. I usually fertilize them once or twice during the growing season.
* Pest and Disease Control: Shallots are generally resistant to pests and diseases, but they can be susceptible to onion maggots, thrips, and fungal diseases. Inspect your plants regularly for any signs of problems. If you notice any pests or diseases, take action immediately to prevent them from spreading. I prefer to use organic pest control methods whenever possible. For example, I use insecticidal soap to control thrips and copper fungicide to prevent fungal diseases.
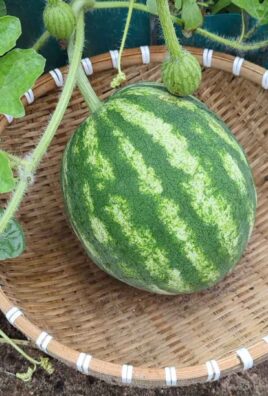
Harvesting Your Shallots
The moment we’ve all been waiting for – harvesting! Shallots are typically ready to harvest in the summer, about 90-120 days after planting. Here’s how to tell when they’re ready:
* The tops will start to turn yellow and fall over. This is a sign that the bulbs are mature and ready to be harvested.
* The bulbs will be plump and firm. Gently dig around the base of the plant to check the size of the bulbs. They should be at least 1-2 inches in diameter.
Step-by-Step Harvesting Guide:
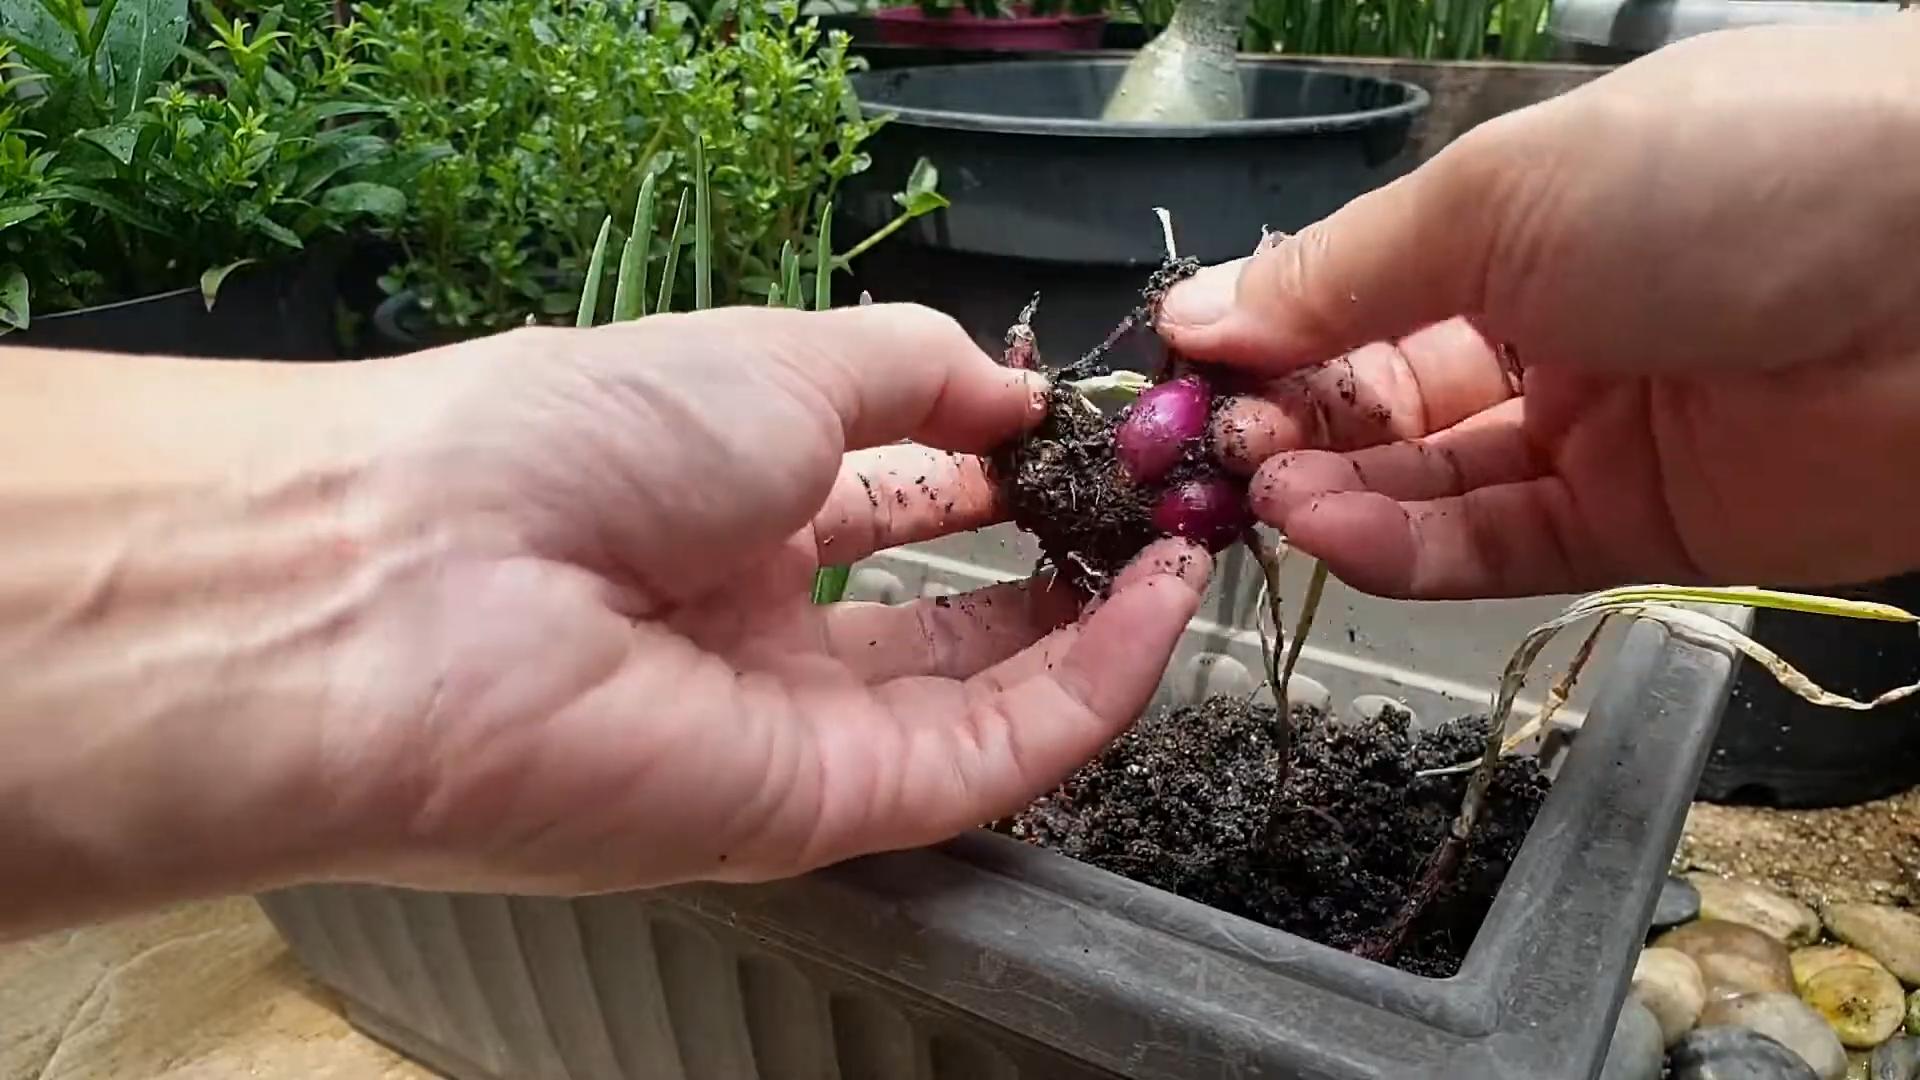
1. Loosen the Soil: Use a garden fork or trowel to gently loosen the soil around the shallots.
2. Lift the Bulbs: Carefully lift the shallots from the soil, being careful not to damage the bulbs.
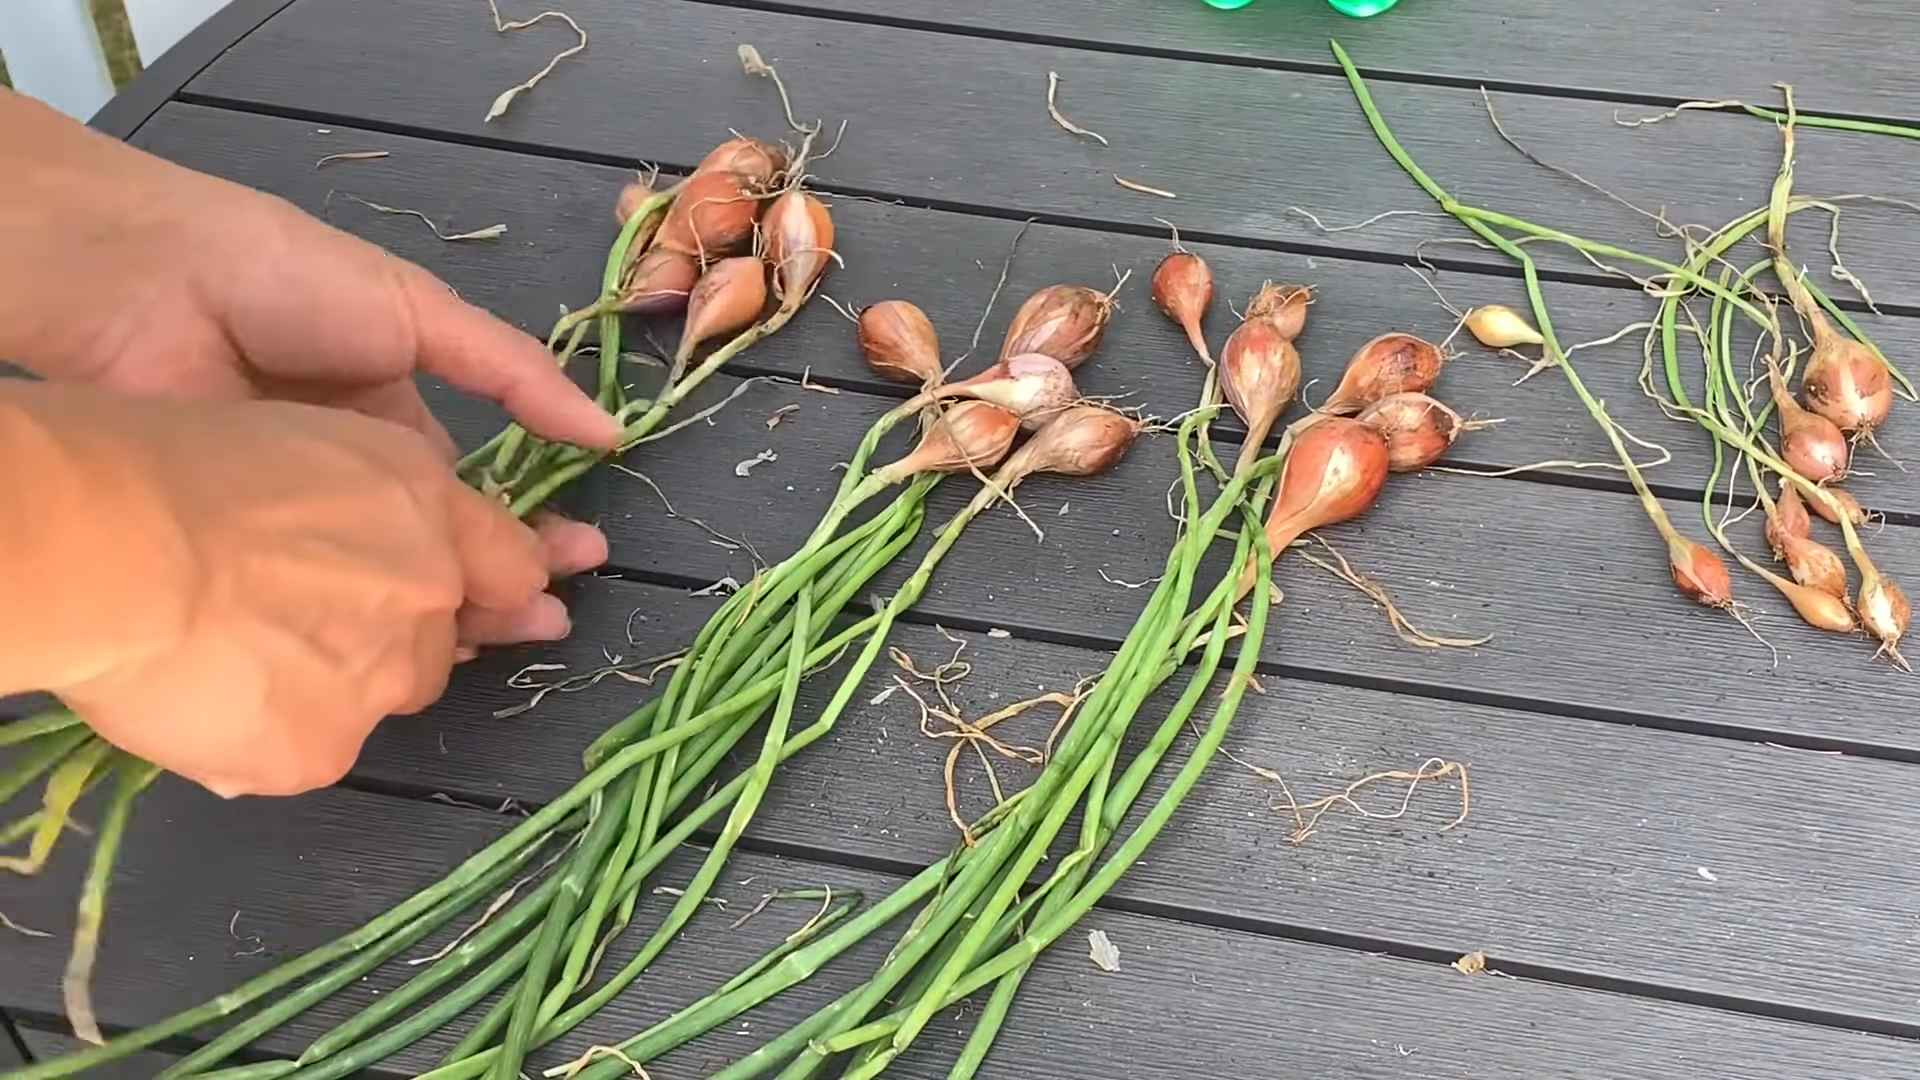
3. Remove Excess Soil: Gently brush off any excess soil from the bulbs.
4. Curing: Cure the shallots by laying them out in a single layer in a warm, dry, well-ventilated place for 2-3 weeks. This allows the outer skins to dry and toughen up, which helps to prevent rot during storage. I usually cure mine in my garage or shed.
5. Trimming: Once the shallots are cured, trim the roots and tops, leaving about 1-2 inches of stem.
6. Storage: Store the cured shallots in a cool, dry, well-ventilated place. They should last for several months if stored properly. I usually store mine in a mesh bag in my pantry.
Troubleshooting Common Problems
Even with the best care, you might encounter some problems while growing shallots. Here are a few common issues and how to deal with them:
* Yellowing Leaves: This can be caused by a number of factors, including overwatering, underwatering, nutrient deficiencies, or pests and diseases. Check the soil moisture and nutrient levels, and inspect your plants for any signs of pests or diseases.
* Rotting Bulbs: This is usually caused by overwatering or poor drainage. Make sure your soil is well-drained and avoid overwatering.
* Small Bulbs: This can be caused by overcrowding, poor soil fertility, or insufficient sunlight. Make sure your shallots are spaced properly, and amend your soil with compost or fertilizer.
* Pest Infestations: Keep an eye out for common pests like onion maggots and thrips. Use organic pest control methods to prevent and treat infestations.
Enjoying Your Harvest
Now that you’ve harvested your shallots, it’s time to enjoy the fruits (or rather, bulbs!) of your labor. Shallots can be used in a variety of dishes, from soups and stews to salads and sauces. Here are a few of my favorite ways to use shallots:
* Sautéed Shallots: Sautéed shallots are a delicious and versatile ingredient that can be used in a variety of dishes. Simply slice the shallots thinly and sauté them in olive oil or butter until they’re golden brown and caramelized.
* Shallot Vinaigrette: Shallot vinaigrette is a classic salad dressing that’s easy to make and adds a delicious flavor to any salad. Simply whisk together minced shallots, olive oil, vinegar, mustard, and salt and pepper.
* French Onion Soup: Shallots add a depth of flavor to French onion soup
Conclusion
So, there you have it! Growing shallots, even for complete beginners, is not only achievable but incredibly rewarding. We’ve walked through the simple steps, from selecting the right shallots to planting, nurturing, and finally, harvesting your own flavorful bulbs. The beauty of this DIY project lies in its accessibility and the tangible connection you forge with your food. Forget those expensive, often lackluster shallots from the grocery store. Imagine the satisfaction of snipping fresh, vibrant green shallot tops for your salads or pulling up plump, perfectly formed bulbs to enhance your favorite dishes.
This isn’t just about saving money; it’s about experiencing the joy of gardening and adding a touch of homegrown goodness to your meals. The flavor of homegrown shallots is simply unmatched – a delicate balance of onion and garlic, with a subtle sweetness that elevates everything from sauces and soups to stir-fries and roasted vegetables.
But the journey doesn’t end here! Feel free to experiment with different varieties of shallots. Try growing French Grey shallots for their exceptional flavor or explore the larger, more robust Dutch shallots. Consider companion planting to maximize your garden’s potential. Marigolds, for example, can help deter pests, while carrots can help loosen the soil around your shallots.
Don’t be afraid to get creative with your planting methods, too. While we’ve focused on traditional in-ground planting, shallots also thrive in raised beds and even containers, making them a viable option for those with limited space. Just ensure your chosen container has adequate drainage and is large enough to accommodate the growing bulbs.
And remember, patience is key. While shallots are relatively easy to grow, they do require time and attention. Keep an eye on your plants, water them regularly, and protect them from pests and diseases. The rewards, however, are well worth the effort.
We wholeheartedly encourage you to embark on this **growing shallots** adventure. It’s a simple, satisfying, and delicious way to connect with nature and enhance your culinary creations. Once you’ve harvested your first batch of homegrown shallots, you’ll never want to go back to store-bought again.
So, grab some shallots, prepare your garden, and get planting! We’re confident that you’ll be amazed by the results. And most importantly, we want to hear about your experience! Share your tips, tricks, and triumphs in the comments below. Let’s create a community of shallot-growing enthusiasts and inspire others to discover the joys of homegrown goodness. What varieties did you try? What challenges did you face? What delicious dishes did you create with your homegrown shallots? We can’t wait to hear your stories!
Frequently Asked Questions (FAQ)
What are the best shallot varieties for beginners?
For beginners, we recommend starting with varieties that are known for their ease of growth and reliability. Dutch shallots are a popular choice due to their large size and robust flavor. They are also relatively resistant to common diseases. Another excellent option is the French Red shallot, which offers a more delicate flavor and is well-suited for salads and sauces. These varieties are generally readily available and forgiving, making them ideal for those new to growing shallots. Experimenting with different varieties is encouraged once you’ve gained some experience.
How much sunlight do shallots need?
Shallots thrive in full sun, meaning they need at least 6-8 hours of direct sunlight per day. Adequate sunlight is crucial for their growth and development, ensuring they produce healthy bulbs and flavorful greens. If you’re growing shallots indoors or in a partially shaded area, consider supplementing with grow lights to provide the necessary light intensity. Insufficient sunlight can lead to stunted growth, smaller bulbs, and a less intense flavor.
What kind of soil is best for growing shallots?
Shallots prefer well-drained, fertile soil that is rich in organic matter. The soil should be loose and friable, allowing the bulbs to expand easily. Before planting, amend the soil with compost, well-rotted manure, or other organic materials to improve its fertility and drainage. Avoid heavy clay soils, as they can become waterlogged and hinder bulb development. A slightly acidic to neutral soil pH (around 6.0 to 7.0) is ideal for shallot growth.
How often should I water my shallots?
Water shallots regularly, especially during dry periods. The soil should be kept consistently moist but not waterlogged. Water deeply when the top inch of soil feels dry to the touch. Avoid overhead watering, as this can increase the risk of fungal diseases. Instead, water at the base of the plants, using a soaker hose or watering can. Reduce watering as the bulbs mature and the foliage begins to yellow, as this indicates that they are nearing harvest time.
When is the best time to harvest shallots?
Shallots are typically ready to harvest when the foliage begins to yellow and fall over, usually around 90-120 days after planting. Gently lift the bulbs from the soil, being careful not to damage them. Allow the harvested shallots to cure in a warm, dry, and well-ventilated place for a week or two. This curing process helps to harden the outer skins and improve their storage life.
How do I store shallots after harvesting?
After curing, store shallots in a cool, dry, and dark place. A temperature between 32°F and 40°F (0°C and 4°C) is ideal. You can store them in mesh bags, baskets, or loosely woven containers to allow for good air circulation. Avoid storing shallots in plastic bags, as this can trap moisture and lead to spoilage. Properly stored shallots can last for several months.
Can I grow shallots in containers?
Yes, shallots can be successfully grown in containers, making them a great option for those with limited space. Choose a container that is at least 8-10 inches deep and wide to accommodate the growing bulbs. Use a well-draining potting mix and ensure the container has drainage holes to prevent waterlogging. Water regularly and fertilize every few weeks with a balanced fertilizer. Place the container in a sunny location that receives at least 6-8 hours of direct sunlight per day.
What are some common pests and diseases that affect shallots?
Shallots can be susceptible to various pests and diseases, including onion thrips, onion maggots, and fungal diseases like downy mildew and botrytis blight. Regularly inspect your plants for signs of infestation or disease. Use organic pest control methods, such as insecticidal soap or neem oil, to control pests. Ensure good air circulation around the plants to prevent fungal diseases. Remove any infected foliage promptly to prevent the spread of disease. Crop rotation can also help to reduce the risk of soilborne diseases.
Can I eat the green tops of shallots?
Yes, the green tops of shallots are edible and have a mild, onion-like flavor. They can be used in salads, soups, stir-fries, and other dishes. Snip off the green tops as needed, leaving the bulbs in the ground to continue growing. Harvesting the green tops can also encourage bulb development.
How do I prevent shallots from bolting (flowering)?
Bolting, or flowering, can occur when shallots are exposed to prolonged periods of cold weather or stress. Bolting can reduce bulb size and quality. To prevent bolting, choose varieties that are well-suited to your climate and avoid planting too early in the spring. Ensure the plants receive adequate water and nutrients to minimize stress. If you notice any flower stalks developing, remove them promptly to redirect the plant’s energy back into bulb development.
Leave a Comment