

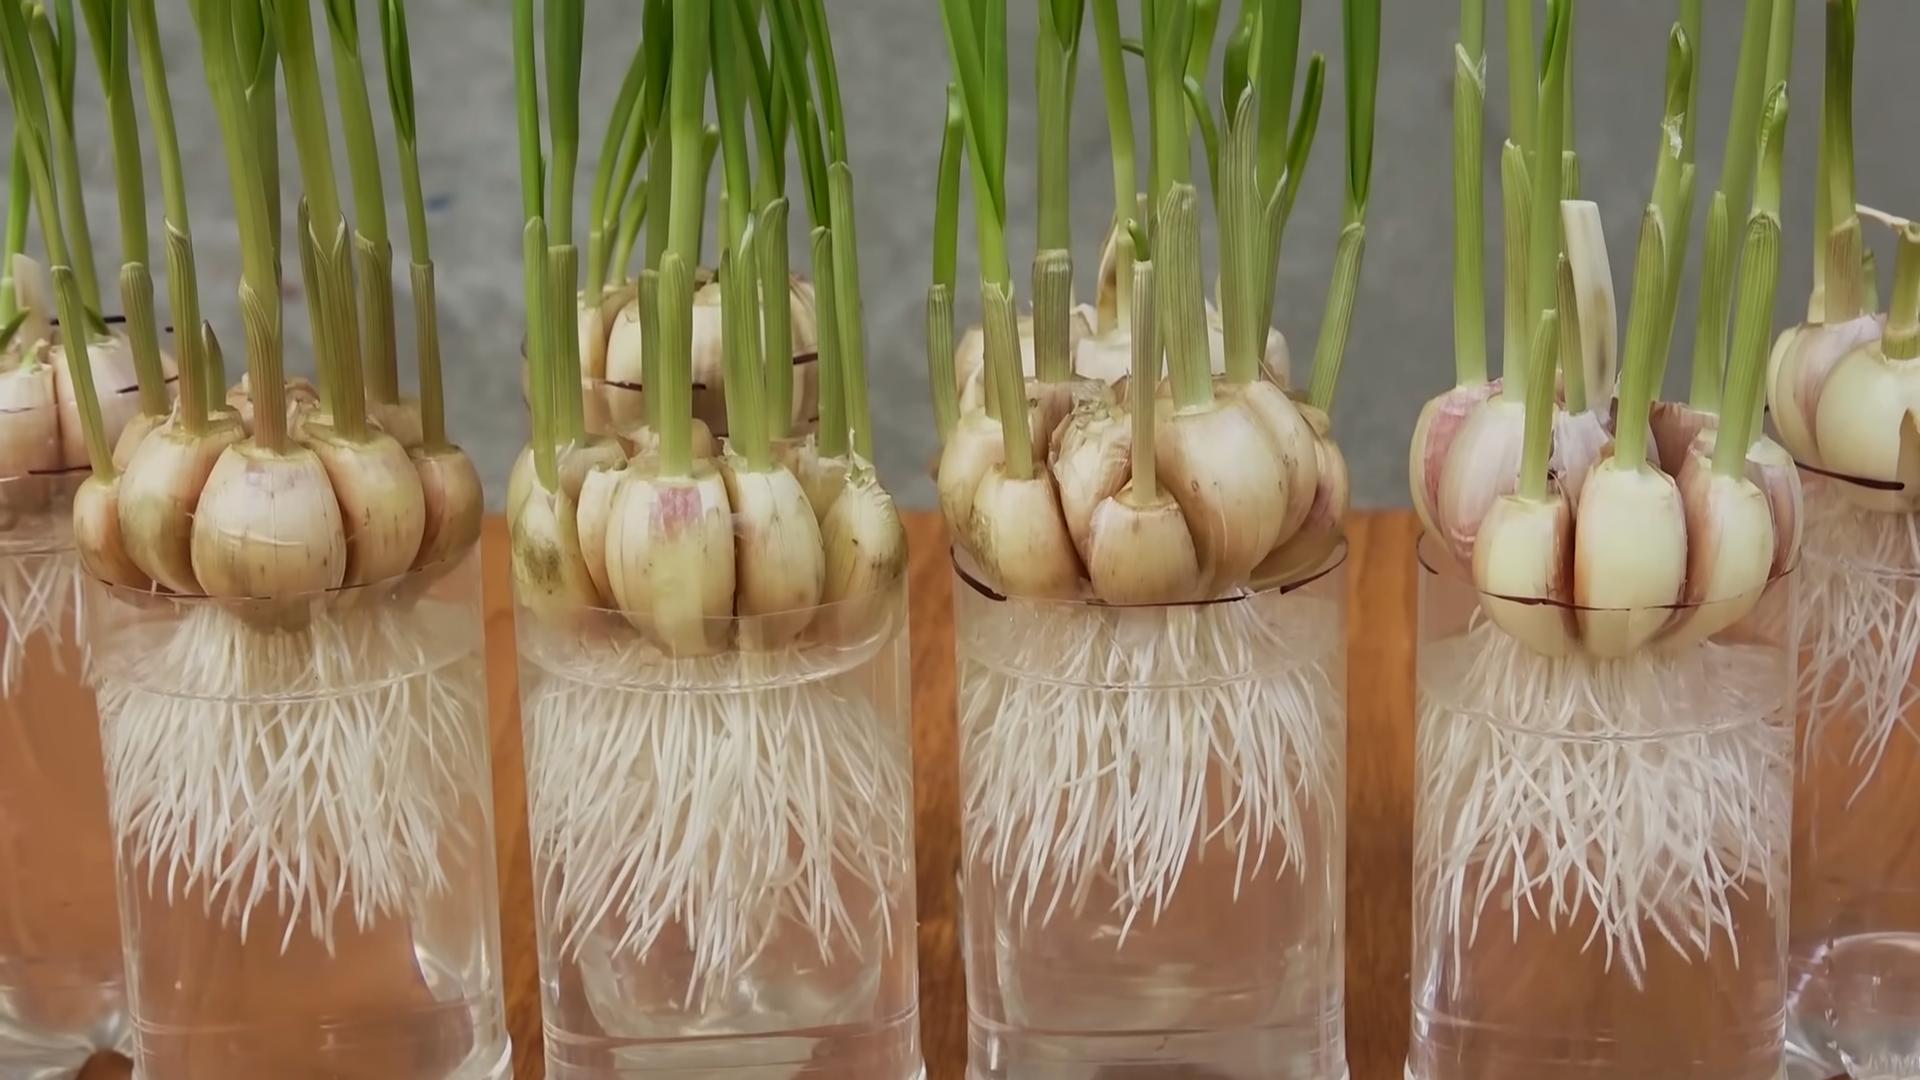
DIY garlic growing bottles – ever thought about turning your old plastic bottles into mini garlic farms? I’m so excited to share this incredibly simple and rewarding project with you! For centuries, garlic has been a staple in cuisines around the world, not just for its pungent flavor, but also for its purported health benefits. From ancient Egypt, where it fueled the pyramid builders, to modern kitchens where it adds zest to our favorite dishes, garlic has always been a valued crop.
But let’s be honest, not everyone has a sprawling garden to dedicate to growing garlic. That’s where this DIY trick comes in! Imagine having fresh, organic garlic right at your fingertips, grown in recycled bottles on your windowsill or balcony. No more last-minute grocery store runs when you realize you’re out of garlic! This method is perfect for apartment dwellers, beginner gardeners, or anyone looking for a sustainable and space-saving way to cultivate their own food. Plus, it’s a fantastic way to reuse those plastic bottles that might otherwise end up in a landfill. So, are you ready to learn how to create your own DIY garlic growing bottles and enjoy a continuous supply of this flavorful and healthy ingredient? Let’s get started!
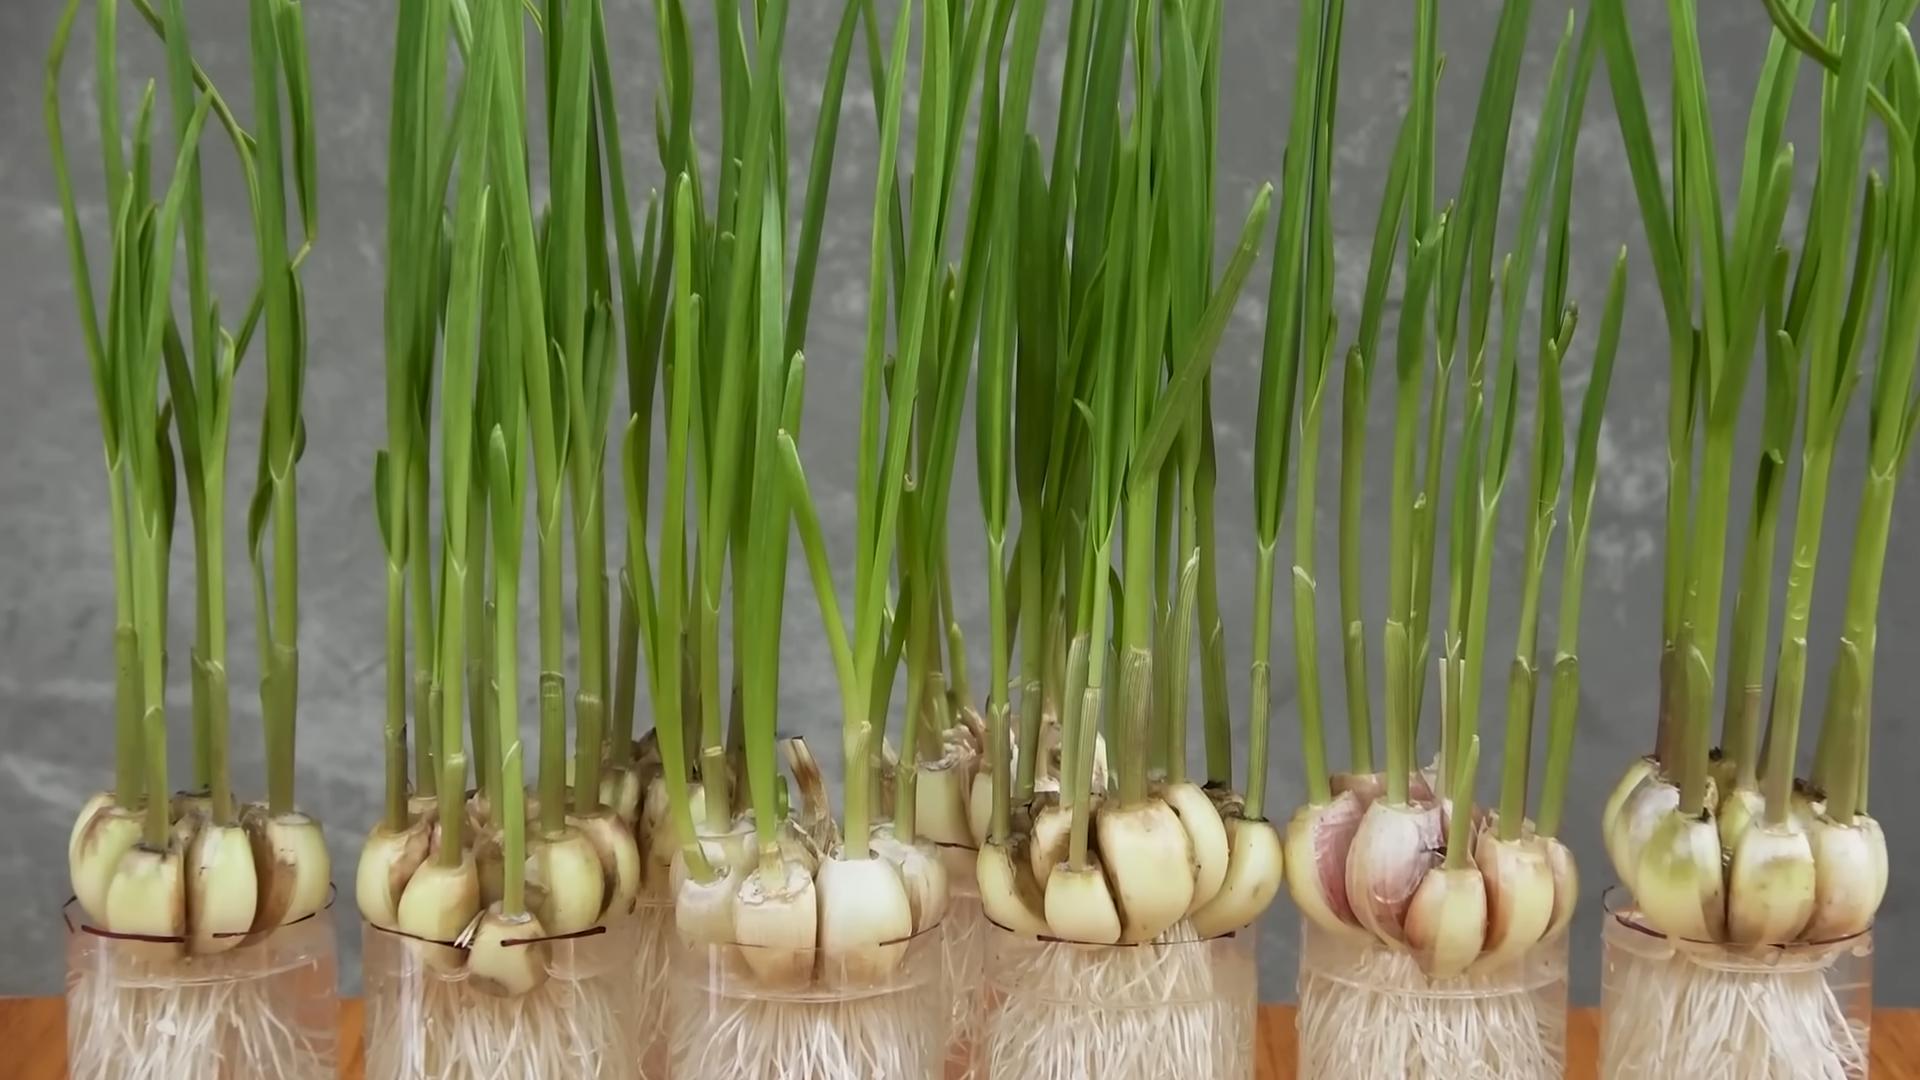
DIY Garlic Growing Bottles: From Kitchen Scrap to Bountiful Harvest!
Hey there, fellow gardening enthusiasts! Ever thought about turning those empty plastic bottles into mini garlic farms? It’s a super fun, eco-friendly project, and I’m here to guide you through every step. Get ready to transform your kitchen scraps into a delicious harvest!
What You’ll Need: The Garlic Grower’s Toolkit
Before we dive in, let’s gather our supplies. This is a pretty low-cost project, which is always a win in my book!
* Plastic Bottles: Think soda bottles, water bottles, juice bottles – anything that’s reasonably sturdy and can hold soil. I usually go for 2-liter bottles, but smaller ones work too, especially if you’re short on space.
* Garlic Cloves: The stars of the show! Use organic garlic if possible, as it’s less likely to be treated with chemicals that could inhibit growth. Choose plump, healthy cloves – these are your future garlic plants!
* Potting Soil: Good quality potting soil is crucial. It provides the nutrients your garlic needs to thrive. Avoid using garden soil directly, as it can be too dense and may contain pests or diseases.
* Gravel or Pebbles: For drainage. We don’t want soggy garlic!
* Scissors or a Utility Knife: For cutting the plastic bottles. Be careful!
* Drill or Nail: To create drainage holes (if your scissors/knife can’t do it).
* Watering Can or Spray Bottle: To keep your garlic happy and hydrated.
* Optional: Labels and a permanent marker to keep track of your garlic varieties.
Preparing the Bottles: Creating the Perfect Garlic Home
This is where we transform those discarded bottles into mini-planters. It’s easier than you think!
1. Clean the Bottles: Wash the bottles thoroughly with soap and water to remove any residue. Rinse well and let them dry completely. This helps prevent mold and other nasties from affecting your garlic.
2. Cut the Bottles: There are a couple of ways to do this, depending on the size of your bottle and your preference:
* Option 1 (Vertical Planter): Cut the bottle in half horizontally. You’ll be using the bottom half as your planter. The top half can be discarded or used as a mini-greenhouse cover later on.
* Option 2 (Hanging Planter): Cut a large rectangular opening on one side of the bottle, leaving the top and bottom intact. This creates a trough-like planter that you can hang. You’ll need to create holes for hanging later.
* Option 3 (Stacked Planter): Cut the bottom off several bottles. Then, cut a hole in the cap of each bottle large enough for the neck of another bottle to fit through. This allows you to stack the bottles, creating a vertical tower of garlic! This is a bit more advanced, but super cool if you’re feeling ambitious.
Safety First! Be extremely careful when using scissors or a utility knife. Always cut away from yourself and use a stable surface.
3. Create Drainage Holes: This is essential! Garlic hates sitting in water. If you haven’t already, use a drill or nail to create several drainage holes in the bottom of the bottle. If you used the hanging planter method, make sure the holes are on the bottom of the trough.
4. Optional: Decorate! This is where you can get creative! Paint the bottles, add labels, or decorate them with stickers. Make them your own!
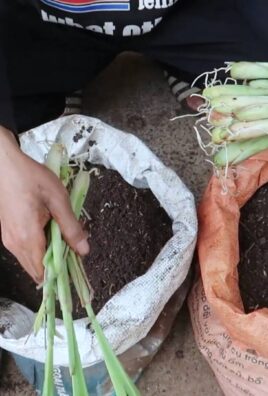
Planting the Garlic: Giving Life to Your Cloves
Now for the fun part – planting the garlic!
1. Add Drainage Layer: Place a layer of gravel or pebbles at the bottom of the bottle. This helps improve drainage and prevents the soil from becoming waterlogged. About an inch or two should do the trick.
2. Fill with Potting Soil: Fill the bottle with potting soil, leaving about an inch or two of space at the top. Gently pat the soil down to remove any air pockets.
3. Plant the Garlic Cloves: Separate the garlic bulb into individual cloves. Plant the cloves pointy-side up, about 2-3 inches deep and 4-6 inches apart. If you’re using a smaller bottle, you might only be able to fit one or two cloves.
4. Water Gently: Water the soil gently until it’s evenly moist but not soggy. Avoid overwatering, as this can lead to rot.
Caring for Your Garlic: Nurturing Your Mini-Farm
Garlic is relatively low-maintenance, but it does need some TLC to thrive.
1. Sunlight: Garlic needs at least 6 hours of sunlight per day. Place your bottles in a sunny location, such as a windowsill, balcony, or patio.
2. Watering: Water regularly, especially during dry periods. The soil should be consistently moist, but not waterlogged. Check the soil moisture by sticking your finger into the soil. If it feels dry, it’s time to water.
3. Fertilizing: Garlic is a heavy feeder, so it benefits from regular fertilization. Use a balanced liquid fertilizer every few weeks, following the instructions on the label.
4. Weeding: Keep the soil free of weeds, as they can compete with your garlic for nutrients and water.
5. Pest Control: Keep an eye out for pests, such as aphids or spider mites. If you spot any, treat them with an organic insecticide or insecticidal soap.
Harvesting Your Garlic: The Sweet Reward
The moment you’ve been waiting for! Harvesting your homegrown garlic is incredibly satisfying.
1. When to Harvest: Garlic is typically ready to harvest in late spring or early summer, about 8-9 months after planting. Look for signs that the leaves are starting to turn yellow and brown.
2. How to Harvest: Gently loosen the soil around the garlic bulb with a trowel or fork. Carefully pull the bulb out of the soil, being careful not to damage it.
3. Curing the Garlic: Curing is essential for long-term storage. Brush off any excess soil from the bulbs. Tie the garlic plants together in bundles and hang them in a cool, dry, well-ventilated place for 2-3 weeks. This allows the bulbs to dry and the skins to harden.
4. Storing the Garlic: Once the garlic is cured, cut off the roots and stems. Store the bulbs in a cool, dry, dark place, such as a pantry or cellar. Properly cured and stored garlic can last for several months.
Troubleshooting: Addressing Common Garlic Growing Issues
Even with the best care, you might encounter some challenges along the way. Here are a few common issues and how to address them:
* Yellowing Leaves: This could be a sign of overwatering, underwatering, nutrient deficiency, or disease. Check the soil moisture and adjust your watering accordingly. Fertilize regularly and inspect the plants for signs of disease.
* Rotting Bulbs: This is usually caused by overwatering or poor drainage. Make sure your bottles have adequate drainage holes and avoid overwatering.
* Small Bulbs: This could be due to insufficient sunlight, poor soil, or overcrowding. Make sure your plants are getting enough sunlight, use good quality potting soil, and space the cloves properly.
* Pests: Aphids, spider mites, and other pests can damage your garlic plants. Inspect the plants regularly and treat them with an organic insecticide or insecticidal soap if necessary.
Advanced Techniques: Taking Your Garlic Growing to the Next Level
Feeling adventurous? Here are a few advanced techniques to try:
* Succession Planting: Plant garlic cloves every few weeks to ensure a continuous harvest throughout the season.
* Different Varieties: Experiment with different varieties of garlic to find your favorites. Some varieties are more pungent than others, while others are better suited for specific climates.
* Garlic Scapes: Don’t throw away the garlic scapes (the curly flower stalks that grow from hardneck garlic). They’re delicious! Use them in pesto, stir-fries, or soups.
* Saving Seeds: Save the largest and healthiest cloves from your harvest to plant next year. This allows you to develop your own strain of garlic that’s perfectly adapted to your local climate.
Why Grow Garlic in Bottles? The Perks of This DIY Project
Besides being a fun and eco-friendly project, growing garlic in bottles offers several advantages:
* Space-Saving: Perfect for small spaces like apartments, balconies, and patios.
* Easy to Move: You can easily move the bottles to follow the sun or protect them from harsh weather.
* Pest Control: Growing garlic in containers can help reduce the risk of soilborne pests and diseases.
* Educational: A great way to teach kids about gardening and where their food comes from.
*
Conclusion
So, there you have it! Transforming ordinary plastic bottles into miniature garlic farms is not just a fun project; it’s a practical and sustainable way to enjoy fresh, homegrown garlic right at your fingertips. This DIY garlic growing bottles method offers a multitude of benefits, from reducing your reliance on store-bought garlic (often shipped from afar) to minimizing waste by repurposing plastic bottles. It’s a win-win for your taste buds and the environment!
But why is this DIY trick a must-try? Beyond the obvious convenience of having fresh garlic readily available, it’s about control. You control the soil, the watering, and the overall environment, ensuring your garlic is grown organically and free from harmful pesticides. Plus, watching those little green shoots emerge from the soil is incredibly rewarding. It’s a tangible connection to the food you eat, something often lost in our modern, fast-paced world.
And the best part? It’s incredibly versatile! While we’ve focused on using plastic bottles, you can adapt this method to other containers, like old yogurt tubs or even repurposed milk cartons. Experiment with different soil mixtures to find what works best for your climate and garlic variety. Consider adding companion plants like basil or parsley to your bottles to deter pests and enhance the flavor of your garlic. You can even try growing different varieties of garlic in separate bottles to compare their tastes and growth habits. Think about using different colored bottles for different garlic varieties to easily identify them.
For those with limited space, this method is a game-changer. Balconies, patios, even sunny windowsills can become thriving garlic gardens. Imagine the satisfaction of snipping off a few fresh garlic chives to garnish your salad or adding a clove of homegrown garlic to your favorite pasta sauce. The possibilities are endless!
Don’t be intimidated if you’ve never grown garlic before. This DIY project is incredibly beginner-friendly. The steps are simple, the materials are readily available, and the rewards are well worth the effort. It’s a fantastic way to introduce children to the joys of gardening and teach them about where their food comes from.
We encourage you to give this DIY garlic growing bottles project a try. It’s a fun, sustainable, and rewarding way to enjoy fresh, homegrown garlic. Once you’ve harvested your first batch, be sure to share your experience with us! We’d love to see your photos, hear your tips, and learn from your successes (and even your challenges). Let’s build a community of bottle-grown garlic enthusiasts! Share your pictures and tips on social media using #DIYGarlicBottles. Let’s spread the word about this fantastic way to grow your own delicious garlic.
Frequently Asked Questions (FAQ)
What kind of garlic should I use for growing in bottles?
You can use any type of garlic you prefer! However, softneck varieties tend to be more adaptable to container growing than hardneck varieties. Softneck garlic is also better suited for braiding. Look for organic garlic bulbs at your local farmers market or garden center to ensure they haven’t been treated with chemicals. Elephant garlic, while technically a leek, can also be grown using this method, but keep in mind that it will require a larger bottle.
What kind of soil should I use?
A well-draining potting mix is essential for successful garlic growing in bottles. Avoid using garden soil, as it can become compacted and waterlogged in containers. A good mix would be equal parts potting soil, compost, and perlite or vermiculite. The compost provides nutrients, while the perlite or vermiculite improves drainage and aeration. You can also add a slow-release fertilizer to the soil mix to provide a steady supply of nutrients throughout the growing season.
How often should I water my garlic plants?
Water your garlic plants regularly, especially during dry periods. The soil should be consistently moist but not waterlogged. Check the soil moisture by sticking your finger about an inch into the soil. If it feels dry, it’s time to water. Avoid overwatering, as this can lead to root rot. During the dormant period in winter, reduce watering significantly.
How much sunlight do garlic plants need?
Garlic plants need at least six hours of sunlight per day to thrive. Place your bottles in a sunny location, such as a south-facing window or a sunny balcony. If you don’t have enough natural sunlight, you can supplement with grow lights. Rotate the bottles regularly to ensure that all sides of the plants receive adequate sunlight.
When is the best time to plant garlic in bottles?
The best time to plant garlic is in the fall, about 4-6 weeks before the first expected frost. This allows the garlic cloves to develop roots before winter sets in. In warmer climates, you can plant garlic in late winter or early spring. Make sure the soil is cool but not frozen when you plant.
How long does it take to grow garlic in bottles?
It typically takes about 8-9 months to grow garlic from cloves to mature bulbs. You’ll plant in the fall and harvest in the following summer. The exact time will depend on the variety of garlic you’re growing and your local climate.
How do I know when my garlic is ready to harvest?
The leaves of the garlic plant will start to turn yellow and brown when it’s ready to harvest. The tops may also begin to fall over. Gently dig around the base of the plant to check the size of the bulbs. If the bulbs are large and well-formed, it’s time to harvest.
Can I grow garlic indoors year-round?
While you can technically grow garlic indoors year-round, it’s best to give it a dormant period in the winter. This can be achieved by placing the bottles in a cool, dark place for a few months. Reduce watering during this time. After the dormant period, you can bring the bottles back into a sunny location and resume regular watering.
What if my garlic plants develop pests or diseases?
Garlic is generally resistant to pests and diseases, but it can be susceptible to certain problems, such as onion thrips or white rot. If you notice any signs of pests or diseases, treat the plants with an appropriate organic pesticide or fungicide. Good air circulation and proper watering can also help prevent problems.
Can I reuse the soil from my garlic bottles?
It’s generally not recommended to reuse the soil from your garlic bottles, as it may contain pests or diseases. However, if you’re confident that the soil is healthy, you can amend it with fresh compost and fertilizer before reusing it. Alternatively, you can use the old soil to amend your garden beds.
What are some variations I can try with this DIY garlic growing bottles method?
Consider adding companion plants like marigolds or nasturtiums to deter pests. You can also experiment with different types of containers, such as terracotta pots or even hanging baskets. Try growing garlic chives in a separate bottle for a continuous supply of fresh chives. You can also try forcing garlic scapes (the flower stalks) for a unique culinary treat.
How do I store my harvested garlic?
After harvesting, cure your garlic by hanging it in a cool, dry, well-ventilated place for 2-3 weeks. Once the bulbs are dry, you can store them in a mesh bag or basket in a cool, dark place. Properly cured garlic can last for several months.

Leave a Comment