

Grow Bean Sprouts DIY: Unlock the secrets to fresh, crunchy sprouts right in your kitchen! Forget those bland, store-bought sprouts – I’m going to show you how incredibly easy and rewarding it is to cultivate your own at home. For centuries, bean sprouts have been a staple in Asian cuisine, prized not only for their delicate flavor and satisfying crunch but also for their impressive nutritional value. Think of them as tiny powerhouses packed with vitamins, minerals, and enzymes, ready to boost your health with every bite.
But why should you bother with a DIY approach? Well, for starters, you’ll have complete control over the quality and freshness of your sprouts. No more worrying about questionable origins or potential contaminants. Plus, it’s a fantastic way to save money and reduce your reliance on grocery store produce. Imagine adding a vibrant, homegrown touch to your salads, stir-fries, and sandwiches – all thanks to your own green thumb (or, in this case, green jar!).
This Grow Bean Sprouts DIY guide is perfect for beginners and seasoned gardeners alike. I’ll walk you through each step, from selecting the right beans to mastering the rinsing process, ensuring you achieve a bountiful harvest of delicious, healthy sprouts in just a few days. So, are you ready to embark on this exciting and surprisingly simple culinary adventure? Let’s get sprouting!
Grow Your Own Crunchy Bean Sprouts at Home!
Forget buying those limp, sad-looking bean sprouts at the grocery store! I’m going to show you how incredibly easy it is to grow your own fresh, crunchy bean sprouts right in your kitchen. It’s a fun project, super rewarding, and you’ll have a constant supply of healthy sprouts for salads, stir-fries, and more. Trust me, once you taste homemade bean sprouts, you’ll never go back!
What You’ll Need
Before we dive in, let’s gather our supplies. The beauty of this project is that you probably already have most of these things lying around:
- Bean Seeds: Mung beans are the most common and easiest to sprout, but you can also use adzuki beans, lentils, or even chickpeas. Make sure they are specifically labeled for sprouting or food use, not for planting in the garden. You can find these at most health food stores or online.
- A Wide-Mouth Jar: A quart-sized mason jar works perfectly. You can also use a large glass bowl if you prefer.
- Sprouting Lid or Cheesecloth: You’ll need something to cover the jar and allow for drainage. A sprouting lid is ideal, but a piece of cheesecloth secured with a rubber band works just as well.
- Water: Clean, filtered water is best.
- A Dark Place: Bean sprouts need darkness to grow properly. A cupboard, pantry, or even a covered box will do the trick.
- A Colander or Strainer: For rinsing the sprouts.
Getting Started: Soaking the Beans
This is the first crucial step. Soaking the beans wakes them up and gets them ready to sprout.
- Rinse the Beans: Place about 1/4 cup of mung beans (or your chosen bean) in a colander and rinse them thoroughly under cool water. This removes any dirt or debris.
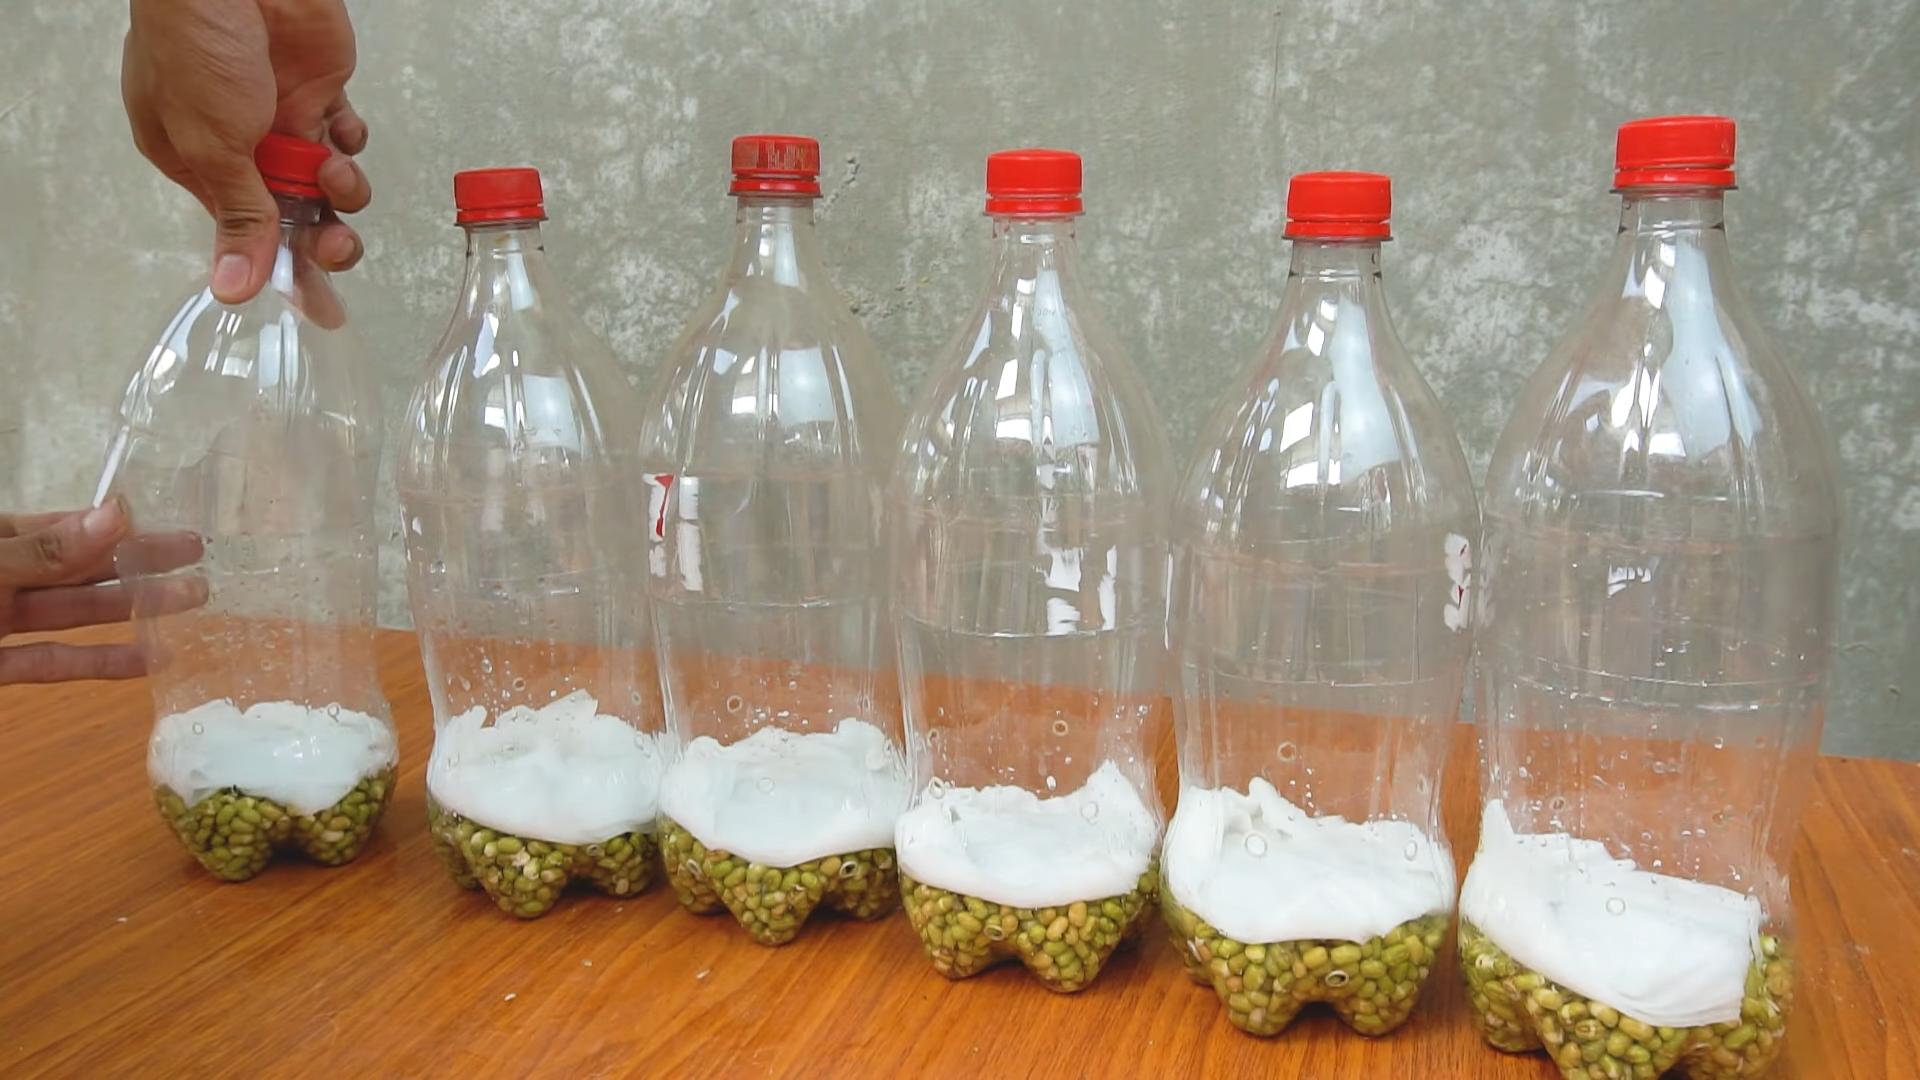
- Transfer to the Jar: Put the rinsed beans into your wide-mouth jar.
- Add Water: Cover the beans with plenty of cool water. They will expand significantly as they soak, so make sure there’s at least 2-3 times more water than beans.
- Secure the Lid: Cover the jar with your sprouting lid or cheesecloth and rubber band.
- Soak for 8-12 Hours: Place the jar in a cool, dark place and let the beans soak for 8-12 hours. I usually soak them overnight.
The Sprouting Process: Rinse, Drain, Repeat!
This is where the magic happens! The key to successful sprouting is consistent rinsing and draining. This keeps the beans moist but prevents them from becoming waterlogged and developing mold.
- Drain the Soaking Water: After the soaking period, drain all the water from the jar through the sprouting lid or cheesecloth.
- Rinse Thoroughly: Rinse the beans with cool water, making sure to get all the beans wet.
- Drain Again: Drain all the water completely. This is really important! You don’t want the beans sitting in water.
- Invert the Jar: Place the jar upside down in a bowl or on a rack at an angle. This allows any excess water to drain out and provides good air circulation.
- Return to the Dark Place: Put the jar back in your dark cupboard or pantry.
- Repeat 2-3 Times a Day: Rinse and drain the beans 2-3 times a day for the next 3-5 days. Consistency is key!
Important Tip: Make sure the beans are draining well after each rinse. If you notice any standing water, gently shake the jar to help remove it.
Watching Them Grow: What to Expect
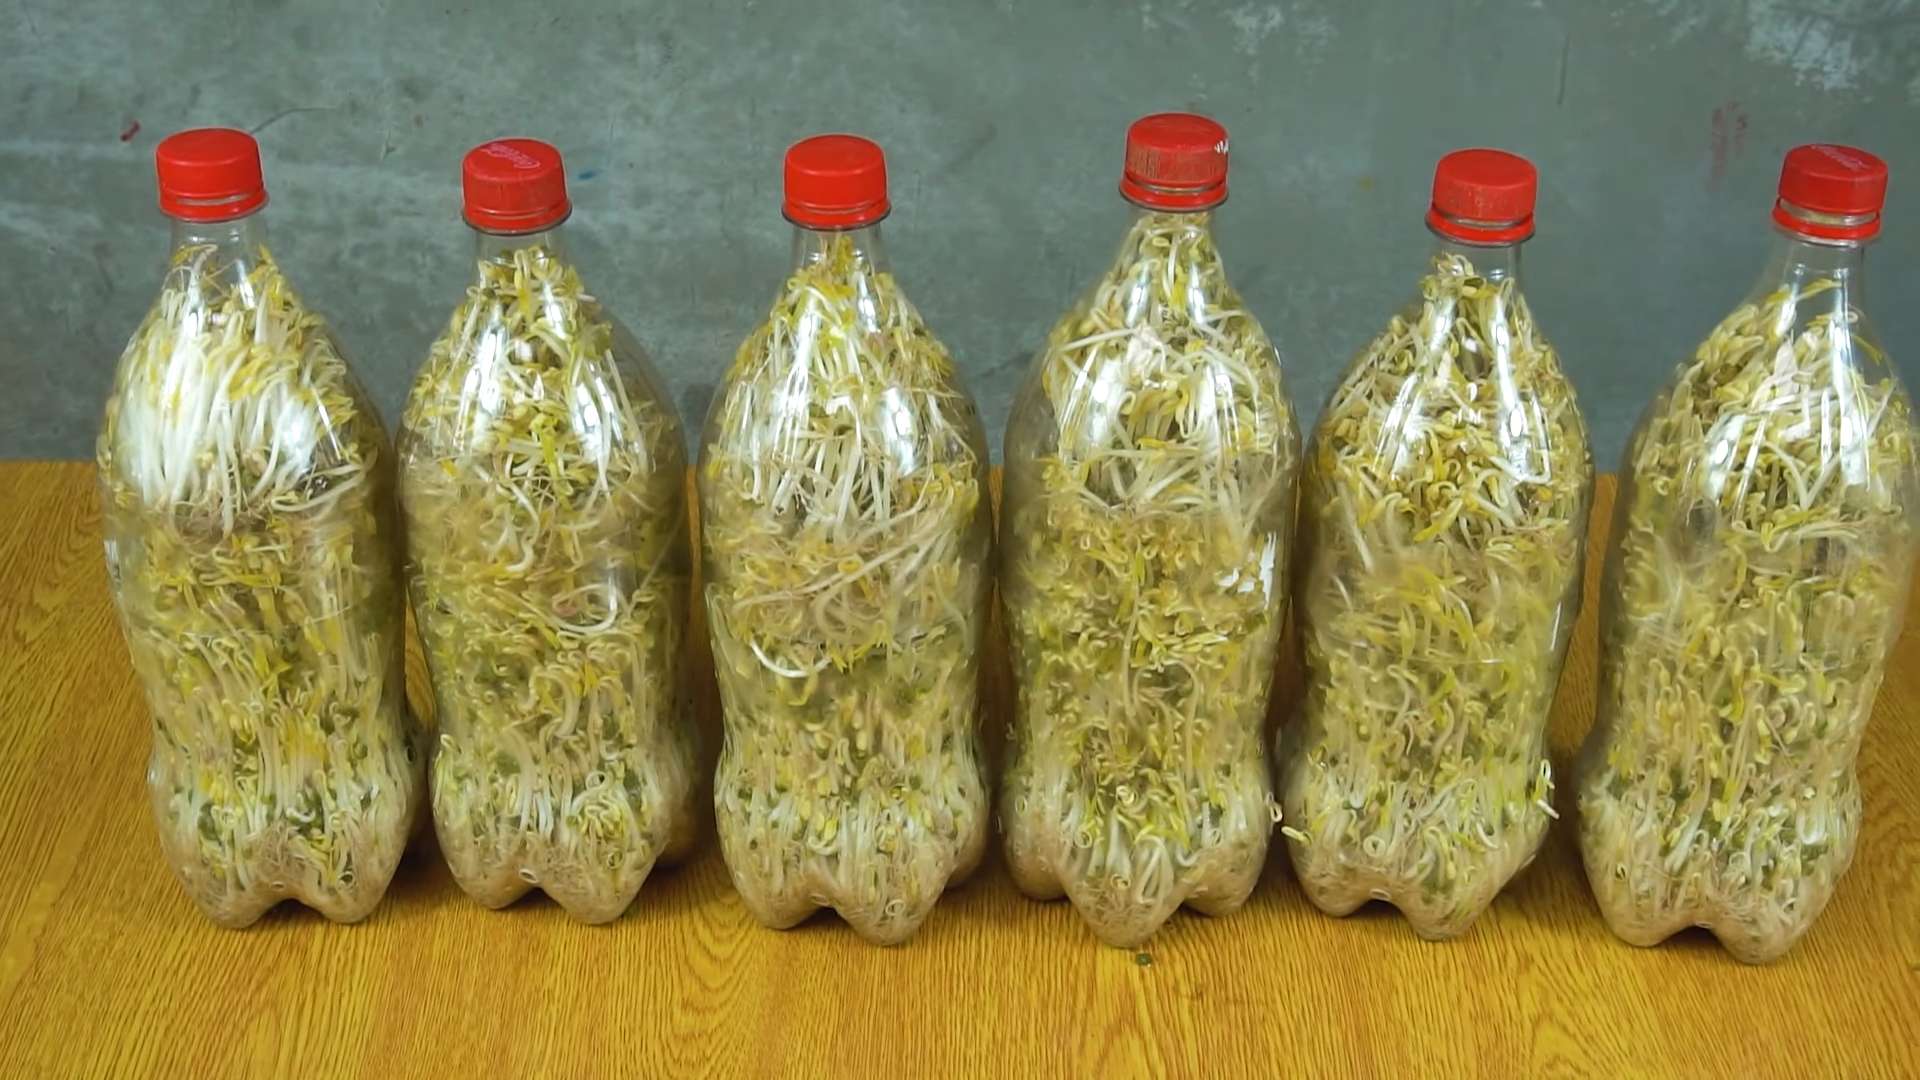
Over the next few days, you’ll see the beans start to sprout. Tiny white tails will emerge, and the sprouts will gradually grow longer.
- Day 1-2: You’ll start to see small sprouts emerging.
- Day 3-5: The sprouts will grow longer and thicker. The bean hulls may start to loosen.
- Keep an Eye Out: Check the sprouts daily for any signs of mold or spoilage. If you see anything suspicious, discard the entire batch.
Greening the Sprouts (Optional)
If you prefer greener sprouts, you can expose them to indirect sunlight for the last day or two of sprouting. This will encourage chlorophyll production and give them a slightly greener color.
- Move to Indirect Light: On the last day or two, move the jar to a location with indirect sunlight. Avoid direct sunlight, as it can overheat the sprouts.
- Continue Rinsing: Continue rinsing and draining the sprouts 2-3 times a day.
- Observe the Color Change: You’ll notice the sprouts start to turn a light green color.
Harvesting and Storing Your Bean Sprouts
Once the sprouts have reached your desired length (usually 1-2 inches), it’s time to harvest them!
- Final Rinse: Give the sprouts a final rinse in cool water.
- Remove the Hulls (Optional): If you want to remove the bean hulls, you can gently rub the sprouts between your hands under water. The hulls will float to the surface and can be easily skimmed off. This is optional, as the hulls are perfectly edible.
- Dry Thoroughly: Drain the sprouts well and pat them dry with a clean towel or paper towels. The drier they are, the longer they will last in the refrigerator.
- Store in the Refrigerator: Store the sprouts in an airtight container lined with paper towels in the refrigerator. They should last for up to a week.
Storage Tip: Don’t pack the sprouts too tightly in the container, as this can cause them to become mushy.
Troubleshooting: Common Problems and Solutions
Even with the best intentions, sometimes things don’t go exactly as planned. Here are some common problems you might encounter and how to fix them:
- Mold: Mold is usually caused by poor drainage or insufficient rinsing. If you see mold, discard the entire batch. To prevent mold, make sure you are rinsing and draining the sprouts thoroughly 2-3 times a day.
- Slimy Sprouts: Slimy sprouts are also a sign of overwatering or poor drainage. Make sure the sprouts are draining well after each rinse.
- Slow Growth: Slow growth can be caused by several factors, including cold temperatures, old seeds, or insufficient rinsing. Make sure the sprouts are kept in a warm (but not hot) location and that you are using fresh, high-quality seeds.
- Bitter Taste: A bitter taste can be caused by overexposure to light. If you are greening the sprouts, make sure they are only exposed to indirect sunlight for a short period of time.
Using Your Homemade Bean Sprouts
Now for the best part – enjoying your delicious, homemade bean sprouts! Here are just a few ideas:
- Salads: Add them to salads for a crunchy and refreshing boost.
- Stir-Fries: Toss them into stir-fries for added texture and flavor.
- Sandwiches and Wraps: Use them as a topping for sandwiches and wraps.
- Soups: Add them to soups for a healthy and crunchy garnish.
- Spring Rolls: They’re a classic ingredient in fresh spring rolls.
- Just Eat Them! Honestly, sometimes I just grab a handful and munch on them straight from the jar.
Why Grow Your Own? The Benefits of Homemade Bean Sprouts
Besides being incredibly easy and fun, growing your own bean sprouts offers a ton of benefits:
- Freshness: Homemade bean sprouts are much fresher and more flavorful than store-bought ones.
- Cost-Effective: Growing your own sprouts is much cheaper than buying them.
- Nutritious: Bean sprouts are packed with vitamins, minerals, and enzymes.
- Sustainable: Growing your own sprouts reduces your carbon footprint.
- Control: You have complete control over the growing process, ensuring that your sprouts are free from pesticides and other harmful chemicals.
So, what are you waiting for? Give it a try! I promise you’ll be amazed at how easy and rewarding it is to grow your own crunchy, delicious bean sprouts at home. Happy sprouting!
Conclusion
So, there you have it! Growing your own bean sprouts at home is not only incredibly easy and cost-effective, but it also provides you with a continuous supply of fresh, nutritious sprouts right at your fingertips. Forget those limp, pre-packaged sprouts from the grocery store – with this simple DIY trick, you can enjoy crisp, flavorful bean sprouts whenever you want.
Why is this a must-try? Because it’s a game-changer! You’re in complete control of the process, ensuring the highest quality and freshness. Plus, it’s a fantastic way to reduce food waste and embrace a more sustainable lifestyle. Think about it: no more plastic containers ending up in landfills, and no more throwing away sprouts that have gone bad before you even had a chance to use them.
But the benefits don’t stop there. Growing your own bean sprouts is also a fun and educational activity, especially if you have kids. It’s a great way to teach them about where their food comes from and the magic of watching something grow from a tiny seed.
Ready to get creative? While mung beans are the most common choice for sprouting, don’t be afraid to experiment with other types of beans and seeds. Lentils, alfalfa, radish seeds, and even broccoli seeds can all be sprouted using the same basic method. Each will offer a unique flavor and nutritional profile, adding variety to your meals. You can also try different sprouting containers, such as mason jars with sprouting lids, or even repurposed plastic containers with drainage holes. Just be sure to keep everything clean to prevent mold growth.
Consider adding a touch of flavor during the rinsing process. A splash of lemon juice or a pinch of sea salt can enhance the taste of your sprouts. You can also experiment with different growing locations. Some people prefer to keep their sprouts in a dark cupboard, while others find that a spot with indirect sunlight yields better results.
The key to successful bean sprouting is consistency. Rinse your sprouts regularly, and make sure they have adequate drainage. Avoid overwatering, as this can lead to mold growth. And be patient! It takes a few days for the sprouts to reach their full potential.
We are confident that once you try this DIY trick, you’ll be hooked. The satisfaction of harvesting your own fresh bean sprouts is truly rewarding. So, ditch the store-bought sprouts and give it a try. We promise you won’t be disappointed.
Now it’s your turn! We encourage you to try this simple method for growing bean sprouts at home and share your experience with us. What kind of beans did you use? What variations did you try? Did you encounter any challenges? We’d love to hear your tips and tricks in the comments below. Let’s build a community of sprout enthusiasts and inspire others to embrace the joy of growing their own food. Don’t forget to share your photos on social media using #DIYBeanSprouts – we can’t wait to see your creations! This **grow bean sprouts DIY** method is truly a game changer.
Frequently Asked Questions (FAQ)
What kind of beans can I use to grow bean sprouts?
While mung beans are the most popular choice for growing bean sprouts, you can also use other types of beans and seeds, such as lentils, alfalfa, radish seeds, broccoli seeds, and adzuki beans. Each type will offer a slightly different flavor and texture. Experiment to find your favorites! Just make sure the beans are intended for sprouting and are not treated with any chemicals.
How long does it take to grow bean sprouts?
Typically, it takes about 3 to 5 days to grow bean sprouts, depending on the type of bean, the temperature, and the humidity. Mung beans tend to sprout relatively quickly, while other types may take a bit longer. Keep an eye on your sprouts and harvest them when they reach your desired length.
What kind of container should I use to grow bean sprouts?
You can use a variety of containers to grow bean sprouts, such as mason jars with sprouting lids, plastic containers with drainage holes, or even specialized sprouting trays. The key is to choose a container that allows for good drainage and ventilation. Make sure the container is clean to prevent mold growth.
How often should I rinse my bean sprouts?
You should rinse your bean sprouts at least twice a day, preferably three times a day, to keep them moist and prevent them from drying out. Use cool, clean water and make sure to drain the water thoroughly after rinsing.
What if my bean sprouts start to smell bad?
A bad smell is usually a sign of mold growth. If you notice a foul odor, discard the sprouts immediately and thoroughly clean your sprouting container before starting a new batch. To prevent mold growth, make sure to rinse your sprouts regularly, provide adequate drainage, and avoid overcrowding the container.
Do I need to grow bean sprouts in the dark?
While some people prefer to grow bean sprouts in a dark cupboard, it’s not strictly necessary. You can also grow them in a spot with indirect sunlight. However, avoid direct sunlight, as this can overheat the sprouts and cause them to dry out.
How do I store bean sprouts?
Once your bean sprouts are ready, rinse them thoroughly and drain them well. Store them in an airtight container in the refrigerator. They should last for up to a week.
Are bean sprouts safe to eat?
Bean sprouts are generally safe to eat, but it’s important to take precautions to prevent foodborne illness. Always rinse your sprouts thoroughly before eating them, and cook them if you’re concerned about bacteria. Pregnant women, young children, and people with weakened immune systems should avoid eating raw bean sprouts.
Can I grow bean sprouts without soil?
Yes, you can absolutely grow bean sprouts without soil! This method relies on water and air to provide the necessary nutrients for the sprouts to grow. That’s what makes this DIY trick so simple and convenient.
What are the nutritional benefits of bean sprouts?
Bean sprouts are a good source of vitamins, minerals, and fiber. They are low in calories and fat, making them a healthy addition to your diet. They are also a good source of antioxidants, which can help protect your body against damage from free radicals.
How can I use bean sprouts in my cooking?
Bean sprouts can be used in a variety of dishes, such as salads, stir-fries, soups, and sandwiches. They add a crunchy texture and a fresh flavor to any meal. You can also use them as a garnish for tacos, spring rolls, and other dishes.
My bean sprouts are not sprouting. What am I doing wrong?
Several factors could be preventing your bean sprouts from sprouting. First, make sure your beans are viable and intended for sprouting. Old or damaged beans may not sprout. Second, ensure the beans are properly soaked before sprouting. Third, maintain consistent moisture levels by rinsing regularly. Fourth, check the temperature – sprouts prefer a moderate temperature. Finally, avoid overcrowding the container, as this can inhibit growth.
Can I reuse the water after rinsing my bean sprouts?
It’s generally not recommended to reuse the water after rinsing your bean sprouts, as it may contain bacteria or other contaminants. It’s best to use fresh, clean water each time you rinse.
How do I know when my bean sprouts are ready to harvest?
Your bean sprouts are ready to harvest when they have reached your desired length and have developed small leaves. The sprouts should be crisp and firm, not mushy or slimy. Taste them to make sure they have a fresh, pleasant flavor.
Leave a Comment