

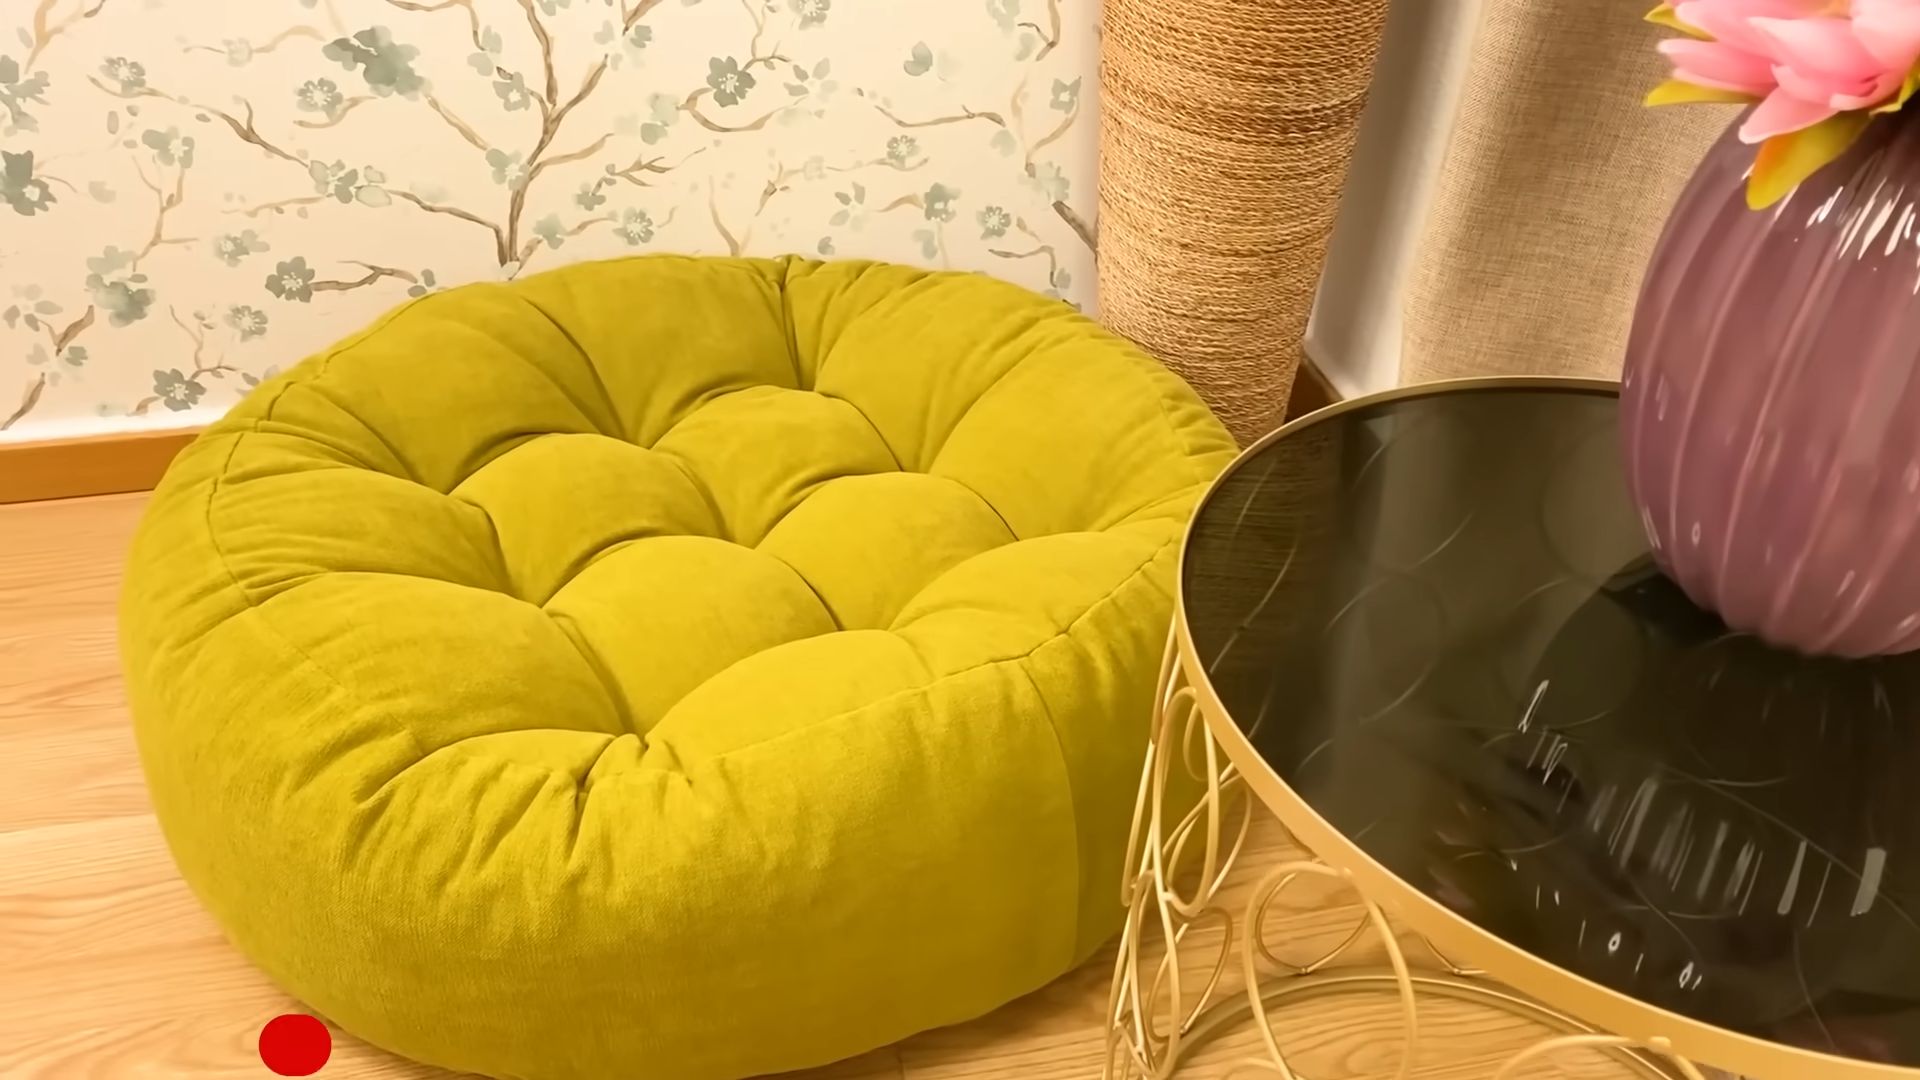
DIY Floor Puff Cushion: Ever dream of sinking into a cloud of comfort right in your own living room? I know I have! Forget those expensive store-bought cushions – I’m about to show you how to create your very own luxurious floor puff cushion, and trust me, it’s easier than you think!
Humans have been crafting cozy seating solutions for centuries. From ancient woven mats to plush royal thrones, the desire for comfortable rest is deeply ingrained in our history. Think of the vibrant Moroccan poufs, traditionally handcrafted and bursting with color, adding warmth and character to any space. We’re channeling that same spirit of creativity and comfort with this project.
Let’s face it, sometimes you just need a comfy spot to relax, read a book, or binge-watch your favorite show. Maybe you’re short on seating, or perhaps you just want to add a touch of bohemian flair to your home. That’s where this DIY floor puff cushion comes in. It’s a fantastic way to upcycle old materials, personalize your décor, and create a unique piece that reflects your style. Plus, it’s a budget-friendly alternative to buying new furniture. So, grab your sewing kit, gather your materials, and let’s get crafting! I promise, you’ll love the result!
DIY Floor Puff Cushion: A Cozy Seating Project
Hey there, fellow DIY enthusiasts! Are you looking for a comfy and stylish addition to your living space? I’m going to walk you through creating your very own floor puff cushion. It’s a fantastic project that’s both budget-friendly and customizable to match your unique style. Get ready to transform your space with this cozy seating solution!
Materials You’ll Need
Before we dive in, let’s gather all the necessary materials. Trust me, having everything on hand will make the process much smoother.
* Fabric: This is where you can really let your creativity shine! Choose a durable fabric that can withstand regular use. Consider options like canvas, denim, upholstery fabric, or even a thick cotton. The amount of fabric you’ll need depends on the desired size of your puff cushion. For a standard size (around 30 inches in diameter), I recommend getting at least 2 yards. If you’re using patterned fabric, make sure to account for pattern matching.
* Sewing Machine: A reliable sewing machine is essential for this project. If you don’t have one, you can borrow one from a friend or rent one from a local sewing shop.
* Thread: Choose a thread that matches your fabric color. It’s always a good idea to have a little extra on hand, just in case.
* Scissors or Rotary Cutter: Sharp scissors or a rotary cutter will make cutting the fabric much easier and more precise.
* Measuring Tape or Ruler: Accurate measurements are crucial for creating a well-proportioned puff cushion.
* Pins: Pins will help hold the fabric pieces together while you sew.
* Chalk or Fabric Marker: Use chalk or a fabric marker to trace your pattern onto the fabric.
* Stuffing: This is what will give your puff cushion its plushness. You can use a variety of materials, such as:
* Polyester Fiberfill: This is a popular and affordable option. It’s lightweight, washable, and provides good support.
* Foam Pieces: Using shredded foam pieces will create a firmer puff cushion. You can often find these at craft stores or upholstery shops.
* Old Clothes or Fabric Scraps: This is a great way to recycle old materials and create a unique and eco-friendly puff cushion. Just make sure the fabric is clean and free of any sharp objects.
* Zipper (Optional): Adding a zipper will allow you to easily remove and wash the cushion cover. Choose a zipper that’s at least 20 inches long.
* Cardboard or Paper for Pattern: You’ll need this to create a template for your fabric pieces.
* Seam Ripper: Just in case you make any mistakes, a seam ripper will come in handy.
Creating the Pattern
Before we start cutting and sewing, we need to create a pattern. This will ensure that all of our fabric pieces are the correct size and shape.
1. Determine the Size: Decide on the desired diameter of your puff cushion. A standard size is around 30 inches, but you can adjust it to fit your needs.
2. Draw the Circle: On a large piece of cardboard or paper, draw a circle with the desired diameter. You can use a compass, a string and pencil, or even trace around a large object like a bucket or pot lid.
3. Divide the Circle: Divide the circle into equal sections. For a standard puff cushion, I recommend dividing it into 6 or 8 sections. This will create a more rounded and even shape. To do this accurately, use a protractor to mark the angles. For 6 sections, each angle will be 60 degrees. For 8 sections, each angle will be 45 degrees.
4. Add Seam Allowance: Add a seam allowance of about 1/2 inch around the entire pattern piece. This will allow for easy sewing and prevent the seams from unraveling.
5. Cut Out the Pattern: Carefully cut out the pattern piece along the marked lines.
Cutting the Fabric
Now that we have our pattern, it’s time to cut the fabric.
1. Fold the Fabric: Fold your fabric in half, right sides together. This will allow you to cut two pieces at once.
2. Pin the Pattern: Place the pattern piece on top of the folded fabric and pin it securely in place. Make sure the pattern is aligned with the grain of the fabric.
3. Trace the Pattern: Using chalk or a fabric marker, trace around the pattern piece onto the fabric.
4. Cut the Fabric: Carefully cut out the fabric pieces along the traced lines. Repeat this process until you have the desired number of fabric pieces (6 or 8, depending on your pattern).
5. Cut the Bottom Circle: Using the same method as above, cut out a circle of fabric for the bottom of the puff cushion. This circle should be the same diameter as the circle you used for your pattern.
Sewing the Pieces Together
This is where the magic happens! We’ll start sewing the fabric pieces together to create the main body of the puff cushion.
1. Pin the First Two Pieces: Take two of your fabric pieces and pin them together along one of the straight edges, right sides together. Make sure the edges are aligned and the pins are spaced evenly.
2. Sew the Seam: Using your sewing machine, sew the seam along the pinned edge, using a 1/2 inch seam allowance. Backstitch at the beginning and end of the seam to secure the stitches.
3. Repeat the Process: Repeat steps 1 and 2, adding each fabric piece to the previous one until you have sewn all the pieces together to form a dome shape.
4. Attach the Bottom Circle: Pin the bottom circle to the open edge of the dome shape, right sides together. Make sure the edges are aligned and the pins are spaced evenly.
5. Sew the Bottom Circle: Sew the bottom circle to the dome shape, using a 1/2 inch seam allowance. Leave a 12-15 inch opening for stuffing. Backstitch at the beginning and end of the seam.
Adding the Zipper (Optional)
If you want to add a zipper to your puff cushion, now is the time.
1. Prepare the Opening: Press the edges of the opening you left in the bottom circle inward, creating a clean edge.
2. Pin the Zipper: Pin the zipper to the opening, right side of the zipper facing the right side of the fabric. Make sure the zipper teeth are aligned with the edge of the fabric.
3. Sew the Zipper: Using a zipper foot on your sewing machine, sew the zipper to the opening. Sew close to the zipper teeth for a secure and professional finish.
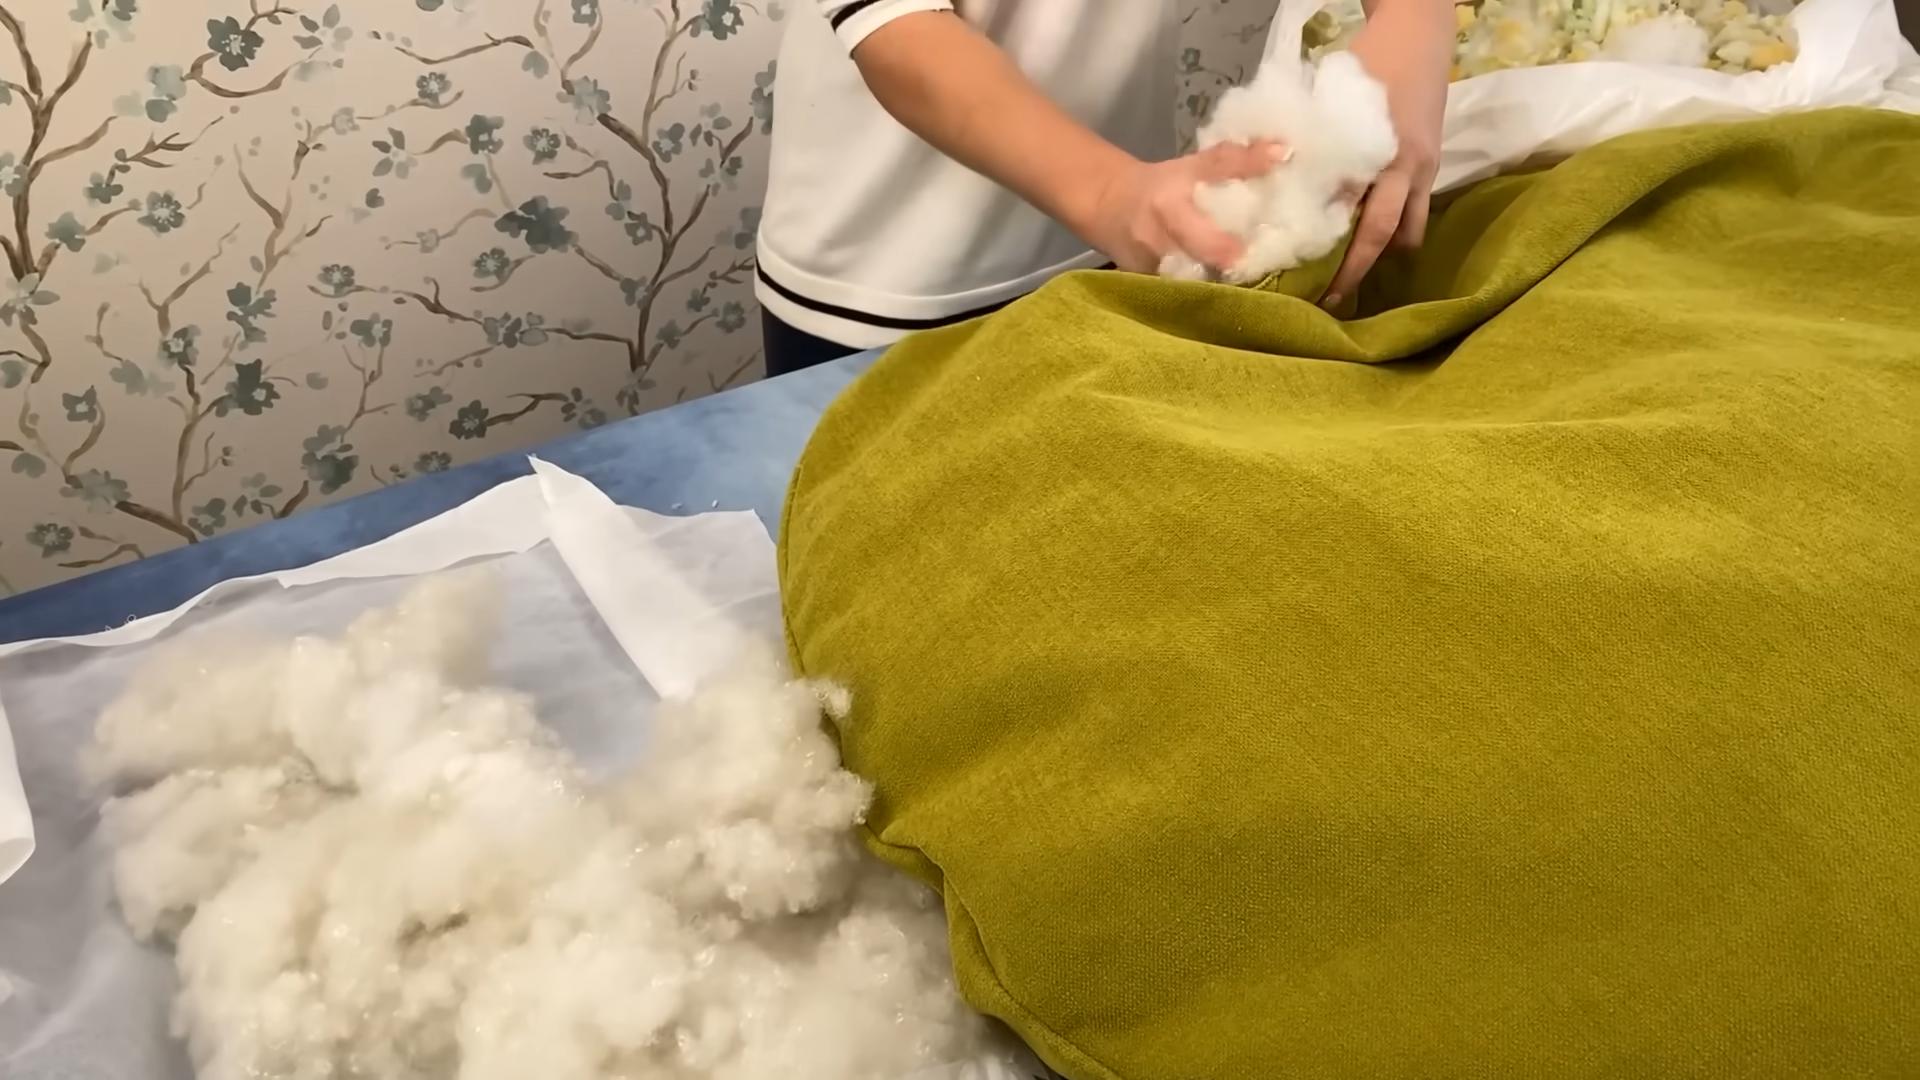
Stuffing the Puff Cushion
Now for the fun part – stuffing!
1. Turn the Cover Right Side Out: Carefully turn the puff cushion cover right side out.
2. Start Stuffing: Begin stuffing the puff cushion with your chosen filling material. Start by filling the corners and edges, and then gradually fill the center.
3. Add Stuffing Gradually: Add the stuffing gradually, making sure to distribute it evenly throughout the cushion. This will prevent lumps and create a more comfortable seating surface.
4. Check for Firmness: As you stuff, periodically check the firmness of the cushion. You want it to be firm enough to provide support, but not so firm that it’s uncomfortable.
5. Close the Opening: Once you’re satisfied with the amount of stuffing, close the opening. If you added a zipper, simply zip it up. If you didn’t add a zipper, you can hand-stitch the opening closed using a hidden stitch.
Finishing Touches
Congratulations! You’ve created your very own floor puff cushion. Here are a few finishing touches to make it even more perfect:
* Fluff and Shape: Give your puff cushion a good fluff and shape it to your liking.
* Add Decorative Details: Consider adding decorative details such as buttons, tassels, or embroidery to personalize your puff cushion.
* Enjoy Your Creation: Find the perfect spot for your new floor puff cushion and enjoy the comfort and style it brings to your space!
Important Considerations:
* Fabric Choice: The fabric you choose will greatly impact the durability and appearance of your puff cushion. Consider the intended use and choose a fabric that can withstand the wear and tear.
* Stuffing Density: The amount of stuffing you use will determine the firmness of your puff cushion. Experiment with different amounts of stuffing to find the perfect balance of comfort and support.
* Seam Strength: Make sure your seams are strong and secure to prevent them from unraveling. Use a sturdy thread and a consistent seam allowance.
* Safety: If you’re making a puff cushion for children, be sure
Conclusion
So, there you have it! Creating your own DIY floor puff cushion isn’t just a fun project; it’s a gateway to unparalleled comfort, personalized style, and a sustainable approach to home décor. Forget those generic, mass-produced cushions that lack character and soul. With a little time, effort, and creativity, you can craft a floor puff that perfectly reflects your taste and complements your living space.
Why is this DIY trick a must-try? Because it empowers you to take control of your comfort and aesthetics. You get to choose the fabrics, the colors, the size, and even the filling, ensuring that your floor puff is a perfect fit for your needs and preferences. Imagine sinking into a plush, oversized cushion made from your favorite vintage textiles, or creating a vibrant, bohemian-inspired floor puff to add a pop of color to your living room. The possibilities are truly endless.
Beyond the personalization aspect, this project is also incredibly budget-friendly. By repurposing old clothes, blankets, or even fabric scraps, you can significantly reduce the cost of creating a high-quality floor puff. Plus, you’re contributing to a more sustainable lifestyle by giving new life to materials that might otherwise end up in a landfill.
Looking for suggestions or variations? Consider experimenting with different filling materials. While cotton batting and shredded foam are popular choices, you could also use buckwheat hulls for a firmer, more supportive cushion, or even old plastic grocery bags for a surprisingly comfortable and eco-friendly option. For the outer cover, think beyond traditional fabrics. Denim, corduroy, velvet, and even repurposed burlap can add unique textures and visual interest to your floor puff. You can also add embellishments like tassels, pom-poms, or embroidery to further personalize your creation.
Another fantastic variation is to create a modular floor puff system. By making several smaller cushions, you can arrange them in different configurations to suit your needs. Use them as individual seating options, combine them to create a larger lounge area, or even stack them to create a makeshift ottoman. The flexibility of a modular system makes it a perfect choice for small spaces or for those who like to rearrange their furniture frequently.
Don’t be intimidated by the thought of sewing. Even if you’re a beginner, there are plenty of easy-to-follow tutorials and patterns available online. Start with a simple design and gradually work your way up to more complex projects as your skills improve. The satisfaction of creating something beautiful and functional with your own two hands is truly rewarding.
We wholeheartedly encourage you to try this DIY floor puff cushion project. It’s a fun, creative, and rewarding way to enhance your home décor and create a comfortable and inviting space. Once you’ve completed your masterpiece, we’d love to see it! Share your photos and experiences with us on social media using [Your Hashtag Here]. We can’t wait to see what you create! Let’s transform our living spaces, one DIY floor puff at a time.
Frequently Asked Questions (FAQ)
What kind of fabric is best for a DIY floor puff cushion?
The best fabric for your DIY floor puff cushion depends on your desired aesthetic, durability requirements, and budget. For a durable and easy-to-clean option, consider using denim, canvas, or outdoor fabric. These materials can withstand heavy use and are resistant to stains and wear. For a softer and more luxurious feel, velvet, corduroy, or faux fur are excellent choices. These fabrics add a touch of elegance and comfort to your floor puff. If you’re looking for a budget-friendly option, consider repurposing old clothes, blankets, or curtains. This is a great way to give new life to materials that you already have on hand and create a unique and personalized floor puff. Ultimately, the best fabric is the one that you love and that fits your needs and preferences.
What kind of filling should I use for my floor puff?
The filling you choose will significantly impact the comfort and support of your floor puff. Cotton batting is a popular choice for its softness and affordability. It’s readily available at most craft stores and provides a comfortable and plush feel. Shredded foam is another excellent option, offering more support and structure than cotton batting. You can purchase shredded foam online or at upholstery supply stores. For a firmer and more supportive cushion, consider using buckwheat hulls. These natural hulls conform to your body shape and provide excellent support for your back and neck. They are also hypoallergenic and resistant to dust mites. If you’re looking for an eco-friendly option, consider using old plastic grocery bags. This is a great way to reduce waste and create a surprisingly comfortable and supportive filling. Just be sure to thoroughly clean and dry the bags before using them.
How do I clean my DIY floor puff cushion?
The cleaning method for your DIY floor puff cushion will depend on the fabric and filling you’ve used. For cushions with removable covers, simply remove the cover and wash it according to the fabric’s care instructions. If the cover is not removable, spot clean any stains with a mild detergent and water. Avoid using harsh chemicals or bleach, as these can damage the fabric. For cushions filled with cotton batting or shredded foam, you can try to fluff them up periodically to maintain their shape and loft. If the filling becomes heavily soiled, you may need to replace it. For cushions filled with buckwheat hulls, you can occasionally air them out in the sun to prevent moisture buildup.
How much fabric and filling do I need?
The amount of fabric and filling you need will depend on the size and shape of your floor puff. Before you start, decide on the dimensions of your cushion. Then, use a pattern or template to determine the amount of fabric required. For the filling, it’s always better to overestimate than underestimate. You can always remove excess filling, but it’s difficult to add more once the cushion is sewn together. A good rule of thumb is to purchase about 20% more filling than you think you’ll need.
Can I make a floor puff without sewing?
Yes, you can! While sewing is the most common method for creating a floor puff, there are alternative techniques that don’t require any sewing. One popular method is to use fabric glue or fusible webbing to attach the fabric pieces together. This is a great option for beginners or for those who don’t have access to a sewing machine. Another option is to use a pre-made cushion cover and simply stuff it with your desired filling. This is the easiest and fastest way to create a floor puff, but it may limit your design options.
How do I make my floor puff more durable?
To make your floor puff more durable, choose a sturdy fabric like denim, canvas, or outdoor fabric. Reinforce the seams with a double stitch or serger to prevent them from unraveling. Use a high-quality thread that is strong and resistant to breakage. If you’re using a zipper closure, choose a heavy-duty zipper that can withstand repeated use. Finally, avoid placing your floor puff in direct sunlight or exposing it to harsh weather conditions, as this can damage the fabric and filling.
Where can I find inspiration for my DIY floor puff cushion?
There are countless sources of inspiration for your DIY floor puff cushion. Browse online platforms like Pinterest, Instagram, and Etsy for ideas and inspiration. Check out home décor magazines and blogs for the latest trends and styles. Visit fabric stores and craft shops to see the wide variety of materials available. Don’t be afraid to experiment with different colors, patterns, and textures to create a floor puff that is truly unique and reflects your personal style.

Leave a Comment