

Soda Can Crafts DIY: Unleash Your Inner Artist and Eco-Warrior!
Ever look at a pile of empty soda cans and think, “There has to be more to life than just recycling these?” Well, you’re absolutely right! For generations, resourceful individuals have transformed humble, discarded materials into stunning works of art and practical household items. From Depression-era ingenuity to modern-day upcycling movements, the spirit of making something beautiful and useful from what others discard is deeply ingrained in our culture.
I know, I know, you might be thinking, “Soda can crafts? Really?” But trust me, the possibilities are endless! In a world increasingly conscious of waste and the need for sustainable living, learning soda can crafts DIY is not just a fun hobby; it’s a small step towards a greener lifestyle. Plus, it’s incredibly satisfying to create something unique and eye-catching from something so ordinary.
This article is your ultimate guide to unlocking the hidden potential of those aluminum cylinders. We’ll explore a range of exciting soda can crafts DIY projects, from dazzling decorations and quirky planters to surprisingly sturdy storage solutions. So, grab your scissors, gather your cans, and let’s embark on a creative adventure that’s both eco-friendly and budget-friendly!
Soda Can Crafts: Turn Trash into Treasure!
Hey there, fellow crafters! Ever look at a pile of empty soda cans and think, “There has to be something more I can do with these?” Well, you’re in the right place! I’m going to show you how to transform those aluminum cylinders into amazing, unique crafts. Get ready to unleash your creativity and give those cans a new life!
Safety First!
Before we dive in, let’s talk safety. Aluminum cans can have sharp edges, so it’s crucial to protect yourself.
* Wear gloves: Protect your hands from cuts. Leather or heavy-duty work gloves are ideal.
* Use appropriate tools: Sharp scissors or metal shears are necessary, but handle them with care.
* File down sharp edges: After cutting, use a metal file or sandpaper to smooth any rough edges. This is super important to prevent accidental cuts later on.
* Work in a well-lit area: Good lighting helps you see what you’re doing and avoid mistakes.
* Supervise children: If you’re crafting with kids, make sure they’re closely supervised and using appropriate tools.
Craft 1: Soda Can Flowers
These flowers are surprisingly beautiful and can be used for decorations, jewelry, or even as embellishments on other crafts.
Materials You’ll Need:
* Empty soda cans (washed and dried)
* Scissors or metal shears
* Ruler
* Pencil or marker
* Metal file or sandpaper
* Hot glue gun and glue sticks
* Beads or buttons (for the flower centers)
* Wire (for stems, optional)
* Paint (optional, for adding color)
Step-by-Step Instructions:
1. Prepare the Can: First, carefully cut off the top and bottom of the soda can using your scissors or metal shears. You’ll be left with a cylinder. Then, make a vertical cut down the cylinder to create a flat sheet of aluminum.
2. Cut the Petals: Now, on the flat sheet, draw different sizes and shapes of petals. I like to create a variety of petal shapes for a more realistic look. You can use a ruler to make sure they are symmetrical, or freehand it for a more organic feel. Aim for at least 15-20 petals of varying sizes.
3. Cut Out the Petals: Carefully cut out each petal shape. Remember to wear your gloves!
4. Shape the Petals: This is where the magic happens! Gently curve and shape each petal to give it dimension. You can use your fingers or a round object like a pen or pencil to help create the curves. I like to curl the edges slightly for a more realistic look.
5. File the Edges: Use your metal file or sandpaper to smooth any sharp edges on the petals. This is a crucial step for safety and will also make your finished flower look more polished.
6. Assemble the Flower: Start with the smallest petals and begin gluing them together using your hot glue gun. Overlap the petals slightly as you go, creating a layered effect. Work your way up to the larger petals, placing them around the smaller ones.
7. Add the Center: Once all the petals are glued in place, add a bead or button to the center of the flower. This will cover up the glue and add a decorative touch. You can use a variety of beads, buttons, or even small pieces of aluminum cut into interesting shapes.
8. Add a Stem (Optional): If you want to create a flower with a stem, attach a piece of wire to the back of the flower using hot glue. You can wrap the wire with floral tape for a more finished look.
9. Paint (Optional): If you want to add color to your flowers, you can paint them with acrylic paint. I recommend using a primer first to help the paint adhere to the aluminum. You can also use spray paint for a quick and easy finish.
Craft 2: Soda Can Butterflies
These butterflies are delicate and beautiful, perfect for adding a touch of whimsy to your home decor.
Materials You’ll Need:
* Empty soda cans (washed and dried)
* Scissors or metal shears
* Pencil or marker
* Butterfly template (you can find these online or draw your own)
* Metal file or sandpaper
* Hot glue gun and glue sticks
* Beads or wire (for the butterfly body and antennae)
* Paint or markers (optional, for adding color and designs)
Step-by-Step Instructions:
1. Prepare the Can: Just like with the flowers, start by cutting off the top and bottom of the soda can and then making a vertical cut to create a flat sheet of aluminum.
2. Trace the Butterfly Template: Print out or draw a butterfly template. Place the template on the flat sheet of aluminum and trace around it with a pencil or marker. You can make butterflies of different sizes and shapes.
3. Cut Out the Butterfly: Carefully cut out the butterfly shape.
4. Shape the Wings: Gently bend and shape the wings to give them a more realistic look. You can use your fingers or a round object to help create the curves. I like to fold the wings slightly along the body to give them a more three-dimensional effect.
5. File the Edges: Use your metal file or sandpaper to smooth any sharp edges on the butterfly.
6. Create the Body: Use beads or wire to create the butterfly’s body. You can string beads onto a piece of wire or twist the wire into the shape of a body.
7. Attach the Body: Attach the body to the butterfly wings using hot glue.
8. Add Antennae: Use thin wire to create the butterfly’s antennae. Attach the antennae to the head of the butterfly using hot glue.
9. Paint and Decorate (Optional): This is where you can really get creative! Use paint, markers, or other embellishments to decorate your butterfly. You can add intricate designs, patterns, or even glitter.
Craft 3: Soda Can Lanterns
These lanterns are perfect for adding a warm and inviting glow to your outdoor space.
Materials You’ll Need:
* Empty soda cans (washed and dried)
* Utility knife or craft knife
* Hammer
* Nail
* Spray paint (optional)
* Tea light candles or LED candles
Step-by-Step Instructions:
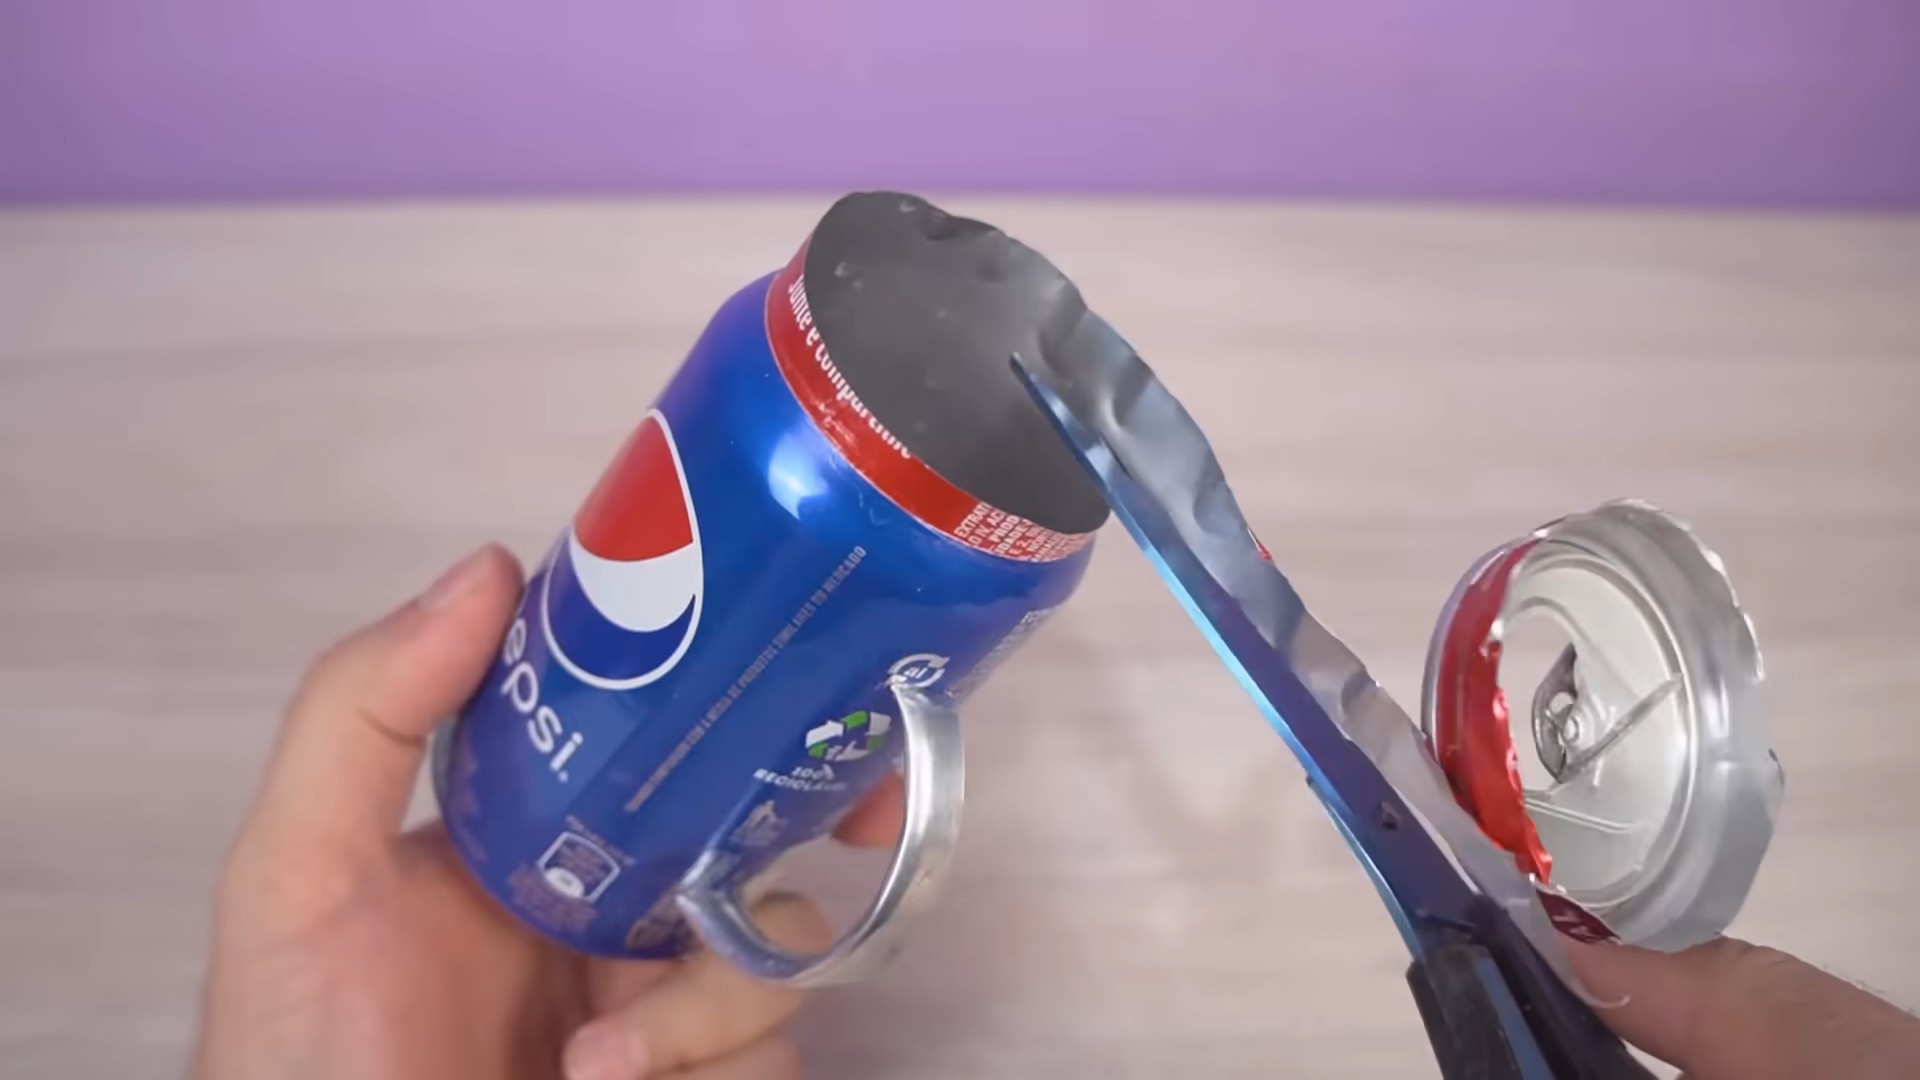
1. Prepare the Can: Remove the top of the soda can. You can do this carefully with a utility knife or craft knife. Be extremely cautious during this step!
2. Fill with Water: Fill the can completely with water and freeze it. This will help prevent the can from collapsing when you start punching holes in it.
3. Create Your Design: Once the water is frozen solid, use a marker to draw your desired design on the outside of the can. You can create simple patterns, intricate designs, or even write words.
4. Punch the Holes: Place the nail on the can where you want to create a hole. Use the hammer to gently tap the nail, creating a small hole in the aluminum. Repeat this process to create your entire design. Be careful not to hit the nail too hard, as you don’t want to crush the can.
5. Melt the Ice: Once you’ve finished punching all the holes, let the ice melt completely.
6. Dry the Can: Thoroughly dry the inside and outside of the can.
7. Spray Paint (Optional): If you want to add color to your lantern, spray paint it with your desired color. Let the paint dry completely before moving on to the next step.
8. Add a Candle: Place a tea light candle or an LED candle inside the lantern.
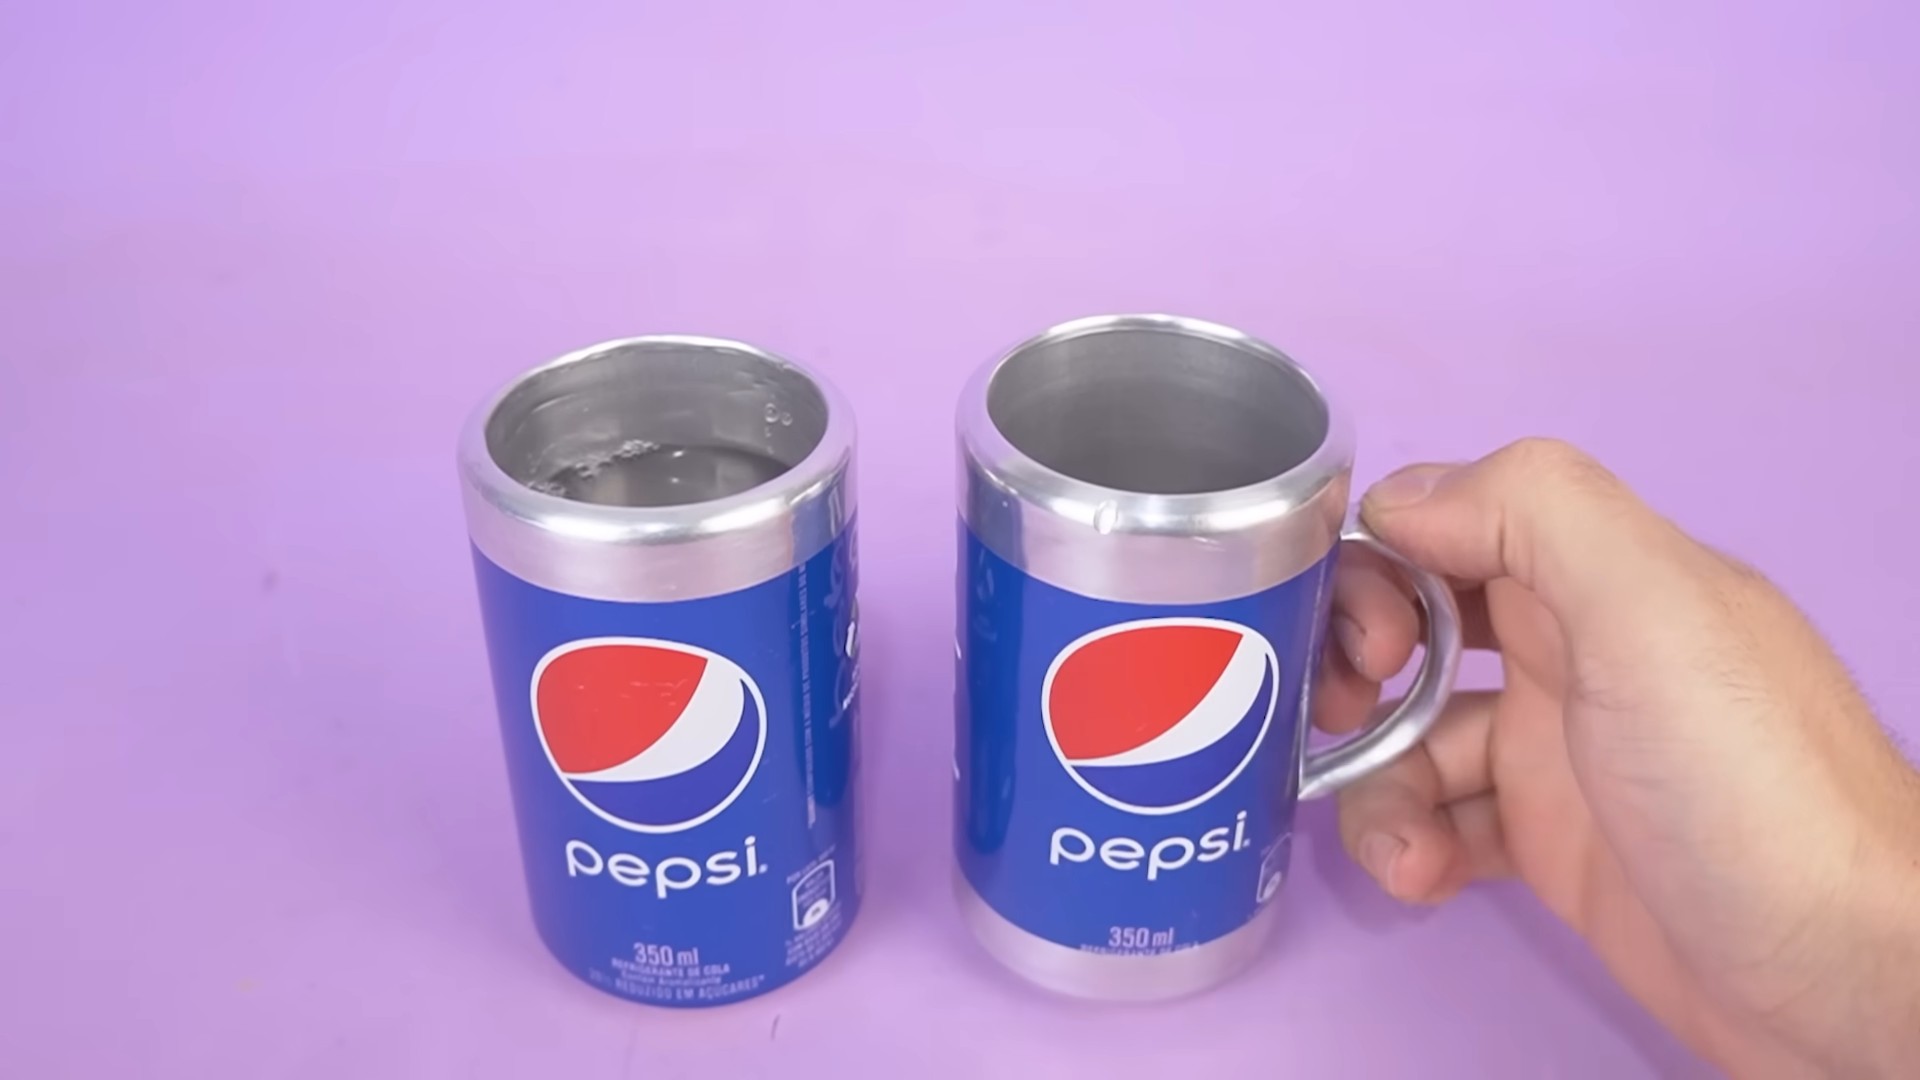
9. Enjoy the Glow: Light the candle and enjoy the warm and inviting glow of your soda can lantern!
Craft 4: Soda Can Coasters
Protect your furniture in style with these unique coasters.
Materials You’ll Need:
* Empty soda cans (washed and dried)
* Scissors or metal shears
* Corkboard or felt
* Pencil
* Ruler
* Hot glue gun and glue sticks
* Circular template (a glass or jar lid works well)
* Metal file or sandpaper
Step-by-Step Instructions:
1. Prepare the Can: Cut off the top and bottom of the soda can and then make a vertical cut to create a flat sheet of aluminum.
2. Cut Out Circles: Using your circular template, trace circles onto the flat sheet of aluminum. You’ll need two circles for each coaster.
3. Cut Out the Circles: Carefully cut out the circles.
4. File the Edges: Use your metal file or sandpaper to smooth any sharp edges on the circles.
Conclusion
So, there you have it! Transforming humble soda cans into amazing crafts is not just a fun way to spend an afternoon; it’s a sustainable practice that breathes new life into discarded materials. This Soda Can Crafts DIY project offers a unique blend of creativity, resourcefulness, and environmental consciousness. It’s a win-win-win!
Why is this a must-try? Because it’s incredibly versatile. Whether you’re a seasoned crafter or a complete beginner, you’ll find a project within the realm of soda can crafts that suits your skill level. The possibilities are truly endless, limited only by your imagination. Plus, think of the satisfaction you’ll get from creating something beautiful and functional from something that would otherwise end up in a landfill.
But the benefits extend beyond personal satisfaction. By engaging in soda can crafts, you’re actively participating in reducing waste and promoting recycling. You’re demonstrating that creativity and sustainability can go hand in hand. You’re also setting a positive example for others, encouraging them to rethink their consumption habits and explore the potential of upcycling.
Looking for variations? Consider experimenting with different types of cans – not just soda cans, but also juice cans, soup cans, and even larger food cans. Each type of can offers a unique size and shape, opening up new avenues for creative expression. You can also explore different embellishments. Add beads, buttons, paint, fabric scraps, or even natural elements like twigs and leaves to personalize your creations. For a more rustic look, try distressing the metal with sandpaper or steel wool. If you’re feeling ambitious, you can even try combining soda can crafts with other crafting techniques, such as knitting, crochet, or decoupage.
Another exciting variation is to focus on creating functional items. Think beyond decorative pieces and consider making things like pen holders, planters, bird feeders, or even small storage containers. With a little ingenuity, you can transform soda cans into practical and stylish additions to your home.
Don’t be afraid to experiment with different cutting and shaping techniques. Try using scissors, craft knives, or even metal shears to create intricate designs. Just remember to always prioritize safety and wear appropriate protective gear, such as gloves and eye protection.
We wholeheartedly encourage you to give this Soda Can Crafts DIY project a try. Gather your supplies, unleash your creativity, and see what amazing things you can create. And most importantly, don’t forget to share your creations with us! We’d love to see what you come up with. Post photos of your finished projects on social media using the hashtag #SodaCanCraftsDIY, and tag us so we can admire your handiwork. We’re eager to see the innovative and inspiring ways you’re transforming soda cans into works of art. Let’s inspire others to join the movement and embrace the joy of upcycling!
Frequently Asked Questions (FAQ)
What kind of tools do I need for soda can crafts?
The tools you’ll need depend on the specific project you’re undertaking, but some essential items include:
* **Scissors or Craft Knife:** For cutting and shaping the cans. A craft knife is useful for more intricate cuts, but always use it with caution and a cutting mat.
* **Cutting Mat:** Protects your work surface when using a craft knife.
* **Ruler or Measuring Tape:** For accurate measurements.
* **Pliers:** For bending and shaping the metal. Needle-nose pliers are particularly useful for small details.
* **Sandpaper or Steel Wool:** For smoothing rough edges and creating a distressed look.
* **Glue or Adhesive:** For attaching different pieces together. Hot glue, craft glue, or epoxy are all good options, depending on the project.
* **Protective Gloves:** To protect your hands from sharp edges.
* **Safety Glasses:** To protect your eyes from flying debris when cutting or sanding.
* **Markers or Paint:** For decorating your creations.
Is it safe to work with soda cans?
Yes, but you need to take precautions. The edges of cut soda cans can be sharp, so it’s crucial to wear protective gloves at all times. Always cut on a stable surface and use sharp tools to avoid tearing the metal, which can create jagged edges. Sanding down the edges after cutting is also highly recommended to remove any burrs or sharp points. If you’re working with children, adult supervision is essential.
How do I clean soda cans before using them for crafts?
Cleaning soda cans is a simple but important step. Rinse the cans thoroughly with warm, soapy water to remove any residue. You can use dish soap or a mild detergent. For stubborn residue, you can soak the cans in hot water for a few minutes before washing them. After washing, rinse the cans thoroughly with clean water and allow them to air dry completely before using them for your crafts. This will help ensure that your finished projects are clean and hygienic.
What kind of paint should I use on soda cans?
Acrylic paint is a great choice for painting soda cans. It’s durable, water-resistant, and comes in a wide range of colors. You can also use spray paint, which provides a smooth, even finish. However, be sure to use spray paint in a well-ventilated area and wear a mask to avoid inhaling the fumes. Before painting, it’s a good idea to prime the cans with a metal primer to help the paint adhere better and prevent rust.
Can I use soda cans for outdoor crafts?
Yes, you can use soda cans for outdoor crafts, but you’ll need to take extra precautions to protect them from the elements. Apply a sealant or varnish to your finished projects to make them more weather-resistant. Choose paints and adhesives that are specifically designed for outdoor use. Regularly inspect your outdoor soda can crafts for signs of wear and tear, and repair or replace them as needed.
Where can I find inspiration for soda can crafts?
The internet is a treasure trove of inspiration for soda can crafts. Search online for tutorials, patterns, and project ideas. Websites like Pinterest, YouTube, and Instructables are excellent resources. You can also find inspiration in craft books, magazines, and even in your own surroundings. Look around your home and garden for objects that you can recreate using soda cans.
How can I make my soda can crafts more durable?
To make your soda can crafts more durable, consider reinforcing them with additional materials. You can use cardboard, wood, or even other soda cans to add strength and stability. Apply multiple coats of paint or sealant to protect the metal from scratches and dents. When joining pieces together, use strong adhesives or consider using rivets or screws for a more secure hold.
Are there any specific soda can craft projects that are good for beginners?
Yes, there are many soda can craft projects that are perfect for beginners. Simple projects like making soda can flowers, pen holders, or small decorative ornaments are a great way to get started. These projects require minimal tools and materials and are relatively easy to complete. As you gain experience, you can move on to more complex projects.
How do I dispose of leftover soda can scraps safely?
Dispose of leftover soda can scraps responsibly. Place them in a recycling bin if your local recycling program accepts aluminum cans. If not, you can take them to a metal recycling center. Be sure to handle the scraps carefully to avoid cutting yourself on any sharp edges. You can also use leftover scraps to create smaller craft projects or to add embellishments to your larger creations.

Leave a Comment