

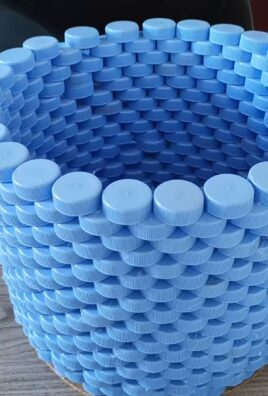
DIY bucket basket weaving: Ever looked at a plain, old bucket and thought, “There has to be more to life than just holding water?” I know I have! For centuries, basket weaving has been a cherished craft, transforming simple materials into functional and beautiful objects. From ancient Egyptians using reeds to create baskets for carrying goods, to indigenous cultures crafting intricate designs with natural fibers, basket weaving is deeply rooted in human history.
But let’s be honest, not all of us have access to reeds or the time to learn complex weaving techniques. That’s where this super fun and surprisingly easy DIY project comes in. We’re taking the humble bucket and giving it a stylish makeover using basket weaving techniques! Why? Because who doesn’t love a good upcycling project that adds a touch of rustic charm to their home or garden?
This DIY bucket basket weaving project is perfect for adding a personal touch to your planters, organizing your craft supplies, or even creating unique storage solutions. Plus, it’s a fantastic way to reduce waste and give those old buckets a new lease on life. I’m going to show you how to transform those ordinary buckets into something extraordinary. So, grab your supplies, and let’s get weaving!
DIY Bucket Basket: From Humble Plastic to Home Decor Hero
Okay, friends, let’s face it: we all have those lonely plastic buckets lurking in the garage or shed. Instead of letting them gather dust, I’m going to show you how to transform them into beautiful, functional baskets! This DIY project is surprisingly easy, incredibly satisfying, and a fantastic way to add a touch of rustic charm to your home. Plus, it’s a great way to upcycle!
Materials You’ll Need
Before we dive in, let’s gather our supplies. Don’t worry, most of these are readily available and won’t break the bank!
* A plastic bucket (any size will do, but I recommend a standard 5-gallon bucket for a good-sized basket)
* Natural rope or twine (jute, sisal, or cotton rope work well – I prefer jute for its rustic look) – you’ll need a LOT, so estimate generously! I usually get at least 200-300 feet depending on the bucket size.
* Hot glue gun and glue sticks (lots of them!)
* Scissors or a utility knife
* Measuring tape or ruler
* Optional: Sandpaper (for smoothing any rough edges on the bucket)
* Optional: Spray paint (if you want to change the color of the bucket before weaving)
* Optional: Leather scraps or fabric for handles
Preparing Your Bucket: The Foundation for Success
This step is crucial for a smooth and professional-looking finish. We want to make sure our rope adheres properly and that there are no sharp edges to snag on.
1. Clean the Bucket: Start by thoroughly cleaning your bucket with soap and water. Remove any dirt, grime, or stickers. Let it dry completely. This ensures the glue will adhere properly.
2. Sand Rough Edges (Optional): If your bucket has any sharp or rough edges, especially around the rim or handle attachments, gently sand them down with sandpaper. This will prevent the rope from snagging and give you a smoother surface to work with.
3. Spray Paint (Optional): If you want to change the color of your bucket, now’s the time to spray paint it. Choose a color that complements your rope and home decor. Apply several thin coats, allowing each coat to dry completely before applying the next. This prevents drips and ensures even coverage. Remember to do this in a well-ventilated area! I often skip this step if I like the original color or if I’m going for a more natural look.
The Weaving Process: Bringing Your Basket to Life
This is where the magic happens! We’ll be using a simple coiling technique to wrap the rope around the bucket, creating a beautiful and textured basket.
1. Starting at the Base: Flip the bucket upside down. Apply a generous amount of hot glue to the center of the base.
2. Attach the Rope: Immediately press the end of your rope firmly into the hot glue. Hold it in place for a few seconds until the glue cools and sets. This is your anchor point, so make sure it’s secure!
3. Coiling and Gluing: Apply a line of hot glue around the perimeter of the glued rope. Carefully coil the rope around the center, pressing it firmly into the glue. Work in small sections, applying glue and pressing the rope into place as you go. The key here is to work quickly before the glue cools, but also to be precise and ensure the rope is tightly packed together.
4. Continue Coiling: Continue coiling the rope around the base, working your way outwards in a spiral pattern. Overlap each row of rope slightly with the previous row to create a seamless and secure finish. Keep applying hot glue to the bucket surface and pressing the rope firmly into place.
5. Working Up the Sides: Once you’ve covered the entire base, start working your way up the sides of the bucket. Continue the coiling and gluing process, ensuring each row of rope is tightly packed against the previous row.
6. Maintaining Tension: As you work your way up the sides, pay attention to the tension of the rope. You want to keep it taut and even to create a consistent and professional-looking weave. If the rope starts to loosen, gently pull it taut before gluing it in place.
7. Dealing with Seams: When you run out of rope, don’t worry! Simply overlap the end of the old rope with the beginning of the new rope by a few inches. Apply a generous amount of hot glue to secure the overlap. Try to position these seams on the back of the basket or in a less visible area.
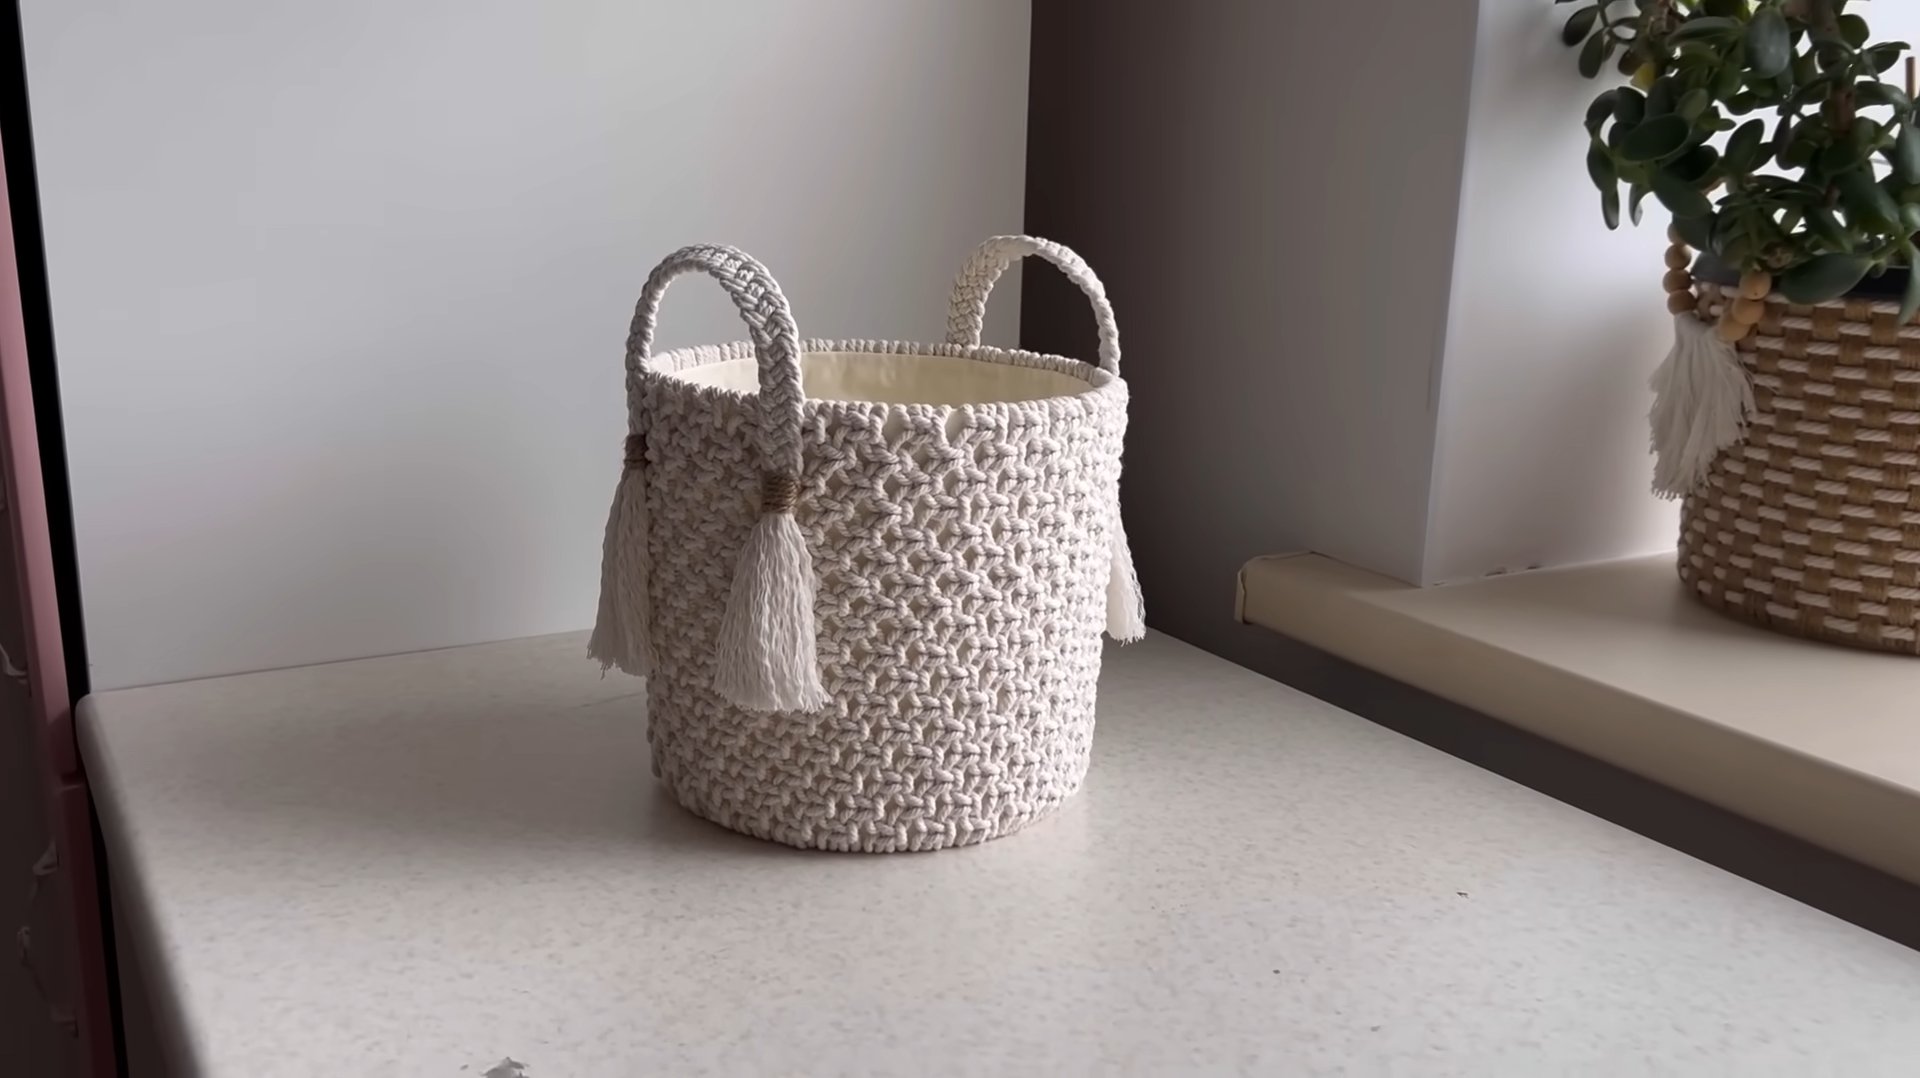
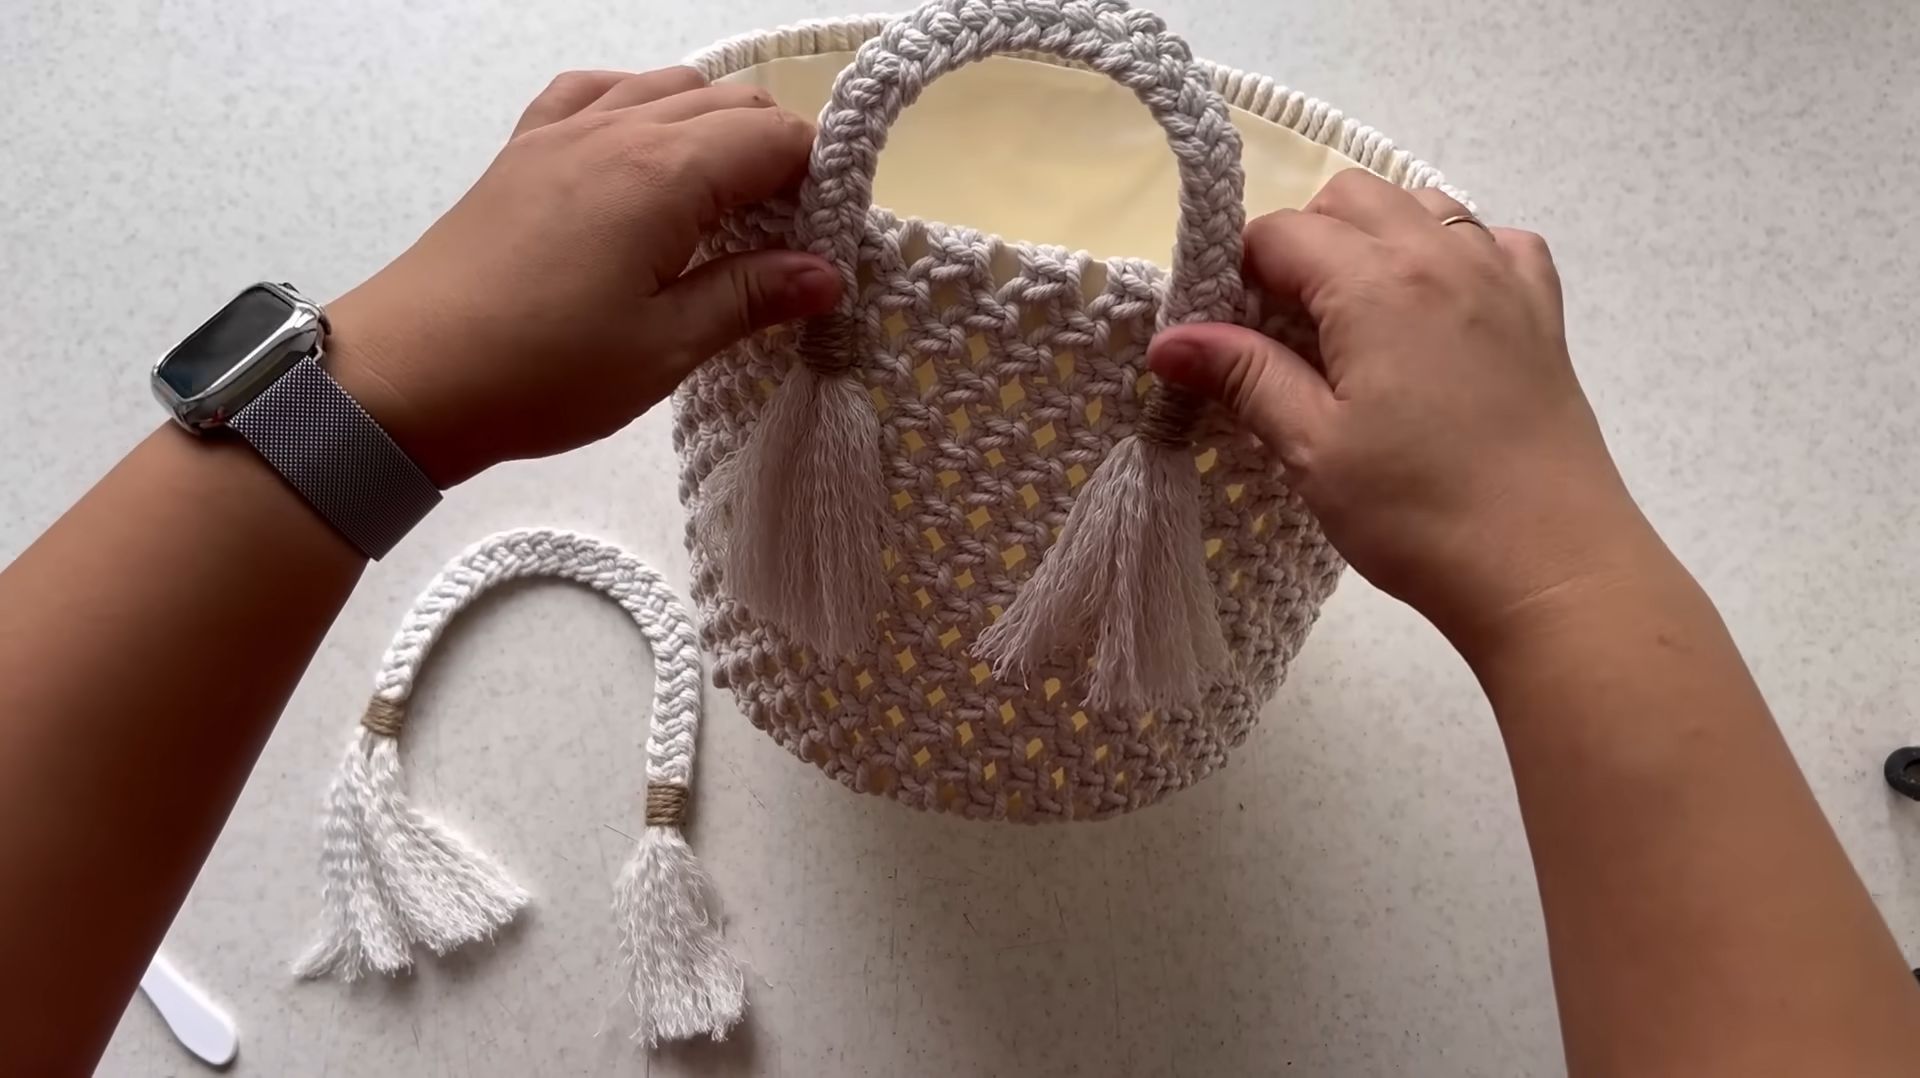
8. Around the Handles: When you reach the handles, you have a couple of options. You can either weave the rope around the handles, leaving them exposed, or you can cover them completely. If you choose to cover them, simply continue coiling the rope over the handles, applying hot glue to secure it in place. I personally like to leave them exposed for a more functional grip.
9. Finishing the Rim: When you reach the rim of the bucket, carefully trim the rope to the desired length. Apply a generous amount of hot glue to the rim and press the end of the rope firmly into place. Make sure the end is securely glued down to prevent it from unraveling. You can also tuck the end under the last row of rope for a cleaner finish.
Adding Handles (Optional): For Extra Functionality
While the bucket handles are already there, you might want to add some extra flair or comfort with custom handles.
1. Cutting the Leather/Fabric: Cut two strips of leather or fabric to your desired length and width. I usually go for about 1 inch wide and long enough to comfortably grip.
2. Folding and Gluing (for Fabric): If you’re using fabric, fold the edges inwards to create a clean seam. Then, fold the strip in half lengthwise and glue the edges together to create a sturdy handle.
3. Attaching the Handles: Apply a generous amount of hot glue to the inside of the bucket handle. Press one end of the leather or fabric strip firmly into the glue. Repeat on the other side.
4. Reinforcing the Attachment: For extra security, you can use rivets or stitching to reinforce the attachment of the handles. This is especially important if you plan to carry heavy items in your basket.
Final Touches: Making it Perfect
Now that your basket is complete, take a step back and admire your handiwork! But before you start using it, let’s add a few final touches to ensure it’s perfect.
1. Trim Any Loose Ends: Carefully trim any loose ends of rope or glue strings with scissors.
2. Inspect for Weak Spots: Inspect the basket for any weak spots or areas where the rope is not securely glued. Apply additional hot glue to reinforce these areas.
3. Let it Cool Completely: Allow the hot glue to cool completely before using the basket. This will ensure that the glue is fully set and that the basket is sturdy and durable.
4. Optional: Add Embellishments: If you want to add a personal touch, you can embellish your basket with beads, buttons, shells, or other decorative items. Simply glue them onto the rope using hot glue.
Using Your New Basket: Endless Possibilities
Congratulations! You’ve successfully transformed a plain plastic bucket into a beautiful and functional basket. Now it’s time to put it to use! Here are just a few ideas:
* Storage: Use it to store blankets, pillows, toys, magazines, or craft supplies.
* Laundry: It makes a great laundry basket for small loads.
* Planter: Line it with plastic and use it as a planter for your favorite plants.
* Gift Basket: Fill it with goodies and give it as a thoughtful and personalized gift.
* Organization: Use it to organize your pantry, closet, or garage.
Tips and Tricks for Success
* Work in Small Sections: Don’t try to glue too much rope at once. Work in small sections to ensure the glue doesn’t cool before you can press the rope into place.
* Use Plenty of Glue: Don’t be stingy with the hot glue! Use a generous amount to ensure the rope is securely attached.
* Press Firmly: Press the rope firmly into the glue to create a strong bond.
* Keep the Rope Taut: Keep the rope taut as you work to create a consistent and professional-looking weave.
* Protect Your Work Surface: Use a drop cloth or newspaper to protect your work surface from hot glue spills.
* Be Patient: This project takes time and patience. Don’t rush it! Take your time and enjoy the process.
* Experiment with Different Ropes: Try using different types of rope, such as jute, sisal, or cotton rope, to create different textures and looks.
* Add Color: Use colored rope or paint the bucket before weaving to add a pop of color
Conclusion
So, there you have it! Transforming an ordinary bucket into a beautiful and functional woven basket is not only achievable but surprisingly rewarding. This DIY bucket basket weaving project is more than just a craft; it’s a testament to resourcefulness, creativity, and the joy of making something unique with your own two hands.
Why is this a must-try? Because it’s a fantastic way to upcycle those forgotten buckets cluttering your garage or shed. Instead of contributing to landfill waste, you’re giving them a stylish new life. Plus, the finished product is incredibly versatile. Use it as a planter for your favorite herbs or flowers, a storage container for blankets or toys, or even a stylish laundry basket. The possibilities are truly endless.
Beyond the practical benefits, this project offers a therapeutic and meditative experience. The rhythmic weaving motion is calming and allows you to disconnect from the digital world and reconnect with your creative side. It’s a chance to slow down, focus on the present moment, and create something tangible and beautiful.
Looking for variations? Absolutely! Experiment with different types of rope or cord. Jute rope offers a rustic, natural look, while colorful cotton cord can add a vibrant pop of color to your décor. You can also play with different weaving patterns. Try a simple over-under weave for a classic look, or explore more intricate patterns for a truly unique design. Consider adding embellishments like beads, shells, or leather accents to personalize your basket even further. You can also paint the bucket before you start weaving to add another layer of customization. Think about using stencils to create patterns or designs on the bucket itself.
Another fun variation is to create a two-toned basket by using two different colors of rope or cord. Alternate the colors in your weaving pattern to create a visually striking effect. You could also try adding handles to your basket for easier carrying. Simply attach sturdy rope or leather straps to the sides of the bucket before you begin weaving.
Don’t be afraid to experiment and let your creativity guide you. The beauty of this DIY project is that there are no hard and fast rules. It’s all about having fun and creating something that you love.
We are confident that you’ll find this DIY bucket basket weaving project to be a fulfilling and enjoyable experience. It’s a chance to unleash your creativity, upcycle materials, and create a beautiful and functional piece for your home.
So, grab a bucket, gather your materials, and get weaving! We can’t wait to see what you create. Share your finished baskets with us on social media using #DIYBucketBasket. We’re eager to see your unique designs and hear about your experience. Happy weaving!
Frequently Asked Questions
What kind of bucket is best for this project?
The best type of bucket to use for DIY bucket basket weaving is a sturdy plastic bucket with a smooth surface. Avoid buckets with deep ridges or textures, as these can make weaving more difficult. A standard 5-gallon bucket is a good size to start with, but you can use smaller or larger buckets depending on your desired basket size. Make sure the bucket is clean and free of any debris before you begin. Also, consider the color of the bucket. If you plan to paint it, choose a light-colored bucket for better paint coverage. If you’re not painting it, choose a color that complements the rope or cord you’ll be using.
What type of rope or cord should I use?
The type of rope or cord you use will depend on the look you’re going for. Jute rope is a popular choice for a rustic, natural look. It’s durable, affordable, and easy to work with. Cotton cord is another great option, especially if you want to add a pop of color to your basket. It’s soft, flexible, and comes in a wide variety of colors. You can also use nylon rope, which is strong and water-resistant, making it a good choice for outdoor use. Experiment with different textures and thicknesses to find what you like best. Thicker rope will create a chunkier, more textured basket, while thinner rope will create a smoother, more refined look.
How do I start the weaving process?
Starting the weaving process can be a little tricky at first, but once you get the hang of it, it’s quite simple. Begin by securing the end of your rope or cord to the bottom of the bucket using hot glue or a strong adhesive. Then, start wrapping the rope around the bucket, working your way up from the bottom. Overlap each row slightly to create a tight, secure weave. As you weave, make sure to keep the tension consistent to avoid gaps or loose spots. You can use clothespins or binder clips to hold the rope in place as you work.
How do I finish the weaving process?
Finishing the weaving process is just as important as starting it. When you reach the top of the bucket, carefully tuck the end of the rope or cord under the last row of weaving. Secure it in place with hot glue or a strong adhesive. Trim any excess rope or cord to create a clean, finished edge. You can also add a decorative trim to the top of the basket by gluing on ribbon, lace, or other embellishments.
How do I clean my woven bucket basket?
Cleaning your woven bucket basket is relatively easy. For minor spills or stains, simply wipe the affected area with a damp cloth. For more stubborn stains, you can use a mild soap and water solution. Avoid using harsh chemicals or abrasive cleaners, as these can damage the rope or cord. If your basket gets wet, be sure to dry it thoroughly to prevent mold or mildew growth. You can also use a vacuum cleaner with a brush attachment to remove dust and debris from the basket.
Can I use this technique on other containers besides buckets?
Yes, absolutely! While this article focuses on DIY bucket basket weaving, the same technique can be applied to other containers as well. Consider using old planters, storage bins, or even cardboard boxes. Just make sure the container is sturdy enough to support the weaving process. You may need to adjust the amount of rope or cord you use depending on the size and shape of the container.
How long does this project take?
The amount of time it takes to complete this project will depend on your skill level, the size of the bucket, and the complexity of the weaving pattern. A simple basket can be completed in a few hours, while a more intricate design may take several days. Don’t rush the process. Take your time and enjoy the creative journey.
What if my rope keeps slipping?
If your rope keeps slipping while you’re weaving, there are a few things you can try. First, make sure you’re using a strong adhesive to secure the rope to the bucket. Hot glue is a good option, but you can also use a construction adhesive or epoxy. Second, try using clothespins or binder clips to hold the rope in place as you work. This will help to keep the tension consistent and prevent the rope from slipping. Finally, make sure you’re overlapping each row of weaving slightly to create a tight, secure weave.
Can I add handles to my woven bucket basket?
Yes, adding handles to your woven bucket basket is a great way to make it more functional. You can use rope, leather straps, or even metal handles. To attach the handles, simply drill holes in the sides of the bucket before you begin weaving. Then, thread the handles through the holes and secure them in place with knots or screws. Make sure the handles are strong enough to support the weight of the basket when it’s full.
What if I make a mistake while weaving?
Don’t worry, mistakes happen! If you make a mistake while weaving, simply undo the affected area and start again. It’s easier to fix a mistake early on than to try to correct it later. If you’re using hot glue, you can use a heat gun to soften the glue and make it easier to remove the rope.
Leave a Comment