

Baking soda peroxide teeth whitening: Are you dreaming of a dazzling smile without the hefty price tag of professional treatments? I know I am! We’ve all seen those picture-perfect smiles and wondered how to achieve that level of brightness ourselves. Well, you’re in luck because I’m about to share a simple, effective, and budget-friendly DIY trick that utilizes two common household ingredients: baking soda and hydrogen peroxide.
The use of baking soda for oral hygiene dates back centuries, with ancient civilizations employing it to clean and whiten their teeth. Combined with the oxidizing power of hydrogen peroxide, this dynamic duo creates a potent yet gentle whitening solution. But why is this DIY method so appealing today? In a world obsessed with aesthetics and self-care, a brighter smile can boost confidence and leave a lasting impression. However, professional whitening treatments can be expensive and sometimes harsh on sensitive teeth. That’s where this baking soda peroxide teeth whitening hack comes in – offering a natural and affordable alternative for achieving a noticeably brighter smile from the comfort of your own home. So, let’s dive in and unlock the secrets to a radiant, confident you!
DIY Teeth Whitening with Baking Soda and Hydrogen Peroxide: A Comprehensive Guide
Hey everyone! Ready to ditch those expensive whitening strips and embrace a brighter smile using ingredients you probably already have in your pantry? I’m going to walk you through a simple, effective, and budget-friendly method for whitening your teeth at home using baking soda and hydrogen peroxide. Let’s get started!
What You’ll Need
Before we dive in, let’s gather our supplies. This is a pretty straightforward process, so you won’t need a ton of fancy equipment.
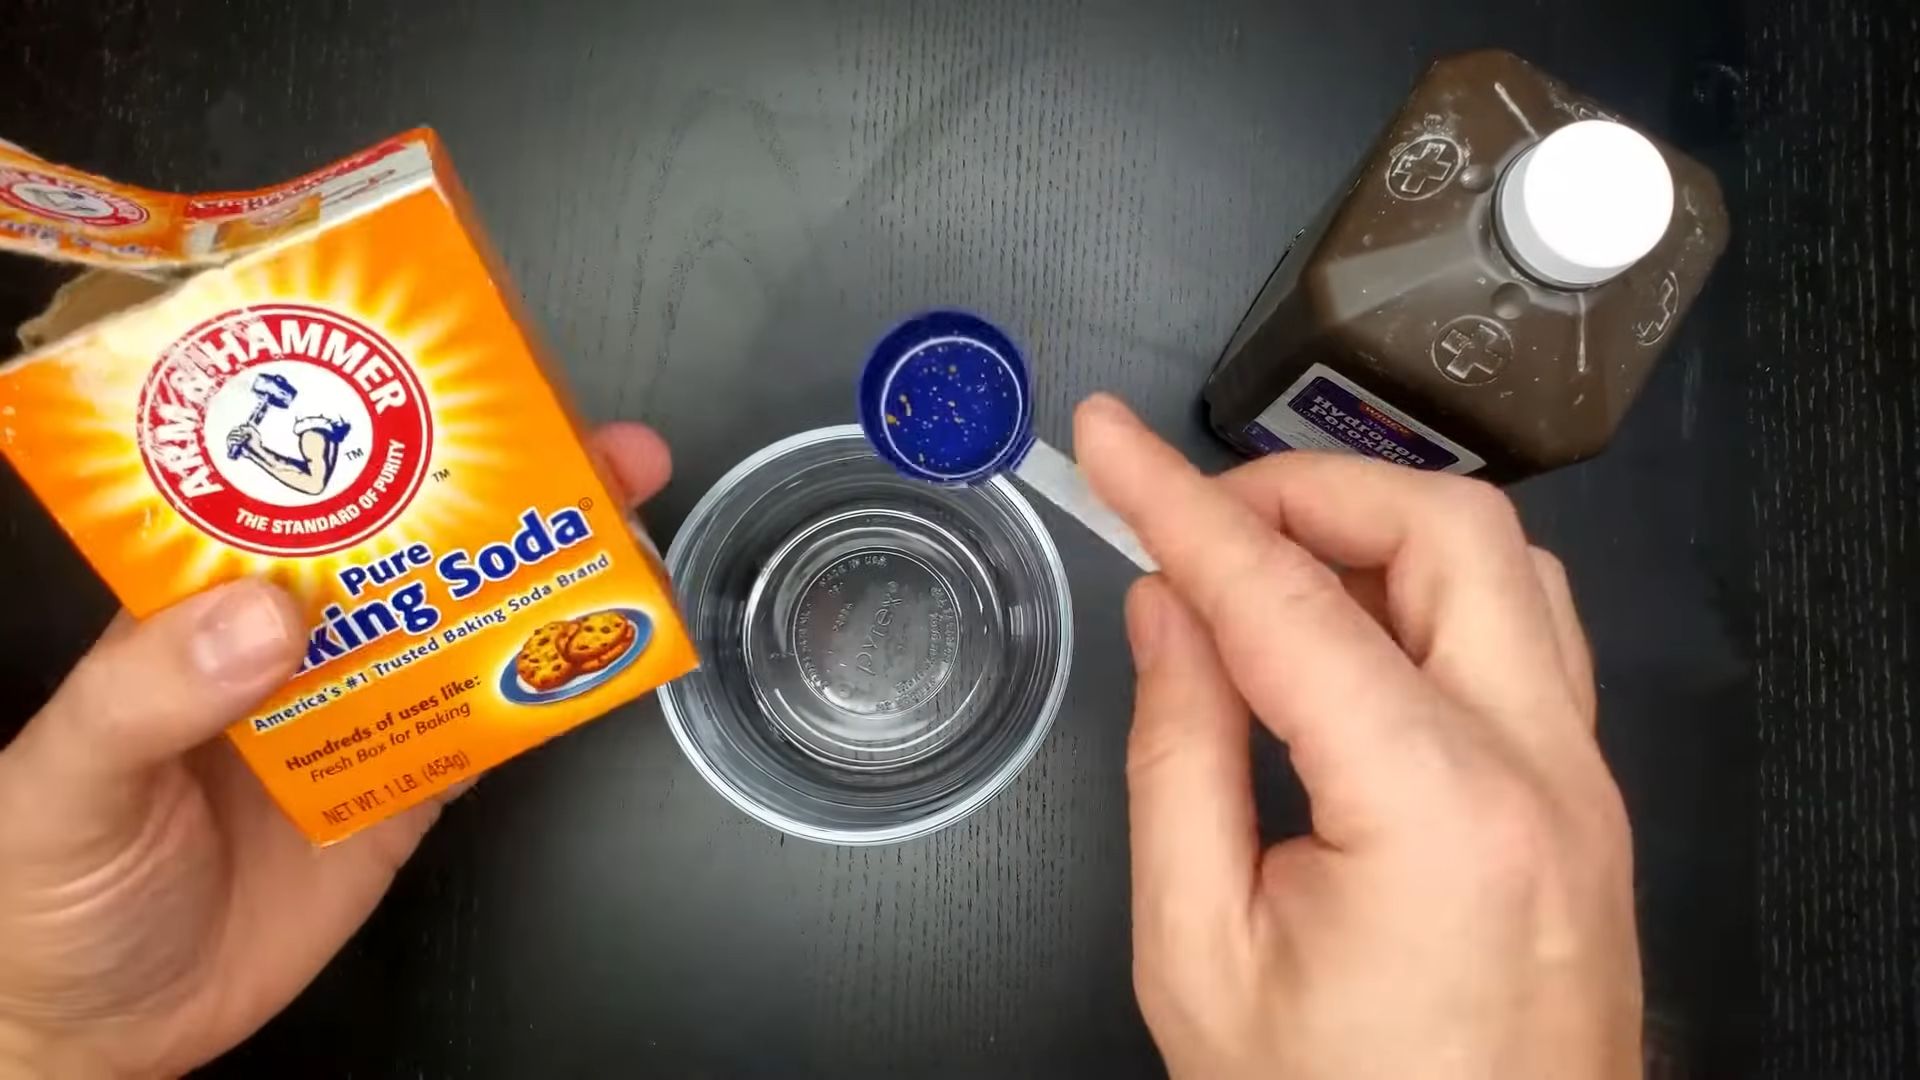
* Baking Soda: This is our gentle abrasive, helping to scrub away surface stains. Make sure you’re using regular baking soda (sodium bicarbonate), not baking powder.
* Hydrogen Peroxide (3%): This is the standard concentration you find at the drugstore. It acts as a bleaching agent, breaking down stain molecules. Do not use higher concentrations without consulting a dentist!
* Toothbrush: A soft-bristled toothbrush is best to avoid irritating your gums.
* Small Bowl or Dish: For mixing our whitening paste.
* Mirror: Essential for applying the paste evenly.
* Water (Optional): To adjust the consistency of the paste if needed.
* Timer: To keep track of the application time.
* Lip Balm (Optional): Hydrogen peroxide can sometimes dry out your lips, so a little lip balm beforehand can help.
Understanding the Science (A Little Bit!)
Okay, I promise I won’t bore you with a full-blown chemistry lesson, but it’s helpful to understand *why* this works. Baking soda is a mild abrasive, meaning it gently scrubs away surface stains like those from coffee, tea, or red wine. Hydrogen peroxide, on the other hand, is a bleaching agent. It penetrates the enamel and breaks down the molecules that cause discoloration. Together, they create a powerful, yet relatively gentle, whitening effect.
Important Note: This method primarily targets surface stains. It won’t drastically change the base color of your teeth. Also, it’s crucial to use this method in moderation to avoid damaging your enamel.
Mixing Your Whitening Paste
This is where the magic happens! Getting the right consistency is key.
1. Start with Baking Soda: Place about 1-2 teaspoons of baking soda into your small bowl or dish. I usually start with 1 teaspoon and add more if needed.
2. Add Hydrogen Peroxide Gradually: Slowly pour in the hydrogen peroxide, a little at a time, while mixing with a spoon or your toothbrush. You’re aiming for a paste-like consistency, similar to toothpaste. It shouldn’t be too runny or too thick.
3. Adjust as Needed: If the mixture is too thick, add a tiny bit more hydrogen peroxide. If it’s too runny, add a little more baking soda. The goal is a smooth, spreadable paste that will adhere to your teeth.
4. Optional: Add a Drop of Peppermint Extract: If you want to freshen up the taste, you can add a single drop of peppermint extract. Be careful not to add too much, as it can be overpowering.
Applying the Paste and Whitening
Now for the fun part!
1. Prepare Your Teeth: Before applying the paste, rinse your mouth thoroughly with water. This helps remove any loose food particles.
2. Apply the Paste: Using your toothbrush, scoop up a small amount of the baking soda and hydrogen peroxide paste. Gently apply it to your teeth, making sure to cover all surfaces. You don’t need to scrub aggressively; just ensure each tooth is coated.
3. Set the Timer: Set a timer for 2 minutes. This is the maximum recommended time for this treatment. Do not exceed 2 minutes!
4. Keep Your Mouth Open (Slightly): Try to keep your mouth slightly open during the 2 minutes to allow the hydrogen peroxide to work its magic. You might experience some slight bubbling or foaming, which is normal.
5. Rinse Thoroughly: After the 2 minutes are up, rinse your mouth thoroughly with water. Make sure to remove all traces of the baking soda and hydrogen peroxide paste.
6. Brush with Regular Toothpaste: After rinsing, brush your teeth with your regular toothpaste to remove any remaining residue and freshen your breath.
Post-Whitening Care
Taking care of your teeth after whitening is just as important as the whitening process itself.
1. Avoid Staining Foods and Drinks: For the next few hours after whitening, try to avoid foods and drinks that are known to stain teeth, such as coffee, tea, red wine, berries, and dark sauces.
2. Stay Hydrated: Drink plenty of water to help keep your mouth clean and hydrated.
3. Use a Straw: If you do consume staining beverages, consider using a straw to minimize contact with your teeth.
4. Maintain Good Oral Hygiene: Continue to brush and floss regularly to maintain your bright smile.
How Often Should You Do This?
This is a crucial question! Overdoing it can damage your enamel, leading to sensitivity and other dental problems.
* Start Slowly: I recommend starting with once a week.
* Assess Your Sensitivity: Pay close attention to how your teeth feel. If you experience any sensitivity, reduce the frequency or stop altogether.
* Maximum Frequency: I wouldn’t recommend doing this more than twice a week, and even that might be too much for some people. Listen to your body!
* Take Breaks: Consider taking breaks from this whitening method every few weeks to give your teeth a rest.
Troubleshooting and Common Concerns
Let’s address some common questions and concerns you might have.
* Sensitivity: If you experience sensitivity, try using a toothpaste designed for sensitive teeth. You can also reduce the frequency of the whitening treatments or shorten the application time.
* Gum Irritation: If you notice any gum irritation, make sure you’re using a soft-bristled toothbrush and applying the paste gently. You can also try applying a thin layer of petroleum jelly to your gums before whitening to protect them.
* Uneven Whitening: If you notice uneven whitening, make sure you’re applying the paste evenly to all surfaces of your teeth. You can also try using a cotton swab to target specific areas.
* Taste: Some people find the taste of baking soda and hydrogen peroxide unpleasant. Adding a drop of peppermint extract can help, but be careful not to add too much.
When to See a Dentist
While this DIY method can be effective, it’s not a substitute for professional dental care.
* Regular Checkups: Continue to see your dentist for regular checkups and cleanings.
* Persistent Stains: If you have stubborn stains that don’t respond to this method, consult your dentist. They may recommend professional whitening treatments.
* Dental Problems: If you experience any dental problems, such as pain, swelling, or bleeding, see your dentist immediately.
Alternatives and Enhancements
Want to boost your whitening efforts? Here are a few ideas:
* Oil Pulling: Swishing coconut oil in your mouth for 15-20 minutes a day can help remove bacteria and surface stains.
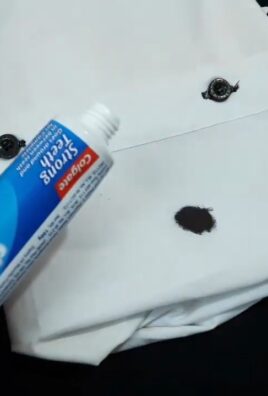
* Activated Charcoal: Some people swear by activated charcoal for whitening. It’s abrasive, so use it sparingly and with caution.
* Whitening Toothpaste: Use a whitening toothpaste in between your DIY treatments to help maintain your bright smile.
* Diet: A healthy diet rich in fruits and vegetables can help keep your teeth healthy and bright.
Safety First!
I can’t stress this enough: safety is paramount.
* Use the Correct Concentration of Hydrogen Peroxide: Only use 3% hydrogen peroxide. Higher concentrations can damage your enamel and gums.
* Don’t Swallow the Paste: Avoid swallowing the baking soda and hydrogen peroxide paste.
* Limit the Application Time: Don’t exceed the recommended application time of 2 minutes.
* Monitor Your Teeth: Pay close attention to how your teeth feel and adjust the frequency of treatments accordingly.
* Consult Your Dentist: If you have any concerns, consult your dentist before trying this method.
My Personal Experience
I’ve been using this method for years, and I’ve seen noticeable results. My teeth are definitely brighter, and I love that I can achieve this without spending a fortune on expensive whitening products. However, I always listen to my body and adjust the frequency of treatments based on how my teeth feel. I also make sure to maintain good oral hygiene and see my dentist regularly.
I hope this guide has been helpful! Remember, a bright smile is a confident smile. Happy whitening!
Conclusion
So, there you have it! This simple yet effective baking soda peroxide teeth whitening trick is a game-changer for anyone seeking a brighter smile without breaking the bank or resorting to harsh chemicals. We’ve explored how these two readily available ingredients, baking soda and hydrogen peroxide, can work synergistically to gently lift stains and reveal a more radiant you.
Why is this a must-try? Because it’s accessible, affordable, and offers a noticeable difference with consistent use. Unlike expensive whitening strips or professional treatments, this DIY method puts you in control. You can adjust the consistency and frequency to suit your individual needs and sensitivity levels. Plus, you likely already have these ingredients in your pantry and medicine cabinet!
But the benefits extend beyond just cost and convenience. This method is also less abrasive than many commercial whitening products, making it a gentler option for those with sensitive teeth and gums. While it’s crucial to use the correct proportions and avoid overuse, the potential for a brighter, healthier-looking smile is undeniable.
Looking for variations? Consider adding a drop of peppermint essential oil to your mixture for a refreshing taste and breath-freshening boost. You could also experiment with different consistencies, creating a paste that’s either thicker for targeted stain removal or thinner for a more general application. Remember to always listen to your body and adjust the recipe accordingly. If you experience any sensitivity, reduce the frequency of use or discontinue altogether.
We’re confident that this baking soda peroxide teeth whitening method will become a staple in your oral hygiene routine. It’s a simple, effective, and budget-friendly way to achieve a brighter, more confident smile.
Now, it’s your turn! We encourage you to give this DIY trick a try and see the results for yourself. Remember to take before-and-after photos to track your progress and share your experience with us in the comments below. We’re eager to hear your tips, variations, and success stories. Let’s build a community of radiant smiles, one baking soda and peroxide mixture at a time! Don’t forget to consult with your dentist before starting any new teeth whitening regimen, especially if you have existing dental conditions. Your dentist can provide personalized advice and ensure that this method is suitable for your specific needs. We believe in empowering you to take control of your oral health, and this DIY trick is just one step towards achieving a brighter, healthier, and more confident you. So go ahead, give it a try, and let your smile shine!
Frequently Asked Questions (FAQ)
Is baking soda and peroxide safe for my teeth?
When used correctly and in moderation, baking soda and hydrogen peroxide are generally considered safe for teeth whitening. However, overuse or incorrect proportions can lead to enamel erosion and increased sensitivity. It’s crucial to use the recommended ratio (usually 1 part hydrogen peroxide to 2 parts baking soda) and avoid brushing too vigorously. Always consult with your dentist before starting any new teeth whitening regimen, especially if you have existing dental conditions like gum disease or sensitive teeth. They can assess your individual needs and advise on the best approach for you.
How often can I use this baking soda peroxide teeth whitening method?
The frequency of use depends on your individual sensitivity and the concentration of hydrogen peroxide you’re using. As a general guideline, start with using it no more than 2-3 times per week. If you experience any sensitivity, reduce the frequency to once a week or discontinue use altogether. It’s important to listen to your body and adjust the frequency accordingly. Remember, consistency is key, but not at the expense of your enamel health. Overdoing it can lead to irreversible damage.
What concentration of hydrogen peroxide should I use?
It’s generally recommended to use a 3% hydrogen peroxide solution, which is readily available at most drugstores. Higher concentrations can be more effective but also increase the risk of sensitivity and enamel damage. Avoid using concentrations higher than 3% without consulting with your dentist. Diluting a higher concentration solution is not recommended as it can be difficult to accurately measure and may still pose a risk.
How long should I leave the baking soda and peroxide mixture on my teeth?
You should leave the mixture on your teeth for no more than 2 minutes. Longer exposure times can increase the risk of sensitivity and enamel erosion. After 2 minutes, rinse your mouth thoroughly with water. Avoid swallowing the mixture.
Will this baking soda peroxide teeth whitening method work for everyone?
The effectiveness of this method can vary depending on the type and severity of staining. It’s generally more effective for removing surface stains caused by coffee, tea, and smoking. Deeper stains may require professional whitening treatments. Also, individuals with certain dental conditions, such as enamel erosion or gum disease, may not be suitable candidates for this method. It’s always best to consult with your dentist to determine the best whitening option for your specific needs.
Can I use this method if I have fillings or crowns?
Baking soda and peroxide are generally safe to use on fillings and crowns. However, it’s important to be gentle and avoid excessive scrubbing, as this could potentially damage the surface of these restorations. If you have any concerns, consult with your dentist before using this method.
What are the potential side effects of using baking soda and peroxide for teeth whitening?
The most common side effects are tooth sensitivity and gum irritation. These side effects are usually temporary and subside within a few days of discontinuing use. However, overuse or incorrect proportions can lead to more serious side effects, such as enamel erosion and increased risk of cavities. If you experience any persistent or severe side effects, discontinue use and consult with your dentist.
Can I add other ingredients to the baking soda and peroxide mixture?
While you can add a drop of peppermint essential oil for flavor, it’s generally not recommended to add other ingredients to the mixture without consulting with your dentist. Some ingredients may interact negatively with baking soda and peroxide or cause irritation. Stick to the basic recipe and adjust the consistency and frequency of use to suit your individual needs.
How long will it take to see results?
Results can vary depending on the severity of staining and the frequency of use. Some people may see a noticeable difference after just a few uses, while others may require several weeks of consistent use to see significant results. Be patient and consistent with your routine, and remember to take before-and-after photos to track your progress.
Is this baking soda peroxide teeth whitening method a substitute for professional teeth whitening?
No, this DIY method is not a substitute for professional teeth whitening. While it can help to remove surface stains and brighten your smile, it’s not as effective as professional treatments for removing deeper stains or achieving dramatic results. Professional teeth whitening treatments use stronger concentrations of whitening agents and are performed under the supervision of a dentist, ensuring safety and effectiveness. This DIY method is best used as a supplementary treatment to maintain your smile between professional whitening appointments.

Leave a Comment