

Indoor fern care tips – are you ready to transform your home into a lush, green oasis? I know I am! There’s something incredibly calming and rewarding about nurturing indoor plants, and ferns, with their delicate fronds and vibrant green hues, are a fantastic choice. But let’s be honest, keeping these beauties thriving indoors can sometimes feel like a bit of a challenge.
Ferns have a rich history, dating back millions of years! They’ve been admired and cultivated across cultures, from ancient civilizations using them for medicinal purposes to Victorian England, where “fern fever” swept the nation, turning them into highly sought-after decorative plants. Today, we continue to appreciate their beauty and the touch of nature they bring into our homes.
That’s why I’ve put together this guide packed with easy-to-follow indoor fern care tips and DIY hacks. Many people struggle with providing the right humidity, light, and watering conditions that ferns crave. This often leads to browning leaves, stunted growth, and ultimately, a sad-looking plant. But don’t worry, I’m here to help you avoid those common pitfalls! I’ll share my secrets for creating the perfect environment for your ferns to flourish, ensuring they bring joy and a touch of the outdoors into your living space for years to come.
Reviving Your Fern: A DIY Guide to Lush Indoor Fronds
Okay, fern fanatics! Let’s face it, those delicate, feathery fronds can be a bit… temperamental indoors. But don’t despair! I’m going to walk you through a step-by-step guide to not only keep your fern alive but help it thrive and become the envy of all your plant-loving friends. We’ll cover everything from assessing its current condition to creating the perfect environment for it to flourish.
Assessing Your Fern’s Current State
Before we dive into the rescue mission, let’s take a good look at your fern. This will help us understand what it needs.
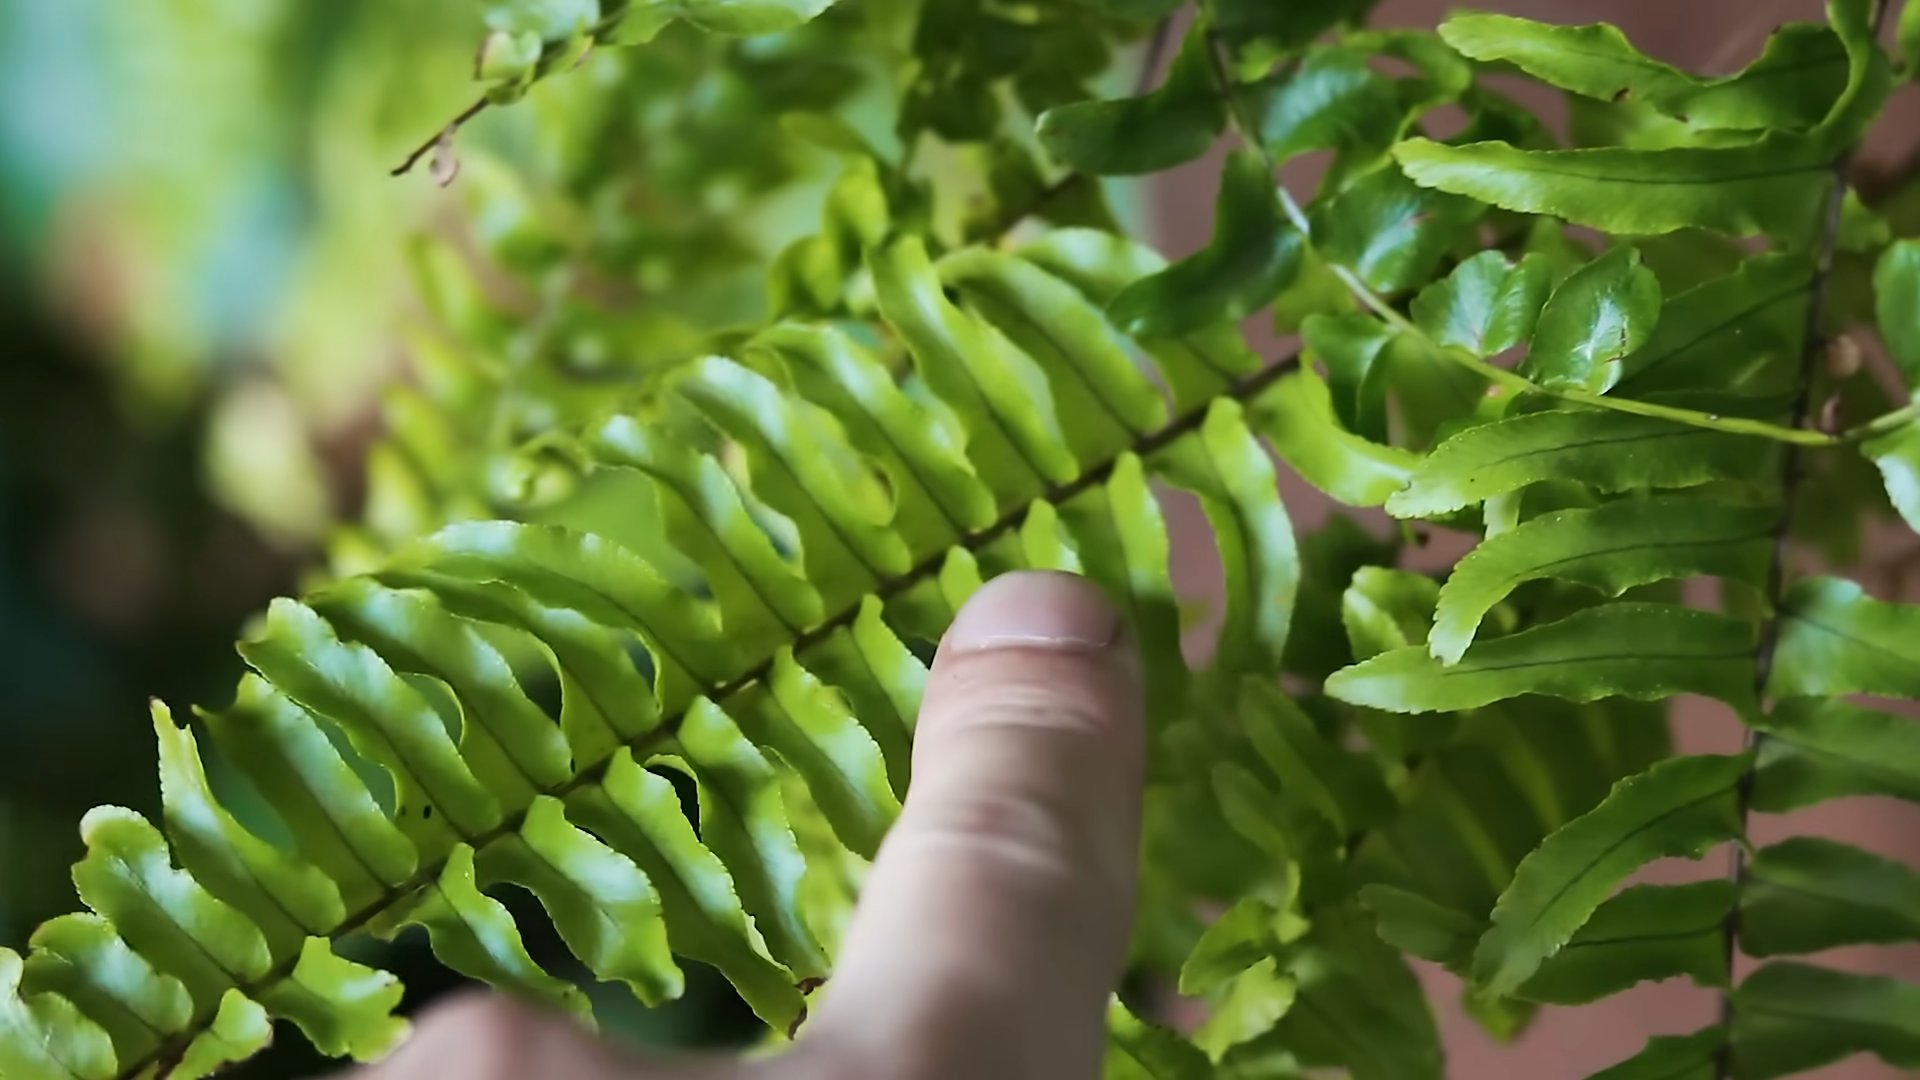
* Frond Color: Are the fronds vibrant green, yellowing, browning, or crispy? Green is good! Yellowing usually indicates overwatering or nutrient deficiency. Brown and crispy fronds often mean the air is too dry or the fern is underwatered.
* Soil Condition: Is the soil soggy, dry, or just right? Soggy soil can lead to root rot, while dry soil means your fern is thirsty. Ideally, the soil should be consistently moist, like a wrung-out sponge.
* Pest Check: Examine the fronds and soil for any signs of pests like spider mites, mealybugs, or scale. These little critters can suck the life out of your fern.
* Pot Size: Is your fern root-bound? Gently try to lift the fern from its pot. If the roots are tightly circling the inside of the pot, it’s time for a bigger home.
* Location: Where is your fern currently located? Is it getting too much direct sunlight, or is it in a dark corner? Ferns generally prefer bright, indirect light.
Creating the Perfect Environment
Ferns are all about mimicking their natural habitat – a shady, humid forest floor. Here’s how we can recreate that indoors:
* Light: Bright, indirect light is key. Avoid direct sunlight, which can scorch the fronds. An east-facing window is often ideal. If you only have a south-facing window, place the fern further back in the room or use a sheer curtain to diffuse the light.
* Humidity: Ferns love humidity! Aim for at least 50%. There are several ways to increase humidity:
* Humidifier: A humidifier is the most effective way to maintain consistent humidity levels.
* Pebble Tray: Fill a tray with pebbles and add water, ensuring the water level is below the top of the pebbles. Place your fern on top of the pebbles. As the water evaporates, it will increase the humidity around the plant.
* Grouping Plants: Grouping plants together creates a microclimate with higher humidity.
* Misting: Misting the fronds regularly can help, but it’s not as effective as other methods and can sometimes lead to fungal problems if the fronds stay too wet for too long.
* Temperature: Ferns prefer temperatures between 65-75°F (18-24°C). Avoid placing them near drafts or heat sources.
* Watering: Water thoroughly when the top inch of soil feels dry to the touch. Use room-temperature water and make sure the pot has drainage holes to prevent waterlogging.
* Soil: Use a well-draining potting mix that retains moisture. A mix of peat moss, perlite, and vermiculite works well.
* Fertilizing: Feed your fern with a diluted liquid fertilizer every 4-6 weeks during the growing season (spring and summer). Use a balanced fertilizer or one specifically formulated for ferns.
Step-by-Step Fern Revival Guide
Now, let’s get our hands dirty and bring your fern back to life!
1. Repotting (If Necessary): If your fern is root-bound, it’s time to repot it.
* Choose a Pot: Select a pot that is 1-2 inches larger in diameter than the current pot. Make sure it has drainage holes.
* Prepare the Potting Mix: Fill the new pot with a well-draining potting mix.
* Remove the Fern: Gently remove the fern from its current pot. You may need to loosen the soil around the edges.
* Loosen the Roots: Gently loosen the roots, being careful not to damage them. If the roots are tightly circling the pot, you can trim them slightly.
* Plant the Fern: Place the fern in the new pot and fill in around the roots with potting mix. Gently pat down the soil.
* Water Thoroughly: Water the fern thoroughly after repotting.
2. Addressing Browning Fronds: Brown, crispy fronds are a common problem.
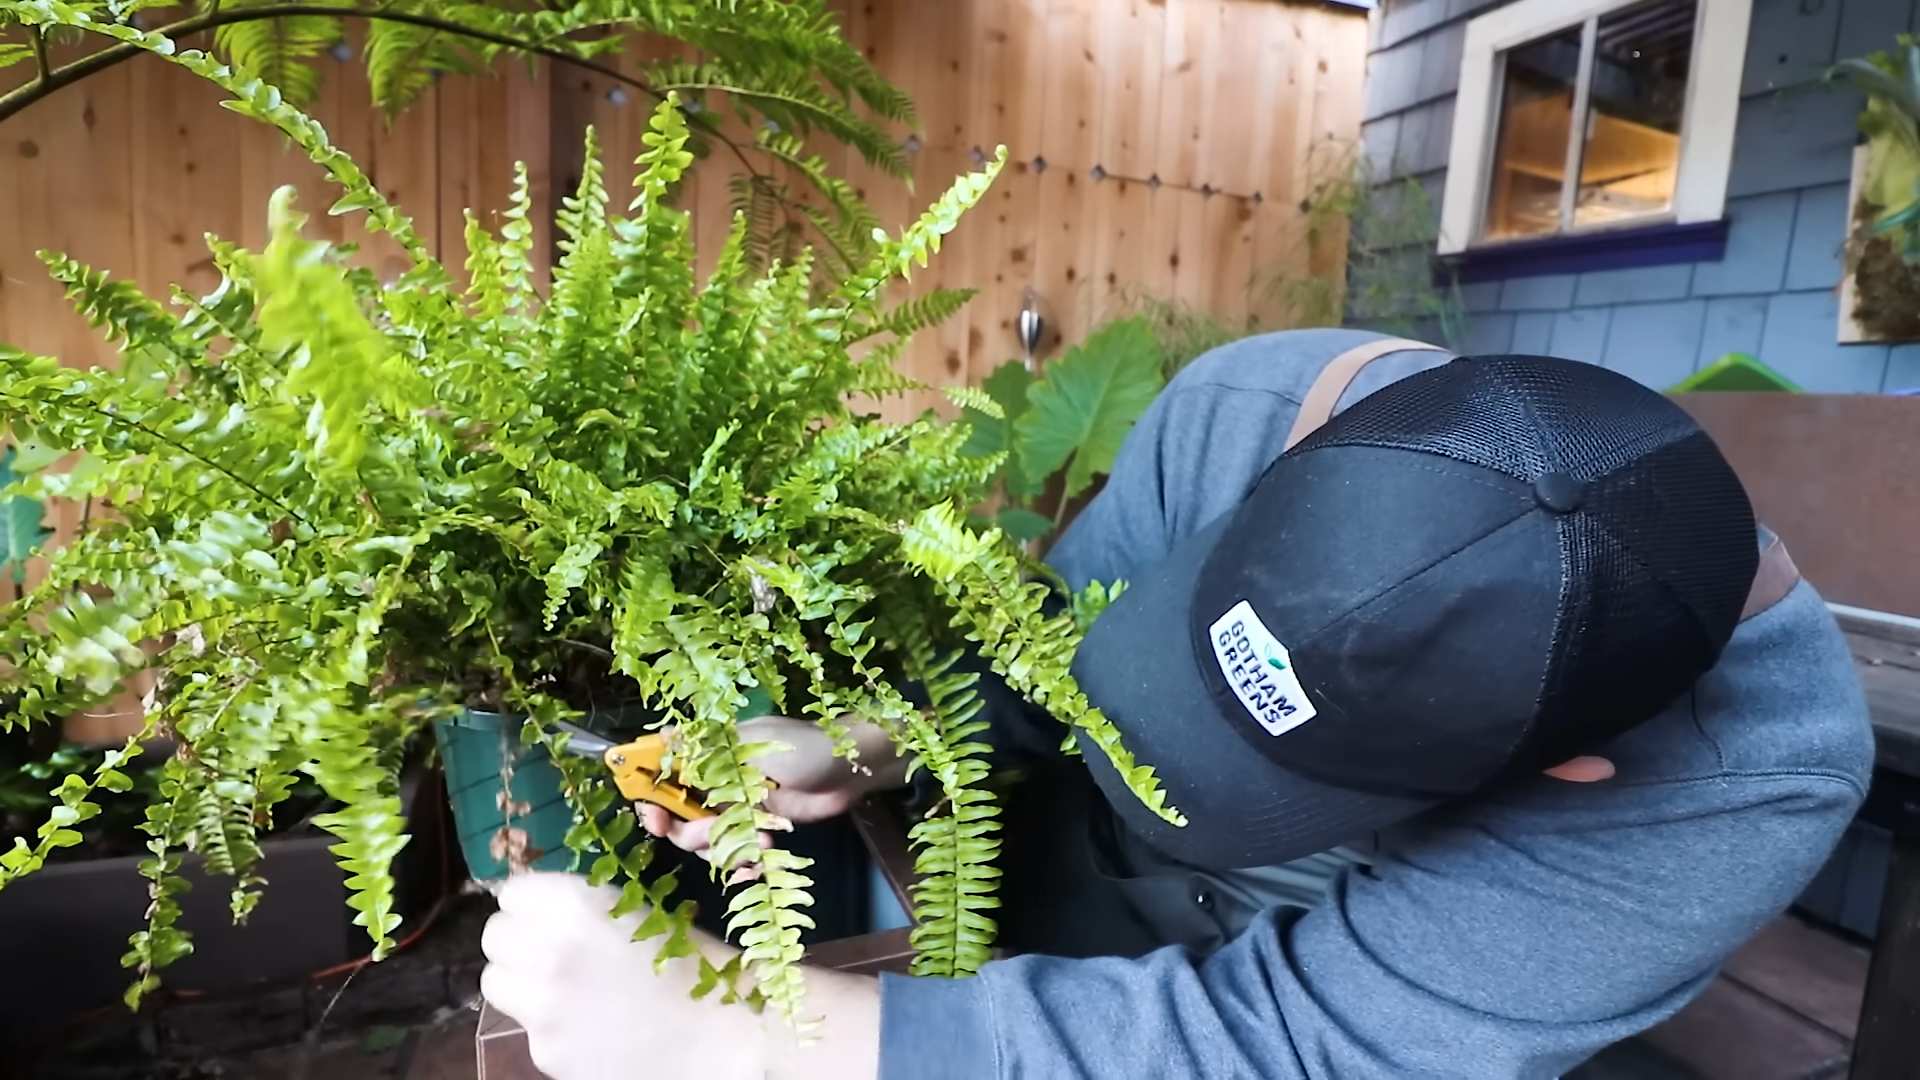
* Prune the Damage: Using clean, sharp scissors or pruning shears, carefully trim away any brown or crispy fronds. Cut them back to the base of the plant. Don’t worry, this won’t hurt the fern; it will encourage new growth.
* Increase Humidity: Implement one or more of the humidity-boosting methods mentioned earlier (humidifier, pebble tray, grouping plants).
* Check Watering: Make sure you’re watering correctly. The soil should be consistently moist, but not soggy.
* Improve Air Circulation: Ensure there’s good air circulation around the fern, but avoid drafts.
3. Dealing with Yellowing Fronds: Yellowing fronds can indicate overwatering or nutrient deficiency.
* Check Watering: If the soil is soggy, you’re likely overwatering. Allow the soil to dry out slightly before watering again.
* Improve Drainage: Make sure the pot has drainage holes and that the potting mix is well-draining.
* Fertilize: If you haven’t fertilized your fern recently, it may be lacking nutrients. Feed it with a diluted liquid fertilizer.
* Check Light: While ferns don’t like direct sunlight, they still need adequate light. Make sure your fern is getting enough bright, indirect light.
4. Pest Control: If you spot any pests, take action immediately.
* Isolate the Fern: Isolate the infested fern from other plants to prevent the pests from spreading.
* Wash the Fronds: Gently wash the fronds with a mild soap and water solution. You can use a soft cloth or sponge to wipe the fronds.
* Insecticidal Soap or Neem Oil: If the infestation is severe, you can use insecticidal soap or neem oil. Follow the instructions on the product label carefully.
* Repeat Treatment: Repeat the treatment every few days until the pests are gone.
5. Watering Techniques: Getting the watering right is crucial for fern health.
* Check Soil Moisture: Before watering, always check the soil moisture. Stick your finger about an inch into the soil. If it feels dry, it’s time to water.
* Water Thoroughly: When you water, water thoroughly until water drains out of the drainage holes. This ensures that the entire root ball is moistened.
* Empty the Saucer: Empty the saucer under the pot after watering to prevent the fern from sitting in water, which can lead to root rot.
* Use Room-Temperature Water: Avoid using cold water, as it can shock the fern. Use room-temperature water instead.
6. Light Adjustment: Finding the right light balance is essential.
* Observe the Fern: Pay attention to how your fern is reacting to the light. If the fronds are turning pale or yellow, it may be getting too much light. If the fronds are becoming leggy or sparse, it may not be getting enough light.
* Move the Fern: Adjust the fern’s location based on your observations. Experiment with different spots in your home until you find the perfect balance.
* Consider Artificial Light: If you don’t have enough natural light, you can supplement with artificial light. Use a grow light specifically designed for plants.
Maintaining Your Thriving Fern
Once you’ve revived your fern, it’s important to maintain its health.
* Regularly Check for Pests: Inspect your fern regularly for any signs of pests.
* Dust the Fronds: Dust can accumulate on the fronds, blocking sunlight and hindering photosynthesis. Gently dust the fronds with a soft cloth or sponge.
* Rotate the Fern: Rotate the fern regularly to ensure that all sides get equal light exposure.
* Prune Regularly: Trim away any dead or damaged fronds to encourage new growth.
* Enjoy Your Beautiful Fern! With a little care and attention, your fern will thrive and bring beauty to your home.
Troubleshooting Common Fern Problems
Even with the best care, you might encounter some challenges
Conclusion
So, there you have it! Mastering indoor fern care doesn’t require a green thumb blessed by the plant gods. It’s about understanding their needs and providing the right environment. This DIY humidity trick, the pebble tray, is a game-changer for keeping your ferns thriving, especially in drier climates or during the winter months when indoor heating sucks the moisture right out of the air.
Why is this a must-try? Because it’s simple, affordable, and incredibly effective. You’re not just adding water to a tray; you’re creating a microclimate around your fern that mimics its natural, humid habitat. This translates to lusher, greener fronds, reduced browning tips, and an overall happier, healthier plant. Forget constantly misting (which can sometimes lead to fungal issues if not done correctly) or investing in expensive humidifiers. This pebble tray is your low-maintenance, high-impact solution.
Looking to take it a step further? Consider these variations:
* Aromatic Enhancement: Add a few drops of essential oils like eucalyptus or tea tree oil to the water in the tray. This can help purify the air and provide a subtle, refreshing scent. Just be sure to use oils that are safe for pets if you have any furry friends.
* Decorative Flair: Get creative with your pebble selection! Use colorful glass beads, polished stones, or even seashells to add a touch of personality to your plant display. The pebble tray doesn’t have to be purely functional; it can be a beautiful addition to your home decor.
* Terracotta Upgrade: Instead of a standard plastic tray, use a shallow terracotta dish. Terracotta is porous and will absorb some of the water, creating even more humidity as it evaporates. Just be mindful that it might require more frequent refills.
* Group Effort: If you have multiple humidity-loving plants, create a larger pebble tray to accommodate them all. Grouping plants together naturally increases humidity levels, so this is a win-win situation.
Don’t let the reputation of ferns as finicky plants intimidate you. With this simple DIY humidity trick, you can provide the perfect environment for your ferns to flourish. We’re confident that you’ll see a noticeable difference in the health and vibrancy of your plants.
Now, it’s your turn! Give this pebble tray trick a try and see the magic for yourself. We’d love to hear about your experience. Share your before-and-after photos, tips, and any variations you’ve tried in the comments below. Let’s create a community of thriving fern enthusiasts! Happy growing!
Frequently Asked Questions (FAQs)
What kind of pebbles should I use for the pebble tray?
You can use a variety of pebbles for your pebble tray. River rocks, aquarium gravel, decorative glass beads, or even seashells are all suitable options. The most important thing is to choose pebbles that are clean and non-toxic. Avoid using pebbles that have been treated with chemicals or dyes that could leach into the water and harm your plant. Make sure the pebbles are large enough that they won’t fall through the drainage holes of your pot. A good size is generally between 0.5 and 1.5 inches in diameter.
How often should I refill the water in the pebble tray?
The frequency of refilling the water in your pebble tray depends on several factors, including the humidity of your home, the size of the tray, and the temperature. Check the water level regularly, ideally every day or every other day. Refill the tray when the water level drops below the top of the pebbles. You want the pebbles to be consistently moist but not submerged in water. During drier months or in homes with central heating, you may need to refill the tray more frequently.
Can I use tap water in the pebble tray?
While tap water is generally safe to use, it can contain minerals and chemicals that can build up over time and potentially harm your fern. It’s best to use filtered water, distilled water, or rainwater in your pebble tray. This will help prevent mineral deposits from forming on the pebbles and in the soil of your plant. If you only have access to tap water, let it sit out for 24 hours before using it to allow chlorine and other chemicals to evaporate.
Will the pebble tray attract bugs?
A properly maintained pebble tray should not attract bugs. However, if the water becomes stagnant or algae starts to grow, it can create a breeding ground for mosquitoes or other pests. To prevent this, change the water in the tray regularly, at least once a week. You can also add a few drops of hydrogen peroxide to the water to help prevent algae growth. Ensure the pebbles are clean and free of debris. If you notice any signs of pests, clean the tray thoroughly and consider using a natural insect repellent.
How do I clean the pebble tray?
Cleaning your pebble tray regularly is essential to prevent the buildup of mineral deposits, algae, and bacteria. Remove the pebbles from the tray and rinse them thoroughly with water. You can also soak them in a solution of water and vinegar (1 part vinegar to 10 parts water) for about 30 minutes to help remove mineral deposits. Scrub the tray with a brush and soapy water, then rinse it well. Allow the pebbles and tray to dry completely before reassembling. Aim to clean your pebble tray every 2-4 weeks, or more frequently if you notice any signs of buildup.
My fern is still turning brown even with the pebble tray. What else could be the problem?
While the pebble tray is an excellent way to increase humidity, other factors can contribute to browning fronds on your fern. Consider these possibilities:
* Watering: Ferns need consistently moist soil, but they don’t like to sit in soggy soil. Water your fern when the top inch of soil feels dry to the touch. Ensure your pot has good drainage to prevent root rot.
* Light: Ferns prefer bright, indirect light. Avoid placing them in direct sunlight, which can scorch their leaves.
* Fertilizer: Ferns are light feeders. Fertilize them sparingly with a balanced liquid fertilizer diluted to half strength. Over-fertilizing can damage their roots.
* Temperature: Ferns prefer temperatures between 65°F and 75°F (18°C and 24°C). Avoid placing them near drafts or heat sources.
* Pests: Inspect your fern regularly for pests such as spider mites or mealybugs. Treat any infestations promptly with insecticidal soap or neem oil.
By addressing these factors in addition to using a pebble tray, you can create the optimal environment for your fern to thrive.
Can I use this pebble tray trick for other plants besides ferns?
Absolutely! While ferns are particularly fond of humidity, many other houseplants benefit from the increased moisture provided by a pebble tray. Plants like orchids, calatheas, peace lilies, and prayer plants also thrive in humid environments. If you have any plants that are showing signs of dryness, such as browning leaf tips or crispy edges, a pebble tray can be a simple and effective way to improve their health and appearance. Just be sure to research the specific humidity needs of each plant to ensure you’re providing the right environment.

Leave a Comment