

Grow Acai Berries at Home? Absolutely! Imagine stepping into your backyard and harvesting your own antioxidant-rich superfood. Sounds like a dream, right? Well, it’s more attainable than you might think! For centuries, the indigenous communities of the Amazon rainforest have revered the acai berry, not just for its nutritional power but also for its vital role in their culture and economy. Now, you can bring a piece of that Amazonian magic to your own garden.
But why bother with the effort? In today’s world, where healthy eating is a priority, having access to fresh, organic acai berries is a game-changer. Store-bought acai can be expensive and often lacks the freshness and potency of homegrown berries. Plus, there’s nothing quite like the satisfaction of nurturing a plant from seedling to harvest. This DIY guide will provide you with the essential tricks and hacks to successfully grow acai berries at home, even if you don’t have a tropical rainforest in your backyard. We’ll explore everything from choosing the right variety and providing the ideal growing conditions to protecting your precious plants from pests and diseases. Let’s get started on this exciting gardening adventure together!
Growing Acai Berries at Home: A Tropical Adventure in Your Backyard (or Balcony!)
Okay, so you want to grow acai berries at home? Awesome! It’s a bit of a challenge, especially if you don’t live in a tropical climate, but definitely achievable with a little planning and dedication. I’m going to walk you through everything you need to know, from understanding the plant’s needs to harvesting your own delicious berries. Let’s get started!
Understanding Acai Berry Needs
Before we dive into the how-to, let’s talk about what acai palms (Euterpe oleracea) actually need to thrive. This is crucial for success!
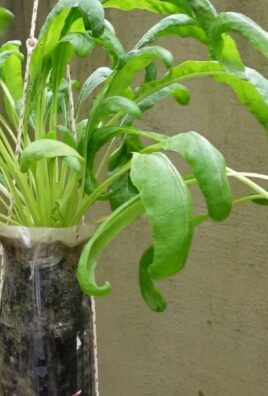
* Climate: Acai palms are native to the Amazon rainforest, so they love warm, humid conditions. Think temperatures consistently between 70°F and 90°F (21°C and 32°C). They can tolerate brief dips into the 60s, but prolonged cold will damage or even kill them. Frost is a definite no-no.
* Sunlight: They prefer partial shade, especially when young. Direct, intense sunlight can scorch their leaves. As they mature, they can handle more sun, but still appreciate some afternoon shade.
* Water: Acai palms are thirsty plants! They need consistently moist soil, but not waterlogged. Good drainage is essential to prevent root rot.
* Soil: They prefer slightly acidic soil that’s rich in organic matter. Think well-draining soil amended with compost, peat moss, or other organic materials.
* Humidity: High humidity is a must. Aim for at least 70% humidity. This can be tricky to achieve indoors or in drier climates, but we’ll talk about solutions.
* Space: Acai palms can grow quite tall (up to 50-100 feet in their natural habitat!), so consider this if you’re planning to grow them indoors or in a container. Dwarf varieties are available, but even those will need a good amount of space.
* Patience: Acai palms are not fast growers. It can take several years (3-5 years or more) before they start producing fruit. So, be prepared to be patient!
Sourcing Your Acai Palm
Now that you know what they need, let’s talk about getting your hands on an acai palm.
* Seeds: Growing from seed is possible, but it’s a very slow process and the germination rate can be low. You’ll need fresh seeds and a lot of patience.
* Seedlings/Young Plants: This is the most common and recommended way to start. You can often find acai palm seedlings or young plants at nurseries specializing in tropical plants or online retailers. Make sure you’re buying from a reputable source to ensure you’re getting a healthy plant.
* Check Local Regulations: Before you buy, check your local regulations regarding importing or growing acai palms. Some areas may have restrictions due to invasive species concerns.
Planting Your Acai Palm
Okay, you’ve got your acai palm! Time to get it planted.
Planting in a Container (Recommended for Most Home Growers)
This is the most practical option for most people, especially if you don’t live in a tropical climate.
1. Choose the Right Container: Select a large container, at least 24 inches in diameter and depth. Make sure it has drainage holes. A larger container is better, as it will give the roots more room to grow and help retain moisture.
2. Prepare the Soil: Mix a well-draining potting mix with plenty of organic matter. I like to use a combination of potting soil, peat moss, and compost. Aim for a slightly acidic pH (around 6.0-6.5). You can test the pH with a soil testing kit.
3. Planting: Gently remove the acai palm from its nursery pot. Loosen the roots slightly if they are root-bound. Place the plant in the center of the container and fill in around it with the prepared soil. Make sure the top of the root ball is level with the soil surface.
4. Water Thoroughly: Water the plant thoroughly after planting, until water drains out of the drainage holes. This will help settle the soil and ensure the roots are well-hydrated.
5. Mulch: Add a layer of mulch around the base of the plant to help retain moisture and suppress weeds. Use organic mulch like wood chips or shredded bark.
Planting in the Ground (If You Live in a Tropical Climate)
If you live in a tropical climate with consistently warm temperatures and high humidity, you can plant your acai palm directly in the ground.
1. Choose the Right Location: Select a location that receives partial shade, especially during the hottest part of the day. The soil should be well-draining and rich in organic matter.
2. Prepare the Soil: Dig a hole that is twice as wide and as deep as the root ball of the acai palm. Amend the soil with plenty of compost and other organic matter.
3. Planting: Gently remove the acai palm from its nursery pot. Loosen the roots slightly if they are root-bound. Place the plant in the hole and fill in around it with the prepared soil. Make sure the top of the root ball is level with the soil surface.
4. Water Thoroughly: Water the plant thoroughly after planting, until the soil is saturated.
5. Mulch: Add a layer of mulch around the base of the plant to help retain moisture and suppress weeds.
Caring for Your Acai Palm
Now comes the ongoing care. This is where you’ll really need to pay attention to your plant’s needs.
Watering
* Consistency is Key: Water your acai palm regularly to keep the soil consistently moist, but not waterlogged. Check the soil moisture regularly by sticking your finger into the soil. If the top inch or two feels dry, it’s time to water.
* Watering Frequency: The frequency of watering will depend on the climate, the size of the container, and the type of soil. In general, you’ll need to water more frequently during the warmer months and less frequently during the cooler months.
* Water Quality: Use filtered or rainwater if possible, as tap water can sometimes contain chemicals that can harm the plant.
Fertilizing
* Regular Feeding: Acai palms are heavy feeders and need regular fertilization to thrive.
* Fertilizer Type: Use a balanced fertilizer specifically formulated for palms or tropical plants. Look for a fertilizer with a ratio of 8-4-8 or similar.
* Fertilizing Schedule: Fertilize your acai palm every 2-3 months during the growing season (spring and summer). Reduce or stop fertilizing during the dormant season (fall and winter).
* Follow Instructions: Always follow the instructions on the fertilizer label carefully. Over-fertilizing can damage the plant.
Humidity
* Maintaining Humidity: Acai palms need high humidity to thrive. If you live in a dry climate, you’ll need to take steps to increase the humidity around your plant.
* Misting: Mist the leaves of your acai palm regularly with water. This will help increase the humidity around the plant.
* Humidifier: Use a humidifier to increase the humidity in the room where your acai palm is located.
* Pebble Tray: Place the container on a tray filled with pebbles and water. As the water evaporates, it will increase the humidity around the plant.
* Grouping Plants: Grouping plants together can also help increase humidity, as they release moisture into the air through transpiration.
Pruning
* Minimal Pruning: Acai palms generally don’t need much pruning.
* Remove Dead or Damaged Leaves: Remove any dead or damaged leaves as they appear. This will help keep the plant healthy and prevent the spread of disease.
* Avoid Over-Pruning: Avoid pruning too much, as this can stress the plant.
Pest and Disease Control
* Monitor Regularly: Inspect your acai palm regularly for signs of pests or diseases.
* Common Pests: Common pests that can affect acai palms include spider mites, aphids, and scale.
* Treatment: Treat any pest infestations promptly with an appropriate insecticide or horticultural oil.
* Common Diseases: Common diseases that can affect acai palms include fungal diseases like leaf spot and root rot.
* Prevention: Prevent fungal diseases by providing good air circulation and avoiding overwatering.
* Treatment: Treat any fungal diseases with an appropriate fungicide.
Overwintering (For Colder Climates)
* Bring Indoors: If you live in a climate with cold winters, you’ll need to bring your acai palm indoors before the first frost.
* Provide
Conclusion
So, there you have it! Growing your own acai berries at home might seem like a tropical dream, but with the right preparation, patience, and a little bit of green thumb magic, it’s entirely achievable. We’ve walked you through the essential steps, from understanding the ideal climate and soil conditions to nurturing your acai palm and eventually harvesting those antioxidant-rich berries.
Why is this DIY trick a must-try? Beyond the sheer satisfaction of cultivating your own food, growing acai berries at home offers a unique opportunity to access these nutritional powerhouses at their freshest. Store-bought acai often undergoes processing and transportation, which can diminish its flavor and nutrient content. By growing your own, you’re ensuring you get the maximum benefit from every berry. Plus, you’re contributing to a more sustainable lifestyle by reducing your reliance on imported produce.
But the benefits don’t stop there. Imagine the conversations you’ll spark when you tell your friends and family you’re growing your own acai berries! It’s a fantastic way to educate others about the importance of sustainable agriculture and the incredible diversity of the plant kingdom.
Looking for variations? Consider experimenting with different soil amendments to see what works best in your specific climate. Some gardeners have had success with adding compost tea or mycorrhizal fungi to boost root development. You can also explore different methods of propagation, such as using air layering to create new plants from existing branches. If you live in a cooler climate, you might want to consider growing your acai palm in a large container that can be moved indoors during the winter months. This allows you to enjoy the benefits of homegrown acai even if you don’t live in a tropical paradise.
And don’t forget the culinary possibilities! Once you’ve harvested your acai berries, the fun really begins. Blend them into smoothies, create delicious acai bowls, or even experiment with making your own acai-infused desserts. The possibilities are endless!
We truly believe that growing acai berries at home is a rewarding and enriching experience. It’s a chance to connect with nature, learn new skills, and enjoy the fruits (literally!) of your labor.
So, what are you waiting for? Take the plunge and embark on your own acai-growing adventure. We’re confident that you’ll be amazed by what you can achieve. And most importantly, don’t forget to share your experiences with us! We’d love to hear about your successes, challenges, and any tips or tricks you discover along the way. Let’s build a community of home acai growers and spread the word about this amazing fruit! Share your photos and stories on social media using #HomegrownAcai and let’s inspire others to try this incredible DIY trick.
Frequently Asked Questions (FAQ)
What is the ideal climate for growing acai berries?
Acai palms thrive in warm, humid climates with temperatures consistently between 70°F and 90°F (21°C and 32°C). They are native to the Amazon rainforest and require high humidity levels and plenty of rainfall. If you live in a region with cooler temperatures or dry conditions, you may need to provide supplemental heating and humidity to ensure your acai palm thrives. Consider using a greenhouse or indoor growing setup to create a suitable environment.
What type of soil is best for acai palms?
Acai palms prefer well-draining, slightly acidic soil with a pH between 5.5 and 6.5. The soil should be rich in organic matter and have good water retention. A mixture of peat moss, perlite, and compost is often recommended. You can also amend your soil with coconut coir or other organic materials to improve drainage and fertility. Regular soil testing can help you determine if your soil needs any amendments to meet the specific needs of your acai palm.
How long does it take for an acai palm to produce fruit?
It typically takes 3-5 years for an acai palm to mature and begin producing fruit. The exact time frame can vary depending on the growing conditions, the variety of acai palm, and the overall health of the plant. Be patient and provide your acai palm with the best possible care, and you’ll eventually be rewarded with a bountiful harvest of delicious acai berries.
How often should I water my acai palm?
Acai palms require consistent moisture but should not be overwatered. Water your acai palm deeply whenever the top inch of soil feels dry to the touch. During the growing season (spring and summer), you may need to water more frequently. Reduce watering during the dormant season (fall and winter). Ensure that your pot or growing area has good drainage to prevent root rot.
What kind of fertilizer should I use for my acai palm?
Use a balanced fertilizer specifically formulated for palms or tropical plants. Look for a fertilizer with an NPK ratio (nitrogen, phosphorus, potassium) of around 8-4-8 or 10-5-10. Fertilize your acai palm every 2-3 months during the growing season. Avoid over-fertilizing, as this can damage the plant. Follow the instructions on the fertilizer package carefully.
Are acai palms susceptible to any pests or diseases?
Acai palms are generally resistant to pests and diseases, but they can occasionally be affected by spider mites, scale insects, or fungal infections. Regularly inspect your acai palm for any signs of infestation or disease. If you notice any problems, treat them promptly with appropriate insecticides or fungicides. Good air circulation and proper watering practices can help prevent many common pests and diseases.
Can I grow acai berries indoors?
Yes, you can grow acai berries indoors, especially if you live in a climate that is not suitable for outdoor cultivation. Choose a large pot with good drainage and use a well-draining potting mix. Provide your acai palm with plenty of bright, indirect sunlight. You may need to supplement with artificial lighting, especially during the winter months. Maintain high humidity levels by misting the plant regularly or using a humidifier.
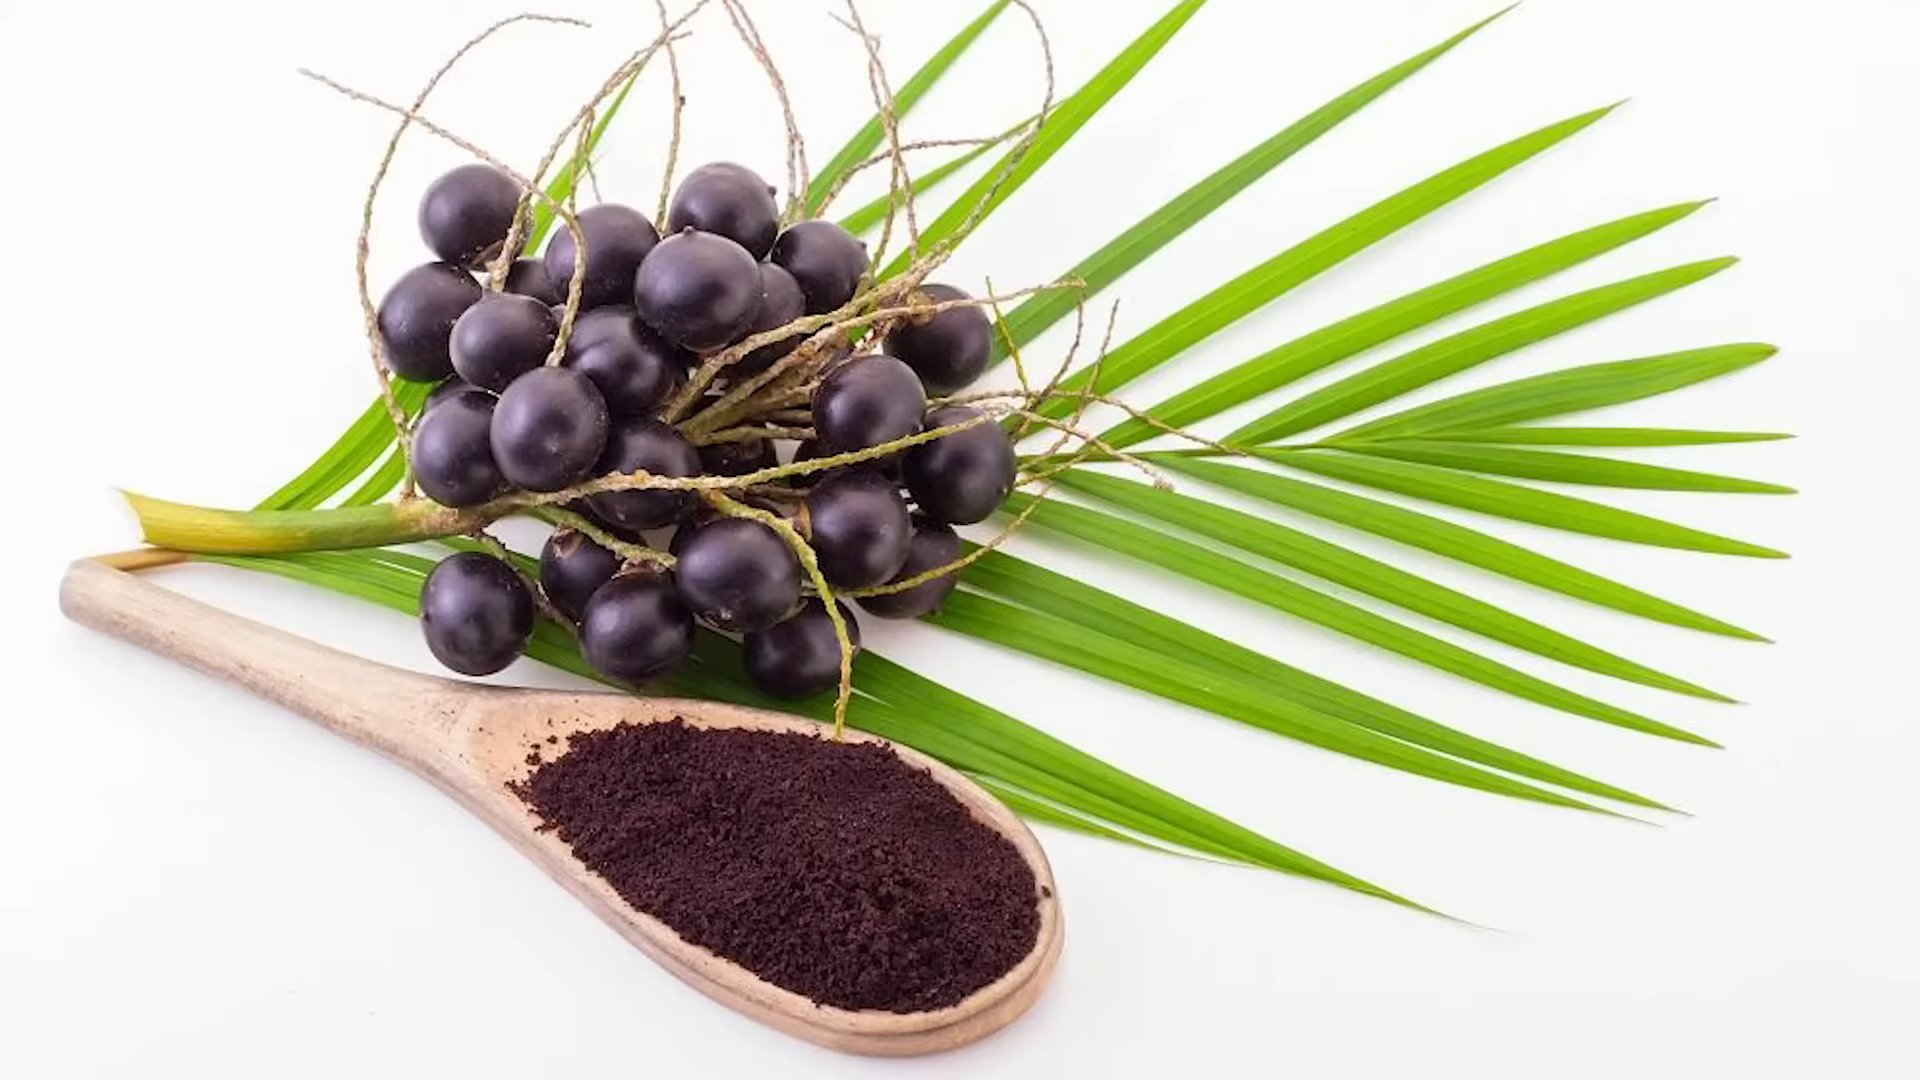
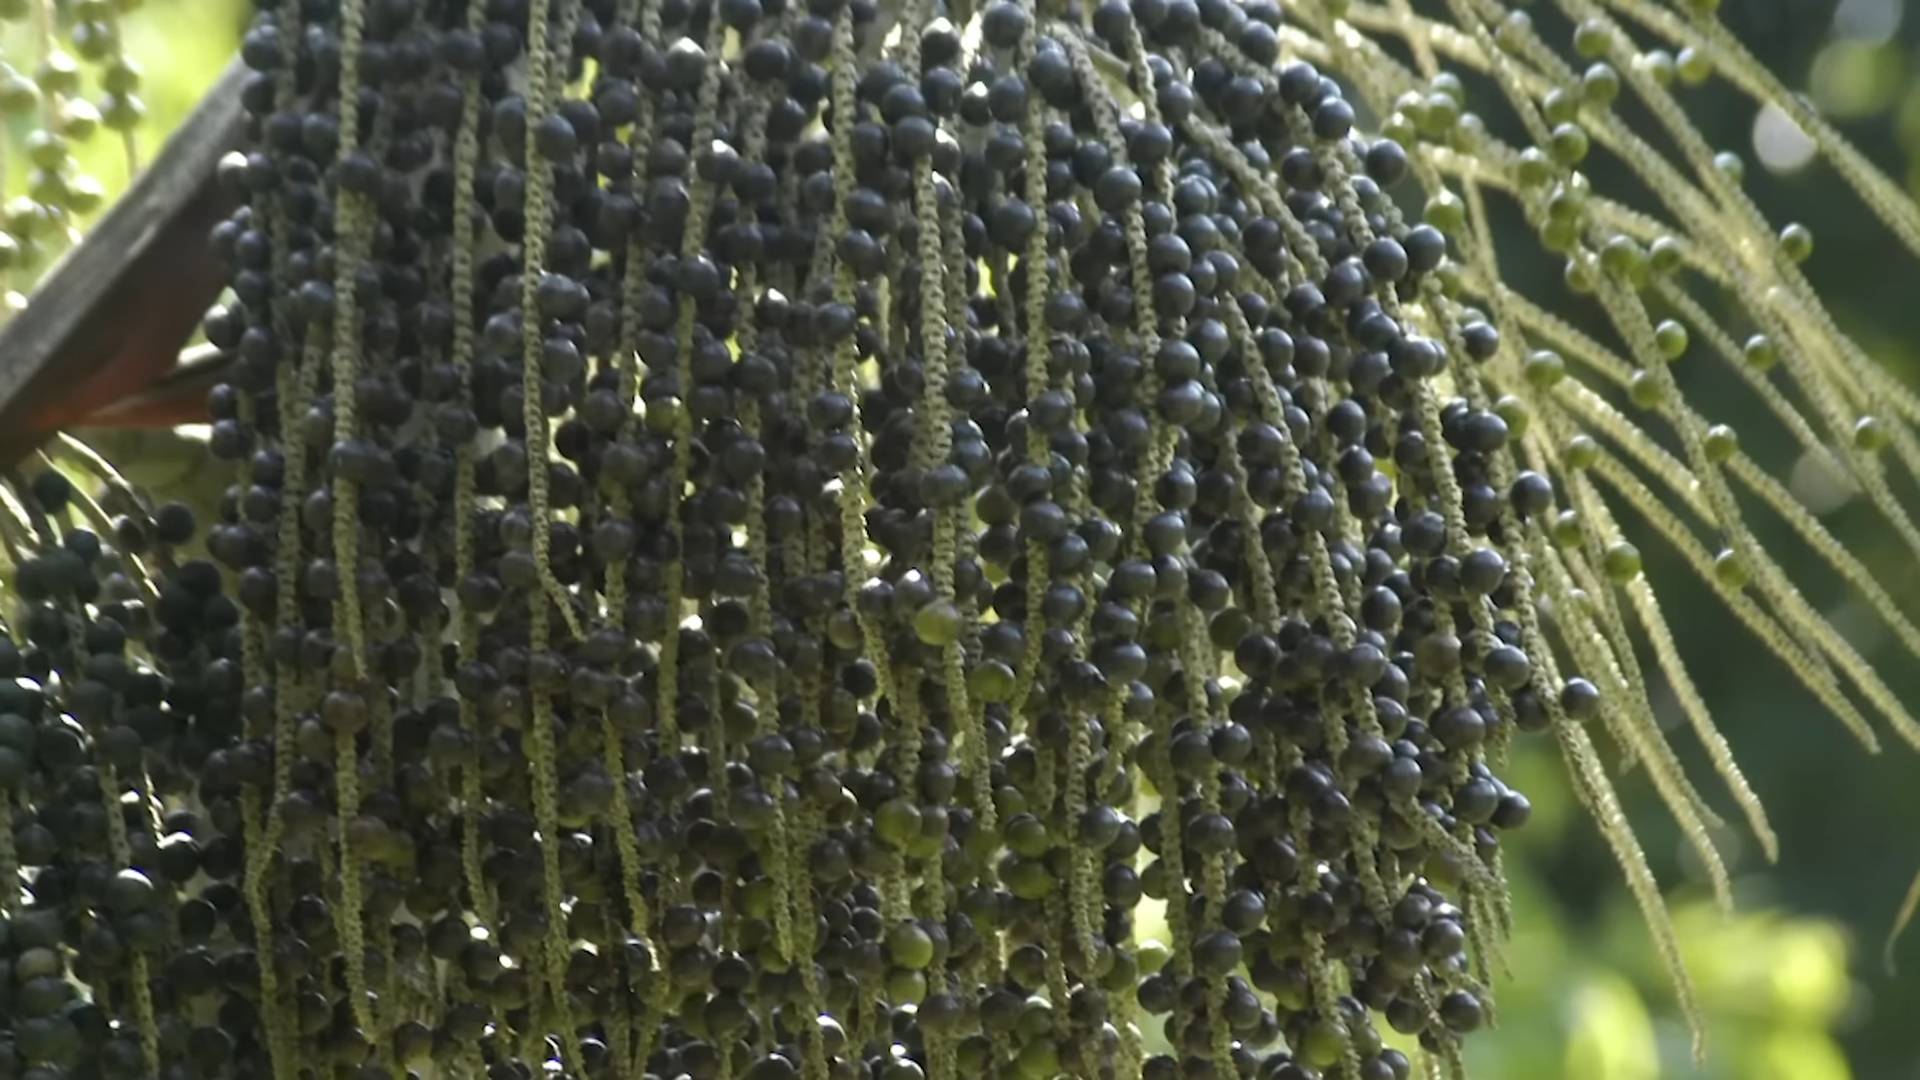
How do I harvest acai berries?
Acai berries grow in clusters on the acai palm. Harvest the berries when they are ripe and dark purple in color. Use a sharp knife or pruning shears to cut the entire cluster of berries from the palm. Be careful not to damage the palm when harvesting. The berries are best consumed fresh or processed soon after harvesting.
How do I process acai berries?
Acai berries have a large seed and a thin layer of pulp. To process them, soak the berries in warm water to soften the pulp. Then, use a food processor or blender to separate the pulp from the seed. Strain the pulp to remove any remaining seeds or skin. The resulting acai pulp can be used to make smoothies, acai bowls, or other delicious treats.
Is growing acai berries at home worth the effort?
Absolutely! While growing acai berries at home requires some effort and patience, the rewards are well worth it. You’ll have access to fresh, nutritious acai berries that are far superior to store-bought options. You’ll also gain a sense of accomplishment and satisfaction from growing your own food. Plus, you’ll be contributing to a more sustainable lifestyle. So, if you’re looking for a challenging and rewarding gardening project, give growing acai berries at home a try!
Leave a Comment