

Growing Bitter Gourd Easily at home might seem like a daunting task, but trust me, it’s more achievable than you think! Have you ever dreamt of plucking fresh, vibrant bitter gourds straight from your own garden, knowing exactly where they came from and how they were grown? Imagine the satisfaction of serving a delicious, home-grown bitter gourd dish to your family, knowing you nurtured it from seed to table. This isn’t just a dream; it’s a reality you can create with a few simple tricks and DIY hacks.
Bitter gourd, also known as karela, has a rich history, deeply rooted in Asian and African cultures. For centuries, it’s been celebrated not only for its unique, slightly bitter flavor but also for its impressive health benefits. From traditional Ayurvedic medicine to modern culinary practices, bitter gourd holds a significant place. But let’s be honest, sometimes getting it to thrive in a home garden can be a bit tricky. That’s where these DIY tricks come in!
Many gardeners struggle with getting a good yield of bitter gourd. Common problems include poor germination, stunted growth, and susceptibility to pests and diseases. But don’t worry, I’m here to share some tried-and-true methods that will help you overcome these challenges and enjoy a bountiful harvest. This article is packed with practical, easy-to-follow tips that will empower you to successfully start growing bitter gourd easily, even if you’re a complete beginner. So, grab your gardening gloves, and let’s get started!
Growing Bitter Gourd Like a Pro: My DIY Guide to a Bountiful Harvest
Hey there, fellow gardening enthusiasts! I’m so excited to share my tried-and-true method for growing bitter gourd (also known as bitter melon or karela) right in your own backyard. Trust me, even if you’re a beginner, you can absolutely nail this. I’ve simplified the process into easy-to-follow steps, so get ready to enjoy a delicious and healthy harvest!
What You’ll Need: The Essential Supplies
Before we dive in, let’s gather all the necessary materials. Having everything ready will make the whole process smoother and more enjoyable.
* Bitter Gourd Seeds: Choose a variety that suits your climate and taste preferences. I personally love the long, green varieties, but there are also shorter, rounder ones.
* Seed Starting Tray or Small Pots: These are perfect for starting your seeds indoors.
* Seed Starting Mix: This is a light and airy soil mix specifically designed for seedlings.
* Gardening Gloves: Protect your hands from dirt and potential irritants.
* Trowel or Small Shovel: For transplanting seedlings.
* Well-Draining Soil: Bitter gourd thrives in rich, well-draining soil. Amend your garden soil with compost or aged manure for best results.
* Compost or Aged Manure: This will provide essential nutrients for healthy growth.
* Trellis or Support Structure: Bitter gourd is a vine, so it needs something to climb on. A trellis, fence, or even a sturdy bamboo structure will work.
* Fertilizer (Optional): A balanced fertilizer can boost growth and fruit production. I prefer organic options like fish emulsion or seaweed extract.
* Watering Can or Hose: For regular watering.
* Pruning Shears: For trimming and shaping the vine.
* Mulch (Optional): Mulch helps retain moisture, suppress weeds, and regulate soil temperature.
* Patience and Enthusiasm: Gardening is a journey, so enjoy the process!
Phase 1: Starting Your Seeds (The Indoor Advantage)
Starting your bitter gourd seeds indoors gives them a head start, especially if you live in a region with a shorter growing season. I highly recommend this method for a more successful harvest.
1. Soaking the Seeds: Before planting, soak the bitter gourd seeds in lukewarm water for 24 hours. This helps soften the hard outer shell and promotes faster germination. I usually put them in a small bowl and leave them on the kitchen counter.
2. Preparing the Seed Starting Tray: Fill your seed starting tray or small pots with seed starting mix. Gently press down the soil to create a firm surface.
3. Planting the Seeds: Make a small hole (about ½ inch deep) in the center of each cell or pot. Place one seed in each hole and cover it with soil. Gently water the soil to moisten it.
4. Creating a Humid Environment: Cover the seed starting tray with a clear plastic lid or plastic wrap to create a humid environment. This helps the seeds germinate.
5. Finding the Right Spot: Place the tray in a warm location with indirect sunlight. A sunny windowsill or a grow light works well. The ideal temperature for germination is between 75-85°F (24-29°C).
6. Monitoring and Watering: Check the soil moisture daily. Keep the soil consistently moist, but not soggy. Water gently with a spray bottle to avoid disturbing the seeds.
7. Germination Time: Bitter gourd seeds typically germinate within 7-14 days. Once the seedlings emerge, remove the plastic lid or wrap to allow for better air circulation.
Phase 2: Transplanting Your Seedlings (Moving to the Great Outdoors)
Once your seedlings have developed a few sets of true leaves (the leaves that look like miniature versions of the adult leaves), it’s time to transplant them into your garden.
1. Hardening Off: Before transplanting, you need to “harden off” the seedlings. This means gradually exposing them to outdoor conditions to help them adjust. Start by placing the tray outside for a few hours each day, gradually increasing the time over a week. Protect them from direct sunlight and strong winds during this process.
2. Preparing the Garden Bed: Choose a sunny location in your garden with well-draining soil. Bitter gourd needs at least 6-8 hours of sunlight per day. Amend the soil with compost or aged manure to improve its fertility and drainage.
3. Digging the Holes: Dig holes that are slightly larger than the root balls of your seedlings. Space the holes about 2-3 feet apart to allow for ample growth.
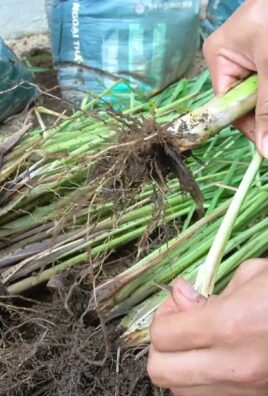
4. Carefully Removing the Seedlings: Gently remove the seedlings from the seed starting tray or pots. Be careful not to damage the roots. If the roots are tightly bound, gently loosen them with your fingers.
5. Planting the Seedlings: Place each seedling in a hole and cover the roots with soil. Gently press down the soil to secure the plant.
6. Watering Thoroughly: Water the newly transplanted seedlings thoroughly to help them establish their roots.
7. Adding Mulch (Optional): Apply a layer of mulch around the base of the plants to help retain moisture, suppress weeds, and regulate soil temperature.
Phase 3: Providing Support (Helping Your Vine Climb)
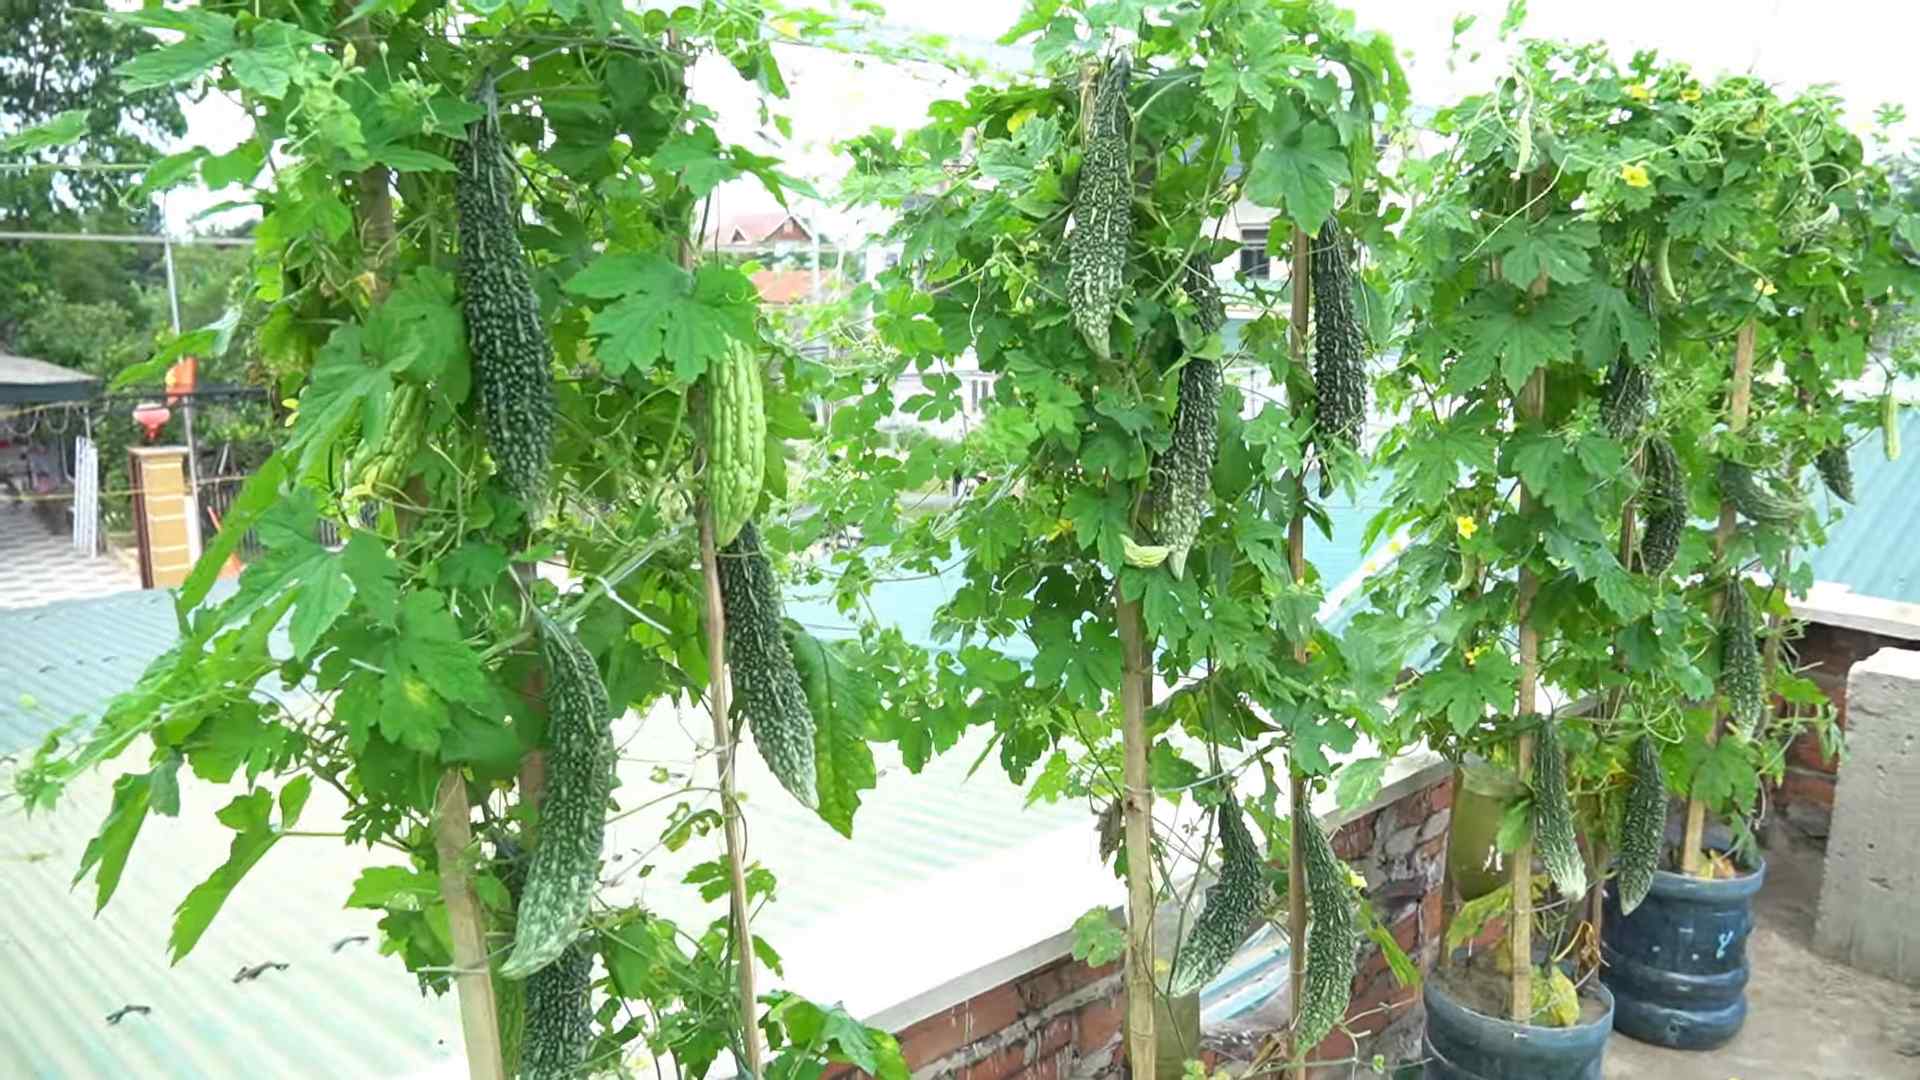
Bitter gourd is a vine, so it needs a support structure to climb on. Providing a trellis or other support will help the plant grow vertically, improve air circulation, and make harvesting easier.
1. Choosing a Support Structure: Select a trellis, fence, or other sturdy structure that is at least 6-8 feet tall. Make sure the structure is strong enough to support the weight of the mature vine and its fruits.
2. Installing the Support Structure: Install the support structure near the transplanted seedlings. Make sure it is securely anchored in the ground.
3. Training the Vine: As the vine grows, gently guide it towards the support structure. You can use plant ties or twine to secure the vine to the trellis.
4. Encouraging Vertical Growth: Regularly check the vine and guide it along the support structure. Prune any side shoots that are not needed to encourage vertical growth.
Phase 4: Caring for Your Bitter Gourd (Watering, Fertilizing, and Pruning)
Proper care is essential for a healthy and productive bitter gourd vine. This includes regular watering, fertilizing, and pruning.
1. Watering Regularly: Water your bitter gourd plants regularly, especially during hot and dry weather. Keep the soil consistently moist, but not soggy. Water deeply at the base of the plant to encourage deep root growth.
2. Fertilizing (Optional): If you want to boost growth and fruit production, you can fertilize your bitter gourd plants every 2-3 weeks with a balanced fertilizer. I prefer organic options like fish emulsion or seaweed extract. Follow the instructions on the fertilizer label.
3. Pruning: Pruning helps to improve air circulation, promote fruit production, and keep the vine manageable. Remove any dead, damaged, or diseased leaves and stems. You can also prune side shoots to encourage vertical growth.
4. Pest and Disease Control: Keep an eye out for pests and diseases. Common pests that affect bitter gourd include aphids, spider mites, and squash bugs. Common diseases include powdery mildew and downy mildew. Treat any infestations or infections promptly with appropriate organic or chemical controls. I always try organic solutions first!
5. Weed Control: Regularly remove weeds from around the base of the plants. Weeds compete with the bitter gourd for nutrients and water.
Phase 5: Harvesting Your Bitter Gourd (The Sweet Reward)
Harvesting your bitter gourd at the right time is crucial for optimal flavor and texture.
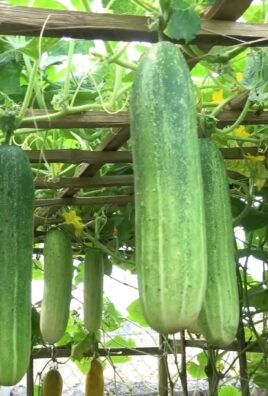
1. Knowing When to Harvest: Bitter gourd is typically ready to harvest about 2-3 months after planting. The fruits should be firm, green (or the color of your chosen variety), and about 6-8 inches long.
2. Harvesting Technique: Use a sharp knife or pruning shears to cut the bitter gourd from the vine. Leave a small piece of stem attached to the fruit.
3. Regular Harvesting: Harvest the fruits regularly to encourage continued production. If you leave the fruits on the vine for too long, they will become overripe and bitter.
4. Storage: Store harvested bitter gourd in the refrigerator for up to a week.
And there you have it! My comprehensive guide to growing bitter gourd. With a little patience and effort, you’ll be enjoying a bountiful harvest of this nutritious and delicious vegetable in no time. Happy gardening!

Conclusion
So, there you have it! Growing bitter gourd easily at home is not only achievable, but also incredibly rewarding. Forget those bland, overpriced gourds from the supermarket. Imagine stepping into your own backyard and harvesting vibrant, healthy bitter gourds, bursting with flavor and packed with nutrients. This DIY trick, focusing on optimal soil preparation, strategic trellising, and consistent watering, unlocks the secret to a bountiful harvest, even for novice gardeners.
Why is this a must-try? Because it puts you in control. You dictate the quality of the soil, ensuring your bitter gourds receive the precise nutrients they need. You manage the watering schedule, preventing overwatering or underwatering, both common pitfalls. And you provide the ideal support structure, maximizing sunlight exposure and air circulation, leading to healthier plants and larger, more abundant fruits. Plus, there’s the sheer satisfaction of nurturing something from seed to table – a connection to nature that’s hard to replicate.
But don’t stop there! Feel free to experiment. Try different varieties of bitter gourd – some are more compact, others more prolific. Consider companion planting with beans or marigolds to deter pests naturally. You can even explore different trellising methods, from simple bamboo stakes to elaborate archways, creating a stunning visual display in your garden. If you live in a cooler climate, starting your seeds indoors a few weeks before the last frost can give you a head start. And for those with limited space, growing bitter gourd in large containers is a perfectly viable option, as long as you provide adequate support and drainage.
This DIY method for growing bitter gourd easily is more than just a gardening tip; it’s an invitation to connect with your food, embrace sustainable practices, and enjoy the unparalleled taste of homegrown produce.
We’re confident that with a little effort and these simple techniques, you’ll be harvesting your own delicious bitter gourds in no time. Don’t be intimidated by the plant’s reputation for being difficult. This method simplifies the process, making it accessible to everyone, regardless of their gardening experience.
So, grab your seeds, prepare your soil, and get ready to embark on a rewarding gardening adventure. We encourage you to try this DIY trick and witness the magic of growing your own bitter gourd. And most importantly, share your experience! Let us know how it goes, what challenges you faced, and what successes you celebrated. Your insights will not only inspire others but also help us refine and improve this method for future gardeners. Share your photos, tips, and stories in the comments below. Let’s build a community of thriving bitter gourd growers! Happy gardening!
Frequently Asked Questions (FAQ)
What is the best time of year to plant bitter gourd?
The ideal time to plant bitter gourd is during the late spring or early summer, after the last frost has passed and the soil has warmed up. Bitter gourd thrives in warm weather and requires a long growing season of at least 90-120 days. If you live in a region with a shorter growing season, you can start the seeds indoors 4-6 weeks before the last expected frost and transplant them outdoors once the weather is consistently warm.
What kind of soil is best for growing bitter gourd?
Bitter gourd prefers well-drained, fertile soil that is rich in organic matter. The soil pH should be slightly acidic to neutral, ideally between 6.0 and 7.0. Before planting, amend the soil with compost, well-rotted manure, or other organic materials to improve its fertility and drainage. Avoid heavy clay soils, as they can become waterlogged and hinder root growth. If you have clay soil, consider adding sand or perlite to improve drainage.
How often should I water my bitter gourd plants?
Water bitter gourd plants regularly, especially during hot and dry weather. Aim to keep the soil consistently moist but not waterlogged. Water deeply at the base of the plants, avoiding wetting the foliage, which can increase the risk of fungal diseases. The frequency of watering will depend on the weather conditions and the type of soil. Check the soil moisture regularly and water when the top inch of soil feels dry to the touch. During periods of heavy rainfall, reduce watering accordingly.
What kind of fertilizer should I use for bitter gourd?
Bitter gourd plants benefit from regular fertilization throughout the growing season. Use a balanced fertilizer with equal amounts of nitrogen, phosphorus, and potassium (e.g., 10-10-10) or a fertilizer specifically formulated for vegetables. Apply the fertilizer according to the manufacturer’s instructions, typically every 2-3 weeks. You can also supplement with organic fertilizers such as compost tea or fish emulsion. Avoid over-fertilizing, as this can lead to excessive foliage growth and reduced fruit production.
How do I trellis bitter gourd plants?
Trellising is essential for growing bitter gourd, as it allows the plants to climb and spread, maximizing sunlight exposure and air circulation. There are several trellising options available, including bamboo stakes, wire fences, arbors, and pergolas. Choose a sturdy trellis that can support the weight of the mature plants and the developing fruits. Train the vines to climb the trellis by gently guiding them and tying them loosely with twine or plant ties. Ensure the trellis is positioned in a sunny location and provides adequate support for the entire growing season.
How do I deal with pests and diseases on my bitter gourd plants?
Bitter gourd plants can be susceptible to various pests and diseases, including aphids, spider mites, squash bugs, powdery mildew, and downy mildew. To prevent pest and disease problems, practice good garden hygiene, such as removing weeds and debris, providing adequate air circulation, and avoiding overhead watering. Inspect your plants regularly for signs of pests or diseases and take action promptly. You can use organic pest control methods such as insecticidal soap, neem oil, or diatomaceous earth to control pests. For fungal diseases, use a copper-based fungicide or a baking soda solution. If the problem is severe, you may need to use a chemical pesticide or fungicide, but always follow the manufacturer’s instructions carefully.
When is bitter gourd ready to harvest?
Bitter gourd is typically ready to harvest 8-12 weeks after planting, depending on the variety and growing conditions. The fruits should be firm, green, and slightly immature. Overripe bitter gourds will turn yellow or orange and become more bitter. Harvest the fruits by cutting them from the vine with a sharp knife or pruning shears, leaving a short stem attached. Harvest regularly to encourage continued fruit production.
Can I grow bitter gourd in containers?
Yes, bitter gourd can be successfully grown in containers, provided you choose a large enough container and provide adequate support. Select a container that is at least 18 inches in diameter and depth, with good drainage holes. Use a well-draining potting mix that is rich in organic matter. Provide a sturdy trellis or support structure for the vines to climb. Water and fertilize regularly, as container-grown plants tend to dry out and deplete nutrients more quickly than those grown in the ground. Place the container in a sunny location that receives at least 6-8 hours of sunlight per day.
Why are my bitter gourd flowers falling off without producing fruit?
This is a common problem with cucurbit plants like bitter gourd and is often due to a lack of pollination. Bitter gourd has separate male and female flowers. The female flowers need to be pollinated by bees or other insects in order to develop into fruit. If there are not enough pollinators in your area, you may need to hand-pollinate the flowers. To hand-pollinate, use a small paintbrush to transfer pollen from the male flowers to the female flowers. Identify the female flowers by the small immature fruit behind the flower. Do this in the morning when the flowers are open. Other factors that can contribute to flower drop include stress from overwatering, underwatering, extreme temperatures, or nutrient deficiencies.
How do I save seeds from my bitter gourd for next year?
To save seeds from your bitter gourd, allow a few fruits to fully mature on the vine. They will turn yellow or orange and become soft. Once the fruits are ripe, harvest them and scoop out the seeds. Wash the seeds thoroughly to remove any pulp or debris. Spread the seeds out on a paper towel to dry completely. Once the seeds are dry, store them in an airtight container in a cool, dark, and dry place. Properly stored bitter gourd seeds can remain viable for several years.

Leave a Comment