

Deep cleaning hacks that work are like secret weapons in the battle against grime! Let’s be honest, who *actually* enjoys spending their weekends scrubbing and scouring? I know I don’t! But a sparkling clean home is so rewarding, isn’t it? It’s a sanctuary, a place where you can truly relax and recharge.
The desire for a clean and organized living space isn’t new. Throughout history, different cultures have placed varying degrees of emphasis on cleanliness, often intertwining it with spiritual or social well-being. Think of the elaborate bathing rituals of ancient Rome or the meticulous cleaning practices in traditional Japanese homes. While our methods might be different today, the underlying motivation remains the same: to create a healthy and comfortable environment.
That’s where these deep cleaning hacks come in. They’re designed to save you time, energy, and maybe even a little sanity! We’re talking about clever solutions that tackle those stubborn stains, hidden dirt, and overlooked corners that can make a huge difference in the overall feel of your home. These aren’t your grandma’s cleaning tips (although some of those are pretty great too!). These are modern, effective, and often use items you already have in your pantry. So, if you’re ready to transform your home from “meh” to “marvelous” without breaking a sweat, keep reading! I’m excited to share these deep cleaning hacks that work and help you achieve a cleaner, happier home.
Deep Cleaning Hacks That Actually Work (And Save You Time!)
Okay, let’s be honest, deep cleaning isn’t exactly anyone’s favorite pastime. But a sparkling clean home? That’s something we can all get behind! I’ve compiled some of my absolute favorite deep cleaning hacks that not only work wonders but also save you precious time and energy. Get ready to transform your space!
Tackling the Kitchen: The Heart of the Home
The kitchen, often the busiest room, can quickly become a breeding ground for grime. Let’s dive into some effective cleaning strategies.
Cleaning the Oven (Without Harsh Chemicals!)
Forget those overpowering oven cleaners! This natural method is just as effective and much safer.
What you’ll need:
* Baking soda
* Water
* Spray bottle
* Spatula or scraper
* Damp cloth
Step-by-step instructions:
1. Empty the Oven: Remove racks, baking stones, and anything else stored inside. I usually soak my racks in hot, soapy water while I’m working on the oven interior.
2. Make a Baking Soda Paste: In a bowl, mix ½ cup of baking soda with enough water to form a spreadable paste. The consistency should be similar to frosting.
3. Coat the Oven Interior: Using your hands (wear gloves if you prefer!), spread the baking soda paste all over the inside of the oven, avoiding the heating elements. Pay special attention to greasy or burnt-on areas. I like to apply a thicker layer on those stubborn spots.
4. Let it Sit Overnight: This is the magic step! The baking soda needs time to work its dissolving power on the grime. Leave it on for at least 12 hours, or even better, overnight.
5. Scrub and Scrape: The next day, use a spatula or scraper to remove as much of the dried baking soda paste as possible. It should come off fairly easily.
6. Wipe Clean: Fill a spray bottle with water and spray down the inside of the oven. Use a damp cloth to wipe away any remaining baking soda residue. You might need to rinse and repeat a few times to get it completely clean.
7. Reassemble and Enjoy: Once the oven is dry, replace the racks and you’re good to go!
Degreasing the Stovetop Like a Pro
A greasy stovetop can be a real eyesore. Here’s how to get it sparkling clean.
What you’ll need:
* Dish soap
* Baking soda
* White vinegar
* Spray bottle
* Scrub brush or sponge
* Microfiber cloth
Step-by-step instructions:
1. Remove Grates and Burner Caps: Take off the stovetop grates and burner caps. Soak them in hot, soapy water to loosen any baked-on food.
2. Sprinkle with Baking Soda: Generously sprinkle baking soda over the entire stovetop surface.
3. Spray with Vinegar: Fill a spray bottle with white vinegar and spray it over the baking soda. The mixture will fizz – that’s a good thing! It means the baking soda and vinegar are reacting to lift the grease.
4. Let it Sit: Allow the mixture to sit for about 15-20 minutes. This gives it time to break down the grease and grime.
5. Scrub Away: Use a scrub brush or sponge to scrub the stovetop. You might need to apply a little elbow grease to stubborn areas.
6. Wipe Clean: Wipe the stovetop clean with a damp microfiber cloth. Rinse the cloth frequently to remove any residue.
7. Clean Grates and Burner Caps: Scrub the grates and burner caps with a scrub brush or sponge. Rinse them thoroughly and dry them completely before placing them back on the stovetop.
Cleaning the Microwave (The Easy Way!)
Microwaves can get surprisingly dirty. This steam cleaning method is quick and effortless.
What you’ll need:
* Microwave-safe bowl
* Water
* White vinegar or lemon juice
Step-by-step instructions:
1. Fill the Bowl: Fill a microwave-safe bowl with 1 cup of water and 2 tablespoons of white vinegar or lemon juice. I personally prefer lemon juice for the fresh scent.
2. Microwave on High: Place the bowl in the microwave and microwave on high for 5 minutes. The water will boil and create steam, which will loosen the grime inside.
3. Let it Sit (Don’t Open!): After the microwave stops, leave the door closed for another 5-10 minutes. This allows the steam to continue working its magic.
4. Wipe Clean: Carefully remove the bowl (it will be hot!). Use a damp cloth or sponge to wipe down the inside of the microwave. The grime should wipe away easily.
Bathroom Bliss: Sparkling Clean Surfaces
The bathroom is another area that requires regular deep cleaning. Let’s tackle those tough stains and grime.
Cleaning Showerheads (Without Removing Them!)
Hard water can leave showerheads clogged and looking dull. This simple trick will restore their shine and improve water flow.
What you’ll need:
* Plastic bag
* White vinegar
* Rubber band or twist tie
Step-by-step instructions:
1. Fill the Bag: Fill a plastic bag with enough white vinegar to completely submerge the showerhead.
2. Secure the Bag: Attach the bag to the showerhead using a rubber band or twist tie. Make sure the showerhead is fully immersed in the vinegar.
3. Soak Overnight: Leave the bag on the showerhead overnight. The vinegar will dissolve the mineral deposits and grime.
4. Remove and Rinse: The next morning, remove the bag and discard the vinegar. Run the shower for a few minutes to flush out any remaining vinegar and debris.
Conquering Grout (Goodbye, Mold!)
Grout can be a magnet for mold and mildew. This powerful cleaning solution will banish those unsightly stains.
What you’ll need:
* Baking soda
* Bleach
* Old toothbrush or grout brush
* Spray bottle
* Water
Step-by-step instructions:
1. Make a Baking Soda Paste: Mix baking soda with a small amount of water to form a thick paste.
2. Apply to Grout: Apply the baking soda paste to the grout lines.
3. Spray with Bleach: Fill a spray bottle with bleach and spray it directly onto the baking soda paste. Be careful not to get bleach on surrounding surfaces.
4. Let it Sit: Allow the mixture to sit for about 10-15 minutes. The bleach will react with the baking soda to kill mold and mildew.
5. Scrub and Rinse: Use an old toothbrush or grout brush to scrub the grout lines. Rinse thoroughly with water.
6. Ventilate: Make sure to ventilate the bathroom well while using bleach.
Important Note: Always wear gloves and eye protection when working with bleach. Never mix bleach with ammonia, as this can create dangerous fumes.
Toilet Bowl Transformation
Let’s face it, cleaning the toilet isn’t glamorous, but it’s essential.
What you’ll need:
* Toilet bowl cleaner
* Toilet brush
* Baking soda
* White vinegar
Step-by-step instructions:
1. Apply Toilet Bowl Cleaner: Apply your favorite toilet bowl cleaner under the rim and around the bowl.
2. Let it Sit: Allow the cleaner to sit for the recommended time (usually 10-15 minutes).
3. Scrub Thoroughly: Use a toilet brush to scrub the entire bowl, paying attention to any stains or buildup.
4. Add Baking Soda and Vinegar: Pour 1 cup of baking soda into the toilet bowl, followed by 1 cup of white vinegar. The mixture will fizz.
5. Let it Sit Again: Let the baking soda and vinegar mixture sit for about 30 minutes.
6. Flush and Rinse: Flush the toilet to rinse away the cleaner and baking soda/vinegar mixture.
Living Room Refresh: Dust-Free and Organized
The living room is where we relax and unwind, so keeping it clean and organized is key.
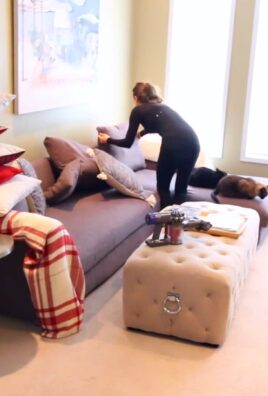
Dusting Like a Pro (Beyond the Surface)
Dusting isn’t just about wiping surfaces. Here’s how to get rid of dust for good.
What you’ll need:
* Microfiber cloths
* Vacuum cleaner with attachments
* Feather duster (optional)
* Furniture polish (optional)
Step-by-step instructions:
1. Start High: Begin by dusting high surfaces

Conclusion
So, there you have it! This deep cleaning hack isn’t just another chore on your to-do list; it’s a game-changer for maintaining a sparkling and healthy home. We’ve walked you through a simple, effective method that utilizes readily available ingredients and minimal effort to achieve professional-level results. Forget spending a fortune on expensive cleaning products filled with harsh chemicals. This DIY approach is not only budget-friendly but also environmentally conscious, allowing you to create a cleaner living space without compromising your well-being or the planet.
Why is this deep cleaning hack a must-try? Because it tackles grime and buildup in those often-overlooked areas, revitalizing your home and creating a fresher, more inviting atmosphere. It’s about more than just surface cleaning; it’s about getting down to the nitty-gritty and eliminating the sources of odors and allergens that can accumulate over time. Think of it as a reset button for your home, leaving it feeling renewed and refreshed.
But the beauty of this deep cleaning method lies in its adaptability. Feel free to experiment with variations to suit your specific needs and preferences. For instance, if you’re dealing with particularly stubborn stains, consider adding a paste of baking soda and water to the affected area before applying the cleaning solution. For a more fragrant experience, infuse your cleaning solution with a few drops of your favorite essential oils, such as lavender, lemon, or eucalyptus. Just be sure to test the solution on an inconspicuous area first to ensure it doesn’t damage the surface.
Another variation involves adjusting the ratios of the ingredients to create a stronger or milder cleaning solution, depending on the level of grime you’re tackling. For heavily soiled areas, you might want to increase the concentration of vinegar or baking soda. Conversely, for more delicate surfaces, you can dilute the solution with more water.
Remember, the key to successful deep cleaning is consistency. Incorporating this hack into your regular cleaning routine will prevent buildup and make future cleaning sessions much easier. Aim to perform a deep clean at least once a month, or more frequently if you have pets or children.
We’re confident that once you try this deep cleaning hack, you’ll be amazed by the results. It’s a simple, effective, and affordable way to achieve a cleaner, healthier, and more enjoyable living space. So, gather your supplies, roll up your sleeves, and get ready to transform your home!
Now, we want to hear from you! Give this deep cleaning hack a try and share your experience with us. Did you find it effective? Did you make any modifications to the recipe? What were the results? We’re eager to learn from your experiences and share your tips with our community. Leave a comment below and let us know how it went! Your feedback will help us refine this hack and make it even better for everyone. Let’s work together to create a cleaner, healthier world, one deep clean at a time.
Frequently Asked Questions (FAQ)
What exactly does this deep cleaning hack target?
This deep cleaning hack is designed to tackle a wide range of cleaning challenges throughout your home. It’s particularly effective at removing grime, grease, soap scum, mildew, and other types of buildup that accumulate in areas like bathrooms, kitchens, and laundry rooms. It can be used on various surfaces, including countertops, sinks, showers, toilets, floors, and appliances. The goal is to go beyond surface cleaning and eliminate the sources of odors and allergens, creating a fresher and healthier living environment.
Is this deep cleaning hack safe for all surfaces?
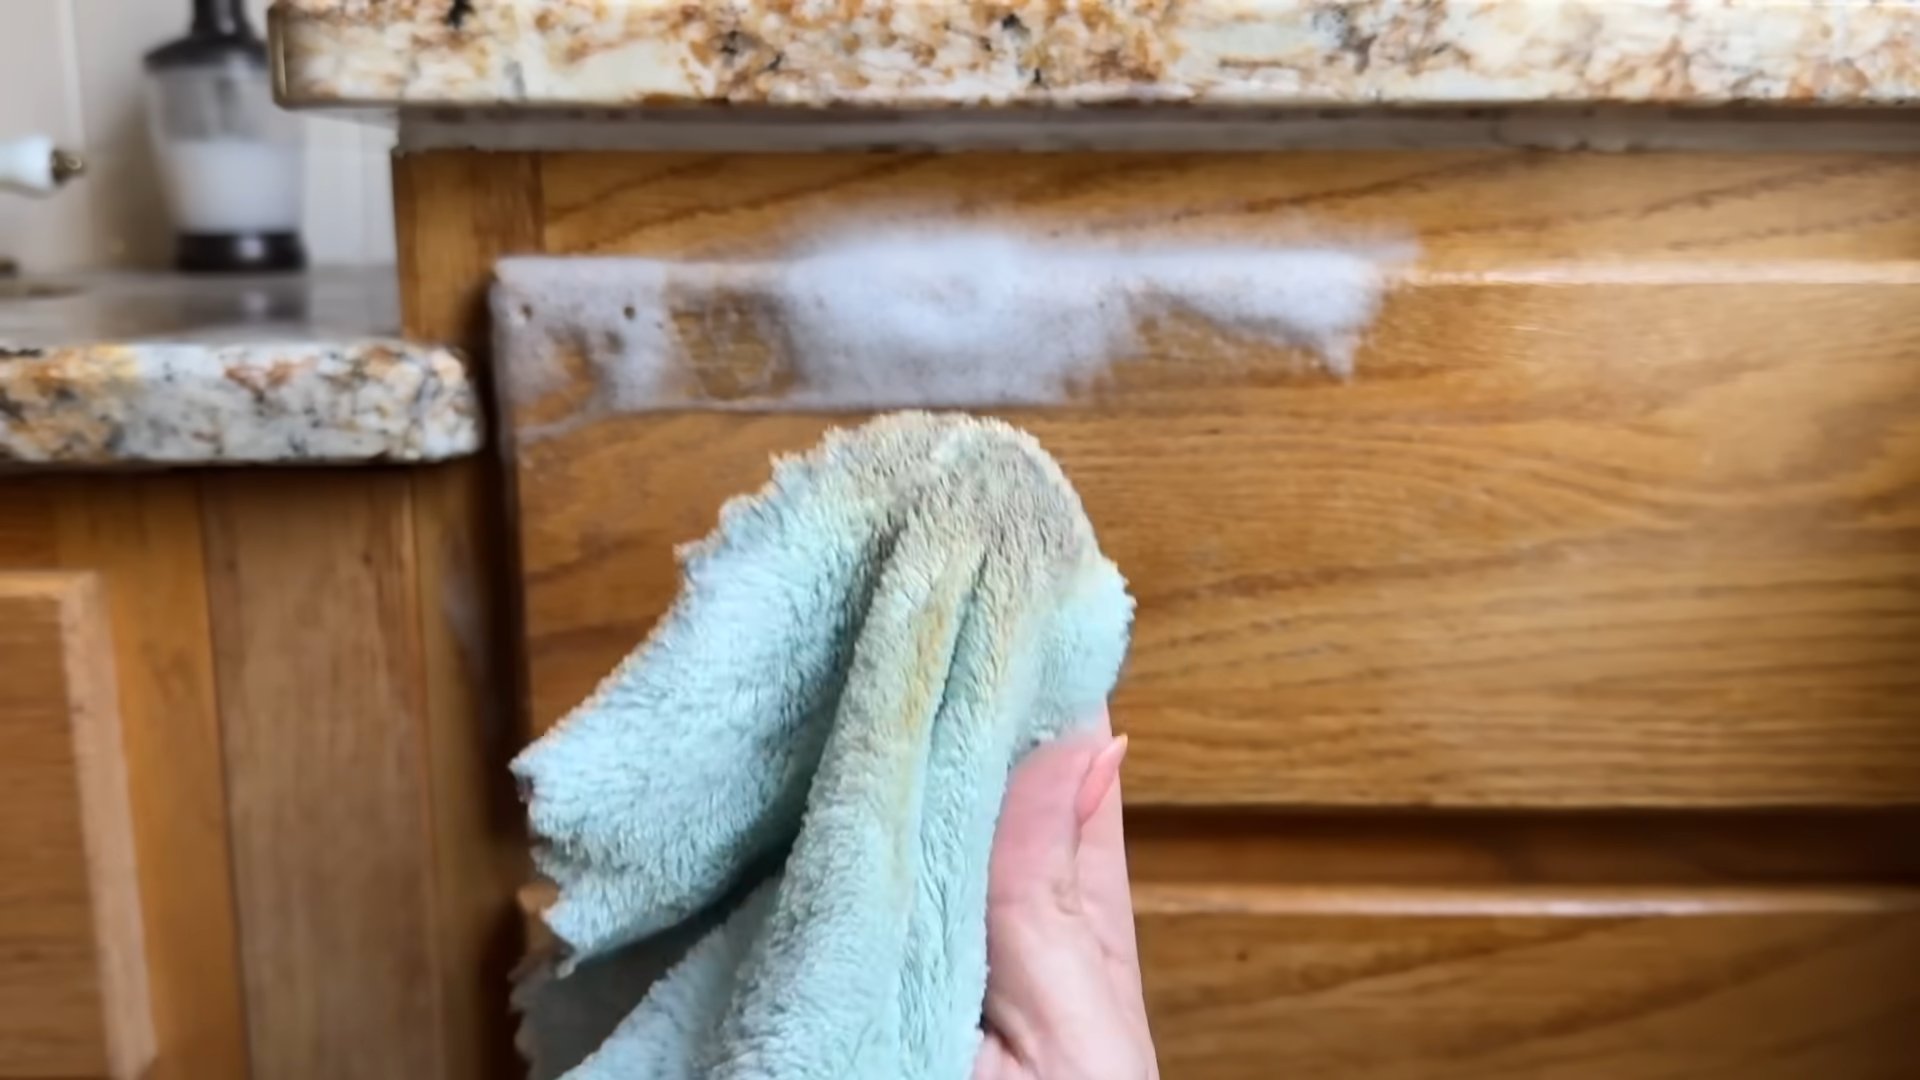
While this deep cleaning hack is generally safe for most surfaces, it’s always a good idea to test it on an inconspicuous area first, especially if you’re unsure about the material’s sensitivity. Avoid using it on delicate surfaces like marble, granite, or wood without proper sealing, as the acidity of vinegar can potentially damage them. For these surfaces, consider using a milder cleaning solution or consulting with a professional cleaner. Always read the manufacturer’s instructions for your surfaces before applying any cleaning product.
Can I use this deep cleaning hack if I have allergies or sensitivities?
If you have allergies or sensitivities to any of the ingredients in this deep cleaning hack, such as vinegar or baking soda, it’s best to avoid using it or to take precautions to minimize your exposure. Wear gloves and a mask while cleaning, and ensure proper ventilation in the area. You can also try substituting the ingredients with alternatives that are less likely to trigger your allergies. For example, you could use lemon juice instead of vinegar, or a mild dish soap instead of baking soda. If you’re unsure about the safety of using this hack, consult with your doctor or an allergist.
How often should I perform this deep cleaning hack?
The frequency of deep cleaning depends on your lifestyle, the size of your home, and the level of grime buildup. As a general guideline, aim to perform a deep clean at least once a month. However, if you have pets, children, or a busy household, you might want to increase the frequency to once every two weeks or even weekly. Regular deep cleaning will prevent buildup and make future cleaning sessions much easier.
What are some common mistakes to avoid when using this deep cleaning hack?
One common mistake is using too much of the cleaning solution, which can leave behind a residue or damage the surface. Always use the solution sparingly and wipe away any excess with a clean, damp cloth. Another mistake is not testing the solution on an inconspicuous area first, which can lead to discoloration or damage. Additionally, avoid mixing different cleaning products together, as this can create harmful fumes. Always follow the instructions carefully and use the ingredients as directed.
Can I add essential oils to this deep cleaning hack?
Yes, you can add essential oils to this deep cleaning hack to enhance its fragrance and provide additional cleaning benefits. Some popular essential oils for cleaning include lavender, lemon, eucalyptus, tea tree, and peppermint. Add a few drops of your favorite essential oil to the cleaning solution and mix well. However, be sure to use essential oils sparingly, as they can be potent and may irritate sensitive skin. Also, avoid using essential oils on surfaces that are sensitive to oils, such as wood or leather.
What should I do if the deep cleaning hack doesn’t remove a stubborn stain?
If the deep cleaning hack doesn’t remove a stubborn stain, try applying a paste of baking soda and water to the affected area and let it sit for a few minutes before wiping it away. You can also try using a specialized stain remover or consulting with a professional cleaner. For particularly stubborn stains, you might need to repeat the deep cleaning process several times.
How do I store the leftover deep cleaning solution?
Store the leftover deep cleaning solution in a clean, airtight container in a cool, dry place. Label the container clearly with the name of the solution and the date it was made. Keep the solution out of reach of children and pets. The solution should be good for several weeks, but it’s best to use it within a month for optimal effectiveness. If the solution starts to smell or change color, discard it.
Can I use this deep cleaning hack on my appliances?
Yes, you can use this deep cleaning hack on your appliances, such as refrigerators, ovens, and dishwashers. However, be sure to unplug the appliance before cleaning it and avoid getting any liquid inside the electrical components. Use a damp cloth to wipe down the surfaces with the cleaning solution and then wipe away any excess with a clean, dry cloth. For ovens, you can also use a paste of baking soda and water to scrub away stubborn grease and grime.
What are the environmental benefits of using this deep cleaning hack?
This deep cleaning hack is environmentally friendly because it uses natural ingredients that are biodegradable and non-toxic. It reduces your reliance on harsh chemicals and synthetic cleaning products, which can pollute the environment and harm your health. By using this hack, you’re contributing to a cleaner and healthier planet.

Leave a Comment