

Kitchen cleaning hacks – who doesn’t need a few of those up their sleeve? Let’s be honest, the kitchen is the heart of the home, but it can quickly become a battlefield of splatters, spills, and stubborn stains. I know I’ve definitely been there! But what if I told you that conquering kitchen chaos doesn’t require hours of scrubbing or a cabinet full of harsh chemicals?
For generations, resourceful homemakers have passed down clever cleaning tricks, often born out of necessity and a desire to keep their kitchens sparkling. Think about it – before the age of fancy cleaning products, people relied on simple, readily available ingredients like vinegar, baking soda, and lemon juice. These aren’t just old wives’ tales; they’re time-tested solutions that still work wonders today!
In today’s busy world, time is precious. That’s why I’m so excited to share these easy and effective kitchen cleaning hacks with you. Whether you’re battling burnt-on food, greasy stovetops, or a funky-smelling fridge, these DIY solutions will save you time, money, and a whole lot of elbow grease. Get ready to transform your kitchen from a cleaning nightmare into a sparkling sanctuary with these simple yet powerful tips!

DIY Kitchen Cleaning Hacks: Sparkling Clean Without Breaking a Sweat!
Okay, let’s face it, cleaning the kitchen is nobody’s favorite chore. But a clean kitchen is a happy kitchen (and a healthier one!). I’ve gathered some of my favorite DIY cleaning hacks that will make your kitchen sparkle without spending hours scrubbing. These are tried and tested, and I promise, they’ll make your life a whole lot easier!
Hack 1: Deep Cleaning Your Microwave with Lemon Power
Microwaves are notorious for splatters and stuck-on food. This lemon trick is a natural and effective way to loosen grime and deodorize your microwave.
What you’ll need:
* 1 Lemon
* 1 Microwave-safe bowl
* 1 Cup of water
* Sponge or cloth
Step-by-step instructions:
1. Prepare the lemon solution: Cut the lemon in half. Squeeze the juice from both halves into the microwave-safe bowl. Then, drop the lemon halves into the bowl as well.
2. Add water: Pour one cup of water into the bowl with the lemon juice and lemon halves.
3. Microwave the solution: Place the bowl in the microwave and heat on high for 3-5 minutes. You want the water to boil and create steam.
4. Let it steam: Leave the microwave door closed for another 5-10 minutes. This allows the steam to loosen the grime. Don’t open the door immediately! The steam is doing its magic.
5. Wipe it clean: Carefully remove the bowl (it will be hot!). Use a sponge or cloth to wipe down the inside of the microwave. The loosened grime should come off easily.
6. Final touch: For stubborn spots, dip your sponge or cloth into the lemon water and scrub a little harder.
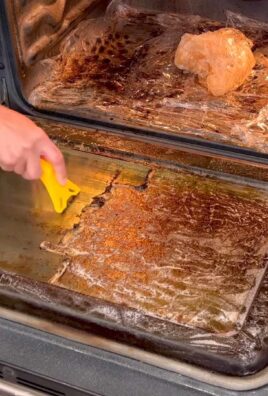
Hack 2: Cleaning Your Oven with Baking Soda Paste
Oven cleaning is the bane of many home cooks. Harsh chemicals are often involved, but this baking soda paste is a natural and effective alternative.
What you’ll need:
* 1 Cup baking soda
* Water (enough to make a paste)
* Spray bottle with white vinegar
* Sponge or cloth
* Scraper (optional, for stubborn spots)
* Rubber gloves
Step-by-step instructions:
1. Prepare the oven: Remove the oven racks and any loose debris.
2. Make the baking soda paste: In a bowl, mix the baking soda with enough water to form a thick, spreadable paste.
3. Apply the paste: Wearing rubber gloves, spread the baking soda paste all over the inside of the oven, avoiding the heating elements. Be generous!
4. Let it sit: This is the key! Let the paste sit for at least 12 hours, or even overnight. The longer it sits, the better it will work.
5. Scrub and scrape: After the waiting period, use a sponge or cloth to scrub the oven. For stubborn spots, use a scraper.
6. Vinegar power: Fill a spray bottle with white vinegar. Spray the vinegar onto the baking soda residue. This will cause a fizzing reaction, which helps to loosen the remaining grime.
7. Wipe it clean: Wipe away the baking soda and vinegar mixture with a clean, damp sponge or cloth. You may need to rinse and repeat several times to remove all the residue.
8. Replace the racks: Once the oven is clean and dry, replace the oven racks.
Hack 3: Degreasing Your Stovetop with Baking Soda and Dish Soap
A greasy stovetop is a common kitchen problem. This simple solution will cut through the grease and leave your stovetop sparkling.
What you’ll need:
* Baking soda
* Dish soap
* Sponge or cloth
* Warm water
Step-by-step instructions:
1. Sprinkle baking soda: Generously sprinkle baking soda over the greasy areas of your stovetop.
2. Add dish soap: Squirt a few drops of dish soap onto the baking soda.
3. Add warm water: Add a small amount of warm water to create a paste.
4. Scrub gently: Use a sponge or cloth to gently scrub the stovetop. The baking soda acts as a mild abrasive, while the dish soap cuts through the grease.
5. Wipe it clean: Wipe away the baking soda and soap mixture with a clean, damp sponge or cloth.
6. Dry the stovetop: Dry the stovetop with a clean cloth.
Hack 4: Cleaning Your Dishwasher with Vinegar and Baking Soda
Your dishwasher cleans your dishes, but it also needs to be cleaned itself! This hack will remove buildup, deodorize, and improve your dishwasher’s performance.
What you’ll need:
* 1 Cup white vinegar
* 1 Cup baking soda
Step-by-step instructions:
1. Vinegar wash: Place a dishwasher-safe cup filled with one cup of white vinegar on the top rack of your empty dishwasher.
2. Run a hot cycle: Run the dishwasher on a hot water cycle.
3. Baking soda boost: After the cycle is complete, sprinkle one cup of baking soda on the bottom of the dishwasher.
4. Run a short cycle: Run the dishwasher on a short, hot water cycle.
5. Wipe down the door and seals: Use a damp cloth to wipe down the dishwasher door and seals.
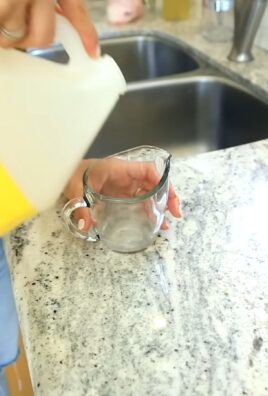
Hack 5: Cleaning Your Kitchen Sink with Baking Soda and Lemon
This hack will clean, deodorize, and shine your kitchen sink.
What you’ll need:
* Baking soda
* Lemon halves
* Salt (optional, for extra scrubbing power)
* Sponge or cloth
Step-by-step instructions:
1. Rinse the sink: Rinse the sink with water.
2. Sprinkle baking soda: Generously sprinkle baking soda all over the sink.
3. Add salt (optional): If you want extra scrubbing power, sprinkle a little salt on top of the baking soda.
4. Scrub with lemon: Cut a lemon in half and use it to scrub the sink. The lemon juice will help to cut through grease and grime, while the baking soda acts as a mild abrasive.
5. Rinse thoroughly: Rinse the sink thoroughly with water.
6. Polish with lemon peel: For extra shine, rub the inside of the sink with the lemon peel.
Hack 6: Cleaning Grout with Baking Soda and Hydrogen Peroxide
Dirty grout can make your kitchen look dingy. This simple paste will brighten your grout lines.
What you’ll need:
* Baking soda
* Hydrogen peroxide
* Old toothbrush or grout brush
Step-by-step instructions:
1. Make the paste: In a small bowl, mix baking soda and hydrogen peroxide to form a thick paste.
2. Apply the paste: Apply the paste to the grout lines.
3. Let it sit: Let the paste sit for 5-10 minutes.
4. Scrub the grout: Use an old toothbrush or grout brush to scrub the grout lines.
5. Rinse thoroughly: Rinse the grout lines thoroughly with water.
Hack 7: Cleaning Cutting Boards with Lemon and Salt
Cutting boards can harbor bacteria and odors. This simple method will clean and deodorize your cutting boards.
What you’ll need:
* Lemon
* Coarse salt
Step-by-step instructions:
1. Sprinkle salt: Sprinkle a generous amount of coarse salt over the cutting board.
2. Scrub with lemon: Cut a lemon in half and use it to scrub the salt into the cutting board.
3. Let it sit: Let the mixture sit for 5-10 minutes.
4. Rinse thoroughly: Rinse the cutting board thoroughly with water.
5. Dry completely: Dry the cutting board completely.
Hack 8: Cleaning Stainless Steel Appliances with Vinegar and Olive Oil
Stainless steel appliances can be tricky to keep clean. This two-step process will remove fingerprints and smudges and leave your appliances shining.
What you’ll need:
* White vinegar
* Olive oil
* Two clean cloths
Step-by-step instructions:
1. Vinegar wipe: Spray white vinegar onto a clean cloth and wipe down the stainless steel appliances. This will remove fingerprints and smudges.
2. Olive oil polish: Pour a small amount of olive oil onto a clean cloth and buff the stainless steel appliances. This will add shine and protect the surface.
Hack 9: Cleaning Bl

Conclusion
So, there you have it! Mastering these simple yet incredibly effective DIY kitchen cleaning hacks is a game-changer for anyone who wants a sparkling clean kitchen without breaking the bank or relying on harsh chemicals. We’ve covered everything from banishing stubborn grease to reviving dull surfaces, all with ingredients you likely already have in your pantry.
Why is this a must-try? Because it’s not just about cleaning; it’s about creating a healthier, happier home. Commercial cleaners often contain volatile organic compounds (VOCs) that can irritate your lungs and trigger allergies. By opting for these natural alternatives, you’re reducing your exposure to these harmful substances and creating a safer environment for yourself, your family, and even your pets. Plus, let’s be honest, the satisfaction of transforming a grimy stovetop into a gleaming surface with just a little baking soda and vinegar is immensely rewarding!
But the beauty of these DIY kitchen cleaning hacks lies in their versatility. Feel free to experiment and adapt them to your specific needs and preferences. For instance, if you’re not a fan of the vinegar smell, add a few drops of your favorite essential oil, like lemon or lavender, to the cleaning solution. For extra scrubbing power on tough stains, try using a paste of baking soda and hydrogen peroxide. And if you have particularly stubborn hard water stains on your faucets, soak a paper towel in vinegar and wrap it around the faucet overnight.
Don’t be afraid to get creative and find what works best for you. Remember, the goal is to make cleaning less of a chore and more of a sustainable, enjoyable part of your routine. These hacks are not just about cleaning, they are about embracing a more eco-friendly and cost-effective lifestyle.
We’re confident that once you try these DIY kitchen cleaning hacks, you’ll be amazed by the results. You’ll not only have a cleaner kitchen, but you’ll also have the satisfaction of knowing that you’re doing your part to protect the environment and your health.
So, what are you waiting for? Grab your baking soda, vinegar, and lemon, and get ready to transform your kitchen into a sparkling oasis. We encourage you to try these hacks and share your experiences with us! Let us know which ones worked best for you, any variations you tried, and any other tips you have to share. Together, we can create a community of clean-kitchen enthusiasts who are passionate about natural, effective cleaning solutions. Share your before and after photos on social media using #DIYKitchenClean and inspire others to join the movement! We can’t wait to see your sparkling kitchens!
Frequently Asked Questions (FAQs)
1. Are these DIY kitchen cleaning hacks really as effective as commercial cleaners?
Yes, in many cases, they are just as effective, and sometimes even more so! The key is understanding the properties of the ingredients you’re using. For example, vinegar is a natural disinfectant and degreaser, while baking soda is a mild abrasive that can scrub away grime without scratching surfaces. Lemon juice is a powerful cleaner and deodorizer. While some heavy-duty cleaning tasks might require a specialized commercial cleaner, these DIY options are perfect for everyday cleaning and maintenance. Plus, they are safer for your health and the environment.
2. What surfaces can I safely use these DIY kitchen cleaning hacks on?
Most of these hacks are safe for a wide range of surfaces, including countertops (granite, quartz, laminate), stovetops (glass, ceramic, stainless steel), sinks (stainless steel, porcelain), appliances (stainless steel, enamel), and floors (tile, linoleum). However, it’s always a good idea to test a small, inconspicuous area first, especially when using acidic ingredients like vinegar or lemon juice on delicate surfaces like marble or natural stone. Avoid using abrasive cleaners like baking soda on polished surfaces that scratch easily.
3. How often should I use these DIY kitchen cleaning hacks?
The frequency depends on your lifestyle and how often you use your kitchen. For everyday cleaning, wiping down countertops and stovetops with a vinegar and water solution is a great habit. Deep cleaning tasks, like cleaning the oven or degreasing the range hood, can be done every few weeks or as needed. Regular maintenance with these DIY solutions will prevent grime buildup and make cleaning easier in the long run.
4. Can I use these DIY kitchen cleaning hacks if I have allergies or sensitivities?
One of the biggest advantages of these DIY hacks is that you control the ingredients. If you have allergies or sensitivities to certain chemicals found in commercial cleaners, you can easily avoid them by using these natural alternatives. However, it’s still important to be cautious. If you have sensitive skin, wear gloves when cleaning. And if you’re allergic to citrus fruits, avoid using lemon juice. Always test a small area first to ensure you don’t have any adverse reactions.
5. What are some variations I can try with these DIY kitchen cleaning hacks?
The possibilities are endless! Here are a few ideas:
* **Essential Oils:** Add a few drops of your favorite essential oils to your cleaning solutions for a pleasant scent and added antibacterial properties. Lemon, lavender, tea tree, and eucalyptus are all great choices.
* **Borax:** For extra cleaning power, add a tablespoon of borax to your cleaning solutions. Borax is a natural mineral that can help remove tough stains and disinfect surfaces.
* **Castile Soap:** Castile soap is a versatile, plant-based soap that can be used for a variety of cleaning tasks. Add a few drops to your cleaning solutions for extra suds and cleaning power.
* **Hydrogen Peroxide:** Hydrogen peroxide is a natural disinfectant and bleaching agent. Use it to clean cutting boards, sanitize sponges, and remove stains from countertops.
6. How do I store these DIY kitchen cleaning solutions?
Store your DIY cleaning solutions in clean, labeled spray bottles or containers. Keep them out of reach of children and pets. It’s best to use them within a few weeks, as some ingredients, like lemon juice, can lose their effectiveness over time. Avoid storing vinegar-based solutions in metal containers, as the vinegar can react with the metal.
7. What is the best way to clean a burnt pot using DIY methods?
For a burnt pot, sprinkle a generous amount of baking soda on the bottom of the pot. Add enough water to cover the burnt area. Bring the mixture to a boil and let it simmer for 10-15 minutes. Remove from heat and let it cool. Use a non-abrasive sponge or scraper to gently scrub away the burnt residue. For stubborn stains, you can add a few tablespoons of vinegar to the boiling water.
8. How can I naturally deodorize my kitchen?
There are several ways to naturally deodorize your kitchen. Place a bowl of baking soda in the refrigerator to absorb odors. Simmer a pot of water with lemon slices, cinnamon sticks, or cloves to freshen the air. You can also use essential oil diffusers or make your own air freshener by mixing water with a few drops of your favorite essential oils in a spray bottle.
9. Are these DIY kitchen cleaning hacks environmentally friendly?
Yes, these hacks are much more environmentally friendly than using commercial cleaners. They use natural, biodegradable ingredients that won’t harm the environment. By making your own cleaning solutions, you’re also reducing your reliance on plastic bottles and packaging, which contributes to waste reduction.
10. What if I don’t have all the ingredients on hand?
Don’t worry! You can still try some of these hacks with just a few basic ingredients. Vinegar and baking soda are two of the most versatile cleaning agents, and you can use them for a wide range of tasks. If you don’t have lemon juice, you can substitute it with another acidic ingredient, like lime juice or citric acid. The key is to experiment and find what works best for you with the ingredients you have available.

Leave a Comment