

Deep clean kitchen like a pro? Absolutely! Let’s face it, the kitchen is the heart of the home, but it’s also a magnet for grime, spills, and lingering odors. We’ve all been there, staring at a sticky stovetop or a mysteriously stained countertop, wondering where to even begin. But fear not, because I’m about to share some game-changing DIY tricks that will transform your kitchen from a chaotic mess to a sparkling sanctuary.
For centuries, cultures around the world have valued clean and organized kitchens, not just for hygiene but also for the sense of peace and well-being it brings. Think of the meticulously maintained kitchens of ancient Rome or the spotless hearths of traditional Japanese homes – cleanliness has always been associated with prosperity and good health.
Why do you need these DIY hacks? Because a truly deep clean kitchen like a pro isn’t just about surface-level tidiness. It’s about eliminating hidden bacteria, preventing pest infestations, and creating a healthier environment for you and your family. Plus, let’s be honest, a clean kitchen is simply more enjoyable to cook and spend time in! So, ditch the harsh chemicals and expensive cleaning services, and get ready to roll up your sleeves. I’m going to show you how to achieve a professional-level clean using simple, affordable ingredients and techniques. Get ready to reclaim your kitchen and enjoy a space that’s not only clean but also inviting and inspiring!
Deep Clean Your Kitchen Like a Pro: A DIY Guide
Hey there! Let’s face it, the kitchen is the heart of the home, but it’s also a magnet for grime, spills, and general chaos. Don’t worry, though! I’m going to walk you through a deep clean that will leave your kitchen sparkling and feeling brand new. Get ready to roll up your sleeves – it’s time to transform your kitchen from a disaster zone to a culinary haven!
What You’ll Need: Your Cleaning Arsenal
Before we dive in, let’s gather our supplies. Having everything on hand will make the process much smoother. Here’s what I recommend:
* Cleaning Solutions:
* All-purpose cleaner (I prefer a natural, eco-friendly option)
* Dish soap
* Glass cleaner
* Baking soda
* White vinegar
* Degreaser (for stubborn grease buildup)
* Stainless steel cleaner (if applicable)
* Tools:
* Microfiber cloths (lots of them!)
* Sponges (with a non-scratch scouring side)
* Scrub brush (for grout and tough spots)
* Old toothbrush (for detail work)
* Spray bottles
* Rubber gloves (protect those hands!)
* Trash bags
* Vacuum cleaner with attachments
* Mop and bucket
* Screwdriver (for removing vent hood filters)
* Step stool (if needed)
* Optional but Helpful:
* Magic Eraser
* Lemon essential oil (for a fresh scent)
* Dishwasher cleaner
* Oven cleaner (if you’re tackling the oven)
Phase 1: Clearing the Decks – Preparation is Key
Before we start scrubbing, we need to declutter and prep the space. This will make the actual cleaning much easier and more efficient.
1. Clear the Countertops: Remove everything from your countertops – appliances, utensils, canisters, everything! This gives you a blank canvas to work with. Place items in boxes or bins to keep them organized while you clean.
2. Empty the Sink and Dishwasher: Make sure the sink is empty and all dishes are either washed, dried, and put away, or loaded into the dishwasher. Run the dishwasher if it’s full.
3. Remove Trash and Recycling: Take out the trash and recycling. This prevents odors and gives you more space to move around.
4. Sweep or Vacuum the Floor: Get rid of any loose crumbs, dirt, or debris on the floor. This will prevent you from spreading it around while you’re mopping.
5. Open Windows (Ventilation is Important!): Open windows to ventilate the kitchen. This is especially important when using cleaning products.
Phase 2: Tackling the Big Stuff – Appliances and Cabinets
Now we’re ready to tackle the major areas of the kitchen. We’ll start with the appliances and cabinets, working our way down.
Cleaning the Refrigerator
1. Unplug the Refrigerator: This is a safety precaution.
2. Remove All Food: Take everything out of the refrigerator, including shelves and drawers. Discard any expired or spoiled items.
3. Wash Shelves and Drawers: Wash the shelves and drawers with warm, soapy water. Rinse thoroughly and let them air dry.
4. Clean the Interior: Wipe down the interior of the refrigerator with a solution of baking soda and water (about 1 tablespoon of baking soda per quart of water). This will help absorb odors. Pay special attention to spills and stains.
5. Clean the Exterior: Wipe down the exterior of the refrigerator with all-purpose cleaner. Don’t forget the door handles!
6. Clean the Condenser Coils: Use a vacuum cleaner with a brush attachment to clean the condenser coils (usually located at the back or bottom of the refrigerator). This will help the refrigerator run more efficiently.
7. Replace Shelves and Drawers: Once the shelves and drawers are dry, replace them in the refrigerator.
8. Restock the Refrigerator: Put the food back in the refrigerator, organizing it as you go.
9. Plug in the Refrigerator: Plug the refrigerator back in.
Cleaning the Oven
1. Self-Cleaning Oven: If your oven has a self-cleaning function, follow the manufacturer’s instructions. Be aware that this process can produce strong odors and a lot of heat, so ensure good ventilation.
2. Manual Cleaning: If you don’t have a self-cleaning oven, or prefer to clean it manually, follow these steps:
1. Remove Racks: Take out the oven racks and soak them in hot, soapy water.
2. Make a Baking Soda Paste: Mix baking soda with water to form a thick paste.
3. Apply the Paste: Spread the paste all over the interior of the oven, avoiding the heating elements.
4. Let it Sit Overnight: Let the paste sit overnight to loosen the grime.
5. Scrub and Wipe: The next day, scrub the oven with a sponge or scrub brush. Wipe away the paste with a damp cloth.
6. Clean the Racks: Scrub the oven racks and rinse them thoroughly.
7. Dry and Replace: Dry the racks and replace them in the oven.
Cleaning the Microwave
1. Steam Clean: Fill a microwave-safe bowl with 1 cup of water and a few tablespoons of white vinegar or lemon juice.
2. Microwave for 5 Minutes: Microwave the mixture on high for 5 minutes. This will create steam that loosens the grime.
3. Let it Sit: Let the bowl sit in the microwave for another 5 minutes.
4. Wipe Clean: Carefully remove the bowl and wipe down the interior of the microwave with a damp cloth.
Cleaning the Dishwasher
1. Remove Food Debris: Check the drain and remove any food debris.
2. Run an Empty Cycle: Place a dishwasher-safe cup filled with white vinegar on the top rack. Run the dishwasher on a hot cycle.
3. Use Dishwasher Cleaner: Alternatively, use a commercial dishwasher cleaner according to the manufacturer’s instructions.
Cleaning the Cabinets
1. Dust the Cabinets: Use a microfiber cloth to dust the cabinets, both inside and out.
2. Wash the Cabinets: Mix warm water with a few drops of dish soap. Use a sponge to wash the cabinets, paying special attention to areas around the handles and knobs.
3. Rinse and Dry: Rinse the cabinets with a damp cloth and dry them with a clean microfiber cloth.
4. Degrease if Needed: For stubborn grease buildup, use a degreaser specifically designed for cabinets. Follow the manufacturer’s instructions.
Cleaning the Vent Hood
1. Remove Filters: Remove the vent hood filters.
2. Wash Filters: Wash the filters in hot, soapy water or run them through the dishwasher.
3. Clean the Hood: Wipe down the exterior of the vent hood with all-purpose cleaner.
4. Replace Filters: Once the filters are clean and dry, replace them in the vent hood.
Phase 3: Detailing and Finishing Touches – The Sparkle Factor
Now that we’ve tackled the big stuff, it’s time to focus on the details that will really make your kitchen shine.
1. Clean the Countertops: Wipe down the countertops with all-purpose cleaner. Pay special attention to seams and edges. For granite or marble countertops, use a cleaner specifically designed for those materials.
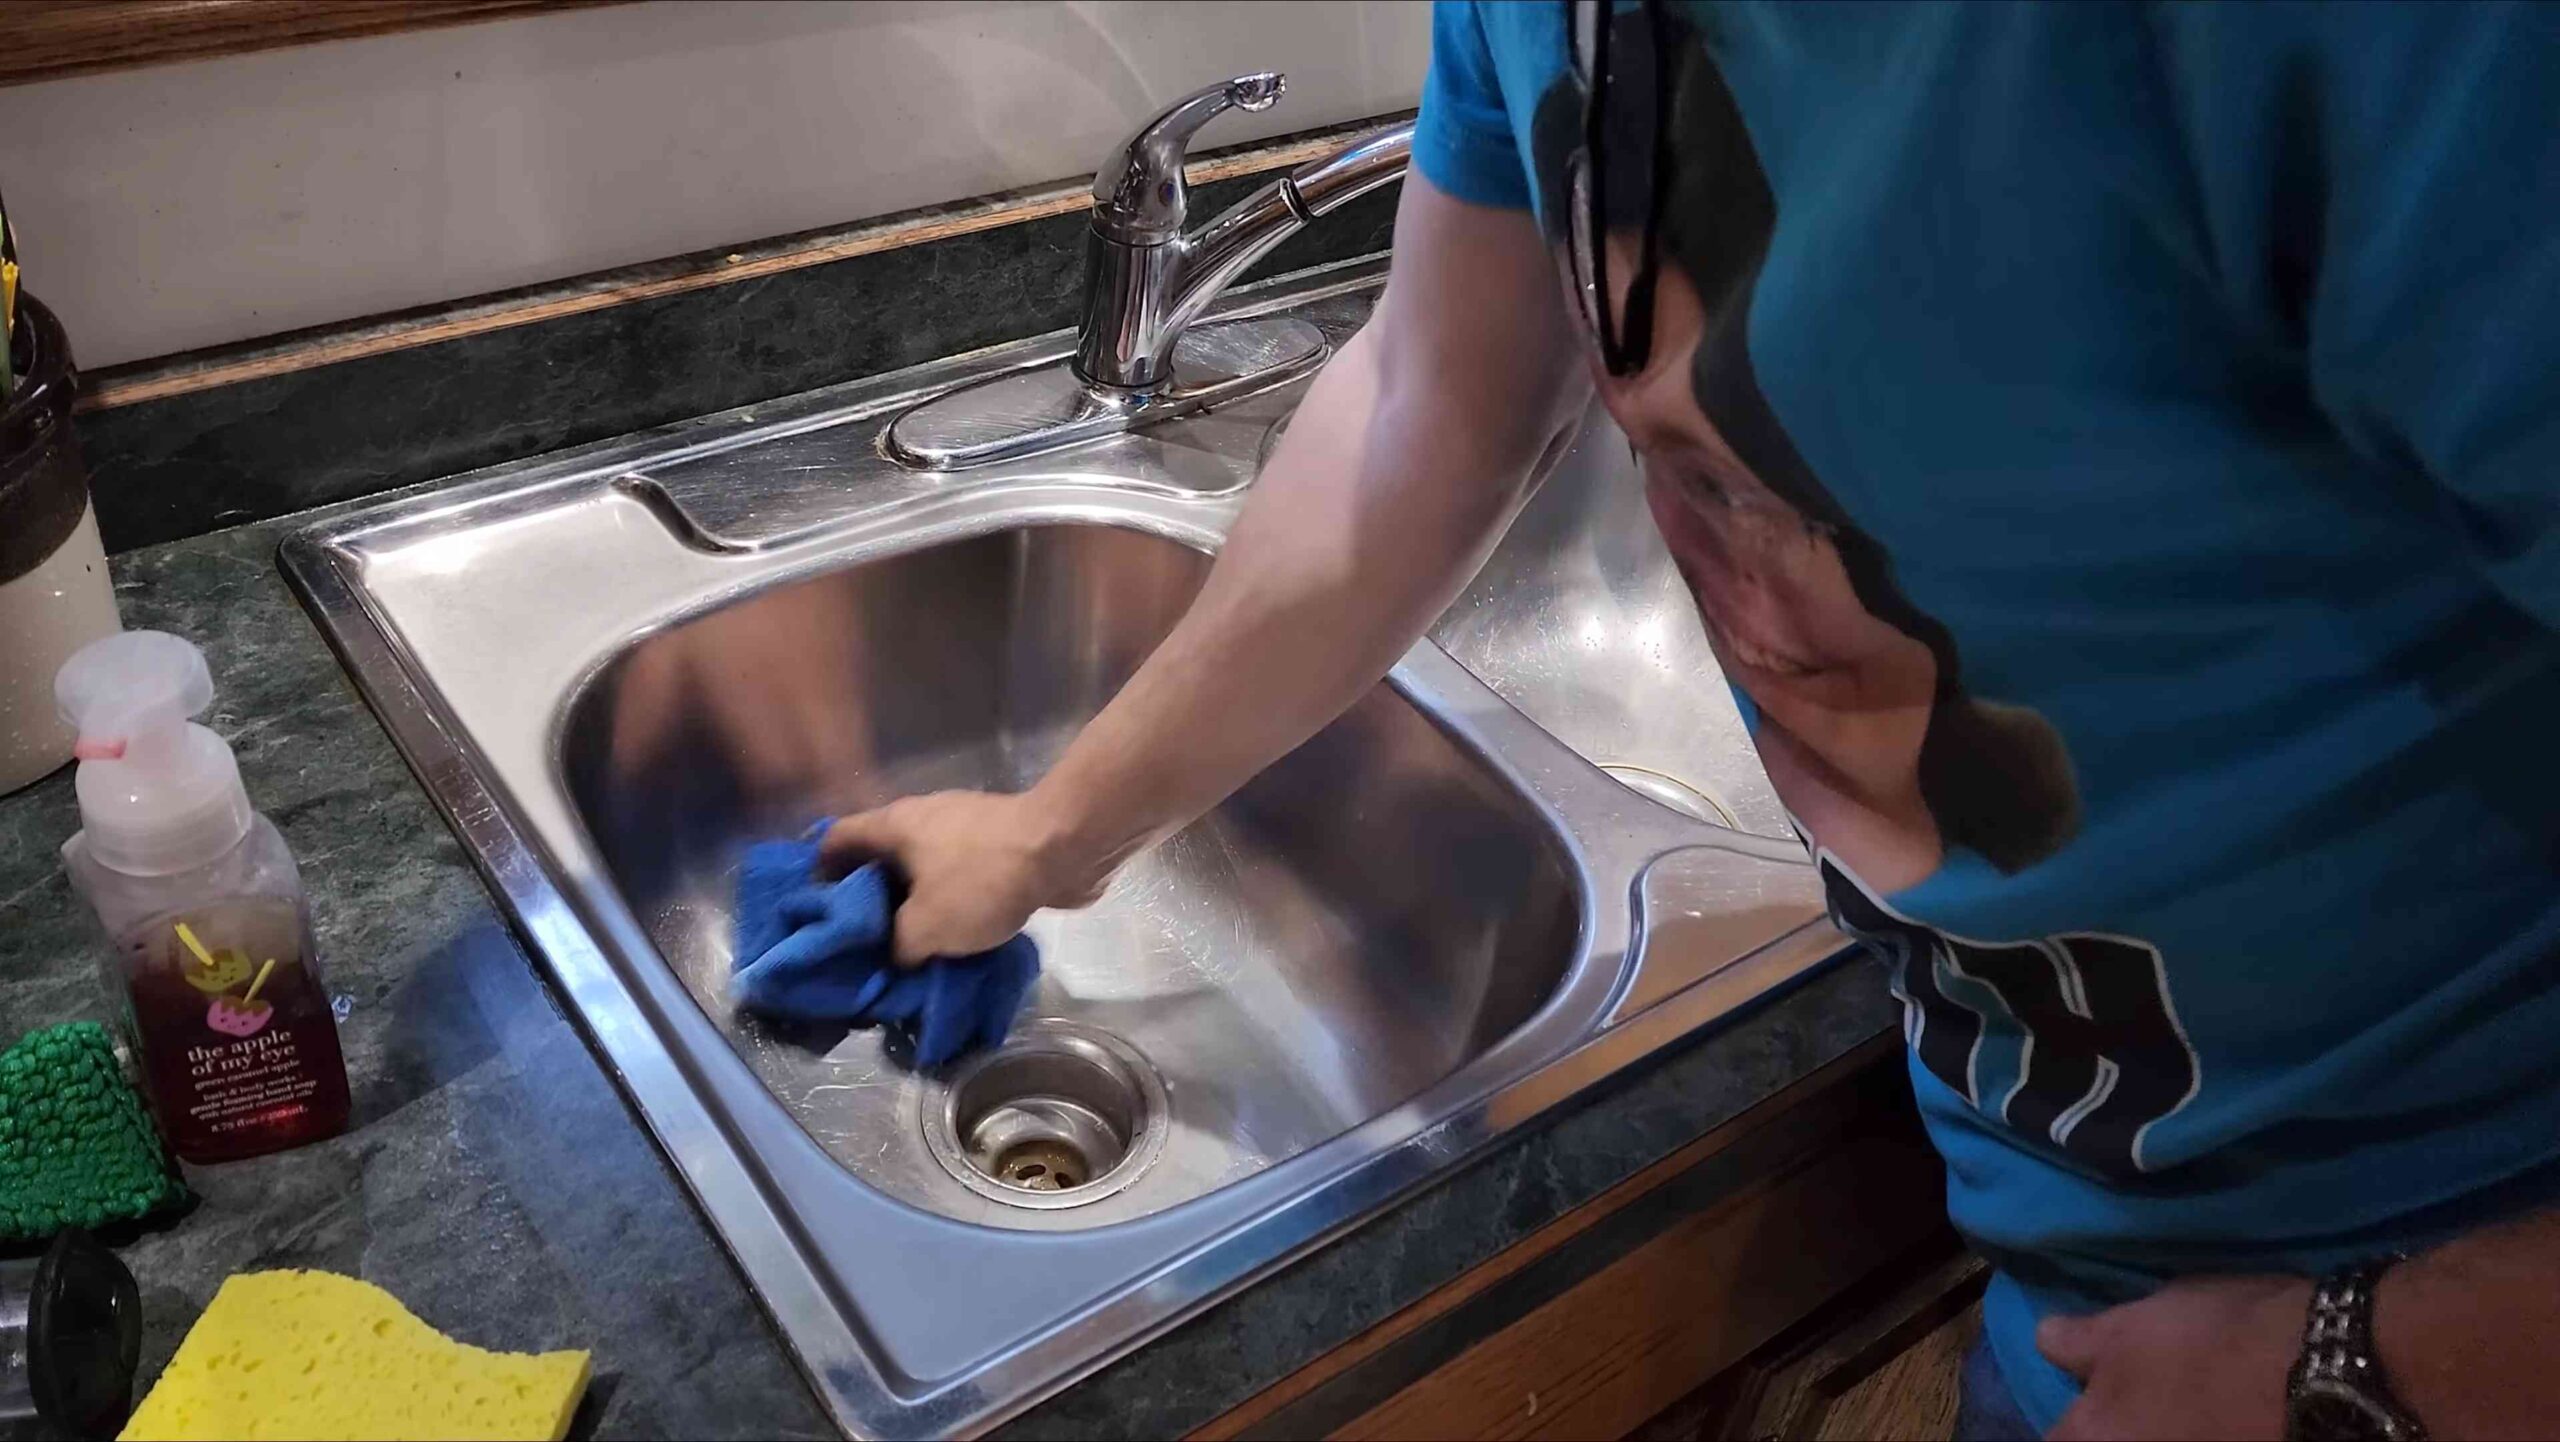
2. Clean the Sink: Scrub the sink with a sponge and dish soap. Rinse thoroughly. For stainless steel sinks, use a stainless steel cleaner to remove water spots and fingerprints.
3. Clean the Faucet: Wipe down the faucet with all-purpose cleaner. Use an old toothbrush to clean around the base of the faucet.
4. Clean the Backsplash: Wipe down the backsplash with all-purpose cleaner. For tile backsplashes, use a grout brush to clean the grout lines.
5. Clean the Windows and Mirrors: Use glass cleaner to clean the windows and mirrors.
6. Clean the Light Fixtures: Dust the light fixtures with a microfiber cloth. If necessary, wash them with warm, soapy water. Make sure the lights are turned off before cleaning.
7. Mop the Floor: Mop the floor with a mop and bucket. Use a cleaning solution appropriate for your floor type.
8. Organize and Put Away: Put everything back in its place, organizing as you go. This is a great opportunity to declutter and
Conclusion
So, there you have it! Mastering the art of deep cleaning your kitchen like a pro isn’t about spending hours scrubbing with harsh chemicals. It’s about working smarter, not harder, and utilizing simple, effective DIY tricks that deliver sparkling results. This comprehensive guide has equipped you with the knowledge and techniques to transform your kitchen from a potential germ haven into a pristine and inviting space.
Why is this DIY approach a must-try? Because it’s not just about cleanliness; it’s about creating a healthier and more enjoyable environment for you and your family. By using natural ingredients and focusing on often-overlooked areas, you’re eliminating harmful chemicals, reducing allergens, and preventing the build-up of bacteria that can lead to illness. Plus, let’s be honest, a clean kitchen is a happy kitchen! It inspires creativity in cooking, makes meal preparation more efficient, and simply feels good to be in.
But don’t stop there! This is just the beginning of your deep cleaning journey. Feel free to experiment with variations on these techniques to suit your specific needs and preferences. For instance, if you’re not a fan of vinegar’s scent, try using lemon juice as a natural disinfectant and degreaser. For stubborn stains on your stovetop, create a paste of baking soda and water and let it sit for a few minutes before scrubbing. Consider adding a few drops of your favorite essential oil to your cleaning solutions for a refreshing and aromatic boost. Lavender, tea tree, and eucalyptus oils are known for their antibacterial properties and can enhance the cleaning power of your DIY solutions.
Remember, consistency is key. While a deep clean is essential, maintaining a clean kitchen requires regular upkeep. Incorporate these DIY tricks into your weekly cleaning routine to prevent grime from accumulating and keep your kitchen looking its best. Wipe down countertops and stovetops after each use, sweep or vacuum floors regularly, and address spills immediately. A little bit of maintenance goes a long way in preserving the cleanliness and hygiene of your kitchen.
We’re confident that these DIY deep cleaning methods will revolutionize your kitchen cleaning routine. They’re effective, affordable, and environmentally friendly. Now, it’s your turn to put them to the test! We encourage you to try these techniques and experience the difference for yourself.
Don’t be shy – share your experiences with us! We’d love to hear about your successes, challenges, and any variations you’ve discovered. Post your before-and-after photos on social media using [Your Hashtag Here] and tag us [Your Social Media Handle Here]. Let’s inspire others to embrace the power of DIY deep cleaning and create healthier, happier homes.
So, grab your supplies, roll up your sleeves, and get ready to transform your kitchen into a sparkling sanctuary. Happy cleaning!
Frequently Asked Questions (FAQ)
What exactly does “deep cleaning” entail, and how is it different from regular cleaning?
Deep cleaning goes beyond the surface-level tasks of regular cleaning. While regular cleaning focuses on maintaining cleanliness through daily or weekly tasks like wiping counters and sweeping floors, deep cleaning tackles accumulated grime, dirt, and bacteria in hard-to-reach areas. It involves a more thorough and intensive cleaning process, addressing areas that are often neglected during routine cleaning, such as inside appliances, behind furniture, and grout lines. The goal of deep cleaning is to create a healthier and more hygienic environment by eliminating hidden sources of dirt and allergens.
How often should I deep clean my kitchen?
The frequency of deep cleaning depends on several factors, including the size of your household, how often you cook, and your personal cleaning standards. As a general guideline, it’s recommended to deep clean your kitchen at least every 3-6 months. However, if you have a large family, cook frequently, or have pets, you may need to deep clean more often. Pay attention to areas that tend to accumulate dirt and grime quickly, such as the stovetop, oven, and refrigerator, and adjust your cleaning schedule accordingly.
Are these DIY cleaning solutions safe for all kitchen surfaces?
While most of the DIY cleaning solutions mentioned are safe for a variety of kitchen surfaces, it’s always a good idea to test them in an inconspicuous area first, especially on delicate or sensitive materials like marble, granite, or stainless steel. Vinegar, for example, can be too acidic for some natural stone surfaces. Baking soda can be abrasive, so use it gently on surfaces that scratch easily. When in doubt, consult the manufacturer’s instructions for your specific appliances and surfaces.
Can I use these DIY cleaning solutions if I have allergies or sensitivities to certain chemicals?
One of the biggest advantages of using DIY cleaning solutions is that you have complete control over the ingredients. This makes them a great option for people with allergies or sensitivities to harsh chemicals found in commercial cleaning products. However, it’s still important to be mindful of potential allergens in natural ingredients. For example, if you’re allergic to citrus fruits, avoid using lemon juice in your cleaning solutions. Always read the labels of any ingredients you use and consult with your doctor if you have any concerns.
How can I prevent grime from building up in my kitchen between deep cleanings?
Prevention is key to maintaining a clean kitchen and reducing the need for frequent deep cleanings. Here are a few tips to help you prevent grime from building up:
* Wipe down countertops and stovetops after each use.
* Sweep or vacuum floors regularly.
* Address spills immediately.
* Empty the trash can frequently.
* Run the dishwasher regularly.
* Ventilate your kitchen while cooking to prevent grease and moisture from accumulating.
* Use a range hood to capture grease and smoke.
* Store food properly to prevent spills and spoilage.
What are some common kitchen cleaning mistakes to avoid?
Even with the best intentions, it’s easy to make mistakes when cleaning your kitchen. Here are a few common pitfalls to avoid:
* Using dirty cleaning cloths or sponges.
* Not rinsing surfaces thoroughly after cleaning.
* Using too much cleaning solution.
* Mixing different cleaning products together (especially bleach and ammonia).
* Ignoring hard-to-reach areas.
* Forgetting to clean the inside of appliances.
* Using abrasive cleaners on delicate surfaces.
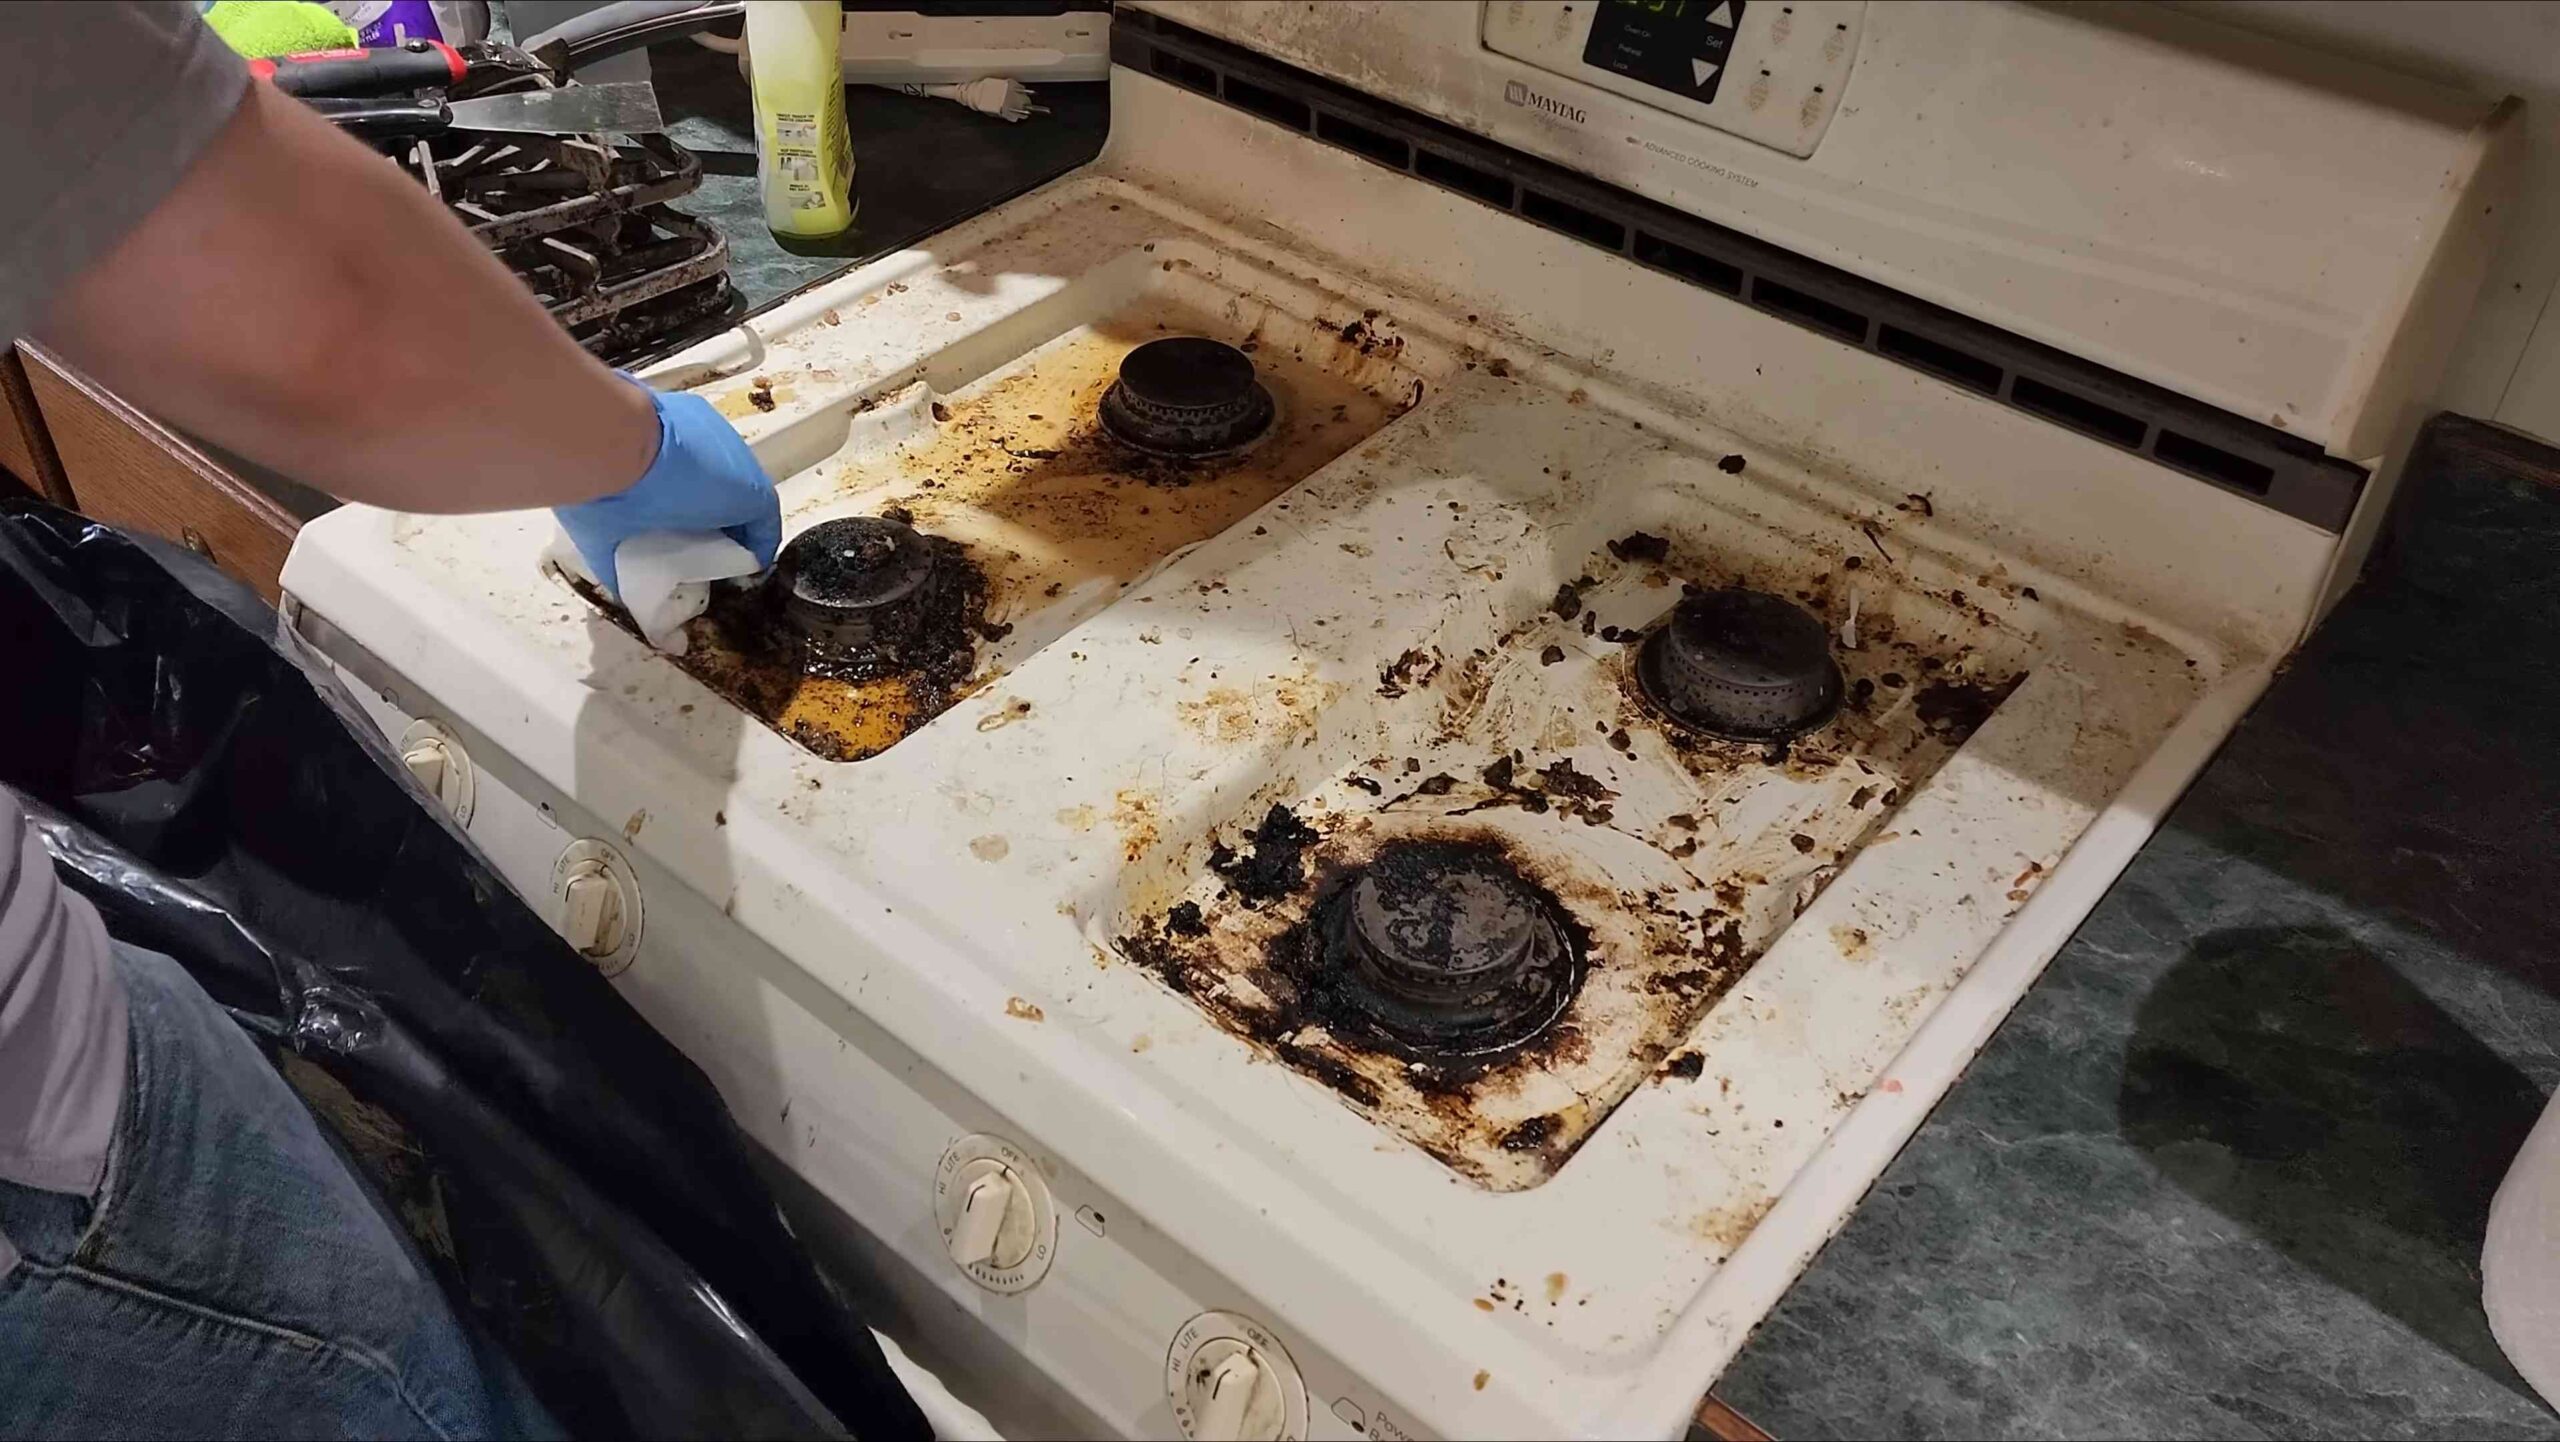
How do I get rid of stubborn stains on my stovetop or oven?
Stubborn stains on your stovetop or oven can be challenging to remove, but with the right techniques, you can restore them to their former glory. For stovetop stains, try creating a paste of baking soda and water and letting it sit on the stain for a few minutes before scrubbing. For oven stains, you can use a similar paste or try a commercial oven cleaner. Be sure to follow the manufacturer’s instructions carefully and ventilate your kitchen while using oven cleaner.
What’s the best way to clean my refrigerator?
Cleaning your refrigerator regularly is essential for preventing food spoilage and maintaining a hygienic environment. Start by removing all the food from the refrigerator and discarding any expired or spoiled items. Then, wipe down the shelves, drawers, and walls with a solution of warm water and dish soap. For stubborn stains or odors, you can use a solution of baking soda and water or vinegar and water. Be sure to rinse all surfaces thoroughly and dry them before putting the food back in.
How can I eliminate odors in my kitchen?
Kitchen odors can be caused by a variety of factors, including food spills, garbage, and mold. To eliminate odors, start by identifying the source and addressing it directly. Clean up any spills, empty the trash can, and check for signs of mold. You can also use natural odor absorbers like baking soda or activated charcoal to neutralize odors. Place a bowl of baking soda in the refrigerator or near the source of the odor. You can also simmer a pot of water with cinnamon sticks or cloves to freshen the air.
Where can I find more information about DIY cleaning solutions and kitchen cleaning tips?
There are many resources available online and in print that offer more information about DIY cleaning solutions and kitchen cleaning tips. You can search online for articles, blog posts, and videos on the topic. You can also consult books and magazines on home cleaning and organization. Be sure to evaluate the credibility of the sources you consult and choose information that is reliable and accurate.


Leave a Comment