

DIY Leaf Mustard Bottle Garden: Ever dreamed of fresh, peppery greens right at your fingertips, even if you don’t have a sprawling backyard? I know I have! Forget those expensive grocery store trips for wilted mustard greens. This DIY project is your ticket to a sustainable, space-saving, and seriously satisfying gardening experience.
Leaf mustard, with its vibrant history rooted in Asian cuisine for centuries, offers a unique flavor profile that elevates everything from salads to stir-fries. But beyond its culinary appeal, growing your own leaf mustard is incredibly rewarding. Think about it: you’re connecting with nature, reducing your carbon footprint, and enjoying the freshest possible ingredients.
Why a bottle garden, you ask? Well, in today’s world, space is a premium. Whether you live in a cozy apartment or simply want to maximize your gardening potential, a DIY bottle garden is the perfect solution. It’s an ingenious way to recycle plastic bottles, turning them into miniature ecosystems bursting with flavor. Plus, it’s a fantastic project for beginners and seasoned gardeners alike. I’m excited to share this simple yet effective trick that will bring the joy of fresh, homegrown leaf mustard right to your windowsill. Get ready to roll up your sleeves and create your very own DIY Leaf Mustard Bottle Garden!
DIY Leaf Mustard Bottle Garden: From Trash to Table!
Hey there, fellow gardening enthusiasts! Ever thought about turning those empty plastic bottles into a thriving little garden? Well, get ready, because today I’m going to show you how to create your very own leaf mustard bottle garden. It’s a fantastic way to recycle, save money, and enjoy fresh, peppery greens right at your fingertips. Plus, it’s super easy, even if you don’t have a green thumb!
What You’ll Need: The Gardener’s Toolkit
Before we dive in, let’s gather our supplies. This is a pretty low-cost project, so you probably have most of these items lying around already.
* Empty Plastic Bottles: The star of the show! I recommend using 2-liter bottles, but any size will work. Just make sure they’re clean and dry. The number of bottles depends on how big you want your garden to be.
* Scissors or a Utility Knife: For cutting the bottles. Be careful!
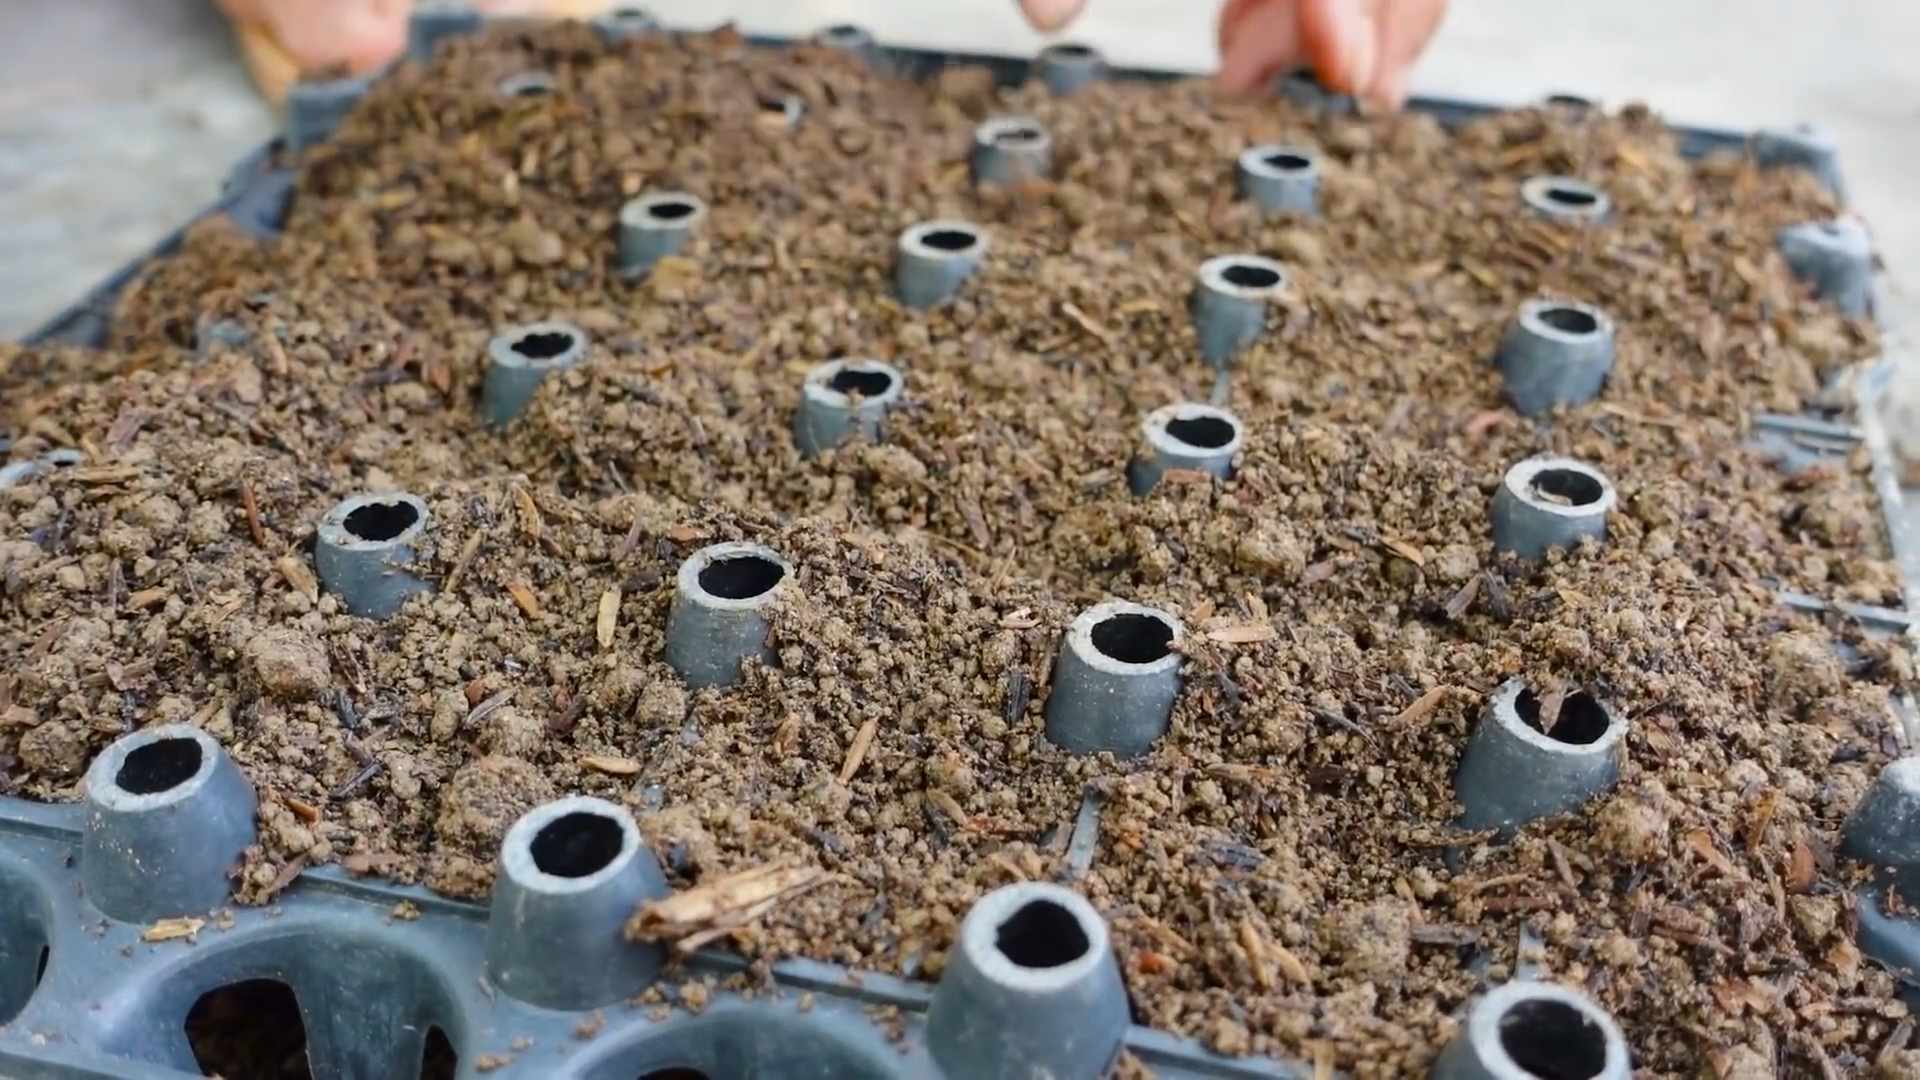
* Potting Soil: This is crucial for providing your mustard greens with the nutrients they need. Don’t skimp on quality!
* Leaf Mustard Seeds: You can find these at most garden centers or online. There are different varieties, so pick one that sounds good to you. I personally love the ‘Red Giant’ for its beautiful color and spicy flavor.
* Water: For watering your plants, of course!
* Optional:
* Drill or Nail: For creating drainage holes.
* Spray Paint: To decorate your bottles (optional, but fun!).
* Twine or Rope: For hanging your bottle garden (if you want a vertical garden).
* Small Pebbles or Gravel: To improve drainage.
Preparing the Bottles: Giving Them a New Life
Okay, let’s get our hands dirty! This is where we transform those discarded bottles into mini-planters.
1. Clean the Bottles: Make sure your bottles are thoroughly cleaned and dried. Remove any labels and sticky residue. A little soap and water usually does the trick.
2. Cut the Bottles: This is where the scissors or utility knife comes in. There are a few ways you can cut the bottles, depending on the look you’re going for:
* Horizontal Cut: Cut the bottle horizontally, about halfway down. This creates two separate containers. You can use the top half as a funnel when watering.
* Vertical Cut: Cut a rectangular opening in the side of the bottle. This is great for creating a window into your soil.
* Hanging Planter: Cut the bottle in half horizontally. Invert the top half and place it inside the bottom half. This creates a self-watering system. You’ll need to drill a hole in the bottle cap to allow the water to wick up.
Safety First! Be extremely careful when using sharp tools. Always cut away from yourself and use a cutting board or other protective surface.
3. Create Drainage Holes (Optional but Recommended): If you’re not using the self-watering method, you’ll need to create drainage holes in the bottom of your bottles. This prevents the soil from becoming waterlogged, which can lead to root rot. Use a drill or a nail to poke a few holes in the bottom of each bottle.
4. Decorate (Optional): This is where you can get creative! Use spray paint, markers, or even decoupage to decorate your bottles. Let your imagination run wild! Just make sure the paint is non-toxic and safe for plants. I love using chalkboard paint so I can label each bottle with the type of plant it contains.
Planting the Mustard Seeds: Nurturing New Growth
Now for the fun part – planting the seeds! This is where we bring our bottle garden to life.
1. Add Drainage Layer (Optional): If you’re using drainage holes, you can add a layer of small pebbles or gravel to the bottom of the bottle. This will help improve drainage and prevent the soil from clogging the holes.
2. Fill with Potting Soil: Fill the bottles with potting soil, leaving about an inch of space at the top. Gently pat down the soil to remove any air pockets.
3. Sow the Seeds: Sprinkle the leaf mustard seeds evenly over the surface of the soil. Don’t overcrowd them! A good rule of thumb is to space them about an inch apart.
4. Cover the Seeds: Lightly cover the seeds with a thin layer of potting soil.
5. Water Gently: Water the soil gently, using a watering can or spray bottle. Be careful not to wash away the seeds. The soil should be moist but not soggy.
Caring for Your Mustard Greens: Keeping Them Happy and Healthy
Congratulations! You’ve planted your leaf mustard seeds. Now it’s time to care for them and watch them grow.
1. Location, Location, Location: Place your bottle garden in a sunny location. Leaf mustard needs at least 6 hours of sunlight per day. A windowsill or balcony is ideal. If you don’t have enough natural light, you can use a grow light.
2. Watering: Keep the soil consistently moist, but not soggy. Water when the top inch of soil feels dry to the touch. Avoid overwatering, as this can lead to root rot.
3. Fertilizing (Optional): Leaf mustard doesn’t need a lot of fertilizer, but you can give it a boost with a diluted liquid fertilizer every few weeks. Follow the instructions on the fertilizer package.
4. Thinning (If Necessary): If your seedlings are too crowded, you may need to thin them out. This means removing some of the seedlings to give the remaining ones more space to grow. Simply snip off the unwanted seedlings at the base with scissors.
5. Pest Control: Keep an eye out for pests, such as aphids or slugs. If you spot any, you can try spraying them with a mixture of water and dish soap. You can also use insecticidal soap or neem oil.
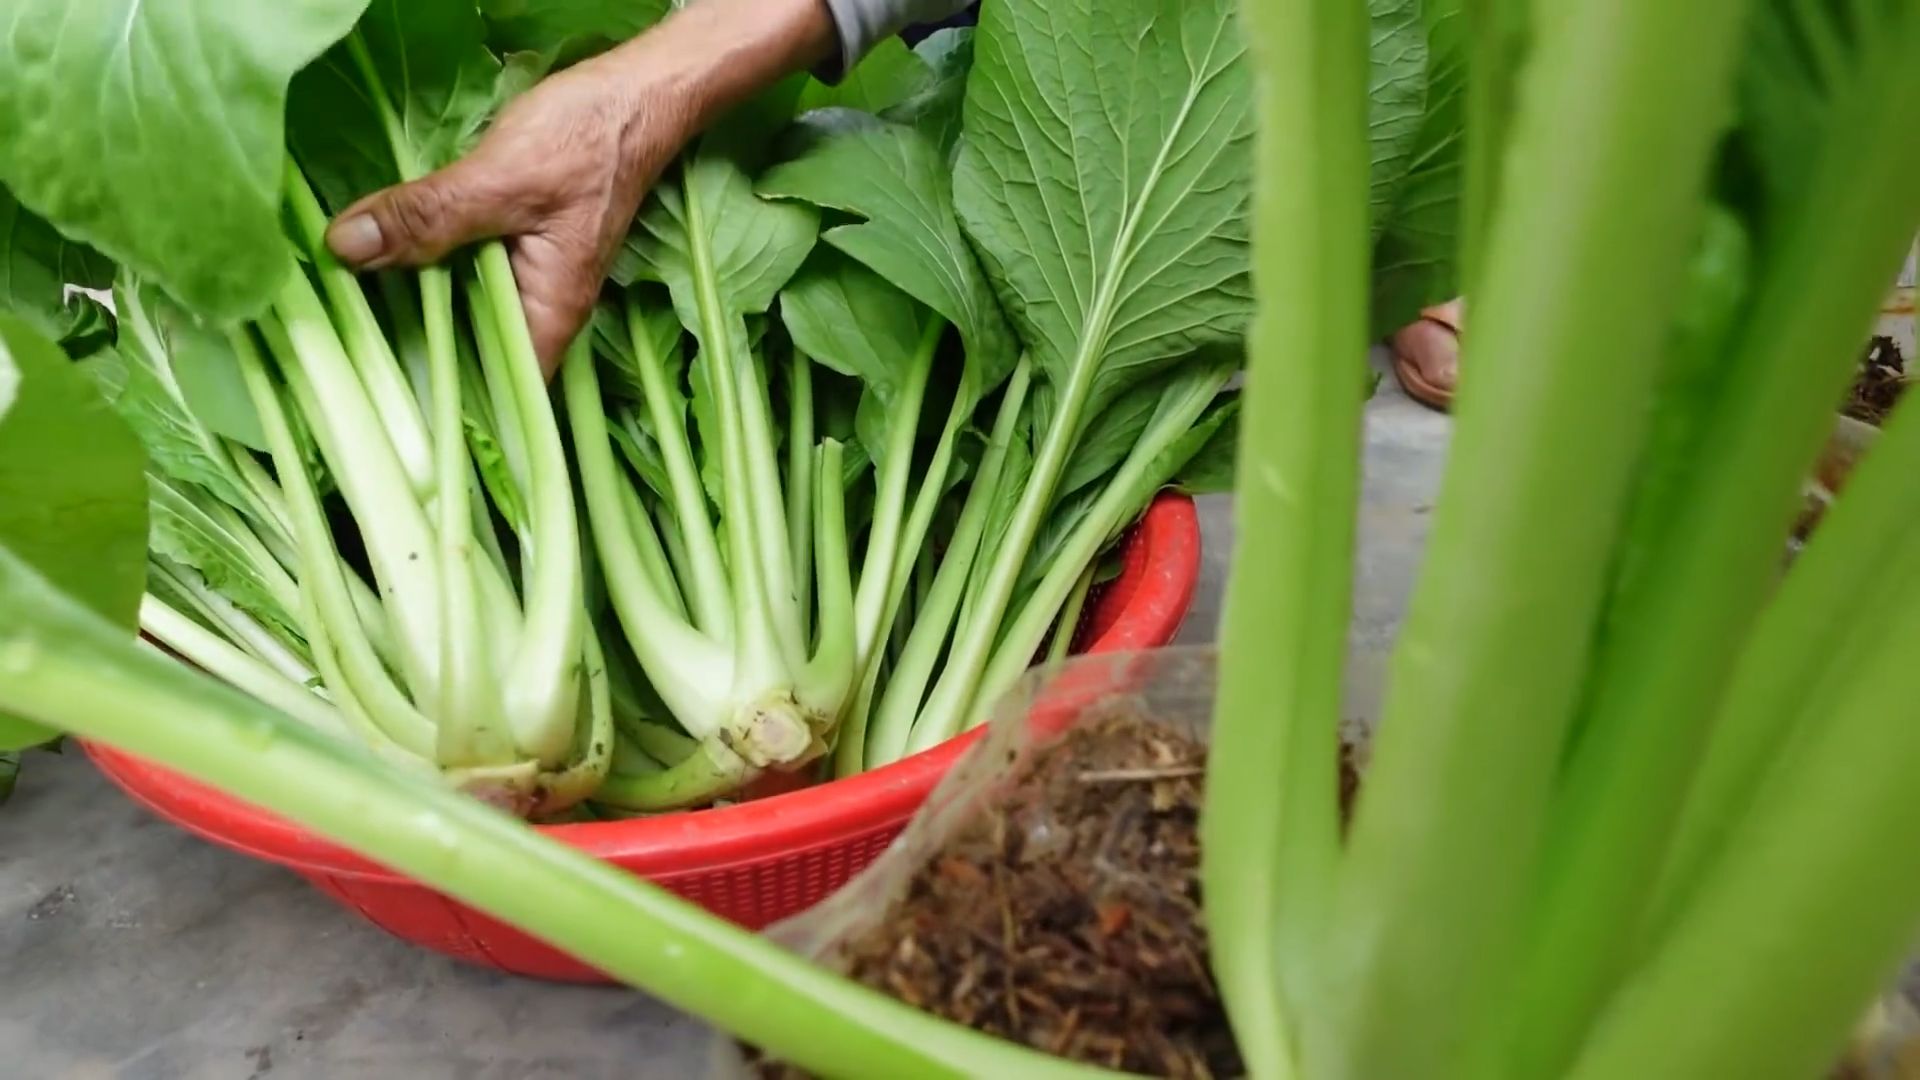
6. Harvesting: You can start harvesting your leaf mustard greens when they are about 4-6 inches tall. Simply snip off the leaves with scissors, leaving the base of the plant intact. This will allow the plant to continue producing new leaves.
Harvesting and Enjoying Your Bounty: From Garden to Plate
The best part of growing your own leaf mustard is, of course, enjoying the fruits (or rather, leaves!) of your labor.
1. Harvesting: As mentioned earlier, you can harvest your leaf mustard greens when they are about 4-6 inches tall. Harvest regularly to encourage new growth.
2. Washing: Wash the harvested leaves thoroughly before eating.
3. Storage: Store the harvested leaves in the refrigerator in a plastic bag or container. They will keep for several days.
4. Enjoying: Leaf mustard has a peppery, slightly spicy flavor. It’s delicious in salads, sandwiches, stir-fries, and soups. You can also use it as a garnish or add it to smoothies.
Troubleshooting: Addressing Common Issues
Even with the best care, you might encounter some problems along the way. Here are a few common issues and how to address them:
* Yellowing Leaves: This could be a sign of overwatering, underwatering, or nutrient deficiency. Check the soil moisture and adjust your watering accordingly. If the soil is dry, water more frequently. If the soil is soggy, water less frequently. You can also try fertilizing the plants with a diluted liquid fertilizer.
* Leggy Seedlings: This means the seedlings are stretching towards the light. This is usually a sign that they’re not getting enough sunlight. Move the plants to a sunnier location or use a grow light.
* Pests: As mentioned earlier, keep an eye out for pests. If you spot any, take action immediately to prevent them from spreading.
* Slow Growth: This could be due to a variety of factors, such as poor soil, lack of sunlight, or cold temperatures. Make sure the plants are getting enough sunlight and water, and that the soil is well-draining. You can also try fertilizing the plants.
Going Vertical: Creating a Hanging Bottle Garden
Want to take your bottle garden to the next level? Try creating a hanging vertical garden! This is a great way to save space and add a touch of greenery to your balcony or patio.
1. Prepare the Bottles: Follow the same steps as above for preparing the bottles.
2. Create Hanging Holes: Drill two holes on either side of the bottle, near the top.
3. Thread Twine or Rope: Thread twine or rope through the holes, creating a loop for hanging.
4. Hang the Bottles: Hang the bottles from a railing, fence, or other sturdy structure.
5. Plant and Care: Plant and care for your leaf
Conclusion
So, there you have it! Transforming a humble mustard bottle into a thriving miniature garden for leaf mustard is not just a fun project; it’s a sustainable, space-saving, and incredibly rewarding way to enjoy fresh greens right at your fingertips. We’ve walked you through the simple steps, highlighting the ease and accessibility of this DIY trick. But why is this a must-try?
Firstly, it’s about control. You dictate the growing environment, ensuring your leaf mustard is free from unwanted pesticides and herbicides. You know exactly what’s going into your food, offering peace of mind and a healthier harvest. Secondly, it’s about sustainability. Repurposing a mustard bottle reduces waste and gives new life to something that would otherwise end up in the recycling bin (or worse, the landfill). It’s a small step towards a greener lifestyle, and every little bit counts. Thirdly, it’s about accessibility. Whether you live in a sprawling suburban home or a tiny city apartment, this project fits. It requires minimal space and resources, making fresh, homegrown produce available to everyone.
Beyond the basic recipe, there’s ample room for experimentation and personalization. Consider using different types of soil mixes to see which yields the best results. Try adding a small amount of organic fertilizer to boost growth. Explore different varieties of leaf mustard – some are spicier, some are milder, and some have beautiful red or purple hues. You could even create a multi-bottle garden, growing different herbs and greens alongside your leaf mustard. Think about adding a small wick watering system for even more hands-off care.
Don’t be afraid to get creative! The beauty of this DIY project lies in its adaptability. You can tailor it to your specific needs and preferences. Perhaps you want to add a decorative touch to your bottle garden, painting it or adding some twine for a rustic look. Maybe you want to experiment with different lighting conditions to see how they affect growth. The possibilities are endless.
This DIY leaf mustard bottle garden is more than just a gardening project; it’s an opportunity to connect with nature, learn new skills, and enjoy the satisfaction of growing your own food. It’s a chance to embrace sustainability and reduce your environmental impact. And, most importantly, it’s a fun and engaging activity that can be enjoyed by people of all ages.
We wholeheartedly encourage you to give this DIY trick a try. It’s a simple, affordable, and incredibly rewarding way to bring a little bit of green into your life. Once you’ve created your own leaf mustard bottle garden, we’d love to hear about your experience! Share your photos, tips, and tricks with us in the comments below. Let’s build a community of bottle gardeners and inspire others to embrace the joy of homegrown produce. What are you waiting for? Grab that empty mustard bottle and get growing!
Frequently Asked Questions
What kind of mustard bottle is best for this project?
Any standard plastic mustard bottle will work well. Look for bottles that are relatively clear so light can reach the soil. Make sure to thoroughly clean the bottle with soap and water to remove any residual mustard. A bottle with a wider mouth will be easier to plant in. If you are concerned about the plastic, you can use a glass jar instead, but be careful when cutting drainage holes.
What kind of soil should I use?
A good quality potting mix is ideal. You can also create your own mix by combining equal parts of potting soil, compost, and perlite or vermiculite. This will provide good drainage and aeration for your leaf mustard. Avoid using garden soil, as it can be too dense and may contain pests or diseases.
How much sunlight does my leaf mustard bottle garden need?
Leaf mustard thrives in bright, indirect sunlight. Place your bottle garden near a sunny window or under a grow light. Avoid direct sunlight, especially during the hottest part of the day, as it can scorch the leaves. If you don’t have access to natural light, a fluorescent or LED grow light can provide adequate illumination. Aim for at least 6-8 hours of light per day.
How often should I water my leaf mustard?
Water your leaf mustard when the top inch of soil feels dry to the touch. Avoid overwatering, as this can lead to root rot. Water gently, using a watering can or spray bottle, until the soil is evenly moist but not soggy. The frequency of watering will depend on the temperature and humidity of your environment. In general, you may need to water more frequently during warmer months.
How long does it take for leaf mustard to grow?
Leaf mustard is a fast-growing green. You can typically start harvesting leaves within 3-4 weeks of planting. The exact time will depend on the variety of leaf mustard and the growing conditions. Harvest leaves when they are young and tender, about 4-6 inches long.
Can I grow other plants in a mustard bottle garden?
Yes, you can grow other small herbs and greens in a mustard bottle garden. Some good options include lettuce, spinach, arugula, and chives. Choose plants that have similar growing requirements to leaf mustard. Be mindful of the size of the plants and ensure they have enough space to grow.
How do I harvest leaf mustard from my bottle garden?
Harvest leaf mustard by snipping off the outer leaves with scissors or a knife. Leave the inner leaves to continue growing. This will allow you to harvest multiple times from the same plant. Harvest leaves when they are young and tender for the best flavor.
What if my leaf mustard starts to bolt (flower)?
Bolting is when a plant prematurely flowers, usually due to stress from heat or lack of water. Once leaf mustard bolts, the leaves can become bitter. To prevent bolting, keep your plants well-watered and provide them with shade during hot weather. If your leaf mustard does bolt, you can still harvest the leaves, but they may not taste as good.
How do I deal with pests in my bottle garden?
Pests are less common in indoor bottle gardens, but they can still occur. If you notice any pests, such as aphids or spider mites, you can try washing them off with a strong stream of water. You can also use insecticidal soap or neem oil to control pests. Be sure to follow the instructions on the product label carefully.
Can I reuse the soil from my bottle garden?
You can reuse the soil from your bottle garden, but it’s a good idea to amend it with fresh compost or potting mix. This will replenish the nutrients that have been depleted by the plants. You may also want to sterilize the soil to kill any potential pests or diseases. You can do this by baking the soil in the oven at 200 degrees Fahrenheit for 30 minutes.
How do I add drainage holes to the mustard bottle?
Carefully use a drill with a small drill bit to create several drainage holes in the bottom of the bottle. Alternatively, you can use a hot nail or screwdriver to melt holes in the plastic. Be cautious when using heat and ensure proper ventilation. Make sure the holes are large enough to allow water to drain freely.
What if I don’t have a sunny window?
If you don’t have a sunny window, you can use a grow light to provide your leaf mustard with the light it needs. LED grow lights are energy-efficient and can provide a full spectrum of light that is beneficial for plant growth. Place the grow light a few inches above the plants and keep it on for 6-8 hours per day.
Can I grow leaf mustard indoors year-round?
Yes, you can grow leaf mustard indoors year-round, as long as you provide it with adequate light, water, and nutrients. Indoor growing allows you to control the environment and avoid the challenges of outdoor gardening, such as pests, diseases, and weather fluctuations.
What are some other variations I can try with this project?
Consider adding a self-watering wick system by inserting a cotton wick through the drainage holes and into a reservoir of water below. You can also experiment with different types of containers, such as glass jars or plastic containers. Try adding a layer of gravel or pebbles to the bottom of the bottle for improved drainage. You can also decorate your bottle garden with paint, twine, or other embellishments.
Leave a Comment