

Quick kitchen deep cleaning – sounds like an oxymoron, right? But trust me, it’s totally achievable! We all know that the kitchen is the heart of the home, a place where delicious meals are created, memories are shared, and, let’s be honest, messes are made. From splattered sauces to lingering odors, our kitchens can quickly become breeding grounds for grime and bacteria. But who has the time for a full-blown, hours-long deep clean every week? That’s where these DIY tricks and hacks come in!
Historically, keeping a clean kitchen has been a cornerstone of good health and hygiene. Think back to our grandmothers, who took immense pride in their spotless kitchens, using natural remedies and elbow grease to keep everything sparkling. While we might not have the same amount of time, we can certainly borrow some of their wisdom and adapt it to our modern lives.
Let’s face it, a clean kitchen isn’t just about aesthetics; it’s about creating a healthy and safe environment for you and your family. Nobody wants to cook in a space crawling with germs or worry about cross-contamination. That’s why mastering the art of quick kitchen deep cleaning is so essential. In this article, I’m going to share my favorite DIY tricks and hacks that will help you achieve a sparkling clean kitchen in a fraction of the time. Get ready to say goodbye to stubborn stains, lingering odors, and hello to a fresh, inviting space where you can cook with confidence and joy!
DIY Deep Clean Your Kitchen: A Step-by-Step Guide
Okay, friends, let’s face it: the kitchen is the heart of the home, but it’s also a magnet for grime, spills, and general chaos. Don’t worry, though! I’m going to walk you through a deep clean that will leave your kitchen sparkling and feeling brand new. Grab your gloves, your favorite playlist, and let’s get started!
Phase 1: Clearing the Decks (and the Counters!)
Before we can even think about scrubbing, we need to declutter. This is crucial for a truly deep clean.
- Gather your supplies: You’ll need cleaning cloths (microfiber are my go-to), sponges, a bucket, dish soap, all-purpose cleaner, glass cleaner, baking soda, vinegar, a scrub brush, and maybe even an old toothbrush for those hard-to-reach spots.
- Empty the countertops: Seriously, everything. Appliances, canisters, mail piles – it all needs to go. This gives you a clear surface to work with and allows you to really see what needs cleaning.
- Clear the sink: Get rid of any dirty dishes. Load them into the dishwasher or wash them by hand. A clean sink is a happy sink!
- Take out the trash and recycling: A full trash can just adds to the clutter and can be a breeding ground for odors.
Phase 2: Tackling the Appliances
Appliances are often overlooked, but they can harbor a lot of hidden grime. Let’s give them some love!
Cleaning the Oven
This is probably the most dreaded task, but trust me, it’s worth it.
- Safety first! Make sure your oven is completely cool and unplugged.
- Remove oven racks: Soak them in hot, soapy water in your sink or bathtub. This will loosen the baked-on gunk.
- Prepare your cleaning solution: You have a couple of options here. You can use a commercial oven cleaner (follow the instructions carefully!) or make a natural paste with baking soda and water. I prefer the natural method. Mix about 1/2 cup of baking soda with enough water to form a spreadable paste.
- Apply the paste: Coat the entire inside of the oven with the baking soda paste, avoiding the heating elements. Be generous!
- Let it sit: This is the key! Let the paste sit for at least 12 hours, or even overnight. The longer it sits, the easier the grime will come off.
- Scrub and wipe: After the waiting period, use a damp sponge or scrub brush to scrub away the baking soda paste and the loosened grime. It might take some elbow grease, but it should come off much easier now.
- Rinse thoroughly: Use a clean, damp cloth to rinse away any remaining baking soda residue. You might need to rinse several times to get it all.
- Clean the oven racks: Scrub the soaked oven racks with a sponge or brush to remove any remaining grime. Rinse them thoroughly and let them dry completely before putting them back in the oven.
- Wipe down the exterior: Use a damp cloth and all-purpose cleaner to wipe down the outside of the oven, including the door and control panel.
Cleaning the Microwave
Microwaves are notorious for splatters and spills. Here’s how to get yours sparkling.
- Steam clean: Fill a microwave-safe bowl with 1 cup of water and a few tablespoons of vinegar or lemon juice.
- Microwave for 5 minutes: This will create steam that loosens the grime.
- Let it sit: Leave the bowl in the microwave for another 5 minutes to allow the steam to work its magic.
- Wipe clean: Carefully remove the bowl (it will be hot!) and wipe down the inside of the microwave with a damp cloth. The grime should come off easily.
- Clean the turntable: Remove the turntable and wash it with soap and water.
- Wipe down the exterior: Use a damp cloth and all-purpose cleaner to wipe down the outside of the microwave.
Cleaning the Refrigerator
A clean fridge is essential for food safety and preventing odors.
- Unplug the refrigerator: This is important for safety.
- Remove all food: Take everything out of the fridge and freezer. Discard any expired or spoiled items.
- Remove shelves and drawers: Wash them in hot, soapy water. You can also soak them in the bathtub if they’re too large for the sink.
- Wipe down the interior: Use a damp cloth and a solution of baking soda and water to wipe down the inside of the fridge and freezer. Pay attention to any spills or stains.
- Clean the door seals: Use a damp cloth to clean the door seals, as they can accumulate dirt and grime.
- Dry everything thoroughly: Make sure all the shelves, drawers, and the interior of the fridge are completely dry before putting the food back in.
- Replace the food: Organize your food as you put it back in the fridge, keeping similar items together.
- Plug the refrigerator back in: Once everything is back in place, plug the fridge back in.
Cleaning the Dishwasher
Even dishwashers need cleaning! This helps them run efficiently and prevents odors.
- Remove food debris: Check the drain and remove any food particles or debris.
- Clean the spray arms: Remove the spray arms and clean the nozzles with a toothpick or small brush.
- Run a cleaning cycle: Place a dishwasher-safe cup filled with white vinegar on the top rack of the dishwasher. Run a normal cycle with no dishes. The vinegar will help to remove grease and grime.
- Clean the exterior: Wipe down the outside of the dishwasher with a damp cloth and all-purpose cleaner.
Phase 3: Countertops, Sink, and Backsplash
These surfaces see a lot of action, so they need some extra attention.
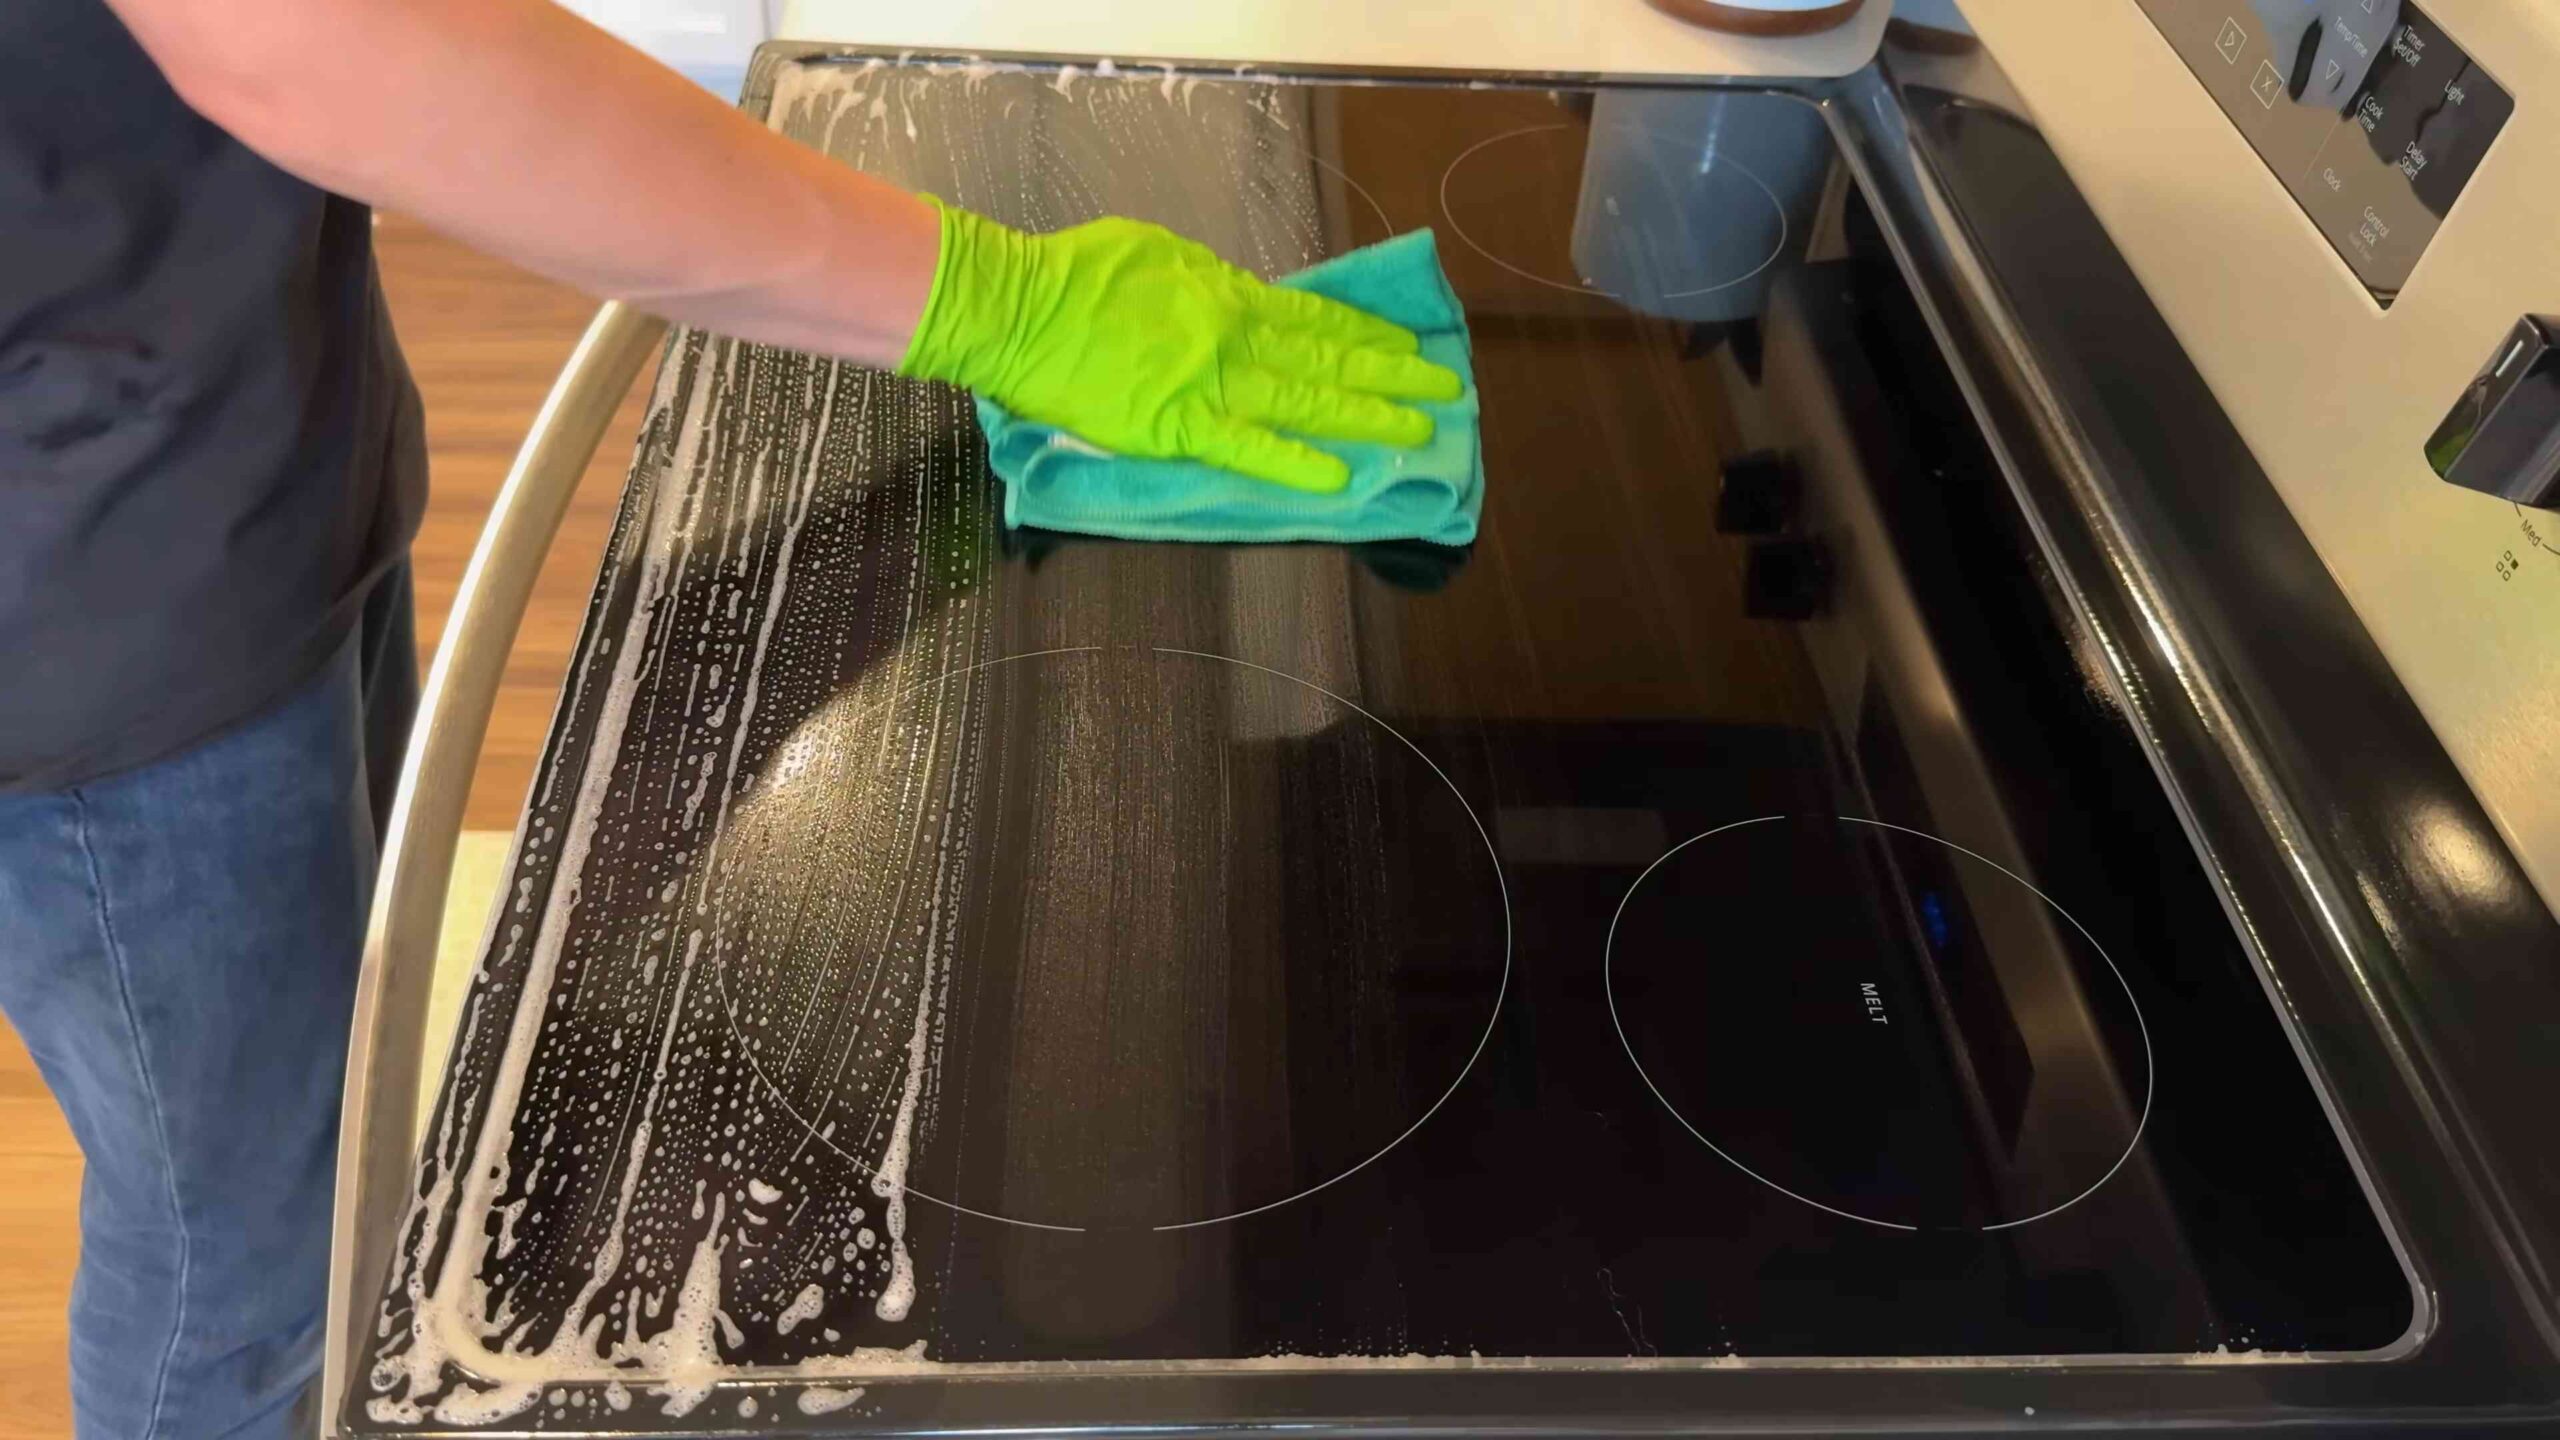
Cleaning Countertops
The cleaning method will depend on your countertop material.
- Granite: Use a pH-neutral cleaner specifically designed for granite. Avoid harsh chemicals or abrasive cleaners.
- Quartz: Use a mild dish soap and water. Avoid harsh chemicals or abrasive cleaners.
- Laminate: Use a mild dish soap and water or an all-purpose cleaner.
- Butcher Block: Clean with a damp cloth and mild dish soap. Sanitize with a solution of white vinegar and water. Be sure to oil your butcher block regularly to prevent it from drying out.
- Clear the countertops (again!): Make sure the countertops are completely clear of any items.
- Spray with cleaner: Spray the countertops with your chosen cleaner.
- Wipe clean: Use a clean cloth to wipe down the countertops, paying attention to any spills or stains.
- Rinse (if necessary): If you used a cleaner that leaves a residue, rinse the countertops with a damp cloth.
- Dry: Dry the countertops with a clean cloth.
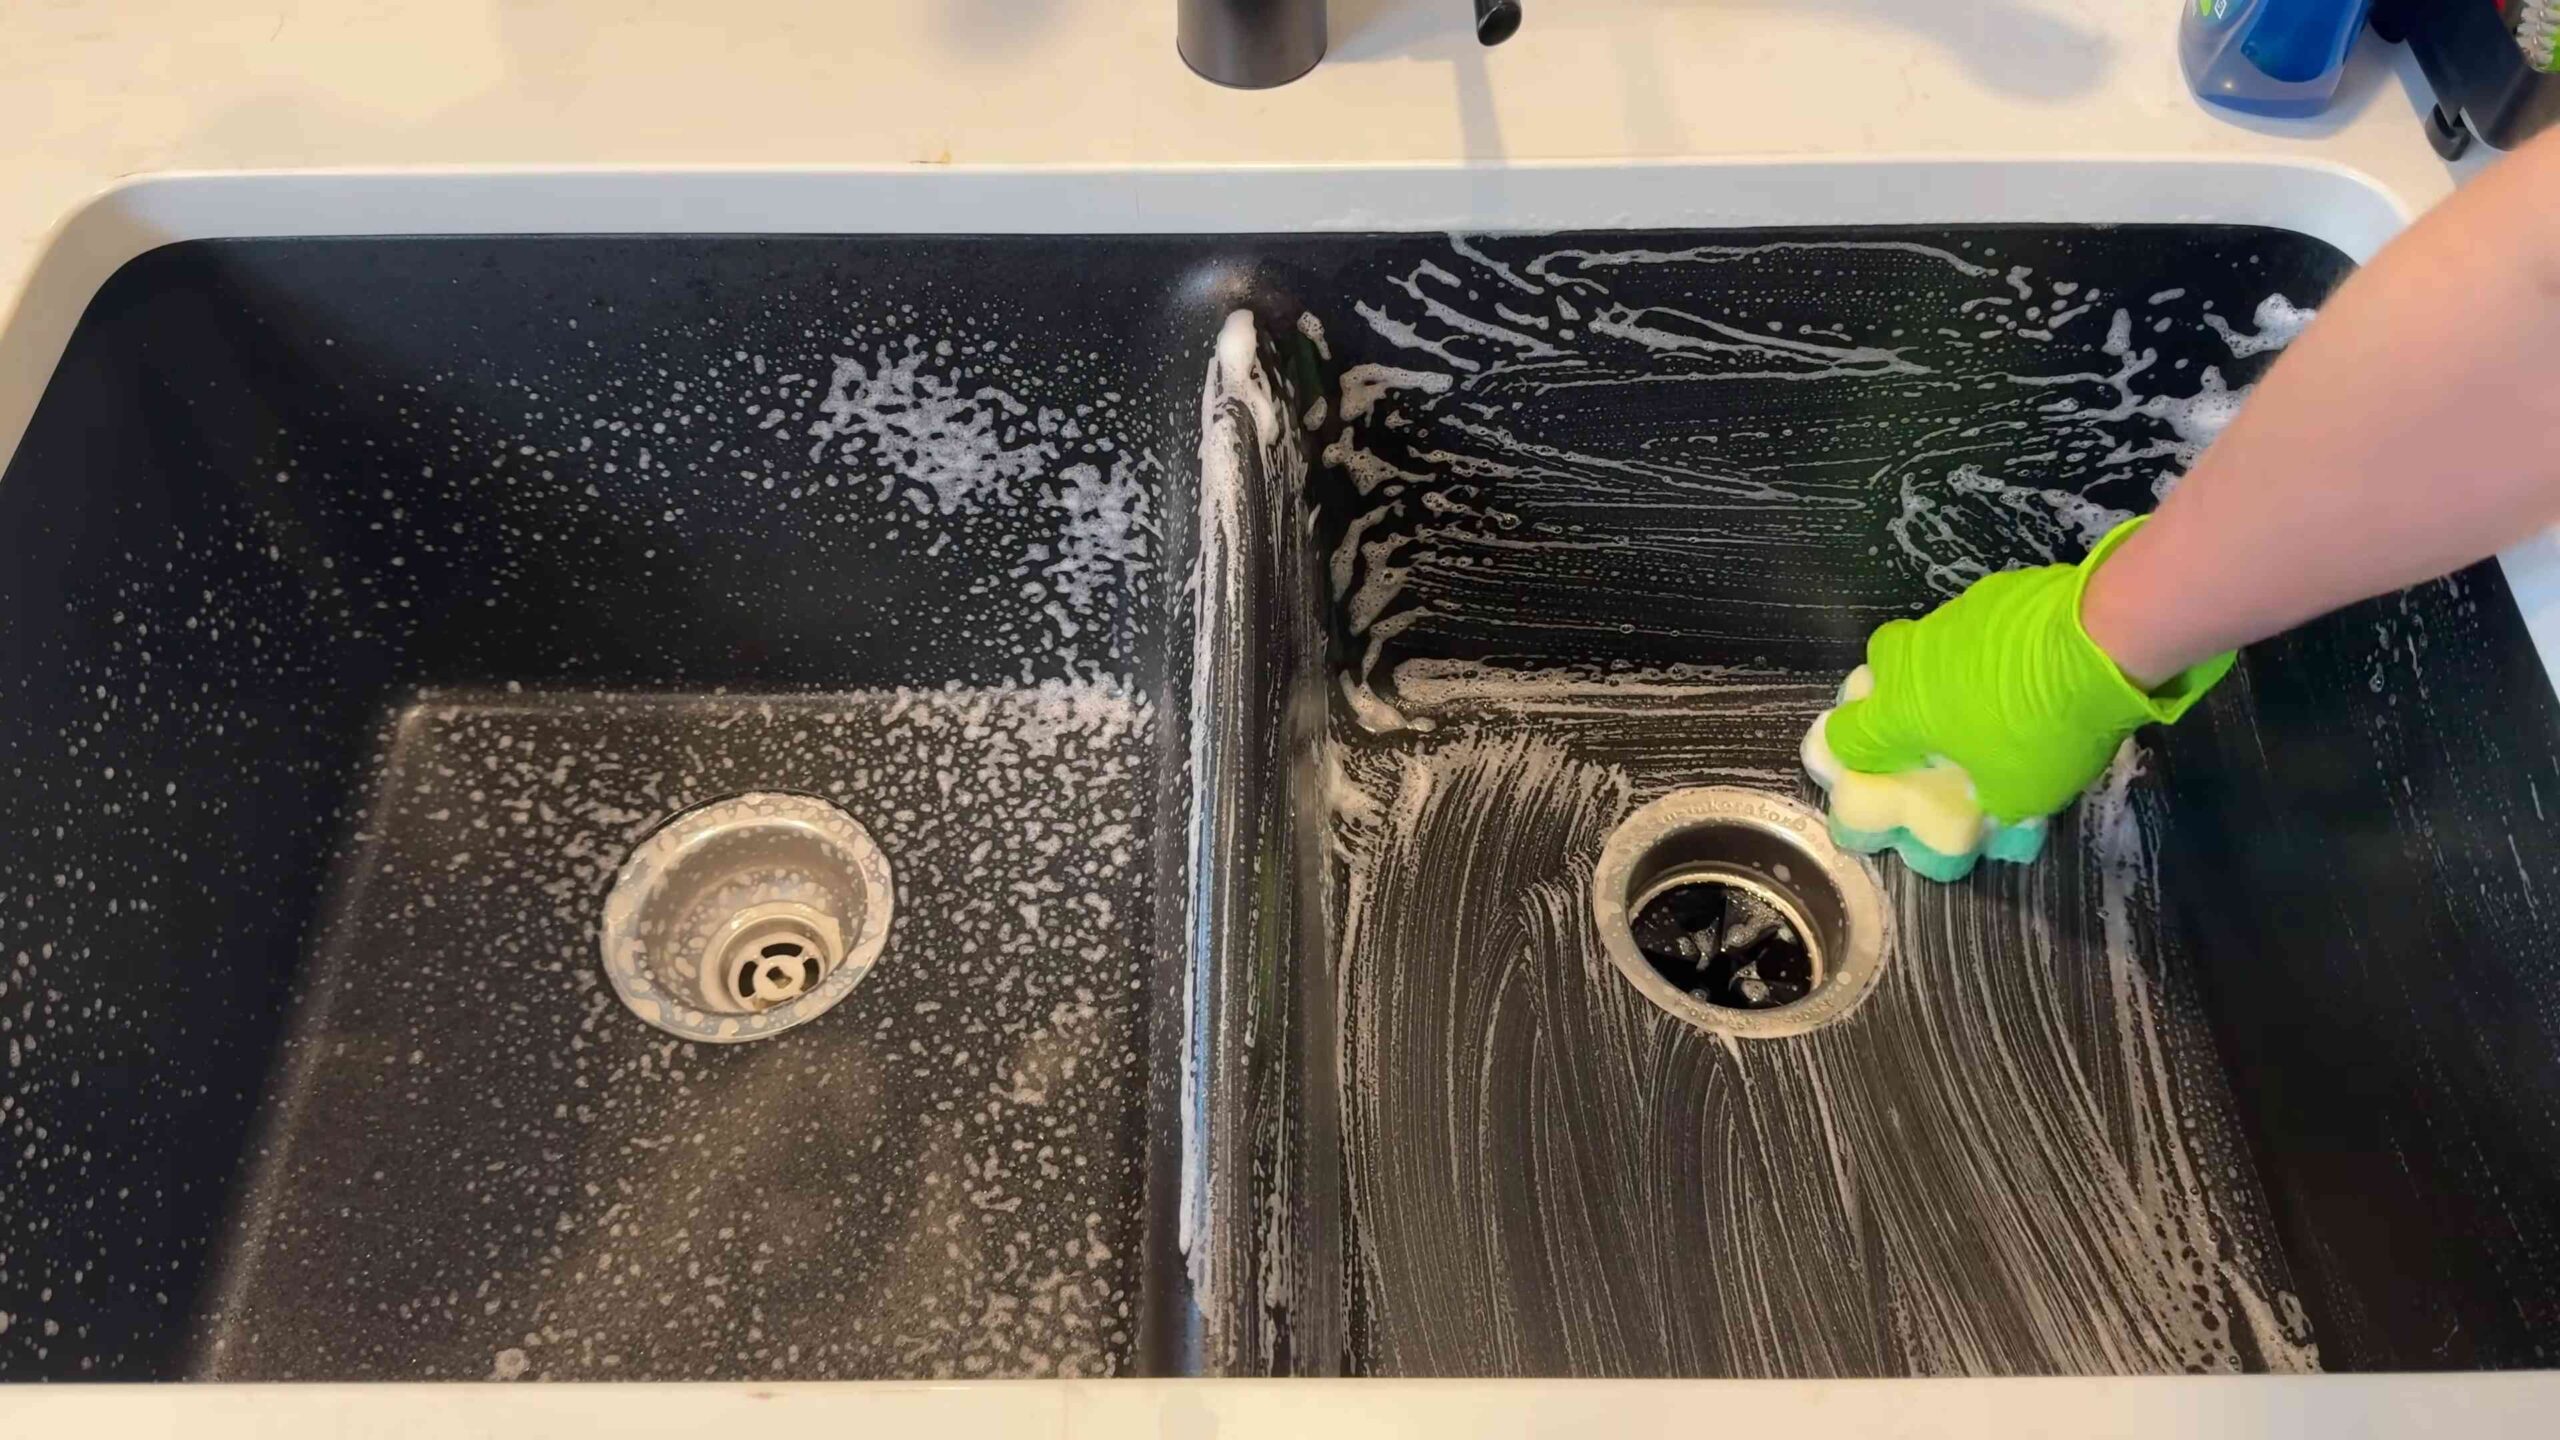
Cleaning the Sink
A sparkling sink can make a huge difference in the overall look of your kitchen.
- Rinse the sink: Rinse the sink with water to remove any loose debris.
- Sprinkle with baking soda: Sprinkle baking soda all over the sink.
- Scrub: Use a damp sponge or scrub brush to scrub the sink, paying attention to any stains or grime.
- Rinse with vinegar: Pour white vinegar over the baking soda. It will fizz and bubble, which helps to loosen the grime.
- Rinse thoroughly: Rinse the sink thoroughly with water.
- Dry: Dry the sink with a clean cloth.
- Shine (optional): For stainless steel sinks, you can use a stainless steel cleaner to add shine.
Cleaning the Backsplash
Backsplashes can get splattered with grease and food, so they need regular cleaning.
- Spray with cleaner: Spray the backsplash with an all-purpose cleaner or a solution of dish soap and water.
- Let it sit: Let the cleaner sit for a few minutes to loosen the grime.
- Wipe clean: Use a clean cloth or sponge to wipe down the backsplash, paying attention to any stains or splatters.
- Rinse (if necessary): If you used a cleaner that leaves
Conclusion
So, there you have it! This simple yet incredibly effective DIY trick for quick kitchen deep cleaning is a game-changer for anyone who wants a sparkling clean kitchen without spending hours scrubbing. We’ve all been there – staring at greasy stovetops, grimy backsplashes, and sticky cabinet doors, feeling overwhelmed by the sheer amount of work required. But with this method, those days are over.
The beauty of this approach lies in its simplicity and the fact that you likely already have all the necessary ingredients in your pantry. No need for harsh chemicals or expensive cleaning products; just a few common household items combined in the right way can work wonders. Think of the time and money you’ll save!
But beyond the practical benefits, this DIY cleaning trick offers something more: a sense of accomplishment. There’s a certain satisfaction that comes from knowing you’ve tackled a tough cleaning job using your own ingenuity and resourcefulness. Plus, a clean kitchen is a happy kitchen, and a happy kitchen leads to more enjoyable cooking and meal times.
Why is this a must-try? Because it’s fast, effective, affordable, and eco-friendly. It cuts through grease and grime like a hot knife through butter, leaving your kitchen surfaces gleaming and fresh. It’s also a fantastic way to reduce your reliance on harsh chemicals, which can be harmful to your health and the environment.
Looking for variations? Absolutely!
* For extra stubborn grease, add a tablespoon of baking soda to your cleaning solution. The baking soda acts as a gentle abrasive, helping to scrub away even the most stubborn buildup.
* If you prefer a more fragrant cleaning experience, add a few drops of your favorite essential oil to the solution. Lemon, orange, and lavender are all great choices for a fresh, clean scent.
* For stainless steel appliances, be sure to wipe in the direction of the grain to avoid streaks. A microfiber cloth is also your best friend for achieving a streak-free shine.
* Consider using a magic eraser sponge for particularly difficult spots. These sponges are incredibly effective at removing scuff marks and stains.We’re confident that once you try this DIY trick, you’ll be amazed by the results. It’s a simple, effective, and affordable way to keep your kitchen looking its best.
Now, we want to hear from you! Give this quick kitchen deep cleaning method a try and let us know what you think. Share your experiences, tips, and variations in the comments below. We’re always eager to learn from our readers and build a community of cleaning enthusiasts. Did you find a particular ingredient combination that worked exceptionally well? Did you discover a new way to tackle a specific cleaning challenge? Share your insights and help others achieve a sparkling clean kitchen!
Don’t delay – transform your kitchen today! You’ll be amazed at how much easier and more enjoyable cooking and spending time in your kitchen becomes when it’s clean and organized. So, grab your supplies, roll up your sleeves, and get ready to experience the magic of this DIY cleaning trick. Happy cleaning!
Frequently Asked Questions
What exactly is the “quick kitchen deep cleaning” trick you’re referring to?
This DIY cleaning method typically involves a mixture of common household ingredients like vinegar, dish soap, and water. The specific ratios and application techniques can vary, but the core principle is to create a powerful yet gentle cleaning solution that effectively cuts through grease, grime, and food residue without the need for harsh chemicals. The exact recipe will depend on the specific area you’re cleaning, but the goal is always the same: a sparkling clean kitchen with minimal effort.
Is vinegar safe to use on all kitchen surfaces?
While vinegar is a fantastic natural cleaner, it’s not suitable for all surfaces. Avoid using vinegar on natural stone surfaces like granite, marble, and quartz, as the acidity can etch and damage them. It’s also best to avoid using vinegar on waxed wood, as it can strip the wax finish. For these surfaces, opt for a pH-neutral cleaner specifically designed for those materials. Always test any cleaning solution in an inconspicuous area first to ensure it doesn’t cause any damage or discoloration.
Can I use this method on my oven?
Yes, you can use a variation of this method on your oven, but it requires a slightly different approach. For oven cleaning, a paste of baking soda and water is often more effective. Apply the paste to the interior of your oven, let it sit overnight, and then scrub away the grime. You can also add a bit of vinegar to the baking soda paste for extra cleaning power. Be sure to avoid getting the cleaning solution on the heating elements or any electrical components.
How often should I perform a “quick kitchen deep cleaning”?
The frequency of your deep cleaning will depend on how often you cook and how much use your kitchen gets. As a general guideline, aim for a deep clean every 1-2 weeks. However, you can spot clean spills and messes as they occur to prevent buildup and make your deep cleaning sessions easier. Regular maintenance is key to keeping your kitchen looking its best.
What kind of cloths or sponges should I use?
Microfiber cloths are ideal for cleaning kitchen surfaces, as they are highly absorbent, lint-free, and effective at removing dirt and grime. They are also gentle on surfaces and won’t scratch. For scrubbing stubborn messes, you can use a non-abrasive sponge or a scrub brush. Avoid using steel wool or abrasive cleaners, as they can damage surfaces.
What about cleaning my kitchen sink?
Your kitchen sink can be a breeding ground for bacteria, so it’s important to clean it regularly. For stainless steel sinks, you can use a mixture of baking soda and water to scrub away stains and water spots. Rinse thoroughly and dry with a clean cloth. For porcelain sinks, avoid using abrasive cleaners, as they can scratch the surface. A mild dish soap and water solution is usually sufficient.
How can I prevent grease buildup in the first place?
Prevention is always better than cure! To minimize grease buildup, use your range hood or exhaust fan whenever you’re cooking. This will help to vent out grease and steam. Also, wipe down your stovetop and backsplash after each use to prevent grease from hardening. Regularly clean your range hood filters to ensure they are functioning properly.
Is this DIY cleaning method environmentally friendly?
Yes, this DIY cleaning method is generally considered to be more environmentally friendly than using commercial cleaning products. Vinegar and baking soda are natural, biodegradable substances that are safe for the environment. By using these ingredients, you can reduce your reliance on harsh chemicals that can pollute waterways and harm wildlife.
Can I use this method to clean my refrigerator?
Absolutely! A mixture of vinegar and water is a great way to clean your refrigerator. It’s effective at removing spills, stains, and odors. Be sure to remove all food items before cleaning and wipe down all surfaces, including shelves, drawers, and door compartments. You can also use baking soda to absorb any lingering odors.
What if I have allergies or sensitivities to certain cleaning ingredients?
If you have allergies or sensitivities, it’s important to be cautious when using any cleaning products, even natural ones. Always test the cleaning solution in a small, inconspicuous area first to ensure you don’t have any adverse reactions. You can also wear gloves and a mask to protect your skin and respiratory system. If you experience any irritation, discontinue use immediately and consult with a doctor. You can also explore alternative cleaning ingredients that are less likely to cause allergic reactions.


Leave a Comment