

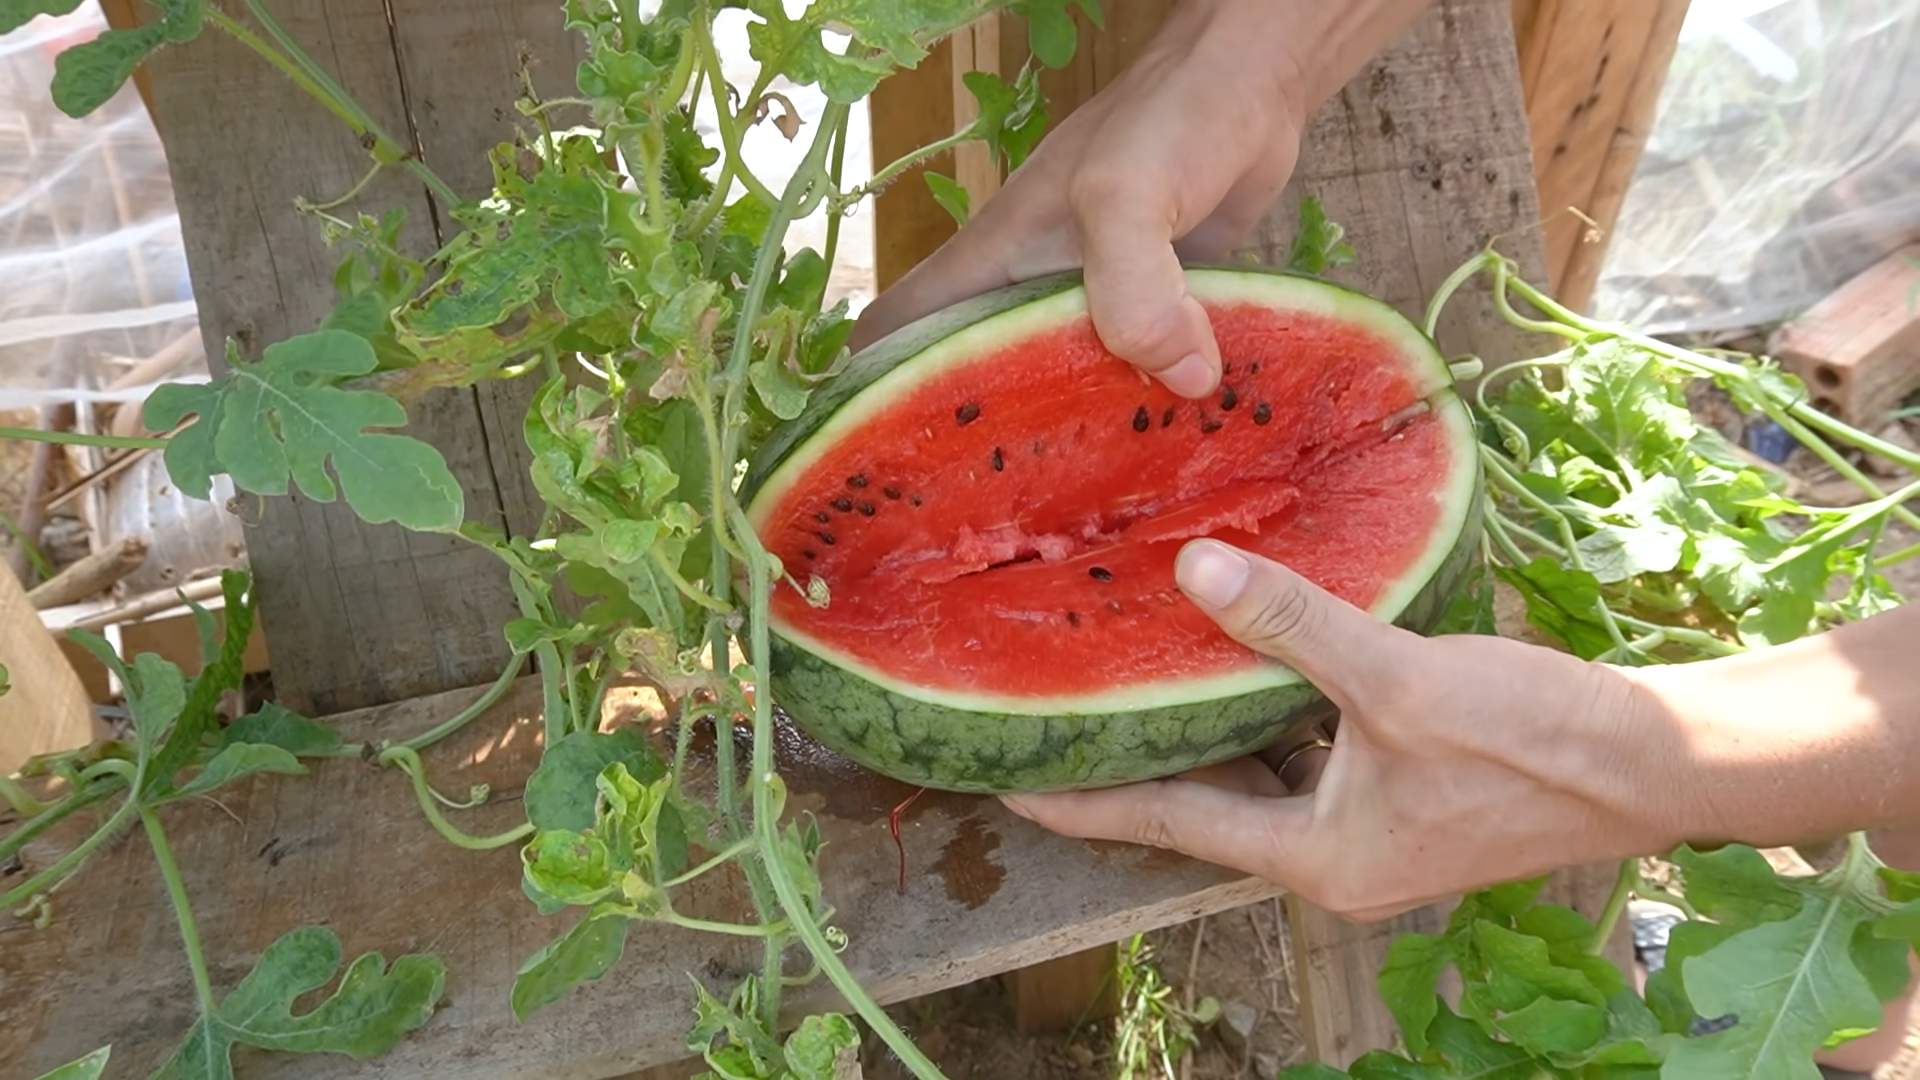
Boost Watermelon Harvest and get ready to sink your teeth into the sweetest, juiciest watermelons you’ve ever tasted! Imagine biting into a perfectly ripe watermelon, bursting with flavor, all thanks to your own green thumb. Forget those bland, store-bought melons – this year, we’re taking control and maximizing our watermelon yields with some simple, yet incredibly effective, DIY tricks.
Watermelons have a rich history, dating back thousands of years to Africa, where they were prized for their hydrating properties in arid climates. Over centuries, they’ve spread across the globe, becoming a symbol of summer and a staple at picnics and barbecues. But let’s be honest, growing watermelons can be tricky. They need a lot of sun, water, and nutrients, and sometimes, even with the best intentions, our harvests can be disappointing. That’s where these DIY hacks come in!
I know, I know, you’re probably thinking, “Do I really need more gardening advice?” But trust me, these aren’t your grandma’s gardening tips (though, no offense to grandma!). These are practical, easy-to-implement strategies designed to boost watermelon harvest, even if you’re a beginner gardener. We’ll cover everything from soil preparation and pollination techniques to clever watering hacks and pest control methods. So, get ready to transform your watermelon patch into a thriving oasis and enjoy a bumper crop of delicious, homegrown watermelons this summer!
Boosting Your Watermelon Harvest: A DIY Guide to Sweet Success
Hey there, fellow gardeners! Are you dreaming of juicy, red watermelons bursting with flavor? I know I am! Growing watermelons can be incredibly rewarding, but sometimes, they need a little extra help to reach their full potential. That’s why I’m sharing my favorite DIY hacks to boost your watermelon harvest and ensure you’re swimming in deliciousness come summer. Let’s dive in!
Understanding Watermelon Needs
Before we get our hands dirty, let’s quickly cover what watermelons crave. They’re sun-loving, water-hungry, and nutrient-demanding plants. Keeping these needs in mind will guide our DIY efforts.
* Sunlight: Watermelons need at least 6-8 hours of direct sunlight daily.
* Water: Consistent and deep watering is crucial, especially during fruit development.
* Nutrients: They’re heavy feeders, requiring plenty of nitrogen, phosphorus, and potassium.
* Pollination: Watermelons need proper pollination to set fruit.
* Warmth: They thrive in warm temperatures (70-90°F).
DIY Hack #1: Supercharging Your Soil with Compost Tea
Compost tea is like a magic potion for your garden! It’s packed with beneficial microbes and nutrients that will revitalize your soil and give your watermelon plants a serious boost. I’ve seen amazing results using this method.
What You’ll Need:
* A 5-gallon bucket
* An air pump and air stone (aquarium supplies work great!)
* A mesh bag or old pillowcase
* High-quality compost (worm castings are fantastic!)
* Unchlorinated water (let tap water sit out for 24 hours to dechlorinate)
* Molasses (optional, but it feeds the microbes)
Step-by-Step Instructions:
1. Fill the Bucket: Fill your 5-gallon bucket with unchlorinated water, leaving a few inches at the top.
2. Add the Compost: Place about 1-2 cups of compost into the mesh bag or pillowcase. Tie it securely.
3. Submerge the Compost Bag: Place the bag of compost into the bucket of water, making sure it’s fully submerged.
4. Aerate the Tea: Place the air stone at the bottom of the bucket and connect it to the air pump. Turn on the air pump. You should see bubbles rising to the surface. This aeration is crucial for the microbes to thrive.
5. Add Molasses (Optional): If you’re using molasses, add about 1 tablespoon to the bucket. This will provide food for the microbes and help them multiply.
6. Brew the Tea: Let the compost tea brew for 24-48 hours. The water will turn a brownish color and may have a slightly earthy smell.
7. Dilute the Tea: Dilute the compost tea with water before applying it to your plants. A ratio of 1:10 (1 part tea to 10 parts water) is a good starting point.
8. Apply the Tea: Water your watermelon plants with the diluted compost tea, focusing on the soil around the base of the plants. You can also use a foliar sprayer to apply the tea directly to the leaves, but do this in the early morning or late evening to avoid burning the leaves.
9. Frequency: I like to apply compost tea every 2-3 weeks during the growing season.
DIY Hack #2: Hand-Pollinating for Guaranteed Fruit Set
Sometimes, even with plenty of bees buzzing around, watermelon pollination can be spotty. Hand-pollinating ensures that your female flowers get the pollen they need to develop into juicy watermelons. It’s a simple process that can make a huge difference.
Understanding Watermelon Flowers:
Watermelons have separate male and female flowers on the same plant. Male flowers appear first and have a thin stem behind the flower. Female flowers have a small, immature watermelon (the ovary) behind the flower.
What You’ll Need:
* A small, soft paintbrush or cotton swab
Step-by-Step Instructions:
1. Identify Male and Female Flowers: Look for open male and female flowers on your watermelon plant. The best time to hand-pollinate is in the early morning when the flowers are fully open.
2. Collect Pollen: Gently brush the paintbrush or cotton swab inside the male flower to collect pollen. You should see the pollen on the brush.
3. Transfer Pollen: Carefully transfer the pollen from the paintbrush or cotton swab to the stigma (the sticky part in the center) of the female flower. Make sure to cover the stigma with pollen.
4. Mark the Pollinated Flower: Use a small piece of ribbon or twine to mark the pollinated flower. This will help you keep track of which flowers you’ve already pollinated.
5. Repeat Daily: Repeat the hand-pollination process daily for several days to ensure that all the female flowers are pollinated.
DIY Hack #3: Epsom Salt for Sweetness and Vigor
Epsom salt (magnesium sulfate) is a fantastic amendment that can help your watermelon plants produce sweeter, more vigorous fruit. Magnesium is essential for chlorophyll production, which is vital for photosynthesis and overall plant health.
What You’ll Need:
* Epsom salt
* Watering can or hose
Step-by-Step Instructions:
1. First Application: When your watermelon plants start to vine, dissolve 1 tablespoon of Epsom salt in 1 gallon of water. Water the plants with this solution, focusing on the soil around the base of the plants.
2. Second Application: When the first female flowers appear, repeat the Epsom salt application.
3. Subsequent Applications: Continue to apply Epsom salt every 2-3 weeks throughout the growing season.
Important Note: Don’t overdo it with the Epsom salt! Too much magnesium can interfere with the uptake of other nutrients. Stick to the recommended dosage.
DIY Hack #4: Protecting Your Melons from Pests and Diseases
Watermelons are susceptible to various pests and diseases, but with a few simple DIY strategies, you can keep them healthy and thriving.
Pest Control:
* Row Covers: Use row covers to protect young plants from pests like cucumber beetles and squash bugs. Remove the row covers when the plants start to flower to allow for pollination.
* Diatomaceous Earth: Sprinkle diatomaceous earth (DE) around the base of your plants to control crawling pests like slugs and snails. Make sure to use food-grade DE.
* Neem Oil: Apply neem oil to control aphids, whiteflies, and other common pests. Follow the instructions on the product label.
Disease Prevention:
* Good Air Circulation: Ensure good air circulation around your plants by spacing them properly and pruning away any overcrowded foliage.
* Watering Practices: Water your plants in the morning to allow the foliage to dry before nightfall. Avoid overhead watering, which can promote fungal diseases.
* Copper Fungicide: If you notice signs of fungal diseases like powdery mildew or anthracnose, apply a copper fungicide according to the product label.
DIY Hack #5: The Sugar Boost (Use with Caution!)
This is a bit of a controversial one, but some gardeners swear by it. The idea is that adding sugar to the soil can provide a quick energy boost to the developing fruit, resulting in sweeter watermelons.
What You’ll Need:
* Granulated sugar
* Watering can
Step-by-Step Instructions:
1. Dissolve the Sugar: Dissolve 1/4 cup of granulated sugar in 1 gallon of water.
2. Apply to the Soil: Water the soil around the base of the watermelon plant with the sugar solution.
3. Timing: Apply this sugar boost when the watermelons are about halfway to their mature size.
4. Frequency: Only apply this once or twice during the fruit development stage.
Important Note: Use this method sparingly! Too much sugar can disrupt the soil’s microbial balance and attract unwanted pests. I personally only use this as a last resort if my watermelons are struggling to sweeten up.
DIY Hack #6: Trellising for Space Saving and Airflow
If you’re short on space or want to improve airflow around your watermelon plants, consider trellising them. This can also help prevent fruit rot by keeping the melons off the ground.
What You’ll Need:
* A sturdy trellis (cattle panels or heavy-duty tomato cages work well)
* Soft twine or cloth strips
* Support slings (optional, for larger melons)
Step-by-Step Instructions:
1. Set Up the Trellis: Install the trellis near your watermelon plants
Conclusion
So, there you have it! This simple, yet incredibly effective DIY trick to boost your watermelon harvest is a game-changer for any gardener, whether you’re a seasoned pro or just starting out. We’ve walked you through the process, highlighting the science behind why it works and offering practical tips to ensure your success.
Why is this a must-try? Because who doesn’t want bigger, juicier, and more abundant watermelons? Imagine biting into a perfectly ripe watermelon, bursting with flavor, knowing that you played a direct role in its creation. This isn’t just about growing watermelons; it’s about experiencing the satisfaction of nurturing life and reaping the rewards of your efforts.
This DIY method isn’t just about increasing the size of your watermelons; it’s about improving their overall quality. By providing the developing fruit with the nutrients it needs at a critical stage, you’re ensuring that it develops to its full potential, resulting in a sweeter, more flavorful, and more satisfying harvest.
But don’t just take our word for it. The real magic happens when you try it yourself. We encourage you to experiment with this technique and see the difference it makes in your own garden.
Variations and Suggestions:
* Adjusting the Nutrient Solution: While the recipe we provided is a great starting point, you can tailor the nutrient solution to your specific soil conditions and watermelon variety. Consider getting a soil test to determine any nutrient deficiencies and adjust the solution accordingly. You can also experiment with adding small amounts of Epsom salts (magnesium sulfate) to the solution, as magnesium is essential for chlorophyll production and overall plant health.
* Timing is Key: Pay close attention to the timing of the application. Applying the nutrient solution too early or too late may not yield the desired results. Monitor your watermelon plants closely and apply the solution when the fruits are about the size of a softball.
* Consider Companion Planting: Enhance your watermelon patch by incorporating companion plants like marigolds, basil, or nasturtiums. These plants can help deter pests and attract beneficial insects, creating a healthier environment for your watermelons to thrive.
* Watering Practices: Maintain consistent watering practices, especially during fruit development. Water deeply and regularly, but avoid overwatering, which can lead to root rot.
* Sunlight: Ensure your watermelon plants receive at least 6-8 hours of direct sunlight per day. Sunlight is crucial for photosynthesis and fruit development.
* Pollination: Watermelons require pollination to set fruit. If you’re experiencing pollination problems, consider hand-pollinating the flowers.
We’re confident that this DIY trick will significantly boost your watermelon harvest. It’s a simple, cost-effective, and rewarding way to improve the quality and quantity of your watermelons.
So, grab your supplies, head out to your garden, and give it a try! We can’t wait to hear about your experiences. Share your results, tips, and variations in the comments below. Let’s learn from each other and create a community of successful watermelon growers! Remember, a bountiful watermelon harvest is within your reach with this easy DIY solution.
Frequently Asked Questions (FAQ)
Q: What exactly does this DIY trick do to boost watermelon harvest?
A: This DIY trick primarily focuses on providing a targeted nutrient boost directly to the developing watermelon fruit. By applying a diluted nutrient solution directly to the fruit, you’re supplementing the plant’s natural nutrient delivery system. This is especially beneficial during the rapid growth phase of the watermelon, when the plant’s resources may be stretched thin. The nutrient boost helps the watermelon grow larger, develop a sweeter flavor, and potentially increase the overall yield of your harvest. It’s like giving your watermelons a super-charged snack right when they need it most!
Q: When is the best time to apply this DIY nutrient solution?
A: The optimal time to apply the nutrient solution is when the watermelons are approximately the size of a softball. This is typically when the fruit is entering its rapid growth phase and is most receptive to the nutrient boost. Applying it too early, before the fruit has properly formed, may not be as effective. Applying it too late, when the fruit is nearing maturity, may not have enough time to make a significant difference. Monitor your plants closely and look for that softball-sized stage to get the best results.
Q: How often should I apply the nutrient solution?
A: A single application of the nutrient solution is usually sufficient to provide a noticeable boost. However, if you notice that your watermelons are not growing as quickly as you’d like, or if they appear to be lacking in vigor, you can consider a second application about a week after the first. Avoid over-applying the solution, as this could potentially lead to nutrient imbalances or other problems.
Q: Can I use a different type of fertilizer for this DIY trick?
A: While the recipe we provided is a good starting point, you can experiment with other types of fertilizers. However, it’s important to choose a fertilizer that is specifically formulated for fruits and vegetables and that contains a balanced ratio of nitrogen, phosphorus, and potassium (NPK). Avoid using fertilizers that are too high in nitrogen, as this can promote excessive vegetative growth at the expense of fruit development. Always dilute the fertilizer according to the manufacturer’s instructions to avoid burning the fruit.
Q: Is this DIY trick safe for organic gardening?
A: Whether this DIY trick is suitable for organic gardening depends on the ingredients you use. If you use a synthetic fertilizer, it would not be considered organic. However, you can adapt the recipe using organic fertilizers, such as compost tea, fish emulsion, or seaweed extract. These organic options provide a more natural and sustainable way to boost your watermelon harvest. Just be sure to dilute the organic fertilizers appropriately to avoid burning the fruit.
Q: Will this DIY trick work for all varieties of watermelons?
A: This DIY trick should work for most varieties of watermelons. However, some varieties may respond better than others. Factors such as the watermelon’s genetics, soil conditions, and overall plant health can all influence the results. It’s always a good idea to experiment and see how your specific watermelon variety responds to the nutrient boost.
Q: What if I don’t see any noticeable difference after trying this DIY trick?
A: If you don’t see a noticeable difference after trying this DIY trick, there could be several reasons why. First, make sure you’re applying the solution at the right time and in the right concentration. Second, consider the overall health of your watermelon plants. If they are stressed due to pests, diseases, or poor growing conditions, they may not be able to fully utilize the nutrient boost. Finally, remember that this DIY trick is just one factor that contributes to a successful watermelon harvest. Other factors, such as sunlight, watering, and pollination, are also important.
Q: Can I use this trick on other types of fruits and vegetables?
A: While this DIY trick is specifically designed for watermelons, you can potentially adapt it for other types of fruits and vegetables. The key is to understand the specific nutrient needs of the plant you’re trying to boost and to adjust the nutrient solution accordingly. For example, tomatoes and peppers may benefit from a similar nutrient boost during fruit development. However, it’s always a good idea to do some research and experiment carefully to avoid causing any harm to your plants.
Q: How do I store the leftover nutrient solution?
A: If you have any leftover nutrient solution, you can store it in a cool, dark place for up to a week. Be sure to label the container clearly and keep it out of reach of children and pets. Before using the stored solution, give it a good shake to ensure that the nutrients are evenly distributed. If the solution develops a foul odor or shows signs of contamination, discard it properly.
Q: Is there a risk of over-fertilizing the watermelon with this method?
A: Yes, there is a risk of over-fertilizing if you apply the nutrient solution too frequently or in too high a concentration. Over-fertilizing can lead to nutrient imbalances, leaf burn, and even plant death. That’s why it’s important to follow the instructions carefully and to dilute the nutrient solution appropriately. If you notice any signs of over-fertilization, such as yellowing or browning leaves, stop applying the solution immediately and flush the soil with water to remove excess nutrients.

Leave a Comment