

Clean Fridge Coils: The unsung heroes of a cool kitchen! Let’s be honest, when was the last time you even *thought* about the coils on the back (or bottom!) of your refrigerator? Probably never, right? But neglecting these humble components can lead to a surprisingly significant energy drain and even shorten the lifespan of your fridge. Think of it like this: your fridge is working overtime, sweating to keep your food fresh, and those coils are its lungs. If they’re clogged with dust and grime, it’s like trying to run a marathon with a stuffy nose!
While cleaning fridge coils might not have the same historical significance as, say, the invention of refrigeration itself, the concept of maintaining appliances for optimal performance is deeply rooted in resourcefulness and sustainability. Our grandparents knew the value of making things last, and this simple DIY task is a direct descendant of that thrifty spirit. Plus, in today’s world of rising energy costs, keeping your appliances running efficiently is more important than ever.
So, why do you *need* this DIY trick? Because a clean fridge is an efficient fridge! By regularly cleaning those coils, you’ll not only save money on your electricity bill but also extend the life of your refrigerator. I’m going to show you how easy it is to clean fridge coils and keep your kitchen running smoothly. Trust me, your wallet (and your fridge!) will thank you.
DIY: Breathe New Life into Your Fridge by Cleaning the Coils!
Okay, let’s be honest, cleaning fridge coils isn’t exactly the most glamorous DIY project. But trust me, it’s one of the most impactful things you can do to keep your fridge running efficiently and save money on your energy bill. Think of it as a spa day for your refrigerator! Dirty coils force your fridge to work harder, which means it uses more energy and can even shorten its lifespan. So, grab your tools, and let’s get started!
Why Clean Your Fridge Coils?
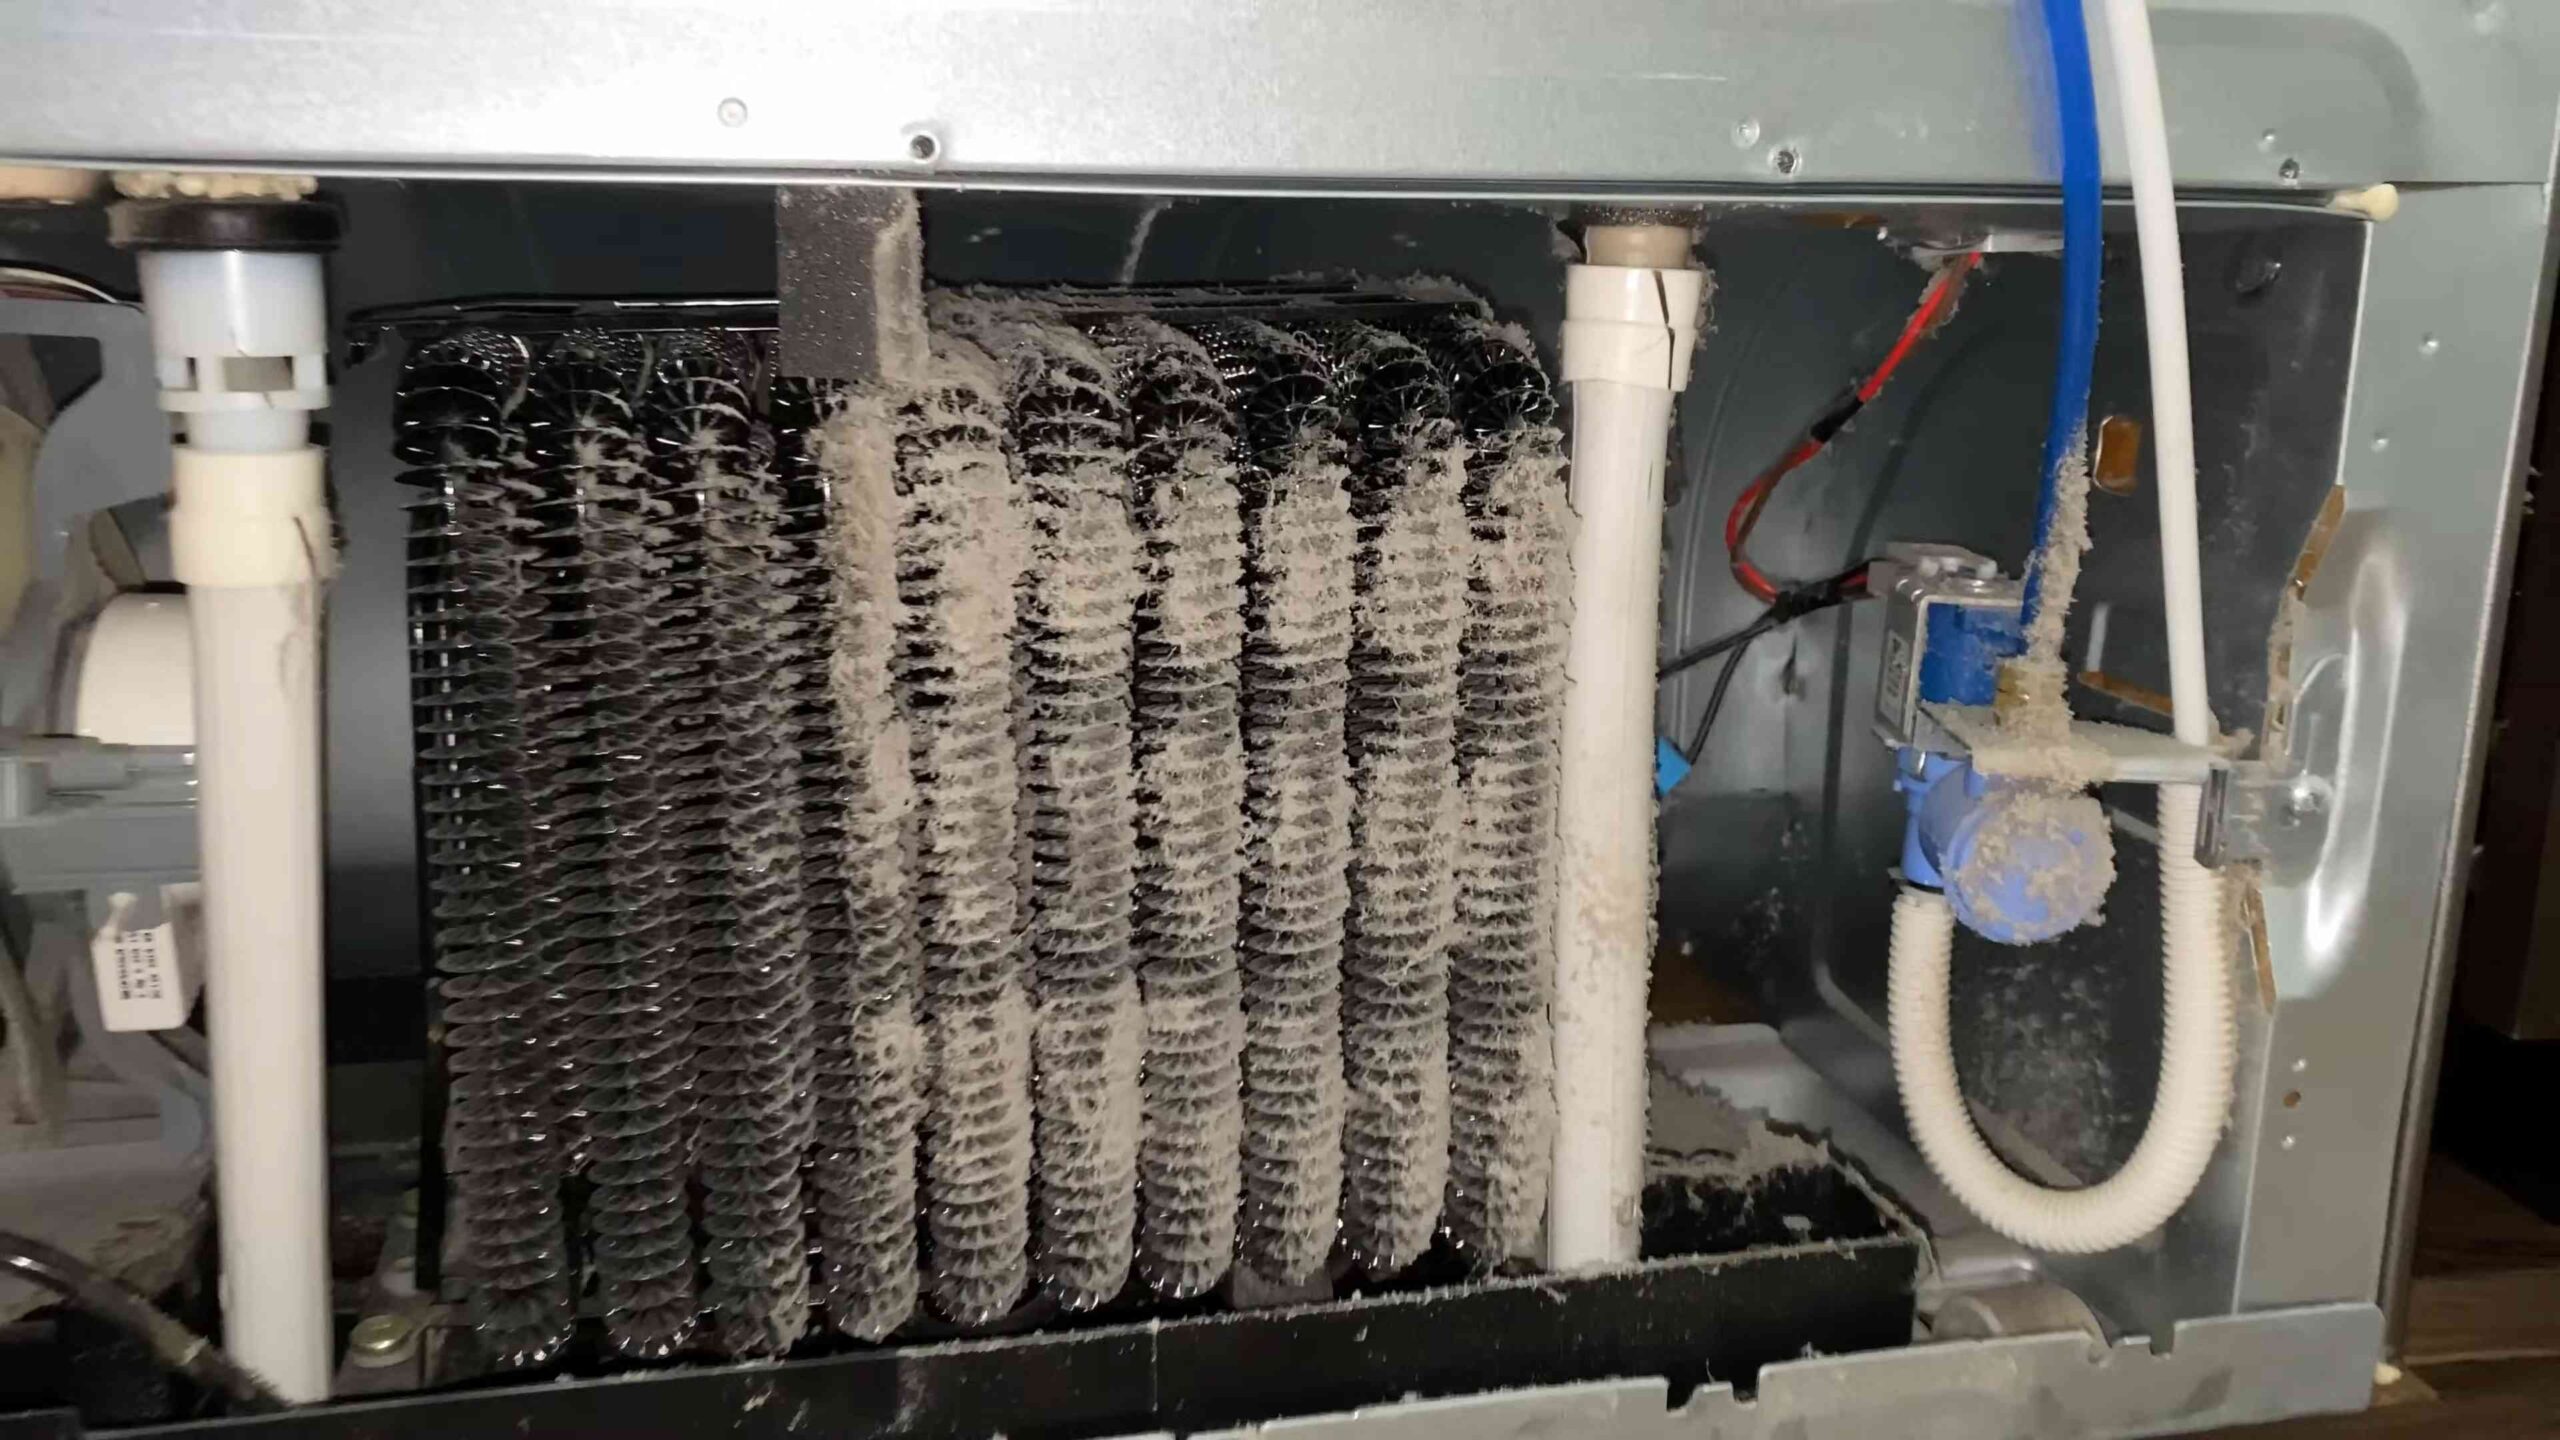
Before we dive into the how-to, let’s quickly cover the why. Fridge coils, usually located at the back or bottom of your fridge, release heat. When they’re covered in dust, pet hair, and other gunk, they can’t do their job properly. This leads to:
* Increased Energy Consumption: Your fridge has to work overtime to maintain the correct temperature.
* Higher Electricity Bills: All that extra work translates to more money out of your pocket.
* Reduced Fridge Lifespan: Overheating can damage the compressor and other vital components.
* Food Spoilage: Inefficient cooling can lead to food spoiling faster.
See? Totally worth the effort!
What You’ll Need
Gathering your supplies beforehand will make the whole process smoother. Here’s what I recommend:
* Vacuum Cleaner with Hose Attachment: A must-have for sucking up all that dust. A brush attachment is even better!
* Soft Brush (Optional): A long-handled duster or a specialized coil brush can help loosen stubborn debris.
* Screwdriver (Possibly): You might need this to remove a back panel or access the coils.
* Work Gloves: Protect your hands from dust and grime.
* Flashlight or Headlamp: Helps you see into those dark corners.
* Appliance Dolly or Furniture Sliders (If Needed): For moving the fridge if the coils are in the back.
* Microfiber Cloth (Optional): For wiping down any surrounding areas.
Step-by-Step Guide to Cleaning Your Fridge Coils
Alright, let’s get down to business! Follow these steps, and your fridge will be thanking you.
1. Safety First: Unplug Your Fridge! This is the most important step. Never work on an electrical appliance while it’s plugged in. Locate the power cord and unplug it from the wall outlet.
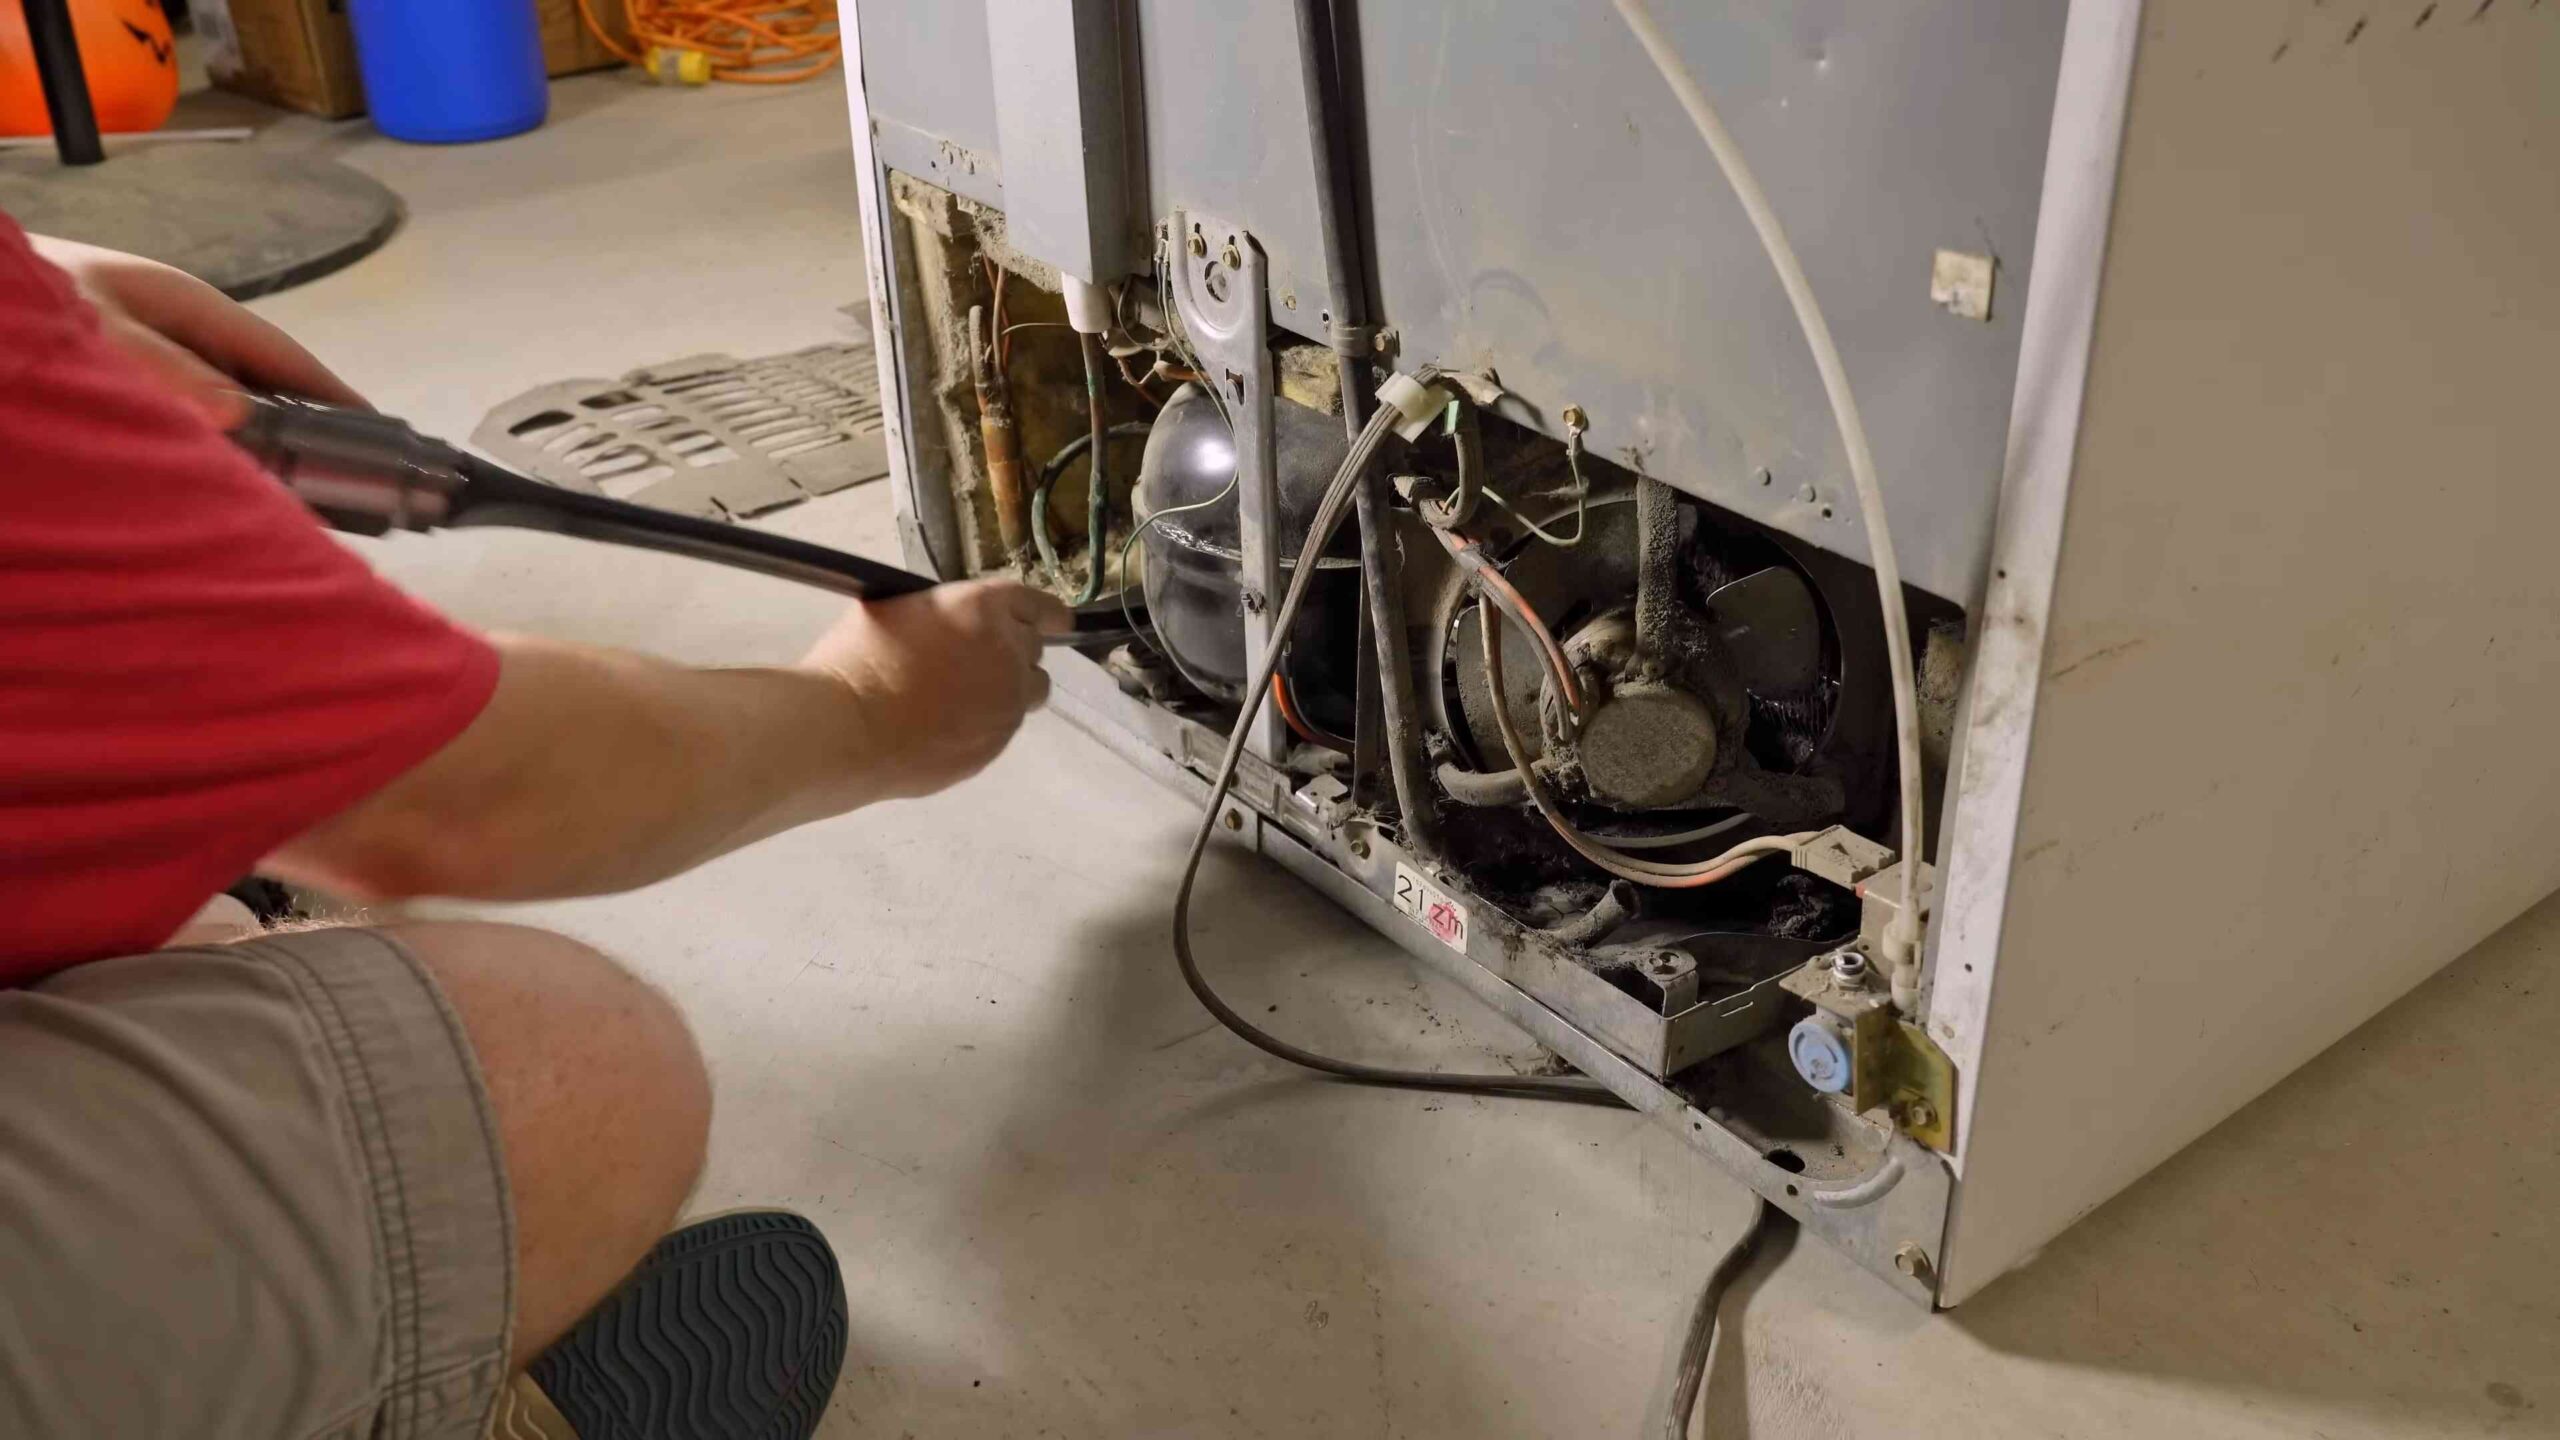
2. Locate Your Fridge Coils: This is where things can vary depending on your fridge model. The coils are usually located in one of two places:
* At the Back: If your coils are at the back, you’ll likely see a large, black grid. You might need to pull the fridge away from the wall to access them. This is where the appliance dolly or furniture sliders come in handy. Be careful not to damage your flooring!
* At the Bottom: Some fridges have the coils behind a kick plate or grille at the bottom front. You might need a screwdriver to remove this panel.
3. Prepare the Area: Once you’ve located the coils, clear the surrounding area. Move any boxes, food containers, or other items that might be in the way. This will give you plenty of room to maneuver.
4. Vacuum the Coils: This is the main event! Attach the hose attachment to your vacuum cleaner and carefully vacuum the coils.
* Work from Top to Bottom: Start at the top of the coils and work your way down, making sure to get into all the nooks and crannies.
* Use a Brush Attachment: If you have a brush attachment, use it to gently loosen any stubborn dust or debris.
* Be Gentle: The coils are delicate, so avoid applying too much pressure. You don’t want to bend or damage them.
* Pay Attention to Corners: Dust tends to accumulate in the corners and crevices, so make sure to give those areas extra attention.
5. Use a Soft Brush (If Needed): If vacuuming alone isn’t doing the trick, use a soft brush to loosen any remaining debris.
* Long-Handled Duster: A long-handled duster can be helpful for reaching coils that are difficult to access.
* Coil Brush: A specialized coil brush is designed specifically for cleaning fridge coils and can be very effective.
* Brush Gently: Again, be careful not to damage the coils.
6. Vacuum Again: After using the brush, vacuum the coils again to remove any loosened debris.
7. Wipe Down Surrounding Areas (Optional): While you’re at it, you can use a damp microfiber cloth to wipe down any surrounding areas, such as the back of the fridge or the kick plate.
8. Reassemble (If Necessary): If you removed a back panel or kick plate, carefully reattach it using the screwdriver.
9. Plug Your Fridge Back In: Once you’re sure everything is clean and reassembled, plug your fridge back into the wall outlet.
10. Monitor Your Fridge: Keep an eye on your fridge over the next few hours to make sure it’s cooling properly. You should notice a difference in how efficiently it runs.
Dealing with Stubborn Dirt
Sometimes, you’ll encounter dirt that just won’t budge. Here are a few tips for dealing with stubborn grime:
* Compressed Air: A can of compressed air can be helpful for blasting away stubborn dust and debris. Use it in short bursts and be careful not to damage the coils.
* Damp Cloth (Use Sparingly): If the dirt is really stuck on, you can try using a slightly damp cloth to wipe the coils. Make sure the cloth is only slightly damp, not soaking wet. And always unplug your fridge before using any liquids!
* Professional Cleaning: If you’re really struggling to clean the coils yourself, you can always hire a professional appliance repair technician.
How Often Should You Clean Your Fridge Coils?
The frequency of cleaning depends on several factors, such as whether you have pets, how dusty your home is, and how often you open and close your fridge. As a general rule, I recommend cleaning your fridge coils at least twice a year. If you have pets or live in a dusty environment, you might need to clean them more often.
Tips for Maintaining a Clean Fridge
Here are a few extra tips to keep your fridge running smoothly:
* Keep the Area Around Your Fridge Clean: Regularly sweep or vacuum the floor around your fridge to prevent dust from accumulating on the coils.
* Check the Door Seals: Make sure the door seals are clean and in good condition. Damaged or dirty seals can let warm air in, forcing your fridge to work harder.
* Don’t Overfill Your Fridge: Overfilling your fridge can restrict airflow and make it harder for it to cool efficiently.
* Keep Your Fridge Organized: An organized fridge allows for better airflow and makes it easier to find what you’re looking for, reducing the amount of time the door is open.
Troubleshooting
* Fridge Still Not Cooling Properly? If you’ve cleaned the coils and your fridge is still not cooling properly, there might be another issue, such as a faulty compressor or a problem with the refrigerant. In this case, it’s best to call a professional appliance repair technician.
* Coils are Frozen? If you notice that your fridge coils are frozen, it could be a sign of a problem with the defrost system. Again, it’s best to call a professional.
* Can’t Reach the Coils? If you’re unable to access the coils yourself, don’t force it. Call a professional who has the tools and expertise to safely clean them.
Conclusion
Cleaning your fridge coils is a simple but effective way to improve your fridge’s performance, save energy, and extend its lifespan. By following these steps, you can keep your fridge running smoothly for years to come. So, go ahead and give your fridge some love! You’ll be glad you did.
Conclusion
So, there you have it! Cleaning your fridge coils might not be the most glamorous task, but it’s undoubtedly one of the most impactful things you can do to extend the life of your refrigerator, save money on energy bills, and ensure your food stays fresh for longer. We’ve walked you through a simple, effective method to tackle this often-overlooked chore, and hopefully, you’re feeling empowered to give it a try.
Think about it: a fridge working at peak efficiency means less strain on the compressor, which translates to fewer repairs and a longer lifespan for your appliance. Plus, a clean fridge coil allows for better heat exchange, meaning your fridge doesn’t have to work as hard to maintain the desired temperature. This translates directly into lower energy consumption and a noticeable reduction in your electricity bill. Who wouldn’t want that?
But the benefits don’t stop there. A clean fridge also contributes to better food preservation. When your fridge is working optimally, it maintains a consistent temperature, preventing temperature fluctuations that can lead to spoilage. This means less food waste and more money saved.
Now, while the method we’ve outlined is a great starting point, feel free to experiment and adapt it to your specific needs and preferences. For example, if you have a pet that sheds a lot, you might want to consider cleaning your fridge coils more frequently – perhaps every three months instead of every six. Or, if you live in a particularly dusty environment, you might find that using a vacuum cleaner with a brush attachment is more effective than a simple brush alone.
Don’t be afraid to get creative! You could even add a few drops of essential oil (like lemon or tea tree) to your cleaning solution for a fresh, clean scent. Just be sure to use essential oils sparingly and avoid getting them directly on the coils.
We understand that tackling appliance maintenance can sometimes feel daunting, but we promise that cleaning your fridge coils is a surprisingly simple and rewarding task. It’s a small investment of time that yields significant returns in terms of energy savings, appliance longevity, and food preservation.
So, what are you waiting for? Grab your vacuum cleaner, unplug your fridge, and get ready to give those coils some much-needed attention. We’re confident that you’ll be amazed at the difference it makes.
And most importantly, we want to hear about your experience! Did you find this method helpful? Did you discover any tips or tricks of your own? Share your thoughts and experiences in the comments below. Your feedback will not only help us improve our guide but also inspire others to take control of their appliance maintenance and reap the benefits of a clean and efficient refrigerator. Let’s all work together to keep our fridges running smoothly and our food staying fresh! Remember, a little effort goes a long way when it comes to keeping your fridge in top condition. This simple DIY trick to clean fridge coils is a game-changer.
Frequently Asked Questions (FAQ)
How often should I clean my fridge coils?
The ideal frequency for cleaning your fridge coils depends on several factors, including the age of your refrigerator, the environment it’s in, and whether you have pets. As a general rule of thumb, we recommend cleaning your fridge coils at least every six months. However, if you have pets that shed a lot, or if you live in a dusty environment, you might want to consider cleaning them more frequently – perhaps every three months. If you notice your fridge running louder than usual, or if your energy bills seem higher than normal, it’s also a good indication that your coils need cleaning. Regular cleaning prevents dust and debris buildup, ensuring optimal performance and energy efficiency.
What happens if I don’t clean my fridge coils?
Neglecting to clean your fridge coils can lead to a variety of problems. The most immediate consequence is reduced energy efficiency. When the coils are covered in dust and debris, they can’t effectively dissipate heat, forcing your refrigerator to work harder to maintain the desired temperature. This increased workload translates directly into higher energy consumption and a noticeable increase in your electricity bill. Over time, the increased strain on the compressor can lead to premature wear and tear, shortening the lifespan of your refrigerator and potentially leading to costly repairs or replacement. Furthermore, a fridge that’s struggling to maintain a consistent temperature can lead to food spoilage, resulting in food waste and potential health risks. In short, neglecting to clean your fridge coils is a recipe for higher energy bills, appliance failure, and spoiled food.
What tools do I need to clean my fridge coils?
Fortunately, you don’t need any specialized or expensive tools to clean your fridge coils. The essential tools include:
* A vacuum cleaner with a hose attachment and a brush attachment (a crevice tool can also be helpful for reaching tight spaces).
* A soft brush (a coil cleaning brush is ideal, but a paintbrush or even an old toothbrush will work in a pinch).
* A screwdriver (to remove the access panel, if necessary).
* A damp cloth or sponge.
* A bucket of warm water (optional, for stubborn dirt).
* Mild dish soap (optional, for stubborn dirt).
With these simple tools, you’ll be well-equipped to tackle the task of cleaning your fridge coils and restoring your refrigerator to peak performance.
Is it safe to clean fridge coils myself?
Yes, cleaning your fridge coils yourself is generally safe, as long as you take a few basic precautions. The most important thing is to unplug your refrigerator before you begin. This will prevent any risk of electric shock. Also, be careful not to damage the coils themselves. They are delicate and can be easily bent or broken. Use gentle pressure when brushing or vacuuming the coils. If you’re using a damp cloth or sponge, make sure it’s not dripping wet, as excess moisture can damage the electrical components. Finally, be mindful of your posture and avoid straining your back while reaching for the coils. If you have any concerns about your ability to safely clean your fridge coils, it’s always best to consult with a qualified appliance repair technician.
Can I use compressed air to clean fridge coils?
While compressed air can be tempting to use for cleaning fridge coils, we generally advise against it. While it can effectively remove dust and debris, it can also blow the dust further into the refrigerator’s components, potentially causing more harm than good. Additionally, the high pressure of the compressed air can damage the delicate coils. If you do choose to use compressed air, use it sparingly and with caution, and be sure to wear a mask to protect yourself from inhaling the dust. A vacuum cleaner with a brush attachment is generally a safer and more effective option.
My fridge coils are located on the back of the fridge and are hard to reach. What should I do?
If your fridge coils are located on the back of the fridge and are difficult to reach, there are a few things you can try. First, try pulling the refrigerator away from the wall as far as possible to give yourself more room to work. If the coils are still hard to reach, try using a vacuum cleaner with a long hose attachment and a crevice tool. You can also try using a coil cleaning brush with a long handle. If all else fails, you may need to enlist the help of a friend or family member to hold the refrigerator while you clean the coils. Remember to unplug the refrigerator before you begin, and be careful not to damage the coils.
Will cleaning my fridge coils really save me money?
Yes, cleaning your fridge coils can absolutely save you money. As mentioned earlier, dirty coils force your refrigerator to work harder to maintain the desired temperature, leading to increased energy consumption. By cleaning the coils, you allow your refrigerator to operate more efficiently, reducing its energy consumption and lowering your electricity bill. The amount of money you save will depend on several factors, including the age and efficiency of your refrigerator, the frequency with which you clean the coils, and your local electricity rates. However, even a small reduction in energy consumption can add up over time, resulting in significant savings. In addition to saving money on energy bills, cleaning your fridge coils can also extend the lifespan of your refrigerator, saving you the cost of repairs or replacement.


Leave a Comment