

Clean greasy cabinets DIY projects might seem daunting, but trust me, they don’t have to be! I know the feeling – you walk into your kitchen, and the once-gleaming cabinets are now coated in a sticky, grimy film. It’s a common kitchen woe, a testament to countless delicious meals cooked and enjoyed. But fear not, because I’m here to share some incredibly effective and surprisingly simple DIY tricks to restore your cabinets to their former glory.
Throughout history, a clean and well-maintained kitchen has been a symbol of a thriving home. From ancient hearths to modern culinary spaces, the heart of the home deserves to shine. And let’s be honest, nobody wants to cook in a greasy, grimy environment! Beyond aesthetics, regularly cleaning your cabinets is crucial for hygiene and preventing the buildup of bacteria and mold. Plus, it extends the lifespan of your cabinets, saving you money in the long run.
This article is packed with easy-to-follow instructions and readily available ingredients. I’ll guide you through various methods, from natural solutions to effective cleaning agents, ensuring you find the perfect fit for your cabinet type and your personal preferences. So, roll up your sleeves, grab your supplies, and let’s dive into the world of clean greasy cabinets DIY! You’ll be amazed at how quickly and easily you can transform your kitchen with these simple hacks.
DIY Guide: Banish Grease from Your Kitchen Cabinets!
Hey everyone! I know, I know, cleaning greasy kitchen cabinets is probably on everyone’s least favorite chore list. But trust me, with this DIY method, it’s way less daunting than you think. I’ve tried countless products and techniques, and this one is by far the most effective and budget-friendly. Get ready to say goodbye to that sticky, grimy film and hello to sparkling clean cabinets!
What You’ll Need: The Arsenal Against Grease
Before we dive in, let’s gather our supplies. Having everything ready beforehand will make the process so much smoother.
* Baking Soda: This is our gentle abrasive. It helps lift the grease without scratching the cabinet finish.
* Dish Soap: A good degreasing dish soap is essential. I prefer something like Dawn, but any grease-cutting formula will work.
* White Vinegar: Vinegar is a natural degreaser and disinfectant. Plus, it’s super affordable!
* Warm Water: Warm water helps dissolve the grease and activate the cleaning power of the other ingredients.
* Spray Bottle: For easy application of our cleaning solution.
* Microfiber Cloths: These are my go-to for cleaning. They’re gentle, absorbent, and won’t leave lint behind. You’ll need several!
* Soft-Bristled Brush (Optional): An old toothbrush or a small scrub brush can be helpful for getting into tight corners and crevices.
* Sponge: For wiping down larger surfaces.
* Rubber Gloves: Protect your hands from the cleaning solution and grease.
* Old Towel or Drop Cloth: To protect your countertops and floors from drips.
* Small Bowl: For mixing the baking soda paste.
* Ladder or Step Stool (If needed): To reach those high cabinets.
Phase 1: Prepping for Battle
Okay, let’s get started! Preparation is key to a successful cleaning mission.
1. Clear the Area: Remove everything from your countertops that’s directly below the cabinets you’ll be cleaning. This will give you plenty of room to work and prevent anything from getting splattered.
2. Protect Your Surfaces: Lay down an old towel or drop cloth on your countertops and floors to catch any drips or spills. This will save you from having to clean up a bigger mess later.
3. Gather Your Supplies: Make sure you have all your cleaning supplies within easy reach. There’s nothing worse than having to stop mid-cleaning to hunt down a missing cloth or bottle.
4. Ventilate the Area: Open windows or turn on your kitchen fan to ensure good ventilation. This is especially important if you’re using vinegar, as the smell can be a bit strong.
Phase 2: The Cleaning Solution – Two Powerful Options
Now, let’s mix up our cleaning solutions. I’m giving you two options here, so you can choose the one that works best for you and your cabinets.
Option 1: The Baking Soda Paste Powerhouse
This method is great for tackling really stubborn grease buildup.
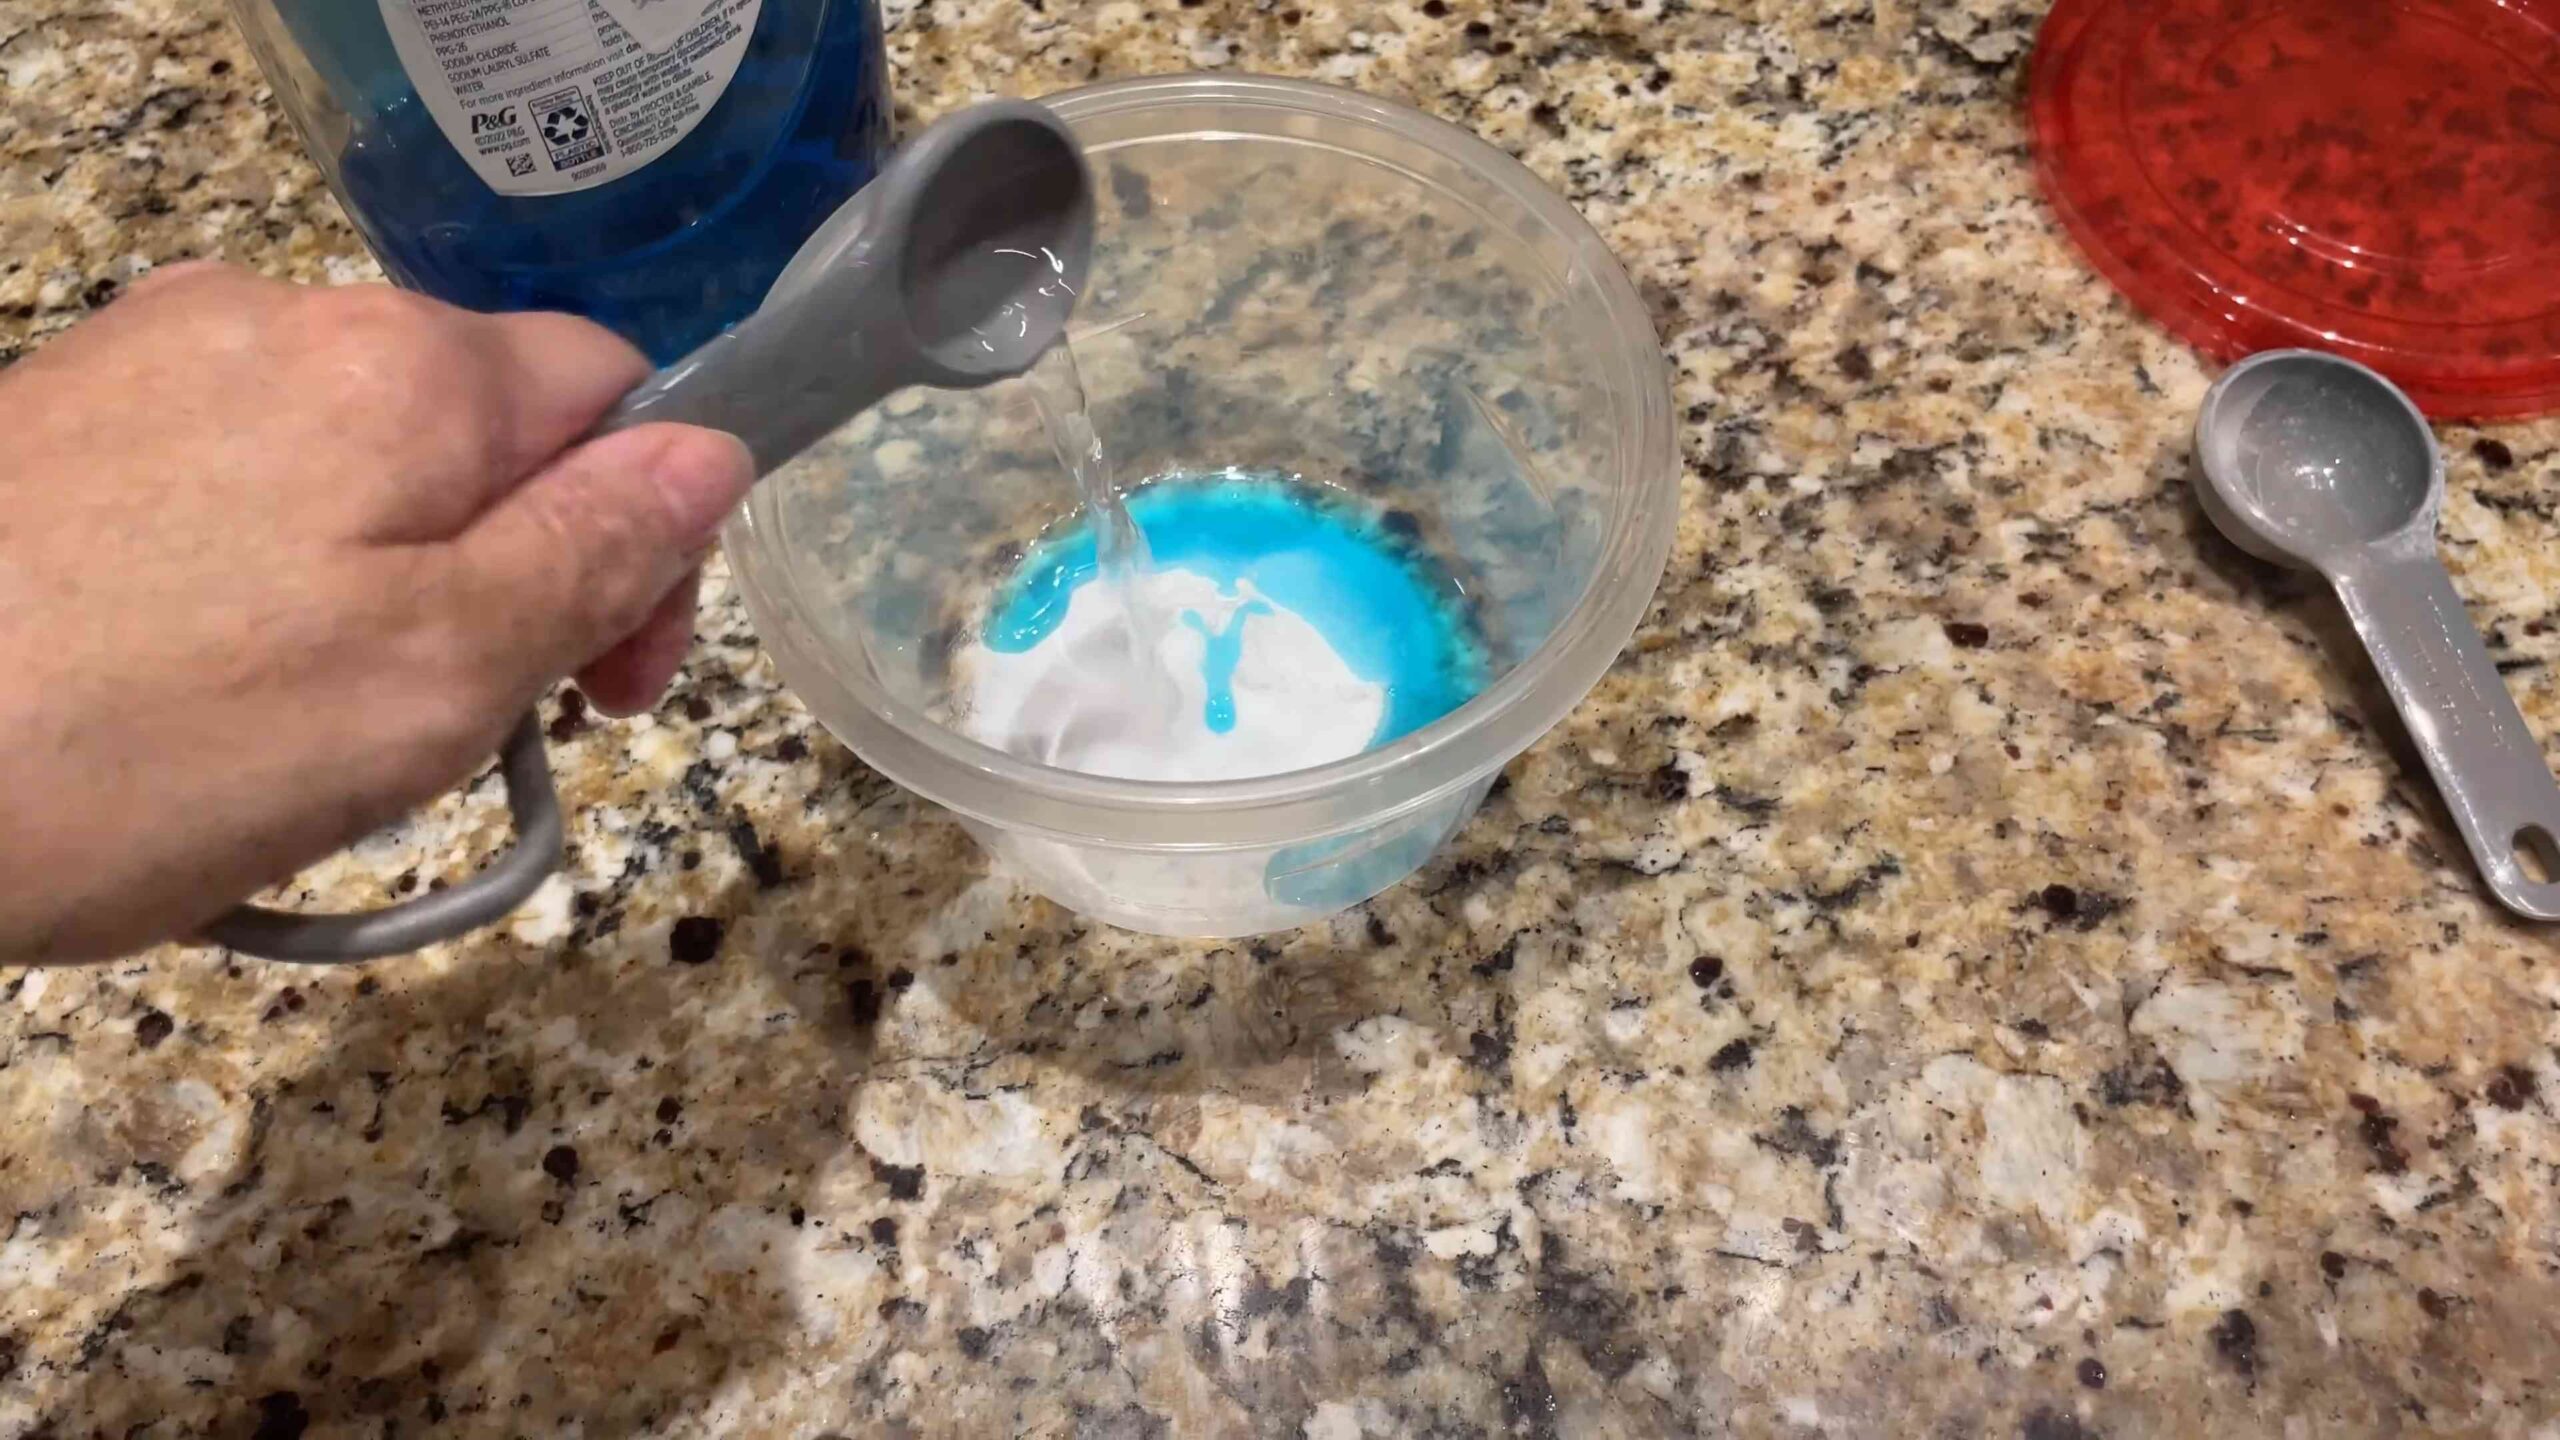
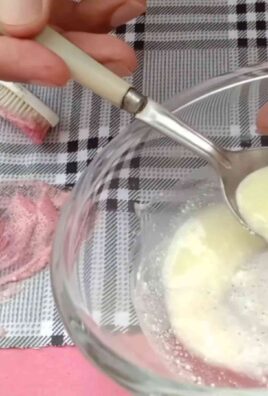
1. Mix the Paste: In a small bowl, combine about 1/4 cup of baking soda with enough warm water to form a thick paste. The consistency should be similar to toothpaste.
2. Test a Hidden Area: Before applying the paste to the entire cabinet, test it on a small, inconspicuous area (like the inside of a cabinet door) to make sure it doesn’t damage the finish. Let it sit for a few minutes, then wipe it off and check for any discoloration or scratches.
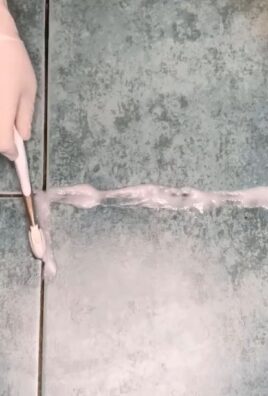
3. Apply the Paste: Using your fingers or a clean cloth, apply the baking soda paste to the greasy areas of your cabinets. Don’t be afraid to be generous!
4. Let it Sit: Allow the paste to sit on the grease for about 5-10 minutes. This will give the baking soda time to break down the grease.
5. Scrub Gently: Using a damp microfiber cloth or a soft-bristled brush, gently scrub the greasy areas. Avoid using too much pressure, as you don’t want to scratch the cabinet finish.
6. Rinse Thoroughly: Use a clean, damp sponge to rinse away all traces of the baking soda paste. Make sure you remove all residue, as it can leave a white film if left to dry.
7. Dry Completely: Use a clean, dry microfiber cloth to dry the cabinets thoroughly. This will prevent water spots and help restore the shine.
Option 2: The Vinegar and Dish Soap Spray
This method is perfect for everyday cleaning and lighter grease buildup.
1. Mix the Solution: In a spray bottle, combine equal parts white vinegar and warm water. Add a squirt of dish soap (about a teaspoon) and shake gently to mix.
2. Test a Hidden Area: As with the baking soda paste, test the spray on a small, inconspicuous area of your cabinet to ensure it doesn’t damage the finish.
3. Spray and Wipe: Spray the cleaning solution onto the greasy areas of your cabinets. Let it sit for a minute or two to loosen the grease.
4. Wipe Clean: Use a clean, damp microfiber cloth to wipe away the grease and cleaning solution.
5. Rinse (If Needed): If you find that the dish soap leaves a residue, you can rinse the cabinets with a clean, damp sponge.
6. Dry Completely: Use a clean, dry microfiber cloth to dry the cabinets thoroughly.
Phase 3: Tackling the Nitty-Gritty Details
Now that we’ve covered the general cleaning process, let’s focus on some specific areas that tend to accumulate more grease.
* Around the Stove: Cabinets near the stove are notorious for collecting grease splatters. For these areas, I recommend using the baking soda paste method, as it’s more effective at breaking down stubborn grease.
* Above the Microwave: The area above the microwave is another grease hotspot. Be extra careful when cleaning this area, as you don’t want to get any cleaning solution inside the microwave.
* Handles and Knobs: Don’t forget to clean the handles and knobs! These are often overlooked, but they can accumulate a lot of grease and grime. You can use either the baking soda paste or the vinegar and dish soap spray to clean them. Remove them if possible for easier cleaning.
* Inside the Cabinets (If Needed): If the inside of your cabinets is also greasy, you can use the same cleaning methods to clean them. Just be sure to remove all the contents of the cabinets first and let them dry completely before putting everything back.
Phase 4: The Finishing Touches
We’re almost there! A few final steps will leave your cabinets looking their absolute best.
1. Polish (Optional): If you want to give your cabinets an extra shine, you can use a furniture polish specifically designed for your cabinet finish. Follow the instructions on the polish carefully.
2. Reorganize: Now that your cabinets are clean, take a moment to reorganize them. Get rid of any expired food or unnecessary items. This will help keep your kitchen clutter-free and make it easier to find what you need.
3. Admire Your Work: Step back and admire your sparkling clean cabinets! You did it!
Tips and Tricks for Keeping Your Cabinets Clean
Prevention is always better than cure! Here are a few tips to help you keep your cabinets clean and prevent grease buildup in the future.
* Wipe Up Splatters Immediately: The sooner you wipe up grease splatters, the easier they will be to remove. Keep a damp cloth handy near the stove for quick cleanups.
* Use Your Range Hood: Always use your range hood when cooking, especially when frying or sautéing. This will help vent the grease and prevent it from settling on your cabinets.
* Regular Cleaning: Make it a habit to wipe down your cabinets regularly, even if they don’t look dirty. A quick wipe-down once a week can prevent grease from building up.
* Consider Cabinet Liners: Line your cabinets with shelf liners to protect them from spills and stains. This will make cleaning much easier in the long run.
* Avoid Harsh Cleaners: Harsh cleaners can damage the finish of your cabinets. Stick to gentle, natural cleaners like baking soda and vinegar.
Troubleshooting Common Problems
Sometimes, even with the best methods, you might encounter a few challenges. Here are some solutions to common problems:
* Sticky Residue: If you’re left with a sticky residue after cleaning, it’s likely due to soap buildup. Rinse the cabinets thoroughly with a clean, damp sponge and dry them completely.
* Streaks: Streaks can be caused by using too much cleaning solution or not drying the cabinets properly. Use a clean, dry microfiber cloth to buff away the streaks.
*

Conclusion
So, there you have it! This simple, yet incredibly effective DIY method for cleaning greasy cabinets is a game-changer for any home. Forget spending hours scrubbing with harsh chemicals and still ending up with sticky residue. This approach, using readily available household ingredients, offers a powerful, natural, and cost-effective solution to tackle even the most stubborn grease buildup.
Why is this DIY trick a must-try? Because it saves you time, money, and effort while delivering sparkling clean cabinets without the harsh fumes and potential damage associated with commercial cleaners. It’s a win-win! Imagine the satisfaction of running your hand across a smooth, grease-free cabinet door, knowing you achieved that with a simple, homemade solution. The difference is truly remarkable.
But the beauty of this method lies not only in its effectiveness but also in its adaptability. Feel free to experiment with variations to suit your specific needs and preferences. For instance, if you have particularly stubborn grease stains, consider letting the baking soda paste sit for a longer period before scrubbing. You could also add a few drops of your favorite essential oil, like lemon or orange, to the cleaning solution for an extra boost of freshness and a pleasant scent. For painted cabinets, always test the solution in an inconspicuous area first to ensure it doesn’t damage the finish. A gentler approach might be needed, perhaps diluting the vinegar slightly or using a softer scrubbing tool.
This DIY method to clean greasy cabinets is a must-try for anyone looking for an effective, affordable, and eco-friendly solution.
We’re confident that once you try this method, you’ll be amazed by the results. It’s a simple change that can make a significant difference in the cleanliness and overall appearance of your kitchen. Don’t just take our word for it, though. We encourage you to give it a try and see for yourself!
And most importantly, we want to hear about your experience! Did you find this method helpful? Did you try any variations? What were your results? Share your tips, tricks, and before-and-after photos in the comments below. Your feedback will not only help us improve this guide but also inspire others to take control of their kitchen cleaning and discover the power of DIY solutions. Let’s create a community of clean cabinet enthusiasts! So, go ahead, tackle those greasy cabinets and share your success story. We can’t wait to hear from you!
Frequently Asked Questions (FAQ)
Q: What kind of cabinets is this DIY cleaning method suitable for?
A: This method is generally safe for most types of cabinets, including wood, laminate, and painted cabinets. However, it’s always a good idea to test the cleaning solution in an inconspicuous area first, especially if you have painted or delicate surfaces. This will help ensure that the solution doesn’t damage the finish or cause any discoloration. For painted cabinets, a gentler approach with diluted vinegar and a soft cloth is recommended. If you have antique or very valuable cabinets, consult with a professional before attempting any cleaning methods.
Q: What ingredients do I need to clean greasy cabinets using this DIY method?
A: The basic ingredients you’ll need are baking soda, white vinegar, warm water, and dish soap. You’ll also need a soft cloth or sponge, a scrubbing brush (optional, for stubborn grease), and a spray bottle. These are common household items that you likely already have on hand, making this a very convenient and cost-effective cleaning solution.
Q: How often should I clean my greasy cabinets?
A: The frequency of cleaning depends on how often you cook and the amount of grease that accumulates in your kitchen. As a general rule, it’s a good idea to wipe down your cabinets with a damp cloth and mild dish soap at least once a week to prevent grease buildup. A more thorough cleaning with the baking soda and vinegar solution can be done every month or two, or as needed. If you notice significant grease buildup, don’t wait too long to clean it, as it can become more difficult to remove over time.
Q: Can I use other types of vinegar besides white vinegar?
A: While white vinegar is the most commonly recommended type for cleaning due to its acidity and lack of color, you can technically use other types of vinegar, such as apple cider vinegar. However, be aware that apple cider vinegar has a slight color that could potentially stain light-colored cabinets. It’s always best to test in an inconspicuous area first. White vinegar is generally preferred for its effectiveness and safety on most surfaces.
Q: Is baking soda abrasive and will it scratch my cabinets?
A: Baking soda is mildly abrasive, but when used with water or vinegar to form a paste, it’s generally safe for most cabinet surfaces. However, it’s important to use gentle pressure when scrubbing and avoid using excessive force. If you’re concerned about scratching, you can test the paste in an inconspicuous area first or use a softer scrubbing tool, such as a microfiber cloth. For very delicate surfaces, consider using a less abrasive alternative, such as a paste made with dish soap and water.
Q: How do I clean the hardware (knobs and pulls) on my cabinets?
A: The hardware on your cabinets can also accumulate grease and grime. To clean them, you can remove them from the cabinets and soak them in a solution of warm water and dish soap. Use a soft brush or cloth to scrub away any dirt or grease. For stubborn grime, you can use a baking soda paste. Rinse the hardware thoroughly with clean water and dry them completely before reattaching them to the cabinets.
Q: What if the grease is really stubborn and doesn’t come off easily?
A: For particularly stubborn grease stains, you can try letting the baking soda paste sit on the affected area for a longer period, perhaps 30 minutes to an hour, before scrubbing. You can also try using a slightly more abrasive scrubbing tool, such as a nylon scrub brush. Another option is to create a stronger cleaning solution by adding a bit more vinegar to the baking soda paste. If all else fails, you can try using a commercial degreaser, but be sure to test it in an inconspicuous area first and follow the manufacturer’s instructions carefully.
Q: How do I prevent grease from building up on my cabinets in the future?
A: Preventing grease buildup is key to keeping your cabinets clean. Here are a few tips:
* Use your range hood or exhaust fan whenever you’re cooking to vent steam and grease away from your cabinets.
* Wipe down your cabinets regularly with a damp cloth and mild dish soap to remove any grease splatters before they have a chance to harden.
* Consider using a backsplash behind your stovetop to protect your walls and cabinets from grease.
* Avoid frying foods too often, as this can generate a lot of grease.
* Clean up spills and splatters immediately to prevent them from becoming stubborn stains.
Q: Can I use this method on other greasy surfaces in my kitchen?
A: Yes, this DIY cleaning method can be used on other greasy surfaces in your kitchen, such as your stovetop, backsplash, and even your oven door. Just be sure to test the solution in an inconspicuous area first, especially on delicate surfaces. The baking soda and vinegar combination is a versatile cleaning solution that can tackle a variety of grease-related cleaning tasks.
Q: Is this DIY cleaning method environmentally friendly?
A: Yes, this DIY cleaning method is much more environmentally friendly than using commercial cleaners, which often contain harsh chemicals that can be harmful to the environment. Baking soda and vinegar are natural, biodegradable ingredients that are safe for your family and the planet. By using this method, you can reduce your reliance on chemical cleaners and contribute to a healthier environment.

Leave a Comment