

Cleaning shortcuts – who doesn’t crave them? Let’s be honest, spending hours scrubbing and polishing isn’t exactly anyone’s idea of a good time. For centuries, people have sought clever ways to maintain tidy homes, from ancient Roman bathhouses with their intricate cleaning systems to the resourceful homemakers of the Victorian era who relied on homemade concoctions. The desire for a sparkling clean space without sacrificing precious time is a timeless pursuit!
I know I’m always on the lookout for ways to streamline my cleaning routine. That’s why I’m so excited to share these amazing DIY cleaning tricks and hacks with you. We’re diving deep into simple, effective methods that will transform your cleaning game. Forget spending your weekends wrestling with stubborn stains and endless chores.
These cleaning shortcuts aren’t just about saving time; they’re about reclaiming your life! Imagine having more free time to pursue your hobbies, spend quality time with loved ones, or simply relax and recharge. With these easy-to-implement tips, you can achieve a spotless home without the stress and exhaustion. So, grab your cleaning supplies, and let’s get started on making your home shine with minimal effort!
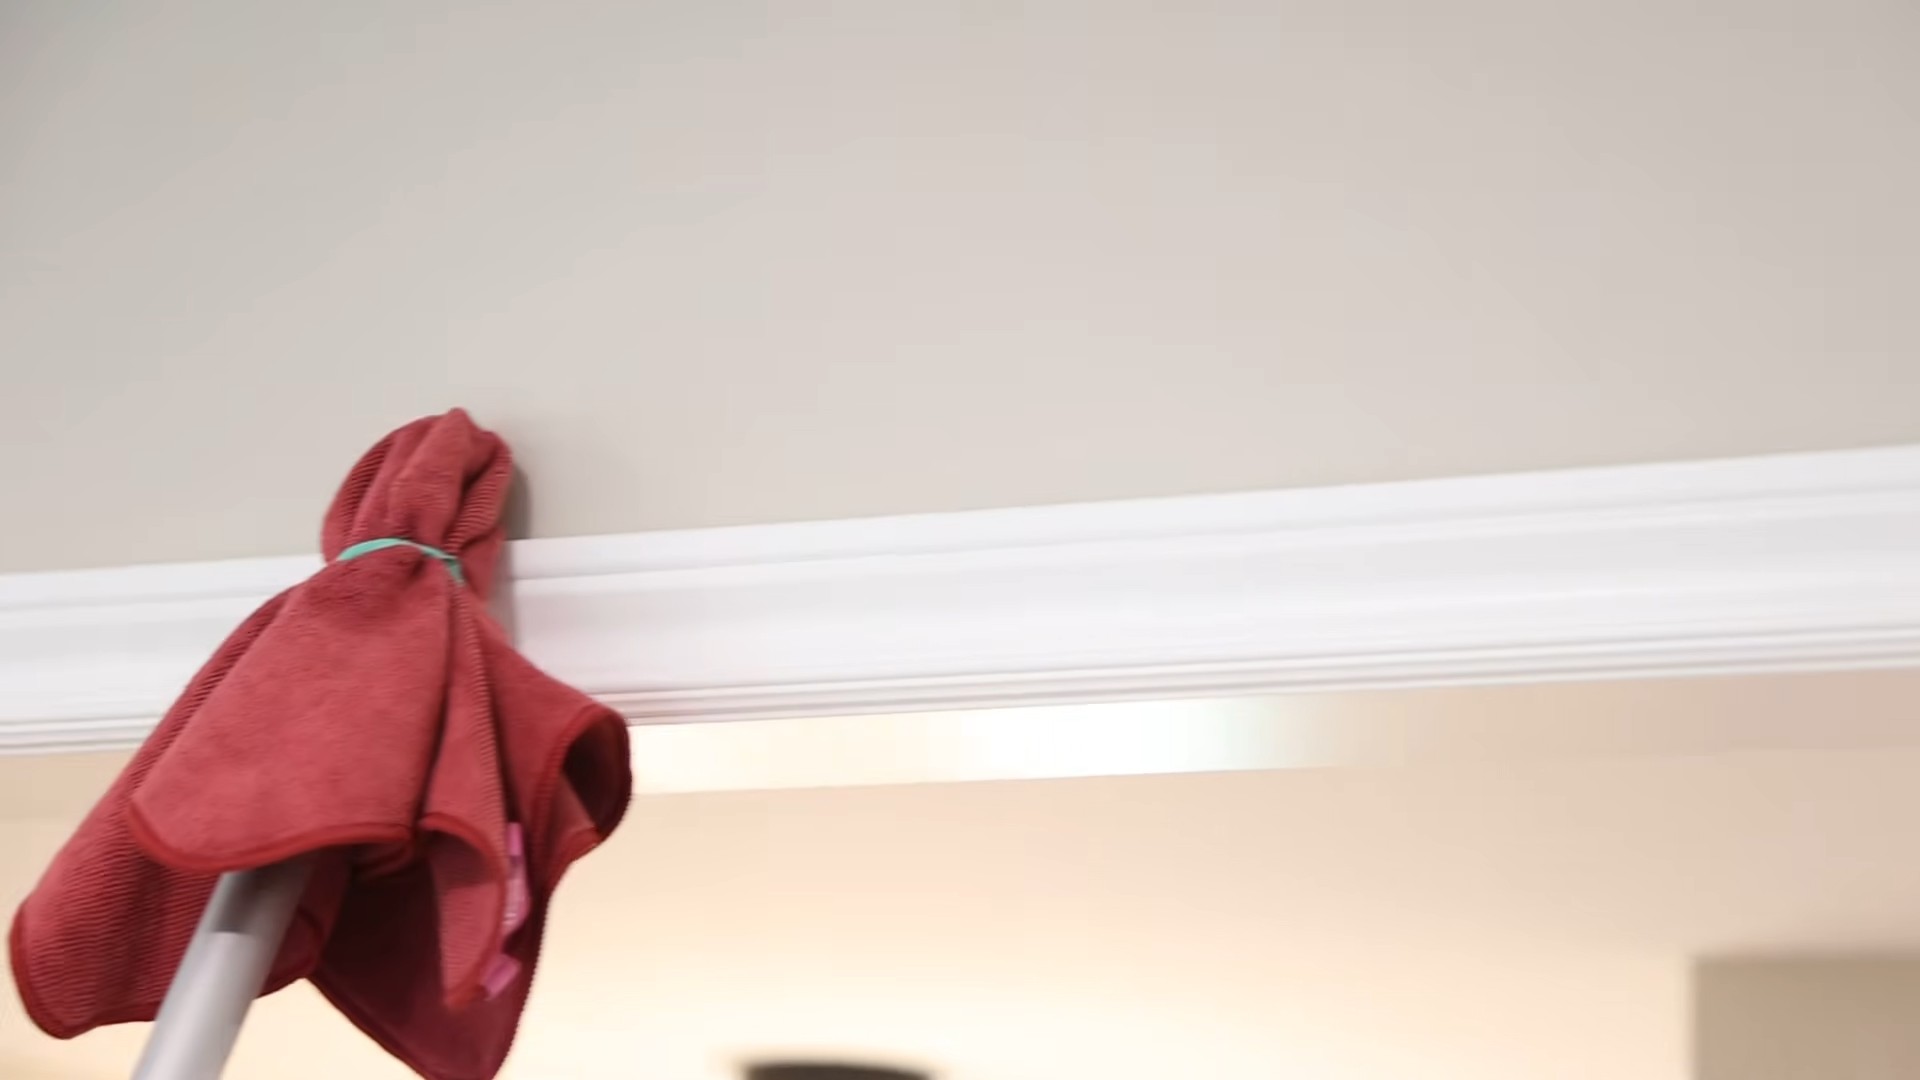
DIY Cleaning Hack: Transforming Old T-Shirts into Reusable Cleaning Rags
Hey everyone! I’m super excited to share one of my favorite DIY cleaning hacks with you: turning old t-shirts into reusable cleaning rags. Not only is this a fantastic way to reduce waste, but it also saves you money on buying disposable paper towels or expensive cleaning cloths. Plus, old t-shirts are usually made of soft cotton, which is perfect for cleaning various surfaces without scratching them. Let’s get started!
Why Use T-Shirt Rags?
Before we dive into the how-to, let’s quickly talk about why this is such a great idea.
* Eco-Friendly: Reusing old t-shirts keeps them out of landfills.
* Cost-Effective: No more buying paper towels or expensive cleaning cloths.
* Gentle on Surfaces: Soft cotton is safe for most surfaces.
* Super Absorbent: T-shirts are surprisingly absorbent, making them great for spills.
* Washable and Reusable: Just toss them in the washing machine after use.
Materials You’ll Need
* Old t-shirts (cotton works best)
* Sharp scissors or a rotary cutter
* Cutting mat (optional, but recommended for rotary cutters)
* Ruler or measuring tape (optional, for uniform sizes)
* Storage container (a basket, bin, or drawer)
Step-by-Step Instructions: Creating Your Reusable Cleaning Rags
Okay, let’s get down to business! I’ll walk you through the process step-by-step.
1. Gather Your T-Shirts: The first thing you need to do is raid your closet (or your family’s closets!) for old t-shirts that are no longer wearable. Look for shirts with stains, holes, or that you simply don’t like anymore. Cotton t-shirts are ideal because they’re soft and absorbent, but blends can work too. Just avoid anything too delicate or stretchy.
2. Prepare Your Workspace: Find a well-lit and spacious area to work in. A large table or countertop is perfect. If you’re using a rotary cutter, make sure you have a cutting mat to protect your surface.
3. Wash the T-Shirts (Optional but Recommended): While not strictly necessary, I highly recommend washing the t-shirts before cutting them up. This will remove any lingering dirt, dust, or odors and ensure that your rags are clean and ready to use. Plus, it will pre-shrink the fabric, so your rags won’t shrink significantly after their first wash.
4. Lay the T-Shirt Flat: Place one of your t-shirts flat on your work surface. Smooth out any wrinkles or creases to ensure even cuts.
5. Cut Off the Sleeves: Using your scissors or rotary cutter, carefully cut off both sleeves of the t-shirt. Try to cut as close to the seam as possible to maximize the amount of usable fabric. I usually discard the sleeves, but you could potentially use them for smaller cleaning tasks or craft projects.
6. Cut Off the Neckline: Next, cut off the neckline of the t-shirt. Again, try to cut as close to the seam as possible. You can discard the neckline piece or save it for other projects.
7. Cut Off the Bottom Hem: Now, cut off the bottom hem of the t-shirt. This will give you a clean, straight edge to work with. Discard the hem.
8. Cut the T-Shirt into Squares or Rectangles: This is where you decide on the size and shape of your rags. I personally prefer to cut my t-shirts into squares or rectangles that are approximately 12×12 inches. This size is large enough to be useful for most cleaning tasks, but not so large that they’re unwieldy.
* Using Scissors: If you’re using scissors, simply eyeball the size and cut the t-shirt into squares or rectangles. Don’t worry about being perfectly precise; the rags don’t need to be perfectly uniform.
* Using a Rotary Cutter and Ruler: If you’re using a rotary cutter and ruler, you can achieve more precise cuts. Use the ruler to measure out 12-inch increments and then use the rotary cutter to slice through the fabric. This method is faster and more accurate, but it requires a cutting mat.
9. Stack and Store Your Rags: As you cut the t-shirts into rags, stack them neatly and store them in your chosen container. A basket, bin, or drawer works well. I like to keep my rags in a convenient location, such as under the kitchen sink or in the laundry room.
10. Repeat the Process: Repeat steps 4-9 for all of your old t-shirts. The more t-shirts you have, the more rags you’ll create!
Tips and Tricks for Maximizing Your T-Shirt Rags
Here are a few extra tips and tricks to help you get the most out of your DIY t-shirt rags:
* Use Different Colors for Different Tasks: If you have t-shirts in various colors, you can use different colors for different cleaning tasks. For example, you could use white rags for cleaning bathrooms, blue rags for cleaning kitchens, and green rags for cleaning windows. This will help you avoid cross-contamination and keep your cleaning organized.
* Consider the Fabric Type: While cotton is generally the best choice for cleaning rags, you can also use t-shirts made from other materials, such as polyester or blends. Just keep in mind that different fabrics have different properties. For example, polyester is more durable than cotton, but it’s also less absorbent.
* Don’t Be Afraid to Experiment: There’s no right or wrong way to make t-shirt rags. Feel free to experiment with different sizes, shapes, and cutting techniques to find what works best for you.
* Wash Your Rags Regularly: To keep your t-shirt rags clean and sanitary, wash them regularly in hot water with detergent. You can also add a cup of white vinegar to the wash to help remove odors and stains.
* Dry Your Rags Thoroughly: After washing your rags, dry them thoroughly in the dryer or on a clothesline. This will help prevent mildew and keep them fresh.
* Don’t Use Rags on Delicate Surfaces: While cotton is generally safe for most surfaces, it’s always a good idea to test a small, inconspicuous area first before using a rag on a delicate surface, such as polished wood or leather.
* Dispose of Worn-Out Rags Responsibly: Eventually, your t-shirt rags will wear out and need to be replaced. When this happens, dispose of them responsibly. You can recycle them if your local recycling program accepts textiles, or you can simply throw them away.
Cleaning Applications for Your New Rags
Now that you have a stash of reusable cleaning rags, let’s talk about how to use them! Here are just a few of the many cleaning tasks you can tackle with your new rags:
* Dusting: T-shirt rags are perfect for dusting furniture, shelves, and other surfaces.
* Wiping Spills: Their absorbency makes them ideal for cleaning up spills of all kinds.
* Cleaning Countertops: Use them with your favorite cleaning solution to wipe down kitchen and bathroom countertops.
* Washing Windows and Mirrors: Achieve streak-free shine with a t-shirt rag and a glass cleaner.
* Polishing Furniture: Apply furniture polish with a rag and buff to a beautiful shine.
* Cleaning Appliances: Wipe down the exterior of your appliances with a damp rag to remove fingerprints and smudges.
* Washing Cars: Use them to wash and dry your car without scratching the paint.
* Gardening: Wipe down your gardening tools to keep them clean and rust-free.
Section: Dealing with Tough Stains
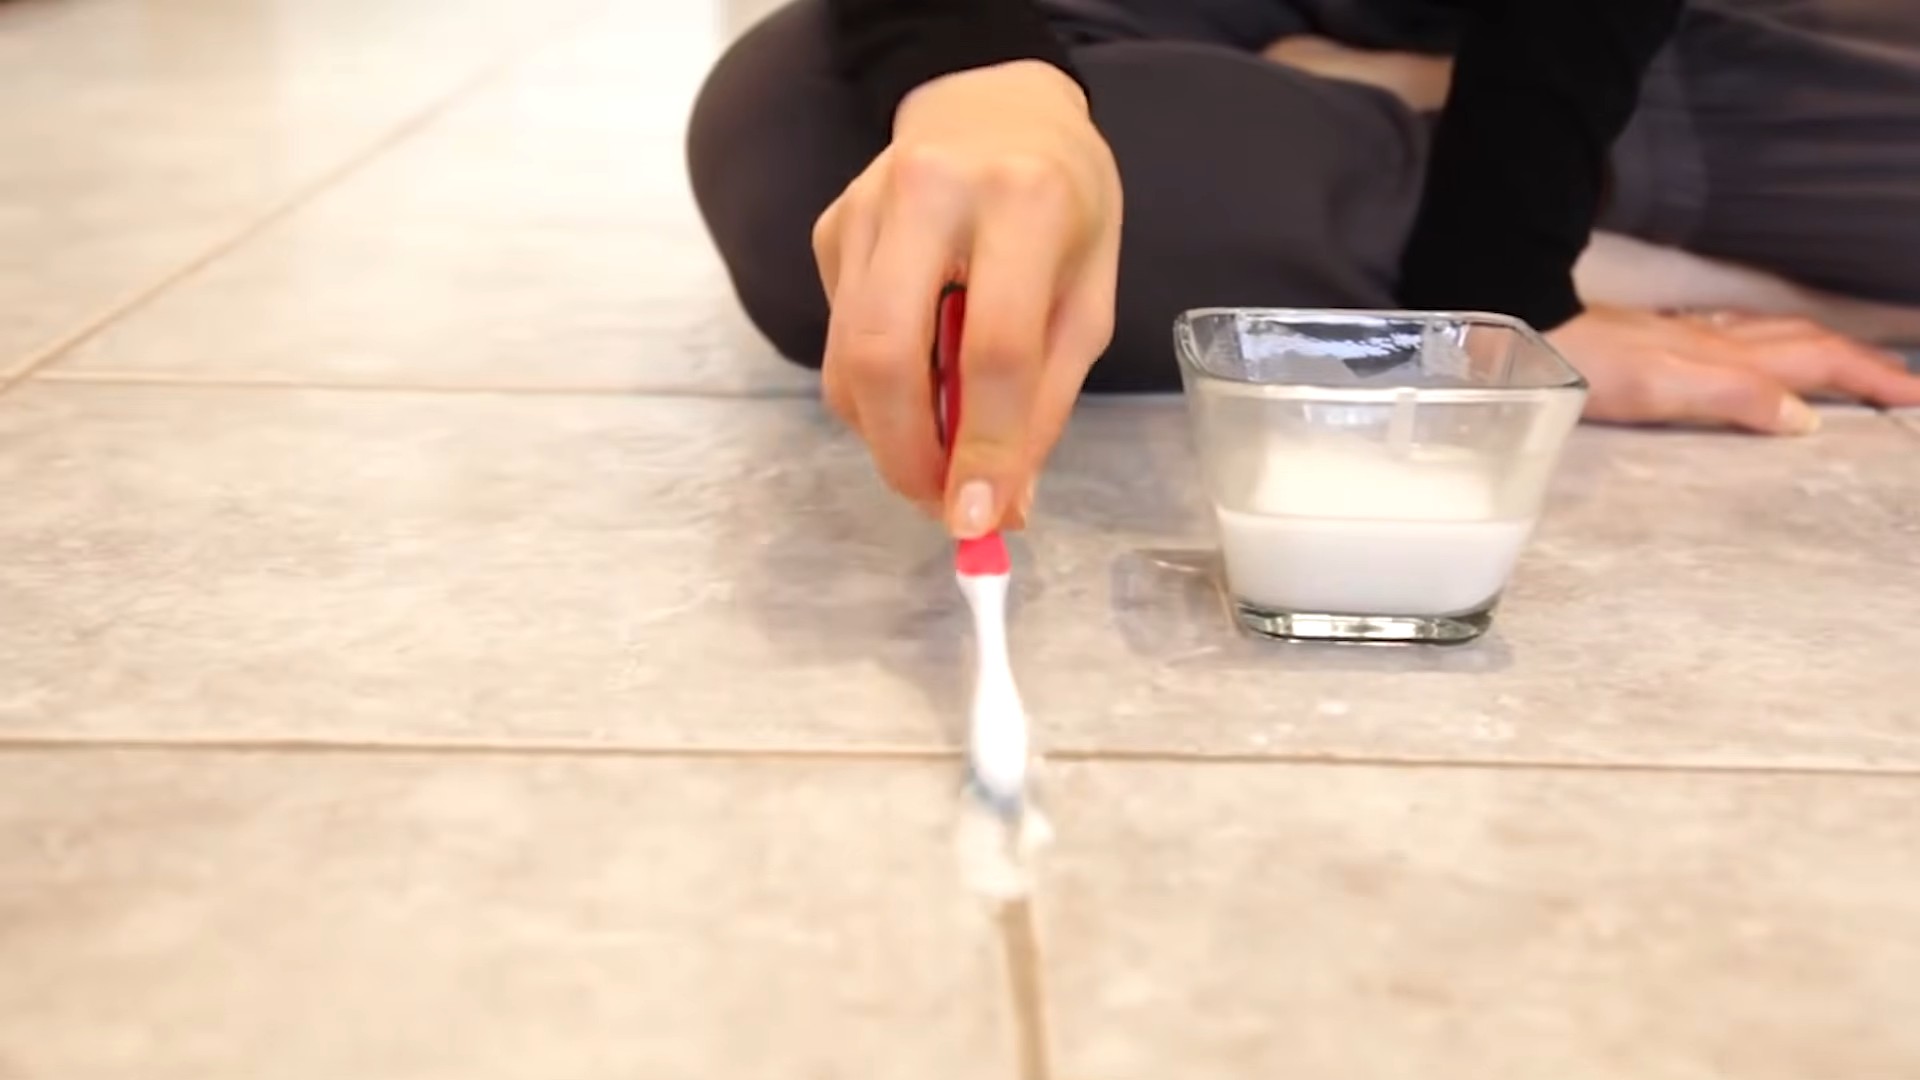
Sometimes, you’ll encounter stains that are a bit more stubborn. Here’s how I tackle those using my trusty t-shirt rags:
1. Pre-Treat the Stain: Before you start scrubbing, pre-treat the stain with a stain remover or a homemade solution. For example, for grease stains, I like to use a mixture of dish soap and baking soda. For coffee or tea stains, I use a solution of white vinegar and water.
2. Apply the Solution: Apply the stain remover or homemade solution directly to the stain and let it sit for a few minutes. This will give the solution time to penetrate the stain and break it down.
3. Scrub Gently: Using a clean t-shirt rag, gently scrub the stain in a circular motion. Avoid scrubbing too hard, as this could damage the surface.
4. Rinse and Repeat: Rinse the area with clean water and repeat the process if necessary. You may need to repeat the process several times to completely remove the stain.
5. Dry the Area: Once the
Conclusion
So, there you have it! This simple yet incredibly effective DIY cleaning shortcut is a game-changer for anyone looking to streamline their cleaning routine and reclaim precious time. We’ve all been there, staring down a mountain of chores, feeling overwhelmed and unmotivated. But with this easy-to-implement trick, you can transform your cleaning process from a daunting task into a manageable and even enjoyable activity.
The beauty of this method lies in its simplicity and adaptability. It’s not about buying expensive cleaning products or spending hours scrubbing; it’s about working smarter, not harder. By incorporating this DIY cleaning shortcut into your regular routine, you’ll not only save time and energy but also reduce the stress associated with keeping a clean and tidy home. Imagine having more free time to pursue your hobbies, spend quality time with loved ones, or simply relax and unwind after a long day. That’s the power of efficient cleaning!
But the benefits don’t stop there. This DIY approach is also incredibly versatile. Feel free to experiment with different essential oils to create your own signature scent. Lavender for relaxation, lemon for a burst of freshness, or eucalyptus for its invigorating properties – the possibilities are endless! You can also adjust the ratios of ingredients to suit your specific needs and preferences. For example, if you have particularly stubborn stains, you might want to add a bit more vinegar or baking soda to the mixture.
Don’t be afraid to get creative and personalize this DIY cleaning shortcut to make it your own. Consider using different types of cloths or sponges depending on the surface you’re cleaning. Microfiber cloths are excellent for dusting and polishing, while scrub brushes are ideal for tackling tough grime in the bathroom or kitchen.
We’re confident that once you try this DIY cleaning shortcut, you’ll wonder how you ever lived without it. It’s a truly transformative technique that can revolutionize your cleaning routine and free up valuable time and energy.
So, what are you waiting for? Give it a try today and experience the difference for yourself! We’re eager to hear about your experiences and see how this DIY cleaning shortcut has helped you simplify your life. Share your tips, tricks, and variations in the comments below. Let’s create a community of clean-living enthusiasts who are passionate about making cleaning easier and more enjoyable! We encourage you to share your before and after photos on social media using #DIYCleaningShortcut and tag us so we can see your amazing results. Let’s inspire others to embrace this simple yet powerful cleaning solution!
Remember, a clean home is a happy home, and with this DIY cleaning shortcut, you can achieve a sparkling clean home without sacrificing your precious time and energy. Embrace the power of simplicity and efficiency, and discover the joy of a clean and organized living space.
Frequently Asked Questions (FAQs)
What exactly is a “cleaning shortcut” and why should I use one?
A cleaning shortcut is any method or technique that simplifies and speeds up the cleaning process, saving you time and effort. In this case, our DIY cleaning shortcut refers to a specific method using readily available ingredients to achieve effective cleaning results with minimal fuss. You should use cleaning shortcuts because they free up your time for more enjoyable activities, reduce stress associated with cleaning, and often save you money compared to buying commercial cleaning products. They also allow for more natural and eco-friendly cleaning options.
What are the main ingredients needed for this DIY cleaning shortcut?
The specific ingredients will vary depending on the exact shortcut being used, but common ingredients include:
* **Vinegar:** A natural disinfectant and degreaser.
* **Baking Soda:** A mild abrasive and deodorizer.
* **Essential Oils:** For fragrance and added cleaning properties (optional).
* **Water:** As a diluent and base for the solution.
* **Dish Soap:** For added cleaning power and grease removal.
The exact ratios and combinations will be detailed in the specific recipe or instructions for the DIY cleaning shortcut.
Is this DIY cleaning shortcut safe for all surfaces?
While many DIY cleaning solutions are safe for a variety of surfaces, it’s always best to test a small, inconspicuous area first to ensure there are no adverse reactions. Avoid using acidic solutions like vinegar on delicate surfaces such as marble, granite, or waxed wood, as they can cause damage. Always research the specific cleaning needs of different surfaces before applying any cleaning solution. When in doubt, consult the manufacturer’s instructions for the surface you’re cleaning.
Can I use different essential oils than the ones suggested?
Absolutely! Feel free to experiment with different essential oils to create your own custom scent and cleaning blend. Some popular options include:
* **Lavender:** For its calming and relaxing properties.
* **Lemon:** For its fresh, citrusy scent and degreasing abilities.
* **Tea Tree:** For its antibacterial and antifungal properties.
* **Eucalyptus:** For its invigorating and decongestant properties.
* **Peppermint:** For its refreshing and energizing scent.
Just be sure to use pure, high-quality essential oils for the best results.
How often should I use this DIY cleaning shortcut?
The frequency of use will depend on your individual cleaning needs and preferences. You can use this DIY cleaning shortcut as part of your regular weekly cleaning routine, or as needed for spot cleaning and tackling specific messes. The beauty of this method is that it’s quick and easy to use, so you can incorporate it into your cleaning routine as often as you like.
What if I don’t have all the ingredients on hand?
Don’t worry! The beauty of DIY cleaning is that you can often substitute ingredients based on what you have available. For example, if you don’t have vinegar, you can try using lemon juice instead. If you don’t have essential oils, you can simply omit them or use a different fragrance, like a few drops of your favorite perfume. The key is to be flexible and resourceful.
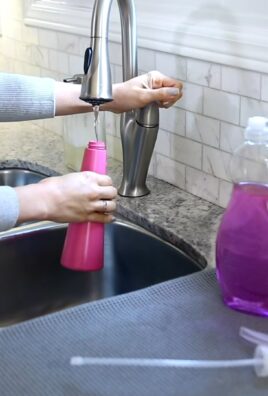
How do I store the DIY cleaning solution?
Store your DIY cleaning solution in a clean, airtight spray bottle or container. Be sure to label the container clearly so you know what’s inside. Store the solution in a cool, dark place away from direct sunlight and heat. Most DIY cleaning solutions will last for several weeks or even months, but it’s always a good idea to discard any solution that shows signs of spoilage, such as discoloration or a foul odor.
Is this DIY cleaning shortcut environmentally friendly?
Yes, one of the biggest advantages of using DIY cleaning solutions is that they are often more environmentally friendly than commercial cleaning products. By using natural ingredients like vinegar, baking soda, and essential oils, you can reduce your exposure to harsh chemicals and minimize your impact on the environment. Plus, you can often reuse spray bottles and containers, further reducing waste.
What if the DIY cleaning shortcut doesn’t work as well as I expected?
If you’re not seeing the results you expected, there are a few things you can try. First, make sure you’re using the correct ratios of ingredients. Second, try increasing the concentration of the cleaning solution. For example, if you’re using a vinegar-based solution, you can try adding more vinegar. Third, make sure you’re allowing the solution to sit on the surface for a few minutes before wiping it away. This will give the ingredients time to work their magic. Finally, if all else fails, you may need to use a more specialized cleaning product for particularly stubborn stains or messes.
Can this DIY cleaning shortcut be used for laundry?
Some of the ingredients used in this DIY cleaning shortcut, such as vinegar and baking soda, can be used in laundry. Vinegar can be used as a natural fabric softener and odor eliminator, while baking soda can help to brighten whites and remove stains. However, it’s important to research the specific laundry needs of different fabrics before using any DIY cleaning solutions. Always test a small, inconspicuous area first to ensure there are no adverse reactions.

Leave a Comment