

Clear Foggy Mirrors Fast – that’s the magic phrase we all need in our bathroom arsenal, isn’t it? I can’t tell you how many times I’ve hopped out of a steamy shower, ready to tackle the day, only to be greeted by a blurry, useless reflection. It’s frustrating, time-consuming, and honestly, a little bit annoying! But fear not, fellow fog-fighters, because I’m about to share some game-changing DIY tricks to banish that bathroom haze for good.
While the problem of foggy mirrors might seem like a modern-day inconvenience, the struggle to see clearly in humid environments is as old as mirrors themselves! From ancient polished metal surfaces to the glass mirrors we know and love today, people have been devising ways to combat condensation. Think about it – even the Romans, with their elaborate bathhouses, must have faced this issue! So, you’re not alone in your quest for a crystal-clear reflection.
Why is this DIY so crucial? Because time is precious! No one wants to waste valuable minutes wiping down a mirror every morning. Plus, constantly wiping can actually damage the reflective surface over time. These simple, cost-effective hacks will not only save you time and effort but also help prolong the life of your mirror. Get ready to say goodbye to foggy frustration and hello to a clear, confident reflection with these easy ways to clear foggy mirrors fast!
DIY: Defog Your Bathroom Mirror in Seconds!
Okay, let’s face it. We’ve all been there. Stepped out of a hot shower, ready to tackle the day, only to be greeted by a completely fogged-up bathroom mirror. Annoying, right? Well, I’m here to tell you that you don’t need fancy gadgets or expensive sprays to solve this problem. I’m going to share a few super simple, DIY methods that will have your mirror crystal clear in no time. Trust me, these are game-changers!
Method 1: The Hair Dryer Hack
This is probably the quickest and easiest method, especially if you already have a hair dryer handy.
What you’ll need:
* A hair dryer
Step-by-step instructions:
1. Grab your hair dryer: Make sure it’s plugged in and ready to go.
2. Set it to a low or medium setting: You don’t want to overheat the mirror or damage it. A lower setting is gentler and just as effective.
3. Aim and blow: Hold the hair dryer a few inches away from the mirror and move it back and forth across the surface. Focus on one section at a time, working your way across the entire mirror.
4. Watch the magic happen: You’ll see the fog disappear almost instantly as the warm air evaporates the condensation.
5. Enjoy your clear reflection: That’s it! You’re ready to style your hair, shave, or whatever else you need to do.
Why this works: The warm air from the hair dryer heats up the surface of the mirror, preventing condensation from forming. It’s a quick fix that works like a charm!
Method 2: The Vinegar Solution
Vinegar is a fantastic all-purpose cleaner, and it works wonders on foggy mirrors too! This method is a little more involved than the hair dryer, but it’s still incredibly easy and uses ingredients you likely already have.
What you’ll need:
* White vinegar
* Water
* A spray bottle
* A clean microfiber cloth
Step-by-step instructions:
1. Mix the solution: In your spray bottle, combine equal parts white vinegar and water. A 50/50 ratio works perfectly.
2. Spray the mirror: Lightly spray the vinegar solution onto the entire surface of the foggy mirror. Don’t overdo it; a light mist is all you need.
3. Wipe it down: Using your clean microfiber cloth, wipe the mirror in a circular motion, ensuring you cover the entire surface.
4. Buff it dry: Once you’ve wiped the mirror clean, use a dry section of the microfiber cloth to buff it until it’s streak-free and crystal clear.
5. Admire your work: Step back and enjoy your fog-free mirror!
Why this works: Vinegar is a natural cleaner and disinfectant. It helps to remove any residue or buildup on the mirror’s surface, preventing condensation from clinging to it. Plus, it leaves a nice, clean shine!
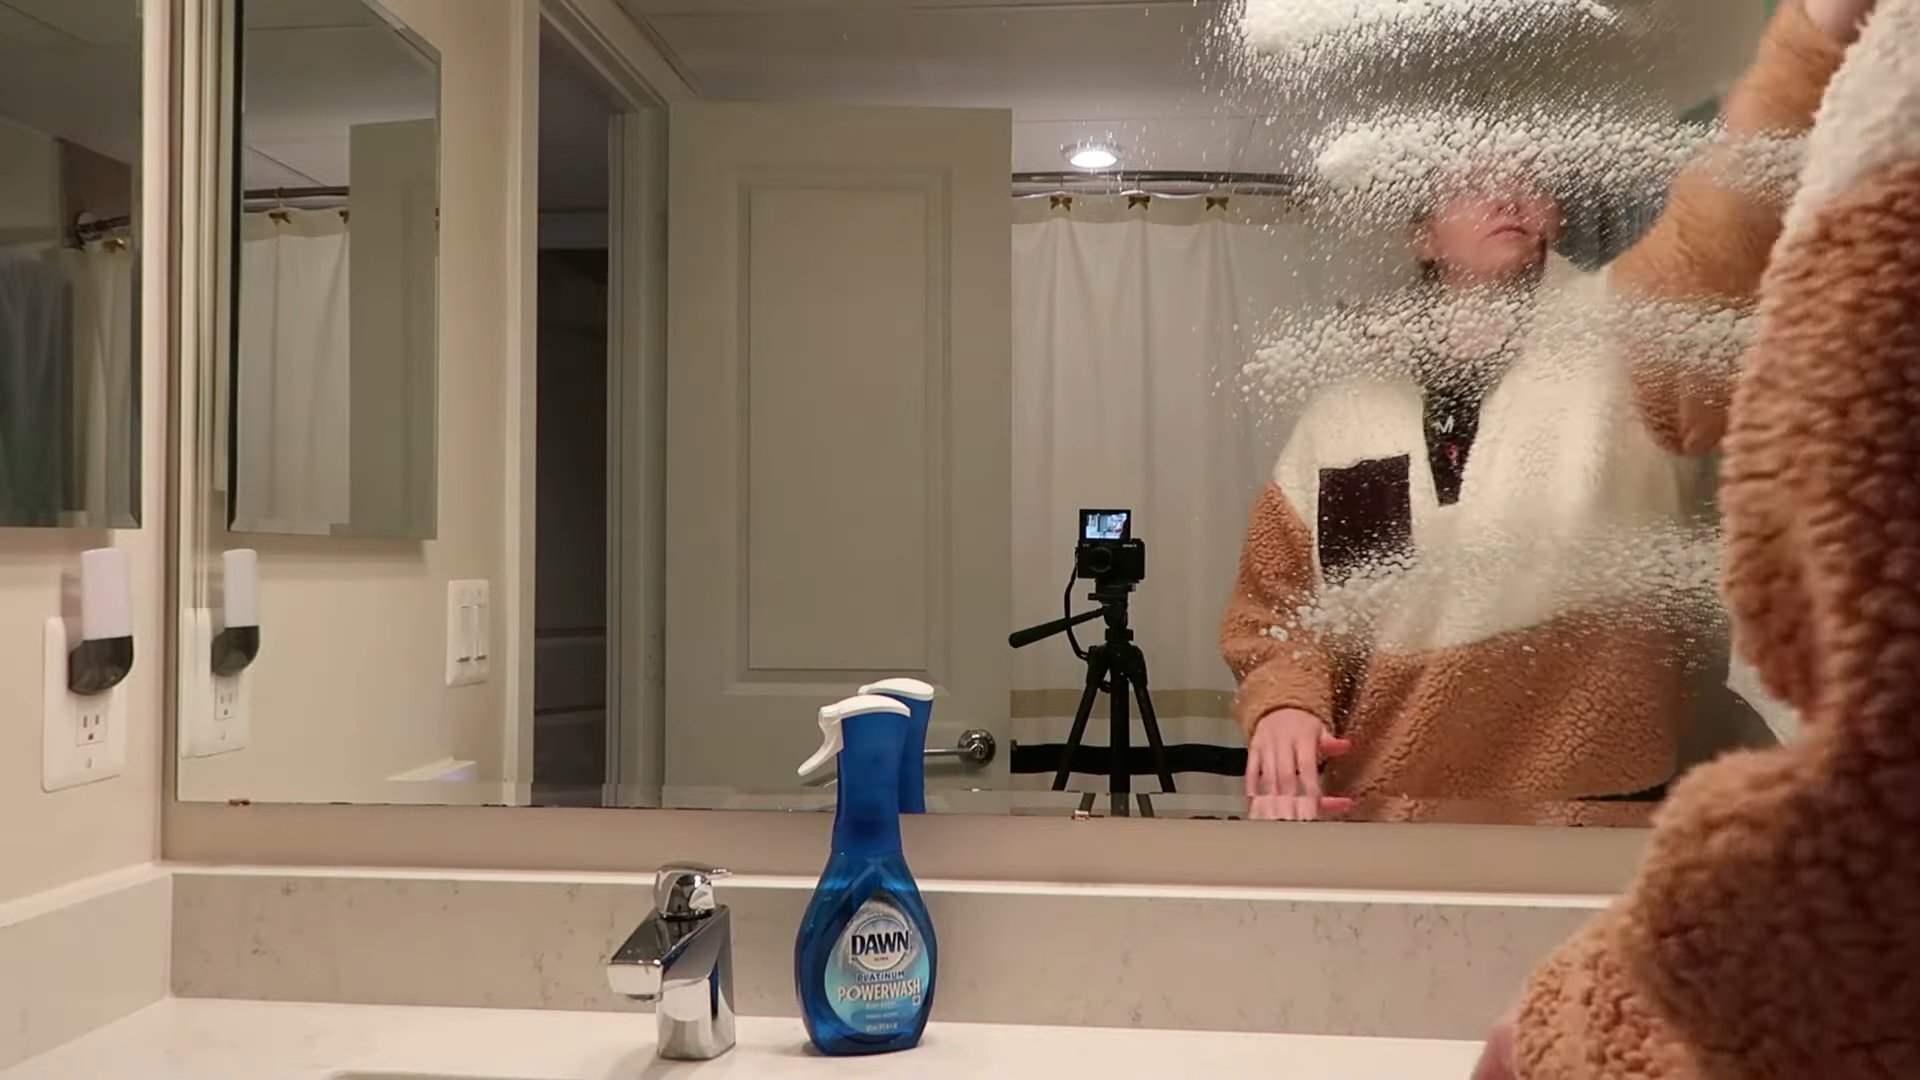
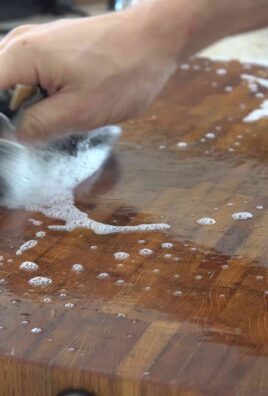
Method 3: The Shaving Cream Trick
This is a classic trick that many people swear by, and for good reason – it works! Shaving cream creates a protective barrier on the mirror that prevents fog from forming.
What you’ll need:
* Shaving cream (any kind will do, but foam works best)
* A clean microfiber cloth
Step-by-step instructions:
1. Apply the shaving cream: Squirt a small amount of shaving cream onto the mirror. You don’t need a lot; a thin layer is sufficient.
2. Spread it around: Using your finger or the microfiber cloth, spread the shaving cream evenly over the entire surface of the mirror. Make sure to cover every inch.
3. Wipe it off: Now, using a clean, damp microfiber cloth, wipe off the shaving cream. Be thorough and make sure to remove all traces of the cream.
4. Buff it dry: Finally, use a dry section of the microfiber cloth to buff the mirror until it’s streak-free and sparkling.
5. Test it out: Take a hot shower and see the magic for yourself!
Why this works: Shaving cream contains ingredients that create a thin, invisible barrier on the mirror’s surface. This barrier prevents water droplets from condensing and forming fog. It’s like a mini rain repellent for your mirror!
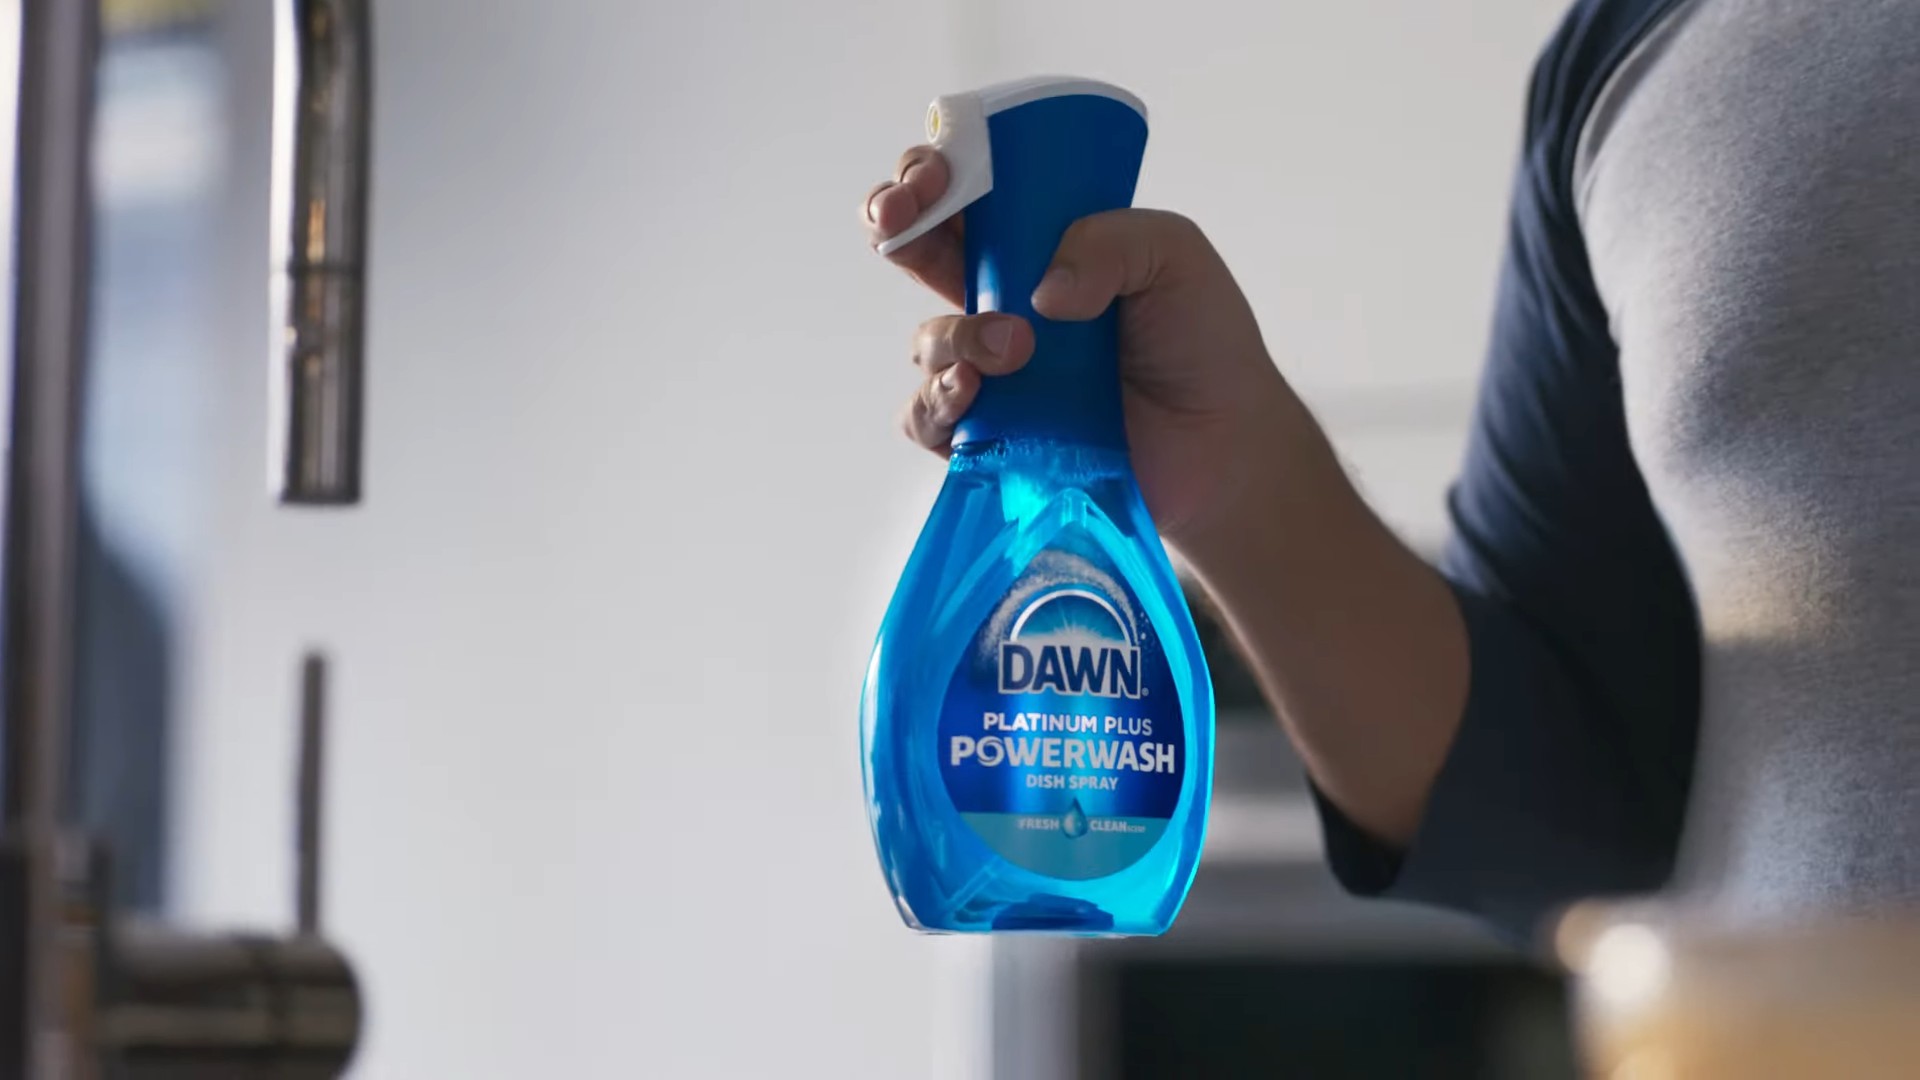
Method 4: The Dish Soap Solution
Similar to shaving cream, dish soap can also create a protective layer that prevents fogging. This is another budget-friendly option that uses something you probably already have in your kitchen.
What you’ll need:
* Dish soap (a small amount)
* Water
* A clean microfiber cloth
Step-by-step instructions:
1. Dilute the dish soap: In a small bowl, mix a tiny drop of dish soap with about a cup of water. You only need a very small amount of soap; too much will leave a residue.
2. Apply the solution: Dip your microfiber cloth into the soapy water and wring it out well. You want the cloth to be damp, not soaking wet.
3. Wipe the mirror: Gently wipe the entire surface of the mirror with the damp cloth, ensuring you cover every inch.
4. Buff it dry: Use a clean, dry microfiber cloth to buff the mirror until it’s streak-free and clear.
5. Enjoy the fog-free view: Now you can enjoy a clear reflection after your shower!
Why this works: Dish soap contains surfactants that reduce the surface tension of water. This prevents water droplets from beading up and forming fog on the mirror.
Method 5: The Commercial Anti-Fog Spray
While this isn’t exactly a DIY method using household ingredients, it’s still a relatively inexpensive and effective solution. There are many commercial anti-fog sprays available at most drugstores or online retailers.
What you’ll need:
* Commercial anti-fog spray
* A clean microfiber cloth
Step-by-step instructions:
1. Read the instructions: Always read the instructions on the anti-fog spray bottle before using it. Different products may have slightly different application methods.
2. Spray the mirror: Typically, you’ll spray a light mist of the anti-fog spray onto the entire surface of the mirror.
3. Wipe it down: Use a clean microfiber cloth to wipe the mirror, spreading the spray evenly over the surface.
4. Buff it dry (if necessary): Some anti-fog sprays require you to buff the mirror dry after wiping, while others don’t. Refer to the product instructions for guidance.
5. Enjoy the results: Your mirror should now be protected from fog for a certain period of time, depending on the product.
Why this works: Commercial anti-fog sprays contain chemicals that create a protective coating on the mirror’s surface, preventing condensation from forming.
Tips for Preventing Foggy Mirrors in the First Place
While these methods are great for quickly defogging your mirror, it’s even better to prevent fog from forming in the first place! Here are a few tips to help you keep your bathroom mirror clear:
* Improve ventilation: Make sure your bathroom has adequate ventilation. Run the exhaust fan during and after showers to help remove moisture from the air. If you don’t have an exhaust fan, consider opening a window.
* Take cooler showers: I know, this might not be the most appealing option, but taking slightly cooler showers will reduce the amount of steam produced, which in turn reduces fog.
* Leave the bathroom door open: After showering, leave the bathroom door open to allow the moisture to escape and prevent it from condensing on the mirror.
* Install a heated mirror: If you’re renovating your bathroom, consider installing a heated mirror. These mirrors are designed to stay warm, preventing condensation from forming. They can be a bit pricey, but they’re a great long-term solution.
Choosing the Right Method for You
So, which method is the best? It really depends on your personal preferences and what you have on hand.
* For speed and convenience: The hair dryer method is the clear winner. It’s quick, easy, and requires no special ingredients.
* For a natural and eco-friendly option: The vinegar solution is a great choice. It’s made with natural ingredients and is effective at cleaning and preventing fog.
* For a long-lasting solution: The shaving cream or dish soap trick can provide longer-lasting fog protection.
* For a hassle-free option: Commercial anti-fog sprays are a convenient option, but they may contain chemicals that some people prefer to avoid.
No matter which method you choose, I’m confident that you’ll
Conclusion
So, there you have it! No more battling foggy mirrors after a hot shower. This simple, DIY trick to clear foggy mirrors fast is a game-changer for anyone tired of wiping, waiting, or resorting to expensive commercial solutions. It’s cost-effective, uses ingredients you likely already have at home, and takes mere seconds to apply.
But why is this a must-try? Beyond the obvious benefit of instantly clear mirrors, this method is gentle on your mirrors, avoiding the harsh chemicals found in many commercial defoggers that can, over time, damage the reflective surface. Plus, it’s incredibly versatile. While we’ve focused on bathroom mirrors, this technique works wonders on car windows, shower doors, and even eyeglasses! Imagine the clarity you’ll experience while driving on a rainy day, all thanks to this simple solution.
Looking for variations? Experiment with different ratios of water to vinegar or dish soap to find what works best for your specific environment and mirror type. Some readers have found that adding a few drops of essential oil, like lavender or eucalyptus, not only enhances the defogging properties but also leaves a subtle, pleasant scent in the bathroom. Just be sure to test a small, inconspicuous area first to ensure the essential oil doesn’t react negatively with your mirror’s surface. Another variation involves using a microfiber cloth for application; its gentle texture ensures a streak-free finish.
We’re confident that once you try this DIY method, you’ll wonder how you ever lived without it. It’s a small change that makes a big difference in your daily routine, saving you time, money, and frustration.
Now, we want to hear from you! Give this clear foggy mirrors fast trick a try and share your experience in the comments below. Did you find a variation that worked particularly well? Did you use it on something other than a bathroom mirror? We’re eager to learn from your successes and troubleshoot any challenges you might encounter. Your feedback will help us refine this method and make it even better for everyone. Don’t be shy – let us know how it goes! Your insights could be invaluable to other readers struggling with the same foggy mirror woes. Together, let’s banish foggy mirrors for good!
Frequently Asked Questions (FAQs)
What exactly causes mirrors to fog up?
Mirror fogging is a result of condensation. When warm, moist air (like from a hot shower) comes into contact with the cooler surface of the mirror, the water vapor in the air cools down rapidly. This rapid cooling causes the water vapor to condense, transforming from a gas into tiny liquid droplets. These droplets accumulate on the mirror’s surface, creating a thin film of water that scatters light and makes the mirror appear foggy. The greater the temperature difference between the air and the mirror, the more pronounced the fogging effect will be.
How does this DIY trick prevent mirrors from fogging?
The key ingredients in this DIY solution, whether it’s vinegar or dish soap, contain surfactants. Surfactants are substances that reduce the surface tension of water. By applying a thin layer of this solution to the mirror, you’re essentially creating a barrier that prevents water droplets from beading up and scattering light. Instead of forming individual droplets, the water spreads out into a thin, transparent film that allows you to see your reflection clearly. This is why the mirror appears clear even in a humid environment.
Is it safe to use vinegar or dish soap on my mirrors?
Generally, yes, both vinegar and dish soap are safe to use on mirrors when diluted properly. However, it’s always a good idea to test the solution on a small, inconspicuous area of the mirror first, especially if you have antique or particularly delicate mirrors. Avoid using abrasive cleaners or scouring pads, as these can scratch the mirror’s surface. When using vinegar, ensure it’s diluted with water to prevent any potential damage to the mirror’s backing over time. Similarly, use a mild dish soap and avoid those with added abrasives or harsh chemicals.
How often do I need to reapply the solution?
The frequency of reapplication depends on several factors, including the humidity levels in your bathroom, the frequency of hot showers, and the specific solution you’re using. In general, you’ll likely need to reapply the solution every few days to a week. You’ll know it’s time to reapply when you start to notice the mirror fogging up again. A quick wipe down with a fresh application will restore its defogging properties.
Can I use this trick on other surfaces besides mirrors?
Yes, this DIY trick can be used on other surfaces prone to fogging, such as car windows, shower doors, and even eyeglasses. However, it’s important to exercise caution and test the solution on a small, inconspicuous area first, especially on delicate surfaces like coated lenses. For car windows, be sure to apply the solution evenly and wipe away any excess to avoid streaks. For eyeglasses, use a very diluted solution and a soft microfiber cloth to avoid scratching the lenses.
What if I don’t have vinegar or dish soap? Are there any alternatives?
While vinegar and dish soap are the most common and readily available ingredients, there are a few alternatives you can try. Some people have had success using a small amount of shampoo or conditioner diluted with water. These products also contain surfactants that can help prevent fogging. Another option is to use a commercial defogging spray, although these tend to be more expensive and may contain harsher chemicals.
My mirror still has streaks after applying the solution. What am I doing wrong?
Streaking can occur if you’re using too much solution or if you’re not wiping it away properly. To avoid streaks, use a very small amount of the solution and apply it evenly to the mirror’s surface. Use a clean, dry microfiber cloth to wipe away any excess solution, using a circular motion. If streaks persist, try dampening the microfiber cloth slightly with clean water and wiping the mirror again.
Will this trick work in extremely humid environments?
While this DIY trick is effective in most situations, it may not completely eliminate fogging in extremely humid environments. In these cases, you may need to reapply the solution more frequently or consider using a combination of methods, such as improving ventilation in your bathroom by opening a window or using a dehumidifier.
Can I use this on a smart mirror with a screen?
Using any liquid cleaner on a smart mirror screen is risky. The liquid can seep into the electronics and damage them. It’s best to consult the manufacturer’s instructions for cleaning your specific smart mirror model. They usually recommend using a dry or slightly damp microfiber cloth specifically designed for electronic screens. Avoid spraying any liquid directly onto the screen.
Is there a way to make the effect last longer?
While frequent reapplication is generally needed, you can prolong the effect by ensuring your bathroom is well-ventilated. Opening a window or using the exhaust fan during and after showers helps reduce humidity levels, minimizing fogging. Also, ensure the mirror is completely clean and dry before applying the solution. A clean surface allows the solution to adhere better and provide a more effective barrier against fogging.
Leave a Comment