

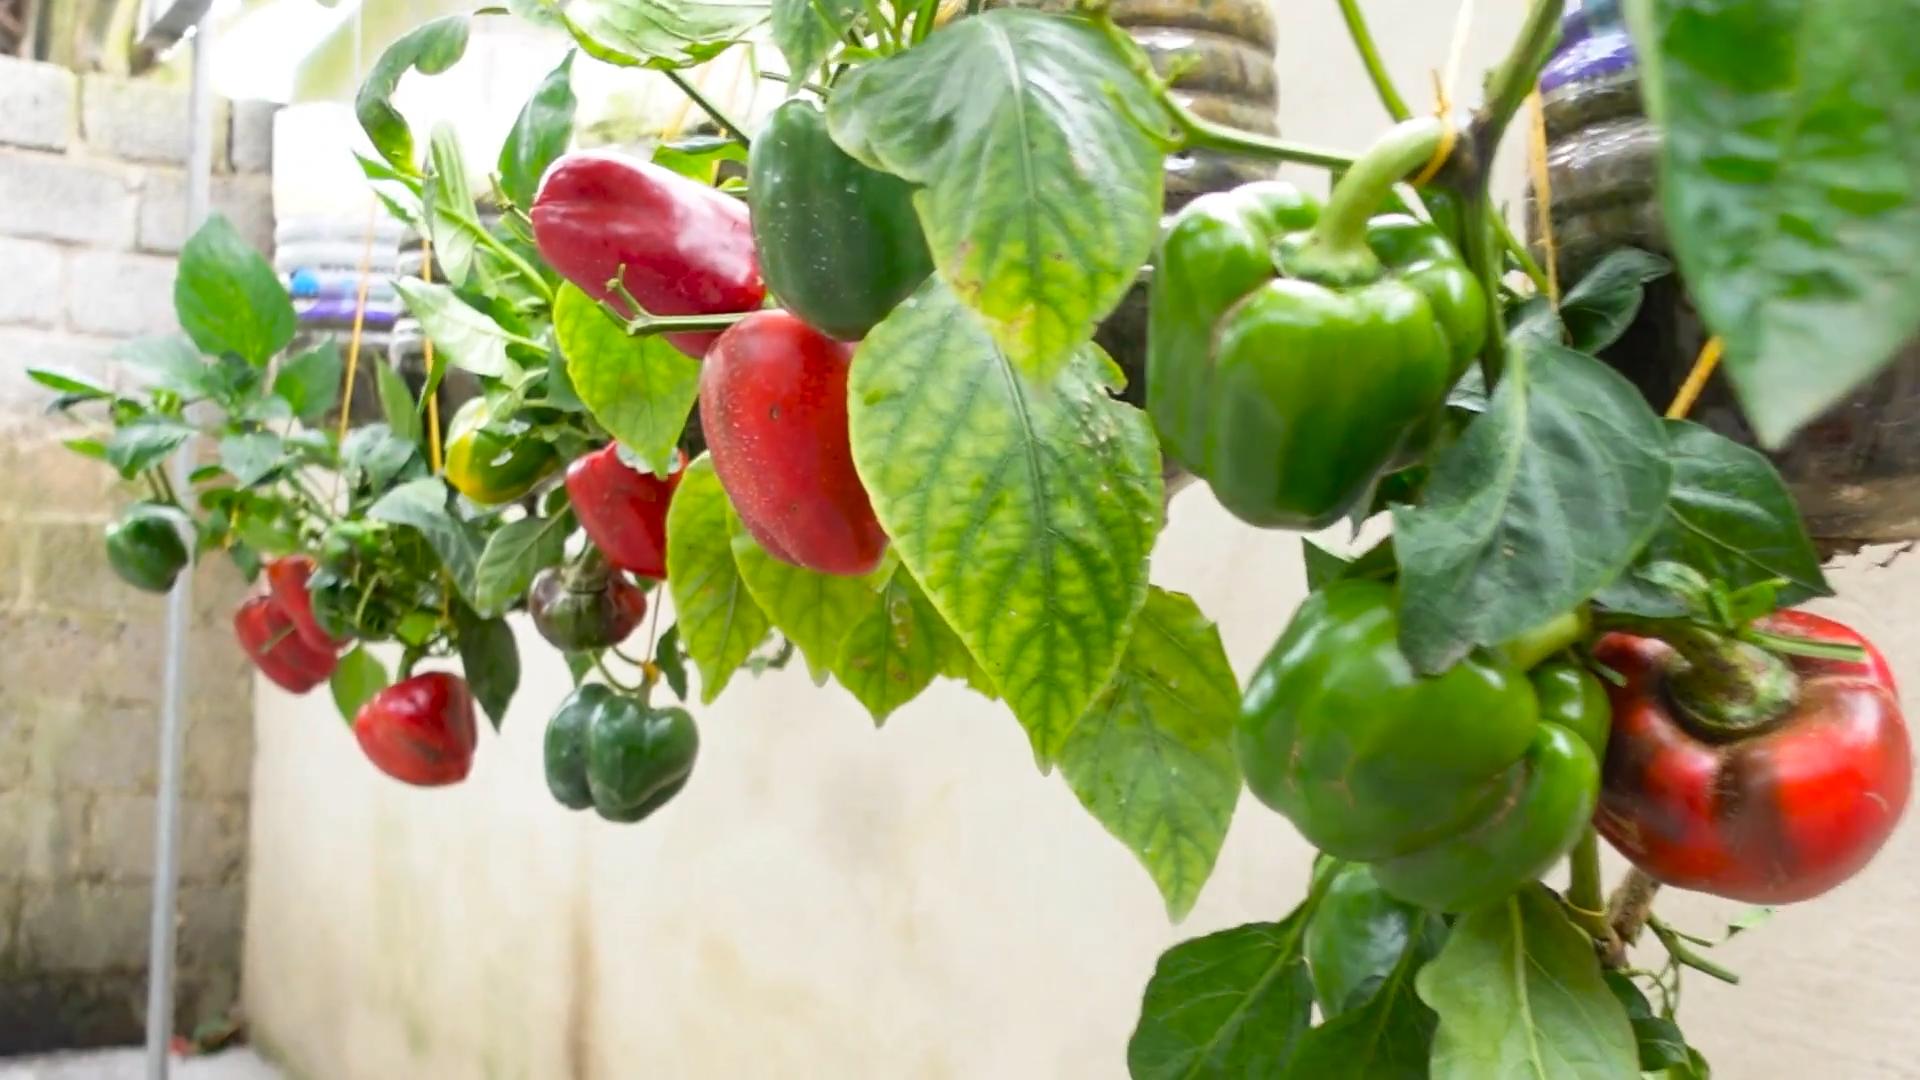
Container gardening bell peppers – the words might conjure images of overflowing pots bursting with vibrant green and red, right? Well, that’s exactly what we’re aiming for! Forget sprawling gardens; even if you only have a sunny balcony or a small patio, you can absolutely enjoy the satisfaction of growing your own delicious bell peppers.
Growing bell peppers, especially in containers, has become increasingly popular. Think about it: for centuries, humans have cultivated peppers, tracing back to South America where they were domesticated. Now, we’re adapting those ancient practices to modern, urban living. It’s a beautiful blend of tradition and innovation!
But why should you bother with container gardening bell peppers? Let’s be honest, store-bought peppers can be expensive and sometimes lack that fresh, vibrant flavor. Plus, there’s something incredibly rewarding about nurturing a plant from seed (or seedling!) to harvest. Imagine the pride you’ll feel serving a salad made with peppers you grew yourself! This DIY guide is packed with simple tricks and hacks to help you overcome common challenges, like choosing the right pot size, preventing pests, and ensuring your peppers get enough sunlight. I’m going to share my secrets to help you achieve a bountiful harvest, no matter how limited your space might be. Let’s get growing!
DIY Container Gardening: Growing Bell Peppers Like a Pro!
Hey there, fellow gardening enthusiasts! I’m so excited to share my tried-and-true method for growing beautiful, bountiful bell peppers right in containers. Forget the sprawling garden – with a little know-how, you can enjoy fresh, crisp peppers even if you only have a balcony or patio. I’ve learned a lot over the years, and I’m going to walk you through every step, from choosing the right container to harvesting your delicious peppers. Let’s get started!
Choosing the Right Container and Soil
Before we even think about seeds or seedlings, we need to set the stage for success. The container and soil are absolutely crucial for healthy pepper plants.
* Container Size: This is super important! Bell peppers need room to spread their roots. I recommend a container that’s at least 12 inches in diameter and 12 inches deep. A 5-gallon bucket works great, or even better, a larger pot that’s 15-20 gallons if you plan on growing multiple plants together. Remember, bigger is generally better!
* Drainage: Excellent drainage is non-negotiable. Bell peppers hate soggy roots. Make sure your container has plenty of drainage holes at the bottom. If you’re using a container without pre-drilled holes, you’ll need to add some yourself.
* Material: Plastic, terracotta, or even fabric pots all work well. I personally prefer plastic because they retain moisture a bit better, which is helpful in hot weather. Terracotta looks beautiful, but it dries out faster. Fabric pots are great for aeration, but they might need more frequent watering.
* Potting Mix: Don’t even think about using garden soil in your containers! It’s too heavy and doesn’t drain well. You need a high-quality potting mix that’s specifically formulated for containers. Look for a mix that contains peat moss, perlite, and vermiculite. These ingredients provide good drainage, aeration, and water retention. I often amend my potting mix with compost for added nutrients.
Starting from Seed vs. Buying Seedlings
You have two main options: starting your bell peppers from seed or buying seedlings from a nursery. Both have their pros and cons.
* Starting from Seed: This gives you more control over the varieties you grow, and it’s generally cheaper. However, it requires more time and effort. You’ll need to start your seeds indoors about 8-10 weeks before the last expected frost.
* Buying Seedlings: This is the easier and faster option. You can find a wide variety of bell pepper seedlings at most nurseries and garden centers. Just make sure to choose healthy-looking plants with no signs of disease or pests.
Starting Bell Peppers from Seed (My Preferred Method!)
Okay, so if you’re like me and love the satisfaction of growing from seed, here’s how I do it:
1. Gather Your Supplies: You’ll need seed starting trays or small pots, seed starting mix, bell pepper seeds, a spray bottle, and a heat mat (optional, but helpful).
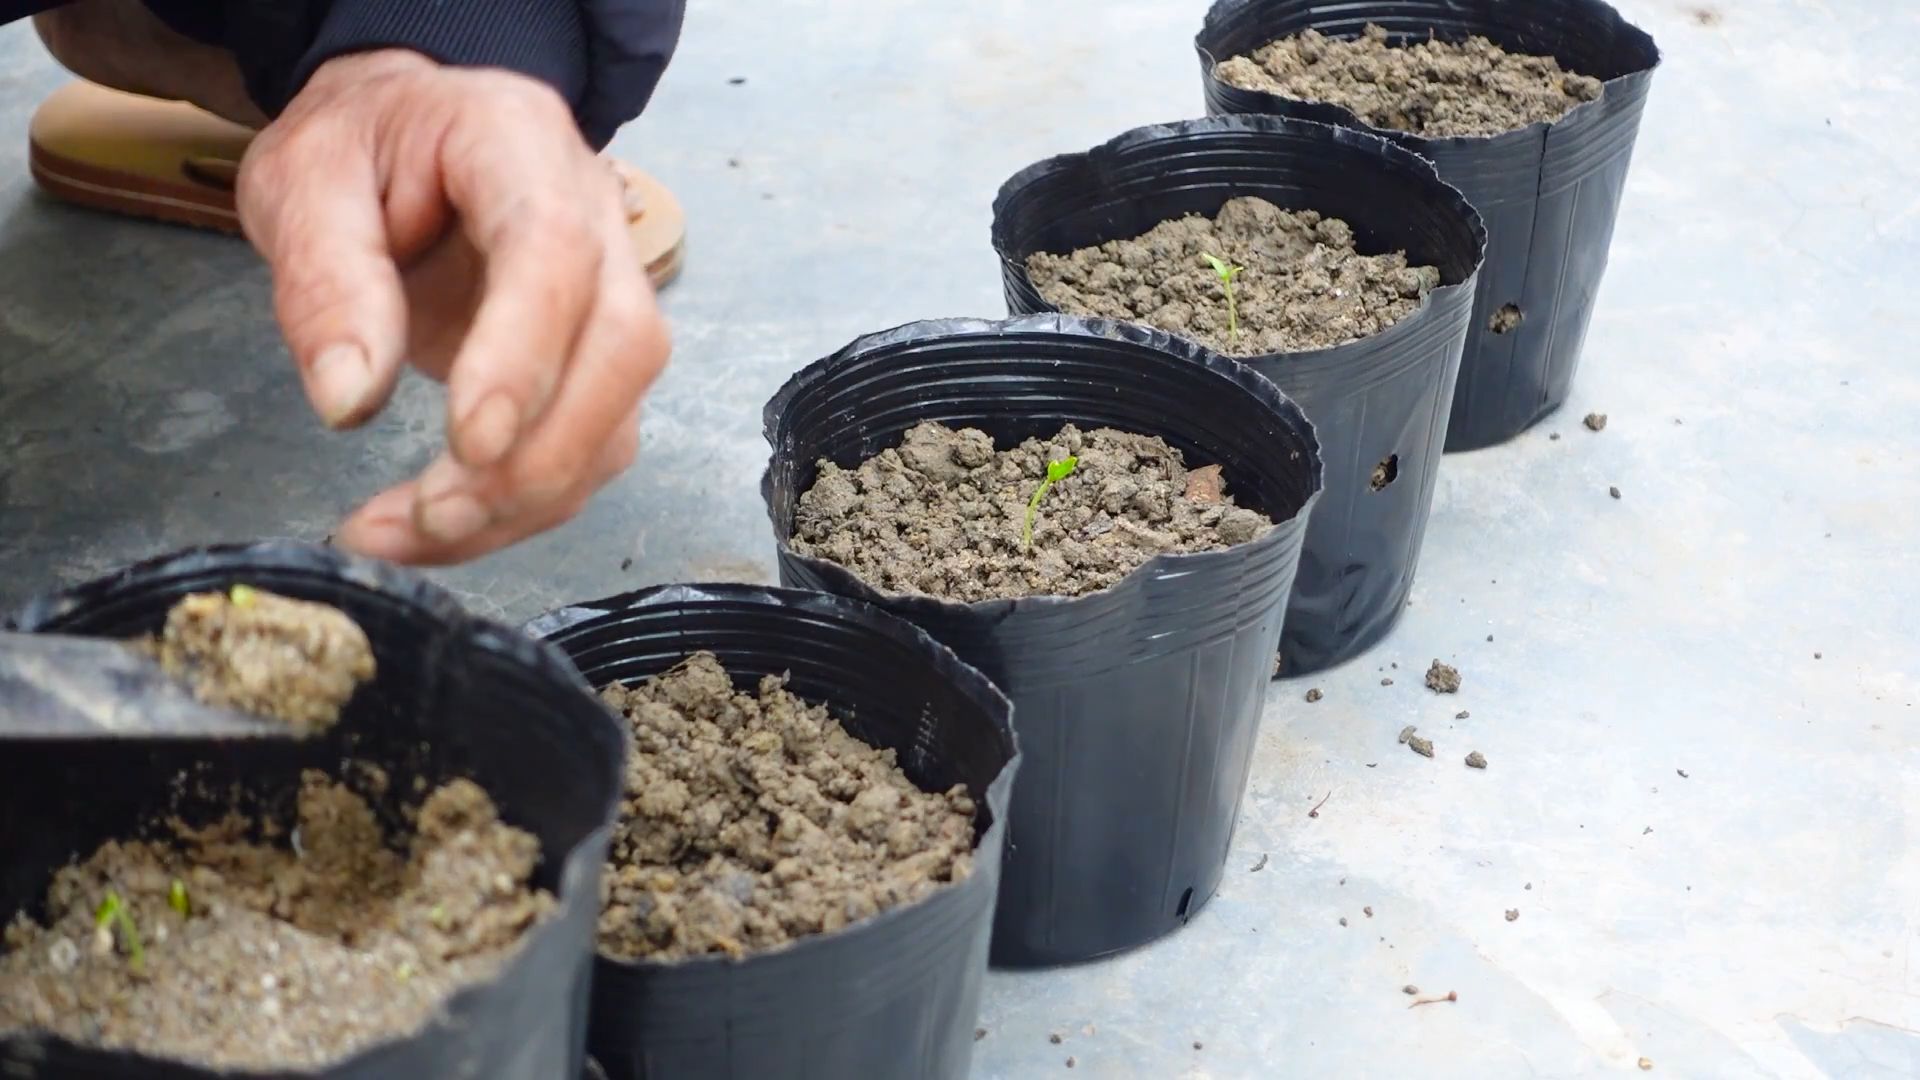
2. Sow the Seeds: Fill your seed starting trays or pots with seed starting mix. Moisten the mix with a spray bottle. Sow the bell pepper seeds about ¼ inch deep. I usually plant 2-3 seeds per cell or pot, just in case some don’t germinate.
3. Provide Warmth and Light: Bell pepper seeds need warmth to germinate. A heat mat can really speed things up. Place your seed starting trays or pots in a warm location, ideally between 70-80°F (21-27°C). You’ll also need to provide plenty of light. A grow light is ideal, but a sunny windowsill can work too.
4. Keep the Soil Moist: Don’t let the soil dry out! Mist the soil regularly with a spray bottle to keep it moist but not soggy.
5. Thin the Seedlings: Once the seedlings emerge (usually in 7-14 days), thin them to one plant per cell or pot. Choose the strongest, healthiest-looking seedling and snip off the others at the soil line.
6. Harden Off the Seedlings: Before transplanting your seedlings outdoors, you need to “harden them off.” This means gradually exposing them to outdoor conditions over a period of 1-2 weeks. Start by placing them outdoors in a sheltered location for a few hours each day, gradually increasing the amount of time they spend outside.
Transplanting Seedlings (Whether You Grew Them or Bought Them)
Whether you started your peppers from seed or bought seedlings, the transplanting process is the same.
1. Choose a Sunny Location: Bell peppers need at least 6-8 hours of sunlight per day. Choose a location for your containers that gets plenty of sun.
2. Prepare the Container: Fill your container with your chosen potting mix, leaving a few inches of space at the top.
3. Carefully Remove the Seedling: Gently remove the seedling from its pot or cell. If the roots are tightly bound, gently loosen them with your fingers.
4. Plant the Seedling: Dig a hole in the potting mix that’s large enough to accommodate the seedling’s root ball. Place the seedling in the hole and backfill with potting mix. Gently firm the soil around the base of the plant.
5. Water Thoroughly: Water the newly transplanted seedling thoroughly.
6. Add Support (Optional): Some bell pepper varieties can get quite tall and top-heavy, especially when they’re loaded with fruit. If you’re growing a tall variety, you might want to add a stake or tomato cage for support.
Caring for Your Bell Pepper Plants
Now that your bell pepper plants are in their containers, it’s time to provide them with the care they need to thrive.
* Watering: Bell peppers need consistent moisture, but they don’t like to be waterlogged. Water deeply whenever the top inch of soil feels dry to the touch. In hot weather, you might need to water daily.
* Fertilizing: Bell peppers are heavy feeders, so you’ll need to fertilize them regularly. I like to use a balanced fertilizer (like 10-10-10) every 2-3 weeks. You can also use a liquid fertilizer every week. Follow the instructions on the fertilizer label.
* Pruning: Pruning isn’t strictly necessary, but it can help to improve air circulation and encourage bushier growth. You can remove any suckers (small shoots that grow from the base of the plant) or any yellowing or damaged leaves.
* Pest and Disease Control: Keep an eye out for pests like aphids, whiteflies, and spider mites. You can usually control these pests with insecticidal soap or neem oil. Bell peppers can also be susceptible to diseases like blossom end rot and fungal infections. Make sure to provide good air circulation and avoid overwatering to prevent these problems. Blossom end rot is often caused by calcium deficiency, so you can add calcium to the soil or use a calcium-rich foliar spray.
Dealing with Common Problems
Even with the best care, you might encounter some problems along the way. Here are a few common issues and how to address them:
* Blossom Drop: This is when the flowers fall off the plant without producing fruit. It’s often caused by temperature stress (too hot or too cold), inconsistent watering, or lack of pollination. Try to maintain consistent watering and protect your plants from extreme temperatures. You can also hand-pollinate the flowers by gently shaking the plant or using a small paintbrush to transfer pollen from one flower to another.
* Yellowing Leaves: Yellowing leaves can be a sign of nutrient deficiency, overwatering, or pest infestation. Check the soil moisture and fertilize if necessary. Inspect the leaves for pests and treat accordingly.
* Stunted Growth: Stunted growth can be caused by a variety of factors, including poor soil, lack of sunlight, or rootbound plants. Make sure your plants are getting enough sunlight and nutrients. If the roots are tightly bound, you might need to transplant the plant into a larger container.
Harvesting Your Bell Peppers
This is the best part! You can harvest your bell peppers when they’ve reached their mature size and color. The color will depend on the variety you’re growing. Green bell peppers are typically harvested when they’re firm and about 3-4 inches long. Red, yellow, and orange bell peppers are harvested when they’ve fully changed color.
To harvest, simply cut the pepper off the plant with a sharp knife or pruning shears. Be careful not to damage the plant.
Enjoying Your Homegrown Bell Peppers
Now that you’ve harvested your delicious bell peppers, it’s time to enjoy them! You can eat them fresh, add them to salads, stir-fries, or omelets, or roast them for a flavorful side dish. You can also freeze or can your bell peppers for later use.
Growing bell peppers in containers is a rewarding
Conclusion
So, there you have it! Growing your own bell peppers in containers isn’t just a fun gardening project; it’s a gateway to fresher, tastier, and more vibrant meals. We’ve explored the ins and outs of container gardening bell peppers, from selecting the right varieties and containers to providing the optimal growing conditions. The beauty of this DIY approach lies in its accessibility. Whether you have a sprawling backyard or a tiny balcony, you can cultivate these colorful vegetables right at your fingertips.
But why is this DIY trick a must-try? Because it empowers you to take control of your food source. You know exactly what goes into your bell peppers – no mystery pesticides or questionable growing practices. Plus, the flavor of a homegrown bell pepper, ripened to perfection under your watchful eye, is simply unmatched by anything you can find in a grocery store. The crispness, the sweetness, the sheer vibrancy – it’s an experience that will transform your relationship with this versatile vegetable.
Beyond the basic techniques, there’s plenty of room for experimentation. Consider trying different bell pepper varieties. From the classic green bell pepper to the sweeter red, yellow, and orange varieties, each offers a unique flavor profile. You can even explore specialty peppers like the purple bell pepper or the miniature lunchbox peppers, perfect for snacking.
Don’t be afraid to get creative with your container gardening setup. Vertical planters can maximize space on small balconies, while self-watering containers can simplify the watering process. Companion planting can also enhance your bell pepper’s growth. Basil, for example, is known to repel pests and improve the flavor of bell peppers. Marigolds are another excellent choice for pest control.
Ultimately, container gardening bell peppers is a rewarding experience that connects you to nature and provides you with a delicious and healthy harvest. It’s a chance to learn, experiment, and enjoy the fruits (or rather, vegetables) of your labor.
We wholeheartedly encourage you to give this DIY trick a try. Start small, learn as you go, and don’t be discouraged by initial setbacks. Gardening is a journey, and every mistake is an opportunity to learn and grow.
And most importantly, we want to hear about your experience! Share your photos, tips, and stories in the comments below. Let’s create a community of container gardening enthusiasts and inspire others to discover the joy of growing their own bell peppers. What varieties did you choose? What challenges did you face? What successes did you celebrate? Your insights can help others embark on their own container gardening adventures. Let’s grow together!
Frequently Asked Questions (FAQ)
What is the best size container for growing bell peppers?
A: The ideal container size for bell peppers is at least 5 gallons, but 7-10 gallons is even better. This provides ample space for the roots to grow and allows the plant to access sufficient nutrients and water. Smaller containers can stunt growth and reduce yields. Make sure the container has drainage holes to prevent waterlogging.
How often should I water my container bell peppers?
A: Watering frequency depends on several factors, including the weather, the size of the container, and the type of potting mix you’re using. Generally, you should water your bell peppers when the top inch of soil feels dry to the touch. During hot, dry weather, you may need to water daily. Avoid overwatering, as this can lead to root rot. A good rule of thumb is to water deeply until water drains out of the drainage holes.
What kind of soil should I use for container bell peppers?
A: Use a high-quality potting mix specifically designed for containers. Avoid using garden soil, as it can become compacted in containers and doesn’t drain well. A good potting mix will be lightweight, well-draining, and rich in organic matter. You can also amend your potting mix with compost or other organic materials to improve its fertility.
How much sunlight do bell peppers need?
A: Bell peppers need at least 6-8 hours of direct sunlight per day to thrive. Choose a sunny location for your container garden. If you live in a particularly hot climate, you may need to provide some afternoon shade to prevent the plants from overheating.
When should I fertilize my container bell peppers?
A: Start fertilizing your bell peppers about two weeks after transplanting them into their containers. Use a balanced fertilizer with an NPK ratio of 10-10-10 or 14-14-14. Follow the instructions on the fertilizer label. You can also use a liquid fertilizer every 2-3 weeks. Avoid over-fertilizing, as this can burn the roots.
How do I prevent pests and diseases from affecting my bell peppers?
A: Regularly inspect your plants for signs of pests or diseases. Common pests that affect bell peppers include aphids, whiteflies, and spider mites. You can control these pests with insecticidal soap or neem oil. Diseases such as blossom end rot and fungal infections can also affect bell peppers. Ensure proper watering and drainage to prevent these problems. You can also use a fungicide if necessary. Companion planting with basil or marigolds can also help deter pests.
How long does it take for bell peppers to mature?
A: The time it takes for bell peppers to mature depends on the variety. Green bell peppers typically mature in 60-70 days, while colored bell peppers (red, yellow, orange) take 70-85 days. You can harvest green bell peppers when they are firm and have reached their desired size. Colored bell peppers should be allowed to ripen fully on the plant for the best flavor.
Can I grow bell peppers indoors?
A: Yes, you can grow bell peppers indoors, but you’ll need to provide them with adequate light. A sunny south-facing window is ideal, but you may also need to supplement with grow lights. Make sure to pollinate the flowers by hand, as there won’t be any bees or other pollinators indoors.
What is blossom end rot, and how can I prevent it?
A: Blossom end rot is a condition that causes the bottom of the bell pepper to become dark and leathery. It’s caused by a calcium deficiency, which is often due to inconsistent watering. To prevent blossom end rot, water your bell peppers regularly and deeply, and avoid letting the soil dry out completely. You can also add calcium to the soil by amending it with bone meal or using a calcium-rich fertilizer.
Can I save seeds from my homegrown bell peppers?
A: Yes, you can save seeds from your homegrown bell peppers, but keep in mind that they may not come true to type if the plants were cross-pollinated. To save seeds, allow the bell pepper to ripen fully on the plant. Then, remove the seeds and dry them completely before storing them in an airtight container in a cool, dark place.
What are some good companion plants for bell peppers in containers?
A: Several plants make excellent companions for bell peppers in containers. Basil repels pests and improves the flavor of bell peppers. Marigolds also deter pests. Carrots, onions, and garlic can also be beneficial. Avoid planting bell peppers near fennel, as it can inhibit their growth.
How do I know when my bell peppers are ready to harvest?
A: Bell peppers are ready to harvest when they are firm, have reached their desired size, and have a glossy skin. Green bell peppers can be harvested when they are still green, while colored bell peppers should be allowed to ripen fully on the plant for the best flavor. Use a sharp knife or pruning shears to cut the bell pepper from the plant, leaving a short stem attached.
Leave a Comment