

Deep Clean Fridge Tips: Is your refrigerator emitting a faint, funky odor that no amount of air freshener can mask? Or perhaps you’re just tired of staring at sticky spills and mysterious crumbs every time you reach for a snack? Don’t worry, I’ve been there! A neglected fridge can quickly become a breeding ground for bacteria and a source of unpleasant smells, impacting not only the freshness of your food but also your overall kitchen hygiene.
While the modern refrigerator is a relatively recent invention, the concept of keeping food cold dates back centuries. Ancient civilizations used ice houses and cellars to preserve perishables, a testament to our long-standing need to combat spoilage. Today, we rely on our trusty fridges, but they require regular maintenance to function optimally.
That’s where these deep clean fridge tips come in! This isn’t just about wiping down a shelf here and there. I’m going to share my tried-and-true DIY methods for a truly thorough cleaning, leaving your fridge sparkling, odor-free, and ready to keep your groceries fresh for longer. From natural cleaning solutions to organizational hacks, I’ll guide you through every step of the process. Trust me, a little elbow grease and these simple tricks will make a world of difference. Let’s get started and transform your fridge from a potential health hazard into a pristine food storage haven!
Deep Clean Your Fridge Like a Pro: A DIY Guide
Okay, let’s be honest, cleaning the fridge isn’t exactly anyone’s favorite chore. But a sparkling clean fridge isn’t just aesthetically pleasing; it’s crucial for food safety and preventing funky smells. I’m going to walk you through my tried-and-true method for a deep clean that will leave your fridge looking and smelling brand new. Get ready to roll up your sleeves!
What You’ll Need
Before we dive in, let’s gather our supplies. Having everything ready will make the process much smoother. Here’s my go-to list:
* Cleaning Supplies:
* Warm water
* Baking soda
* White vinegar
* Dish soap (mild)
* All-purpose cleaner (optional, for stubborn stains)
* Tools:
* Microfiber cloths (lots of them!)
* Soft sponge
* Old toothbrush (for those hard-to-reach spots)
* Small bowl or bucket
* Trash bags
* Cooler or insulated bags (to keep food cold)
* Paper towels
* Optional: Rubber gloves (to protect your hands)
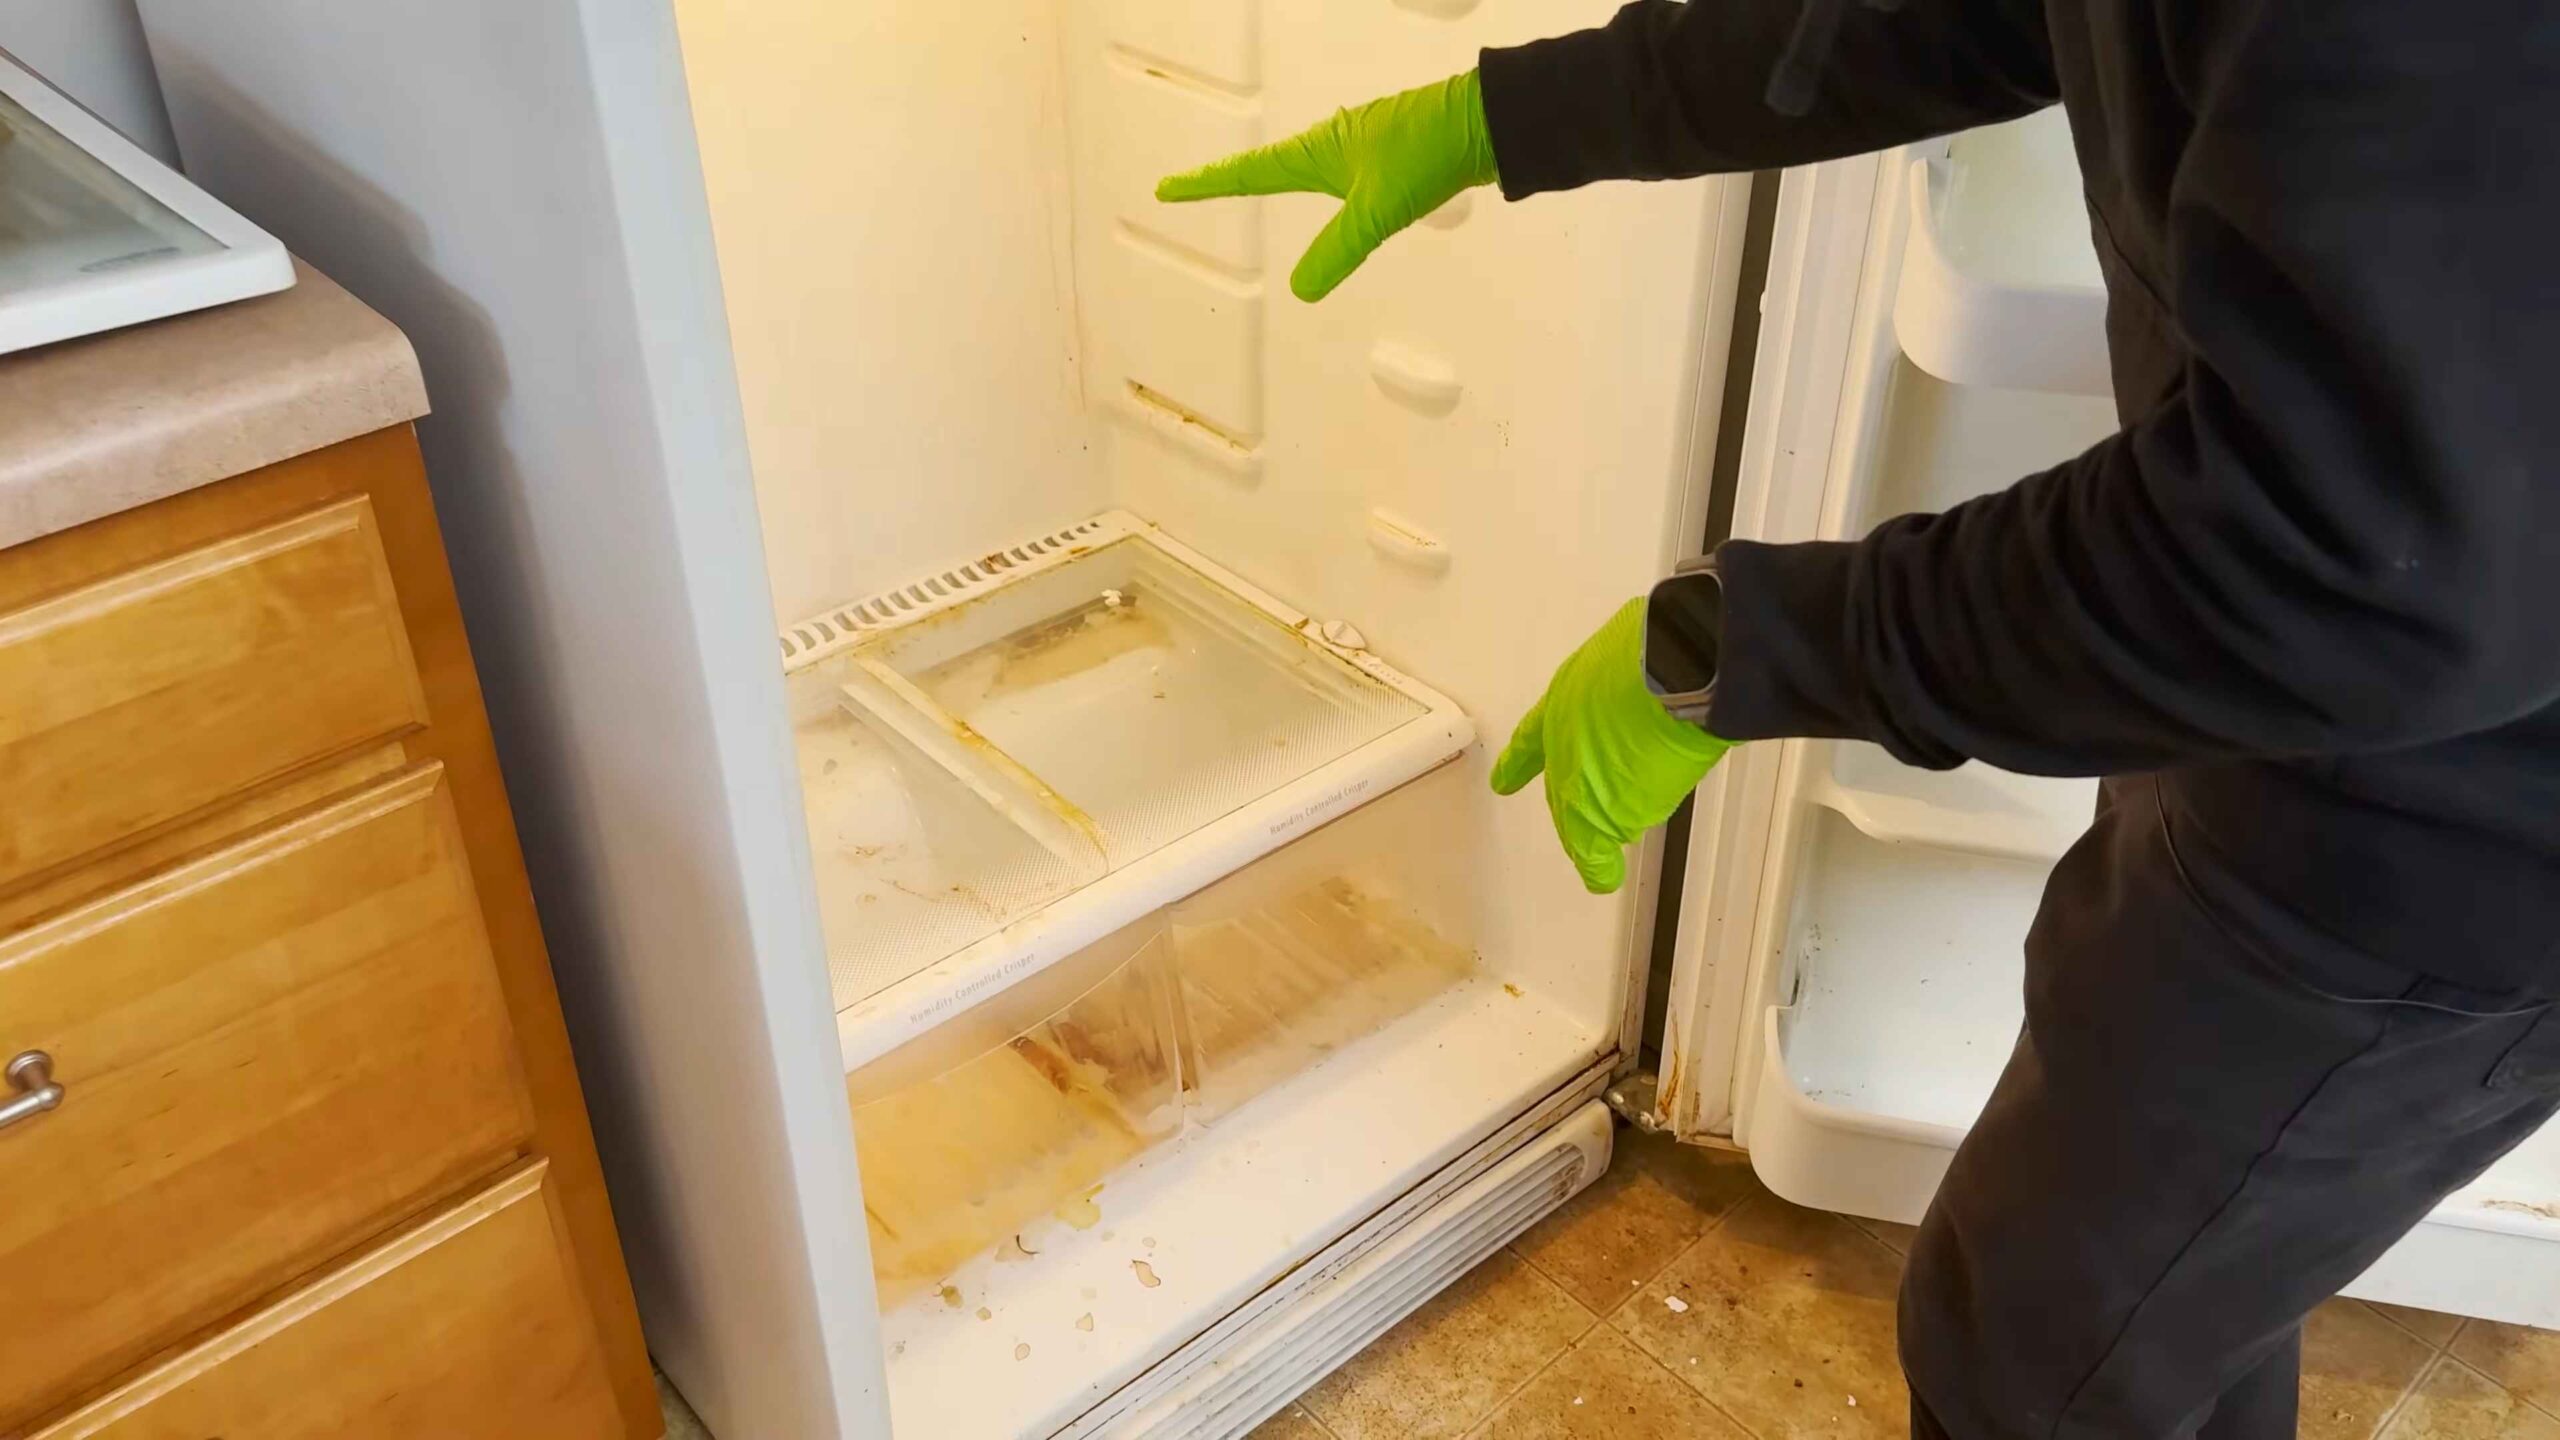
Phase 1: Emptying and Assessing the Situation
This is the most crucial step. Don’t skip it! A thorough emptying allows you to see what you’re working with and prevents you from just pushing crumbs around.
1. Unplug the Fridge: Safety first! Unplugging the fridge prevents any electrical accidents and saves energy while you’re cleaning.
2. Remove All Food: Take everything out of the fridge and freezer. This includes condiments, leftovers, produce, and anything else lurking in the back.
3. Sort and Discard: This is where the tough decisions come in. Check expiration dates and toss anything that’s past its prime, questionable, or just plain unidentifiable. Be honest with yourself! If you haven’t used it in a while, it’s probably time to say goodbye.
4. Organize Food for Temporary Storage: Place perishable items like meat, dairy, and eggs in a cooler or insulated bags with ice packs to keep them cold while you clean. This is super important to prevent food spoilage.
5. Remove Shelves and Drawers: Take out all removable shelves, drawers, and bins. This will allow you to clean them thoroughly and access all areas of the fridge interior.
Phase 2: Cleaning the Interior
Now for the fun part (okay, maybe not fun, but definitely satisfying!). We’re going to tackle the inside of the fridge, getting rid of spills, stains, and lingering odors.
1. Prepare Your Cleaning Solution: I prefer a simple and effective solution of warm water and baking soda. Mix about 1 tablespoon of baking soda per quart of warm water. Baking soda is a natural deodorizer and mild abrasive, perfect for cleaning fridge surfaces. For tougher stains, you can use a solution of equal parts white vinegar and water.
2. Wipe Down the Interior: Dip a microfiber cloth or sponge into your cleaning solution and wring out the excess. Thoroughly wipe down all interior surfaces, including the walls, ceiling, floor, and door compartments. Pay special attention to areas with spills or stains.
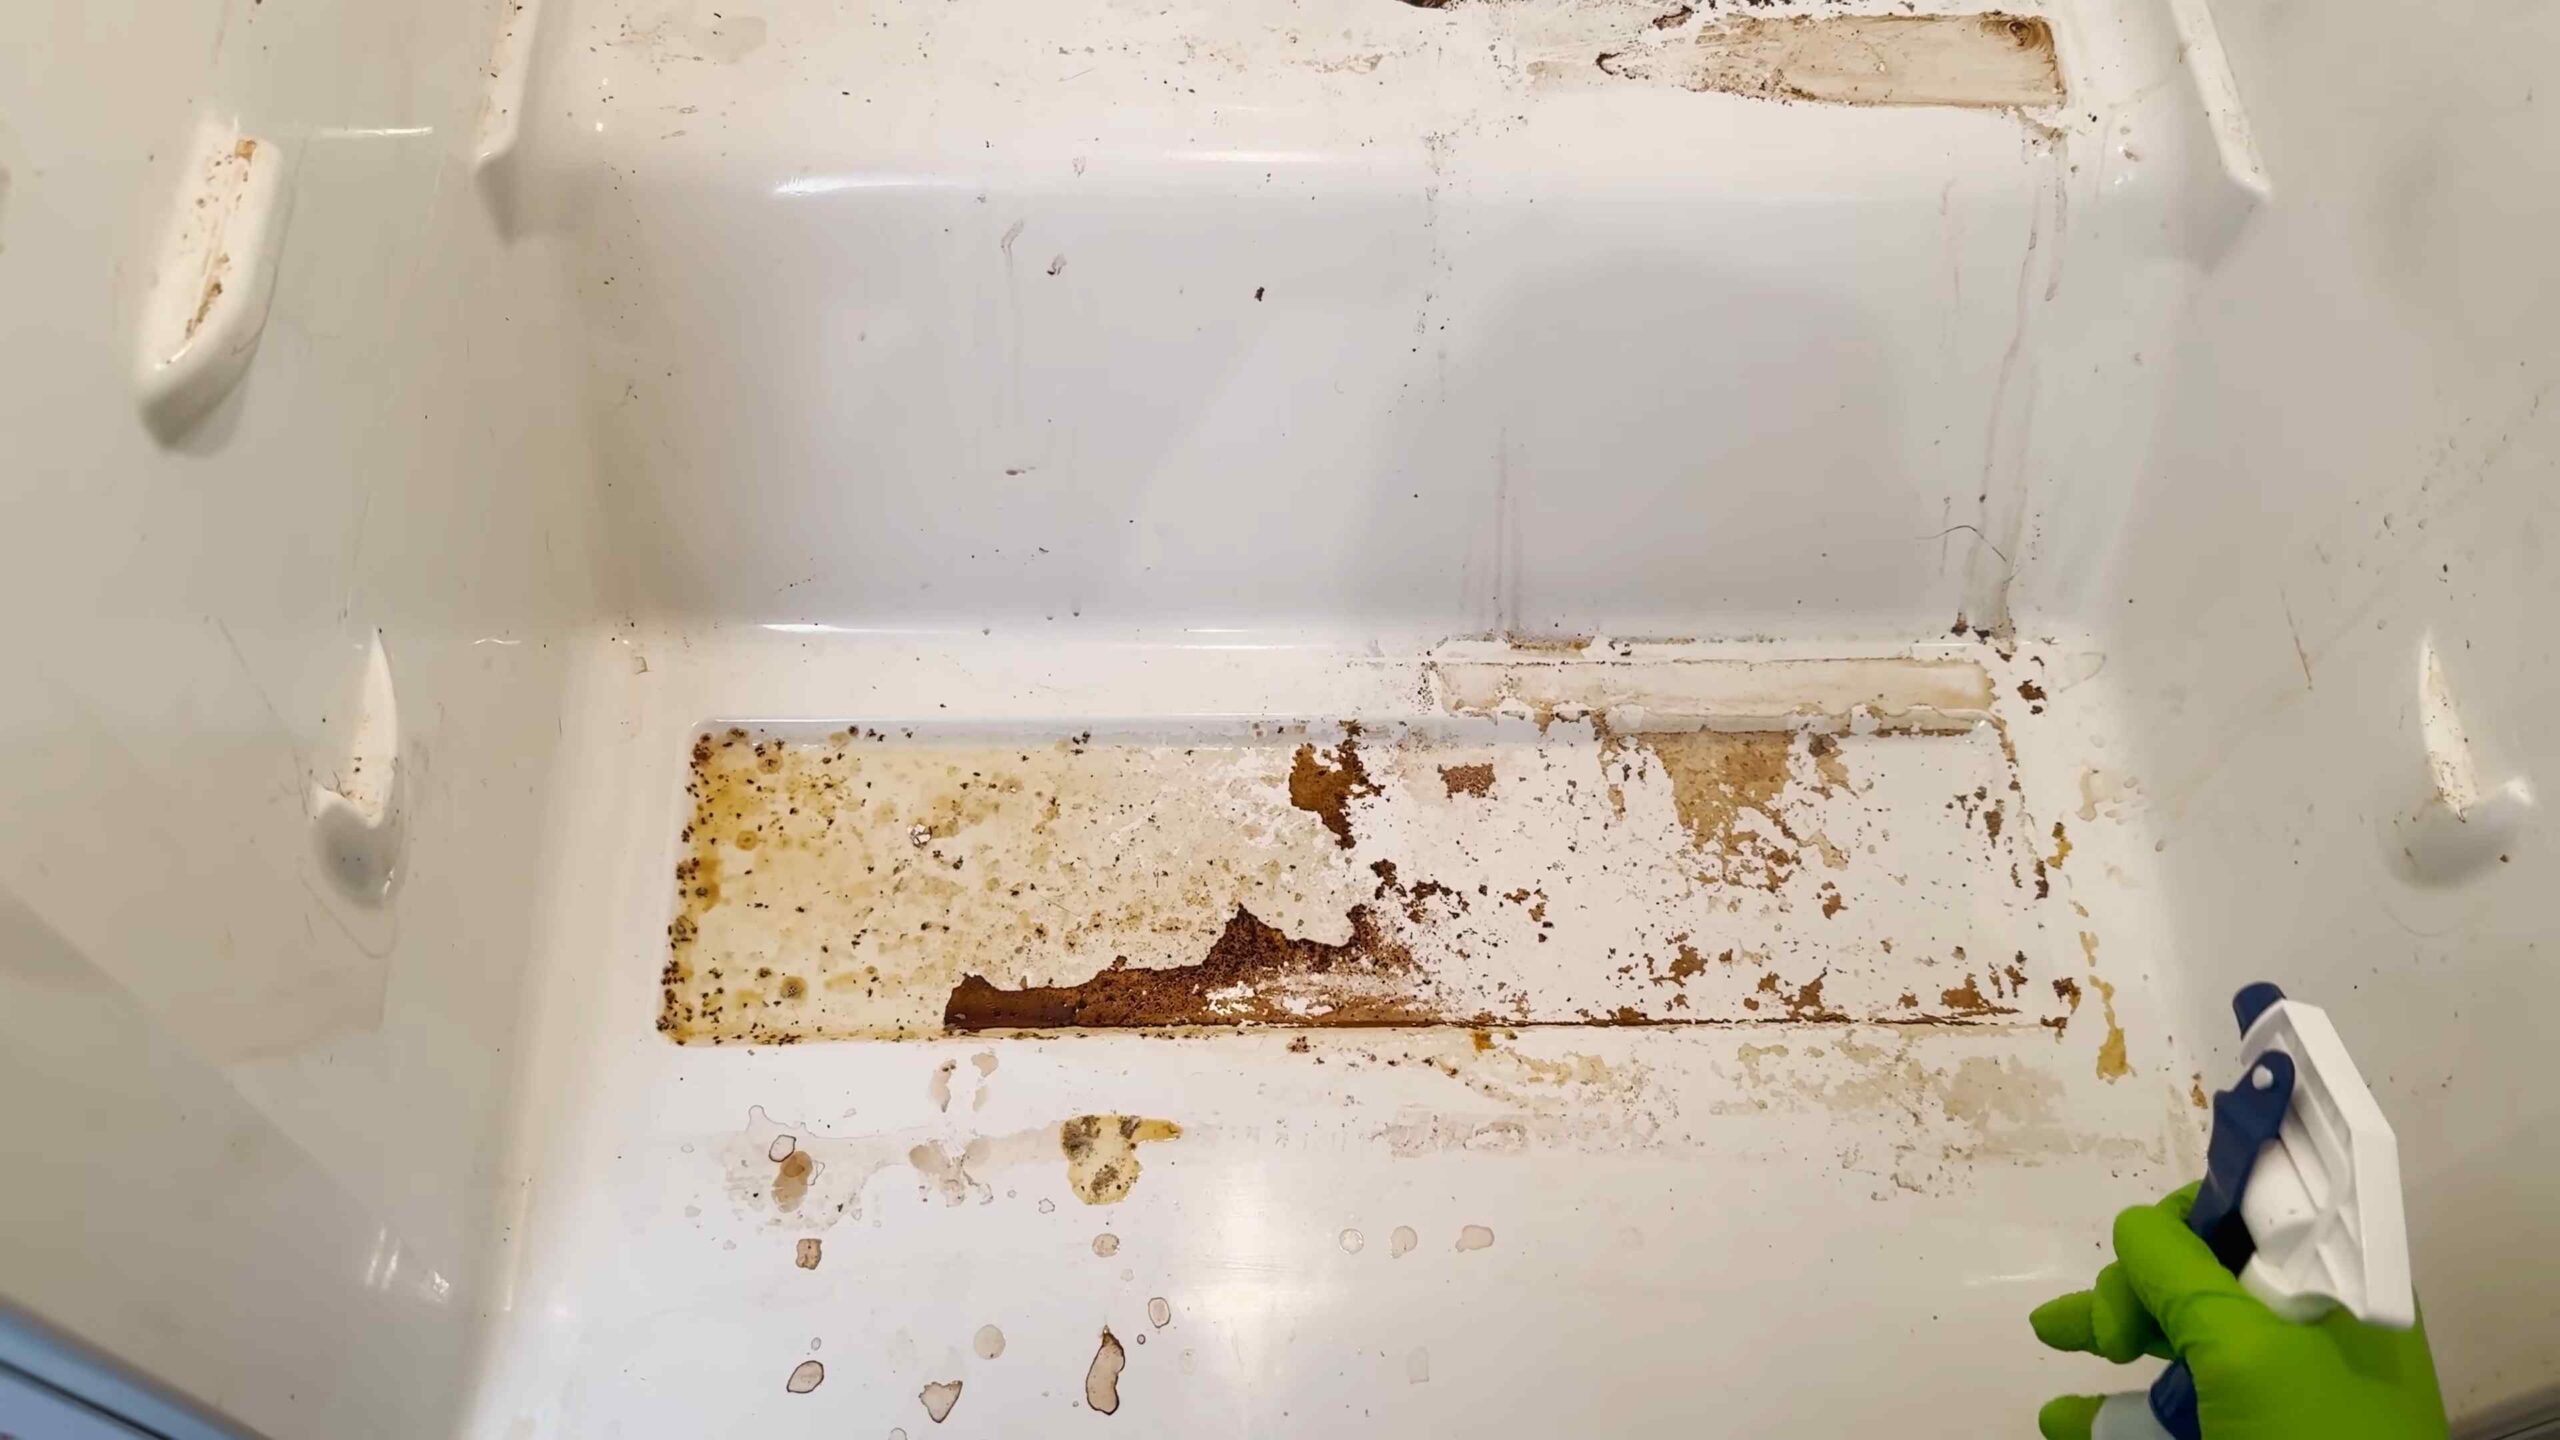
3. Tackle Stubborn Stains: For stubborn stains, let the cleaning solution sit for a few minutes before wiping. You can also use a paste of baking soda and water for extra scrubbing power. Gently scrub the stain with a soft sponge or old toothbrush. If the stain persists, try a small amount of all-purpose cleaner, but be sure to rinse it thoroughly.
4. Clean the Door Seals: Don’t forget the door seals! These can accumulate dirt and grime, preventing a proper seal and wasting energy. Use a damp cloth or sponge to clean the seals, paying attention to any crevices.
5. Rinse and Dry: After cleaning, rinse all surfaces with a clean, damp cloth to remove any cleaning solution residue. Then, dry everything thoroughly with a clean microfiber cloth or paper towels. This will prevent water spots and mold growth.
Phase 3: Cleaning Shelves and Drawers
These removable parts often bear the brunt of spills and messes. Let’s give them some extra attention.
1. Wash with Warm Soapy Water: Fill a sink or tub with warm water and a small amount of mild dish soap. Wash the shelves, drawers, and bins thoroughly with a sponge or cloth.
2. Rinse Thoroughly: Rinse each item thoroughly with clean water to remove all traces of soap.
3. Disinfect (Optional): If you want to disinfect the shelves and drawers, you can use a solution of white vinegar and water. Spray the solution on the surfaces and let it sit for a few minutes before wiping it off.
4. Dry Completely: Before placing the shelves and drawers back in the fridge, make sure they are completely dry. This will prevent water from dripping and creating new messes. You can air dry them or use a clean microfiber cloth to dry them quickly.
Phase 4: Addressing Odors
Even after cleaning, lingering odors can be a problem. Here are a few tricks to keep your fridge smelling fresh.
1. Baking Soda Box: Place an open box of baking soda in the fridge to absorb odors. Replace the box every few months.
2. Activated Charcoal: Activated charcoal is another excellent odor absorber. Place a small container of activated charcoal in the fridge.
3. Coffee Grounds: Place a small bowl of dry coffee grounds in the fridge to absorb odors.
4. Lemon or Orange Peels: Place a few lemon or orange peels in the fridge to add a fresh scent.
Phase 5: Reassembling and Restocking
Almost there! Now it’s time to put everything back together and restock your fridge.
1. Replace Shelves and Drawers: Once the interior of the fridge and the shelves and drawers are completely dry, carefully replace them in their original positions.
2. Organize Food: As you restock your fridge, take the opportunity to organize your food. Place items that expire sooner in the front and items that last longer in the back. Use clear containers to store leftovers and produce, making it easier to see what you have and prevent food waste.
3. Consider Shelf Liners: To make future cleanups easier, consider using shelf liners. These can be easily removed and washed, protecting your shelves from spills and stains.
4. Plug the Fridge Back In: Once everything is in place, plug the fridge back in.
5. Monitor the Temperature: Make sure your fridge is set to the correct temperature (around 40°F or 4°C) to keep your food safe.
Bonus Tips for Maintaining a Clean Fridge
* Wipe up spills immediately: Don’t let spills sit and harden. Clean them up as soon as they happen to prevent stains and odors.
* Check expiration dates regularly: Get in the habit of checking expiration dates and tossing out expired food.
* Clean your fridge regularly: Aim to do a quick wipe-down of your fridge once a week and a deep clean every few months.
* Store food properly: Store food in airtight containers to prevent spills and odors.
* Don’t overfill your fridge: Overcrowding can restrict airflow and make it harder to keep your food cold.
And there you have it! A sparkling clean fridge that’s ready to keep your food fresh and your kitchen smelling great. It might seem like a lot of work, but trust me, it’s worth it. Plus, now you can open your fridge without cringing! Happy cleaning!
Conclusion
So, there you have it! Mastering the art of a deep clean fridge isn’t just about aesthetics; it’s about food safety, extending the life of your refrigerator, and ultimately, saving you money and reducing food waste. This DIY deep clean fridge method is a game-changer, transforming a dreaded chore into a manageable and even satisfying task.
Why is this a must-try? Because it goes beyond a simple wipe-down. We’re talking about eliminating hidden bacteria, banishing lingering odors, and creating a truly hygienic environment for your food. Think of it as a reset button for your refrigerator, ensuring that everything inside stays fresher for longer. No more mysterious smells or questionable spills lurking in the corners!
But the best part? This deep clean fridge process is incredibly adaptable. Feeling adventurous? Infuse your cleaning solution with a few drops of your favorite essential oil, like lemon or grapefruit, for an extra burst of freshness. Dealing with stubborn stains? Create a paste of baking soda and water and let it sit on the affected area for a few minutes before scrubbing. You can even use old toothbrushes to get into those hard-to-reach crevices.
Consider these variations to personalize your deep clean fridge routine:
* **For the Eco-Conscious:** Replace commercial cleaners with a solution of equal parts white vinegar and water. It’s just as effective and much gentler on the environment.
* **For the Allergy-Prone:** Ensure all cleaning solutions are fragrance-free and hypoallergenic to avoid any potential reactions.
* **For the Busy Bee:** Break down the cleaning process into smaller chunks. Tackle one shelf or drawer each day to prevent feeling overwhelmed.
Ultimately, a clean fridge is a happy fridge, and a happy fridge means happy, healthy eating. We’ve provided you with the tools and knowledge; now it’s your turn to put them into action. Don’t be intimidated – this deep clean fridge method is designed to be simple and effective.
We are confident that once you experience the difference a truly clean fridge makes, you’ll never go back to your old ways. So, roll up your sleeves, gather your supplies, and prepare to be amazed by the transformation.
We’re eager to hear about your experience! Did you try any of the variations? Did you discover any hidden messes you didn’t know existed? Share your tips, tricks, and before-and-after photos in the comments below. Let’s create a community of clean fridge enthusiasts! Your insights could help others achieve refrigerator bliss. Let us know if this deep clean fridge method worked for you!
Frequently Asked Questions (FAQ)
How often should I deep clean my fridge?
Ideally, you should aim for a deep clean fridge session every 3-6 months. However, this depends on your lifestyle and how often you use your refrigerator. If you notice spills, odors, or a general buildup of grime, it’s time for a deep clean, regardless of the timeframe. Regular spot cleaning, such as wiping up spills immediately, can help extend the time between deep cleans. Consider a quick wipe-down of shelves and drawers during your weekly grocery shopping trip to prevent buildup.
What’s the best way to remove stubborn stains from my fridge?
Stubborn stains often require a little extra attention. A paste made from baking soda and water is an excellent natural abrasive. Apply the paste to the stain, let it sit for 10-15 minutes, and then scrub gently with a soft cloth or sponge. For particularly tough stains, you can try using a solution of equal parts white vinegar and water. Always test any cleaning solution in an inconspicuous area first to ensure it doesn’t damage the fridge’s surface. Another option is to use a melamine sponge (like a Magic Eraser), but be careful as it can be abrasive on some surfaces.
How can I prevent odors from developing in my fridge?
Preventing odors is key to maintaining a fresh-smelling fridge. The most common culprit is spilled food, so clean up spills immediately. Keep an open box of baking soda in the fridge to absorb odors. Replace the baking soda every 1-3 months. You can also place a cotton ball soaked in vanilla extract in the fridge for a pleasant scent. Ensure all food is properly sealed in airtight containers to prevent odors from escaping. Regularly check for expired food and discard it promptly.
Is it safe to use bleach to clean my fridge?
While bleach is a powerful disinfectant, it’s generally not recommended for cleaning your fridge. Bleach can be harsh and potentially damage the fridge’s interior. It can also leave behind a strong odor that can transfer to your food. If you choose to use bleach, dilute it heavily with water (no more than 1 tablespoon of bleach per gallon of water) and rinse thoroughly with clean water afterward. Ensure the fridge is well-ventilated to allow the bleach fumes to dissipate. Natural alternatives like vinegar and baking soda are generally safer and just as effective.
What’s the best way to clean the ice maker and water dispenser in my fridge?
Cleaning the ice maker and water dispenser is essential for maintaining water quality. Consult your refrigerator’s manual for specific instructions, as cleaning procedures may vary depending on the model. Generally, you’ll need to empty the ice bin and clean it with warm, soapy water. For the water dispenser, you can flush the system with a solution of white vinegar and water, followed by several cycles of clean water. Replace the water filter regularly according to the manufacturer’s recommendations.
How do I clean the rubber seals around the fridge door?
The rubber seals around the fridge door can accumulate dirt and grime, which can compromise their ability to create a tight seal. Clean the seals regularly with a damp cloth or sponge and a mild detergent. You can also use a toothbrush to get into the crevices. Dry the seals thoroughly after cleaning to prevent mold and mildew growth. If the seals are cracked or damaged, they may need to be replaced.
What should I do with the food in my fridge while I’m cleaning it?
Before you start cleaning, remove all the food from your fridge. Place perishable items in a cooler with ice packs to keep them cold while you’re working. This will prevent them from spoiling. Discard any expired or questionable food items. This is also a good opportunity to reorganize your fridge and ensure that items are stored properly.
How can I make my fridge more organized?
An organized fridge is easier to clean and helps prevent food waste. Use clear containers to store leftovers and prepped ingredients. Label containers with the contents and date. Designate specific areas for different types of food, such as a crisper drawer for fruits and vegetables and a meat drawer for raw meat. Store frequently used items at eye level for easy access. Rotate food items so that older items are used first.
What are some common mistakes to avoid when deep cleaning my fridge?
Avoid using abrasive cleaners or scouring pads, as they can scratch the fridge’s surface. Don’t forget to unplug the fridge before cleaning to prevent electrical shock. Be careful not to get water inside the electrical components. Don’t use excessive amounts of water, as this can lead to mold and mildew growth. Always dry the fridge thoroughly after cleaning.
Can I use a steam cleaner to clean my fridge?
While a steam cleaner can be effective for sanitizing surfaces, it’s generally not recommended for cleaning your fridge. The high heat and moisture can damage the fridge’s interior and electrical components. It’s best to stick to traditional cleaning methods using warm, soapy water and a soft cloth or sponge.


Leave a Comment