

DIY Carpet Stain Remover: Let’s face it, accidents happen! You’re enjoying a cozy evening at home, maybe with a glass of red wine or a playful pet, and suddenly – disaster strikes! A spill on your beloved carpet can feel like a mini-crisis. But don’t panic and reach for those expensive, chemical-laden cleaners just yet. I’m here to tell you that you can conquer those unsightly blemishes with simple ingredients you probably already have in your pantry.
For generations, resourceful homeowners have relied on homemade remedies to keep their homes sparkling. Before the age of mass-produced cleaning products, natural solutions were the only option, passed down through families like treasured secrets. This tradition of resourcefulness is something I truly admire, and it’s what inspired me to create this guide.
Why spend a fortune on commercial carpet stain removers when you can whip up your own effective solution for a fraction of the cost? Not only is it budget-friendly, but it’s also a much healthier option for your family and pets, avoiding harsh chemicals that can linger in your home. Plus, there’s a certain satisfaction in knowing you’ve tackled a tough stain with your own two hands and a little bit of know-how. So, are you ready to learn some amazing DIY carpet stain remover tricks that will save you money, protect your health, and keep your carpets looking their best? Let’s dive in!
DIY Carpet Stain Remover: Banish Stains Like a Pro!
Okay, let’s face it: carpets are magnets for spills and stains. Whether it’s a rogue coffee cup, muddy paw prints, or a mysterious red wine incident, life happens. But don’t despair! You don’t need to shell out big bucks for expensive commercial carpet cleaners. I’m going to show you how to whip up your own powerful and effective carpet stain remover using ingredients you probably already have in your pantry. Trust me, this stuff works wonders!
What You’ll Need: Your Stain-Fighting Arsenal
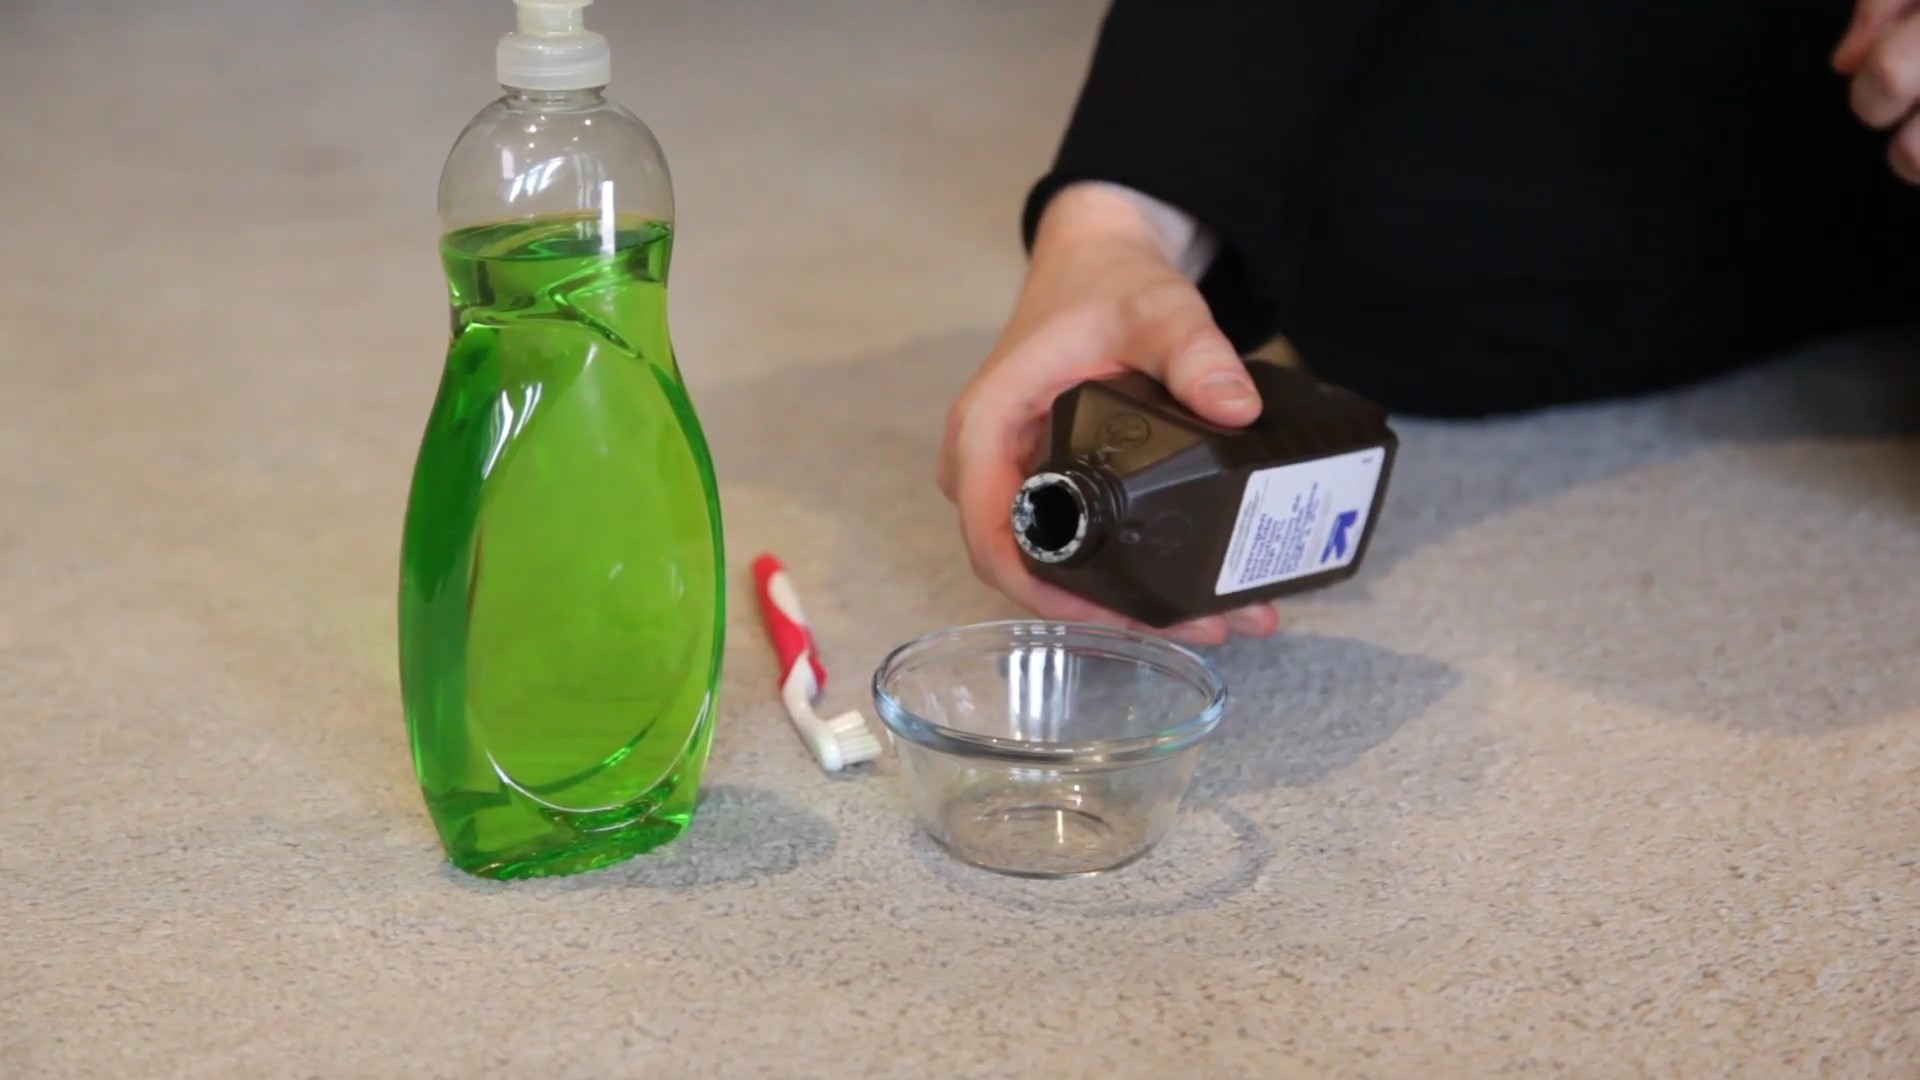
Before we dive in, let’s gather our supplies. This is a simple recipe, so you won’t need anything too fancy.
* **White Vinegar:** This is our star ingredient! Vinegar is a natural disinfectant and deodorizer, and its acidity helps break down stains.
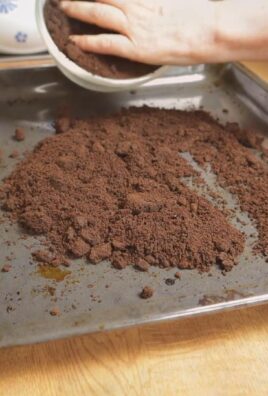
* **Baking Soda:** Another powerhouse cleaner! Baking soda absorbs odors and helps lift stains from carpet fibers.
* **Dish Soap (Clear, Non-Bleach):** A gentle dish soap helps to emulsify grease and lift dirt. Make sure it’s clear to avoid adding any unwanted dyes to your carpet. I recommend using a brand like Dawn or Palmolive.
* **Hydrogen Peroxide (3%):** This is optional, but it’s great for tackling tougher stains, especially those with color. Use with caution on dark carpets, as it can sometimes lighten them.
* **Spray Bottle:** For easy application.
* **Clean White Cloths or Paper Towels:** Avoid using colored cloths, as the dye could transfer to your carpet.
* **Spoon or Scrub Brush (Soft Bristles):** For working the solution into the stain.
* **Vacuum Cleaner:** To remove any residue after cleaning.
* **Warm Water:** For diluting the solution.
Mixing Your Magic Potion: The Stain Remover Recipe
Alright, let’s get mixing! This recipe is super easy to adjust depending on the size of the stain you’re dealing with.
1. **The Basic Formula:** In your spray bottle, combine:
* 1/2 cup white vinegar
* 1/4 cup baking soda
* 1 teaspoon clear dish soap
* 2 cups warm water
2. **Mix it Up:** Gently swirl the mixture to combine the ingredients. Be careful, as the baking soda and vinegar will react and create some fizzing. Don’t shake it vigorously, or you’ll end up with a bubbly mess!
3. **For Stubborn Stains (Hydrogen Peroxide Boost):** If you’re dealing with a particularly tough stain, you can add 1-2 tablespoons of 3% hydrogen peroxide to the mixture. Remember to test this on an inconspicuous area of your carpet first to ensure it doesn’t cause any discoloration.
Tackling the Stain: Step-by-Step Instructions
Now for the fun part – banishing those pesky stains! Follow these steps carefully for the best results.
1. **Blot, Blot, Blot!** The first and most crucial step is to blot up as much of the stain as possible with a clean white cloth or paper towel. Work from the outside of the stain inward to prevent it from spreading. Apply firm pressure, but avoid rubbing, as this can grind the stain deeper into the carpet fibers.
2. **Spray and Saturate:** Generously spray the stain with your DIY carpet cleaner. Make sure the area is thoroughly saturated, but not soaking wet.
3. **Let it Sit (The Waiting Game):** Allow the solution to sit on the stain for 5-10 minutes. This gives the vinegar and baking soda time to work their magic and break down the stain. For older or more stubborn stains, you can let it sit for up to 30 minutes.
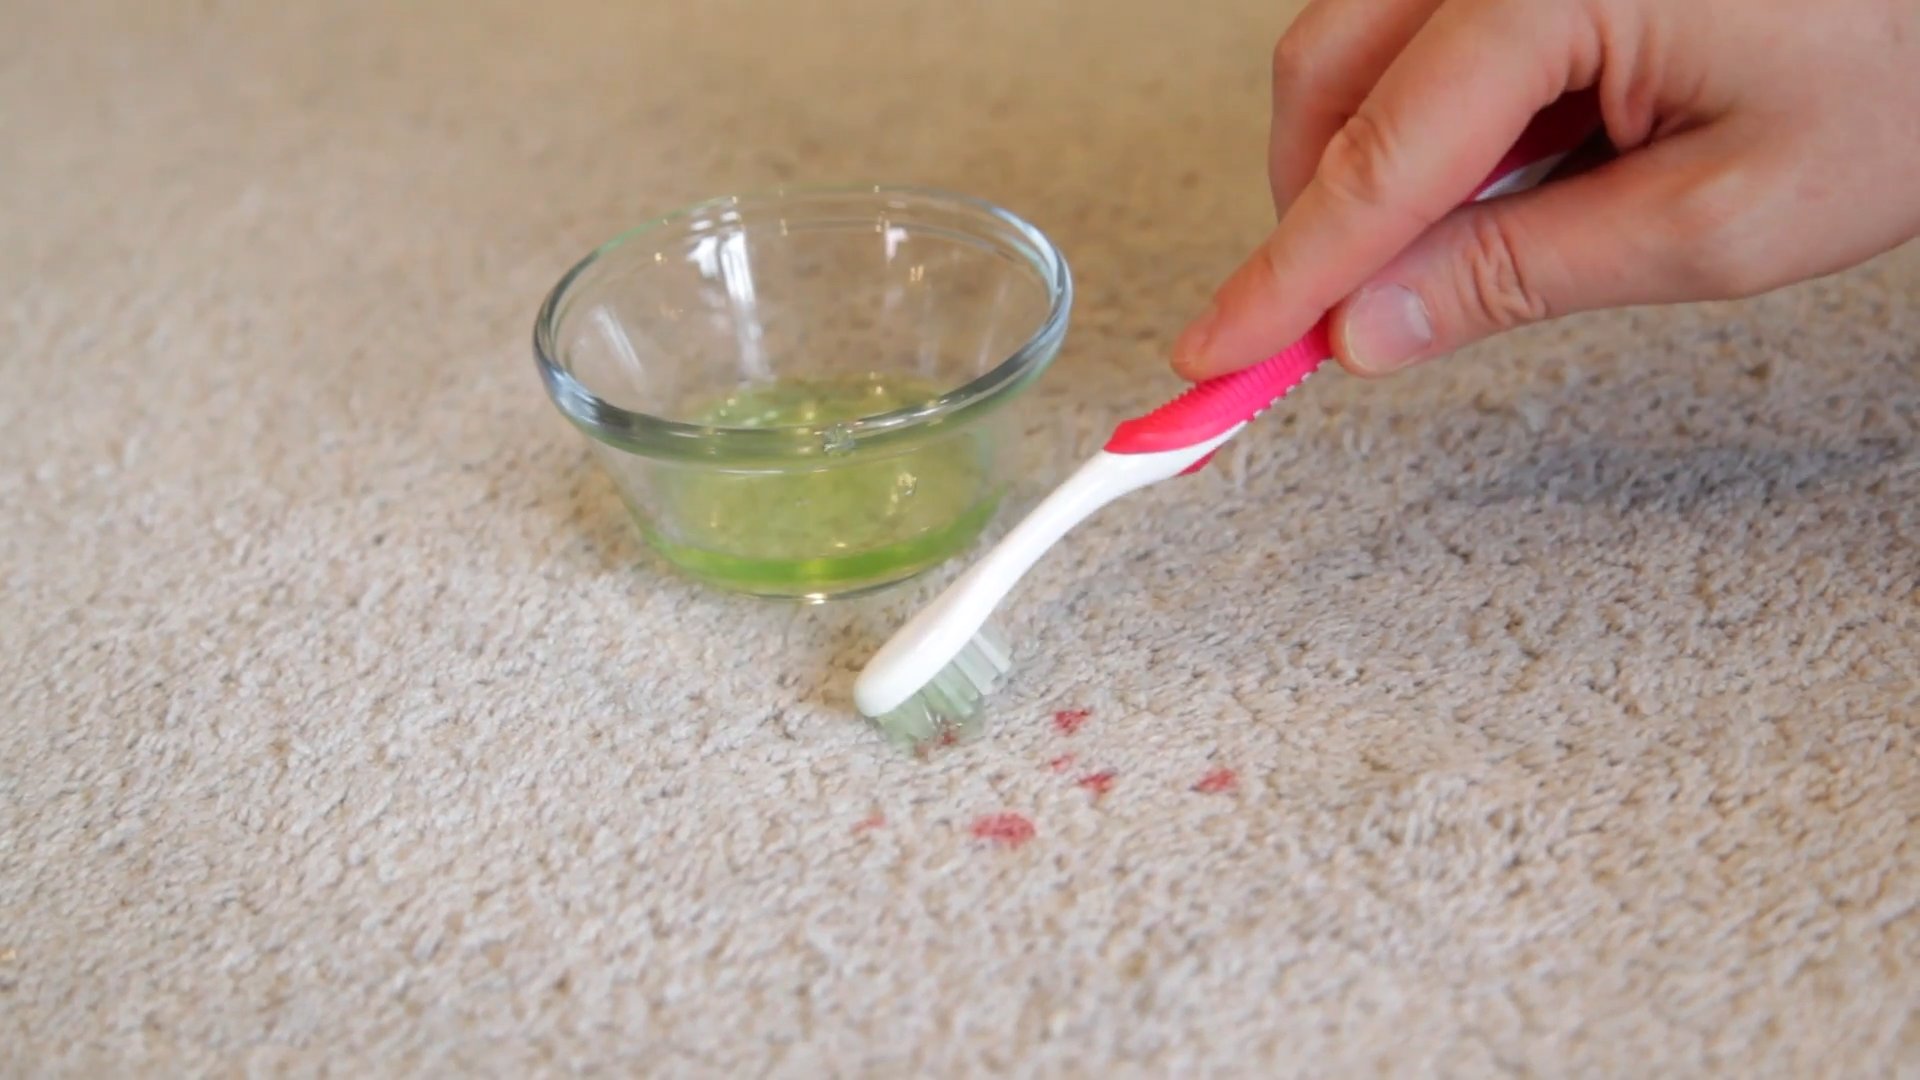
4. **Scrub (Gently Does It):** Using a clean white cloth or a soft-bristled scrub brush, gently scrub the stain in a circular motion. Avoid using too much force, as this can damage the carpet fibers.
5. **Blot Again (Rinse and Repeat):** Blot the area with a clean, damp white cloth to remove the cleaning solution and any remaining stain residue. Rinse the cloth frequently with clean water.
6. **Dry it Out (Patience is Key):** Allow the area to air dry completely. You can speed up the drying process by placing a fan near the area or using a hairdryer on a low, cool setting.
7. **Vacuum (The Final Touch):** Once the area is completely dry, vacuum it thoroughly to restore the carpet fibers and remove any remaining baking soda residue.
Dealing with Specific Stain Types: A Quick Guide
Different stains require slightly different approaches. Here’s a quick guide to tackling some common carpet culprits:
* **Coffee Stains:** Follow the general cleaning instructions above. For older coffee stains, you may need to repeat the process a few times.
* **Red Wine Stains:** Act fast! Blot up as much wine as possible immediately. Then, sprinkle the stain generously with baking soda and let it sit for several hours or overnight. Vacuum up the baking soda, and then follow the general cleaning instructions.
* **Pet Stains (Urine, Vomit):** Clean up the mess as quickly as possible. Blot up any excess liquid. Then, sprinkle the area with baking soda to absorb odors. Let it sit for several hours or overnight. Vacuum up the baking soda, and then follow the general cleaning instructions. You may also want to add a few drops of essential oil (like lavender or lemon) to the cleaning solution to help neutralize any lingering odors.
* **Grease Stains:** Blot up any excess grease with a clean cloth. Then, sprinkle the stain with cornstarch or baking soda to absorb the grease. Let it sit for 30 minutes, then vacuum it up. Follow the general cleaning instructions, paying extra attention to the dish soap.
* **Mud Stains:** Let the mud dry completely before attempting to clean it. Once dry, vacuum up as much of the dried mud as possible. Then, follow the general cleaning instructions.
Important Considerations: Safety First!
Before you start cleaning, keep these safety tips in mind:
* **Test in an Inconspicuous Area:** Always test your DIY carpet cleaner on a small, hidden area of your carpet first to ensure it doesn’t cause any discoloration or damage.
* **Ventilation is Key:** Make sure the room is well-ventilated while you’re cleaning.
* **Avoid Over-Wetting:** Don’t saturate the carpet excessively, as this can lead to mold and mildew growth.
* **Keep Away from Children and Pets:** Store your DIY carpet cleaner out of reach of children and pets.
* **Be Careful with Hydrogen Peroxide:** Use hydrogen peroxide with caution on dark carpets, as it can sometimes lighten them.
Troubleshooting: What to Do if the Stain Persists
Sometimes, even with the best efforts, a stain might not completely disappear on the first try. Don’t give up! Here are a few troubleshooting tips:
* **Repeat the Cleaning Process:** Sometimes, all it takes is another round of cleaning to fully remove the stain.
* **Increase the Concentration:** If the stain is particularly stubborn, you can try increasing the concentration of vinegar or dish soap in your cleaning solution.
* **Try a Different Cleaning Method:** If the general cleaning instructions aren’t working, you can try using a steam cleaner or renting a professional carpet cleaner.
* **Call in the Pros:** If all else fails, it might be time to call in a professional carpet cleaning service.
Preventing Future Stains: A Proactive Approach
The best way to deal with carpet stains is to prevent them from happening in the first place! Here are a few tips for keeping your carpets clean and stain-free:
* **Act Fast:** The sooner you clean up a spill, the easier it will be to remove the stain.
* **Use Rugs and Mats:** Place rugs and mats in high-traffic areas to protect your carpets from dirt and wear.
* **Regular Vacuuming:** Vacuum your carpets regularly (at least once a week) to remove dirt and debris that can contribute to staining.
* **Professional Cleaning:** Consider having your carpets professionally cleaned every 12-18 months to keep them looking their best.
* **Consider a Carpet Protector:** Apply a carpet protector spray to help repel stains and make cleaning easier.
So there you have it! With a little bit of elbow grease and this simple DIY carpet stain remover, you can keep your carpets looking fresh and clean without breaking the bank. Happy cleaning!
Conclusion
So, there you have it! This DIY carpet stain remover isn’t just another cleaning hack; it’s a game-changer for anyone who wants to keep their carpets looking fresh and vibrant without resorting to harsh chemicals or expensive professional services. We’ve all been there – that moment of dread when a spill happens, and you’re staring down the barrel of a potentially permanent stain. But with this simple, effective, and budget-friendly solution, you can tackle those accidents head-on and restore your carpet to its former glory.
What makes this DIY carpet stain remover a must-try? It’s the combination of readily available ingredients, the ease of application, and the remarkable results. You’re likely to have everything you need already in your pantry or cleaning cabinet. No special trips to the store, no complicated mixing instructions, just a straightforward process that delivers real results. Plus, you’re avoiding the harsh chemicals found in many commercial stain removers, making it a safer option for your family, your pets, and the environment.
But the best part? It works! The power of vinegar, baking soda, and dish soap combined creates a potent cleaning force that lifts stains, neutralizes odors, and leaves your carpet looking and smelling fantastic.
Variations and Suggestions:
* For stubborn stains: Pre-treat the stain with a paste of baking soda and water before applying the DIY solution. Let it sit for 30 minutes to an hour to help lift the stain.
* For pet stains: Add a few drops of essential oil, like lavender or eucalyptus, to the solution to help neutralize odors. Be sure to test the essential oil on an inconspicuous area of the carpet first to ensure it doesn’t cause discoloration.
* For colored carpets: Test the solution on a hidden area of the carpet before applying it to the stain to ensure it doesn’t cause fading.
* For older stains: You may need to repeat the process several times to fully remove the stain. Be patient and persistent!
* For a deeper clean: After applying the solution and blotting the stain, use a wet/dry vacuum to extract any remaining residue.
We’re confident that this DIY carpet stain remover will become your go-to solution for tackling spills and stains. It’s a simple, effective, and affordable way to keep your carpets looking their best.
Now, it’s your turn! Give this DIY carpet stain remover a try and see the amazing results for yourself. We’re eager to hear about your experiences. Share your before-and-after photos, your tips and tricks, and any variations you’ve tried in the comments below. Let’s build a community of stain-fighting experts! Don’t let those spills stress you out any longer. Embrace the power of DIY and reclaim your carpets today!
Frequently Asked Questions (FAQ)
What kind of stains does this DIY carpet stain remover work on?
This DIY carpet stain remover is effective on a wide range of common household stains, including food spills (like coffee, wine, and sauces), pet accidents (urine, vomit, and feces), dirt and mud, and some ink stains. However, the effectiveness may vary depending on the type of stain, how long it has been on the carpet, and the type of carpet fiber. For very old or deeply embedded stains, you may need to repeat the process several times or consider professional cleaning. It’s always best to test the solution on a hidden area of the carpet first to ensure it doesn’t cause discoloration.
Is this DIY carpet stain remover safe for all types of carpets?
While this DIY carpet stain remover is generally safe for most carpets, it’s crucial to test it on an inconspicuous area first, especially if you have delicate or natural fiber carpets like wool or silk. Some carpets may be more sensitive to vinegar or dish soap, so testing will help you avoid any potential damage or discoloration. If you’re unsure about your carpet type, consult the manufacturer’s instructions or a professional carpet cleaner.
How much of each ingredient should I use for the DIY carpet stain remover?
The recommended ratio is typically 1 cup of warm water, 1/2 cup of white vinegar, 1/4 cup of baking soda, and 1 tablespoon of dish soap. However, you can adjust the amounts slightly depending on the size and severity of the stain. For smaller stains, you can reduce the quantities proportionally. For larger or more stubborn stains, you may need to increase the amounts, but be careful not to oversaturate the carpet.
Can I use any type of dish soap for this DIY carpet stain remover?
It’s best to use a clear, non-bleach dish soap for this DIY carpet stain remover. Avoid using dish soaps that contain dyes or fragrances, as they may leave a residue or stain on your carpet. A mild, pH-neutral dish soap is generally the safest option.
How long should I let the DIY carpet stain remover sit on the stain?
After applying the DIY carpet stain remover to the stain, let it sit for 5-10 minutes to allow the ingredients to penetrate the stain and break it down. For older or more stubborn stains, you can let it sit for up to 30 minutes, but be sure to monitor the area to ensure it doesn’t cause any discoloration.
How do I remove the DIY carpet stain remover from the carpet after it has sat?
After letting the solution sit, blot the area with a clean, dry cloth or paper towel. Avoid rubbing the stain, as this can spread it and damage the carpet fibers. Continue blotting until you’ve removed as much of the solution and stain as possible. You can also use a wet/dry vacuum to extract any remaining residue.
Will this DIY carpet stain remover remove odors as well as stains?
Yes, the baking soda and vinegar in this DIY carpet stain remover can help neutralize odors as well as remove stains. Baking soda is a natural odor absorber, while vinegar helps to break down odor-causing bacteria. For particularly strong odors, you can sprinkle baking soda directly onto the affected area, let it sit for several hours or overnight, and then vacuum it up.
How often can I use this DIY carpet stain remover on my carpets?
You can use this DIY carpet stain remover as needed to address spills and stains. However, avoid overusing it, as excessive moisture can damage your carpet and promote mold growth. Always allow the carpet to dry completely after cleaning.
What if the DIY carpet stain remover doesn’t completely remove the stain?
If the DIY carpet stain remover doesn’t completely remove the stain on the first try, you can repeat the process several times. For very stubborn stains, you may need to try a different cleaning solution or consider professional carpet cleaning.
Is it safe to use this DIY carpet stain remover around children and pets?
This DIY carpet stain remover is generally safer than commercial stain removers, as it doesn’t contain harsh chemicals. However, it’s still important to keep children and pets away from the area while you’re cleaning and until the carpet is completely dry. Vinegar can be irritating to some animals, so ensure proper ventilation. As with any cleaning product, store the ingredients out of reach of children and pets.

Leave a Comment