

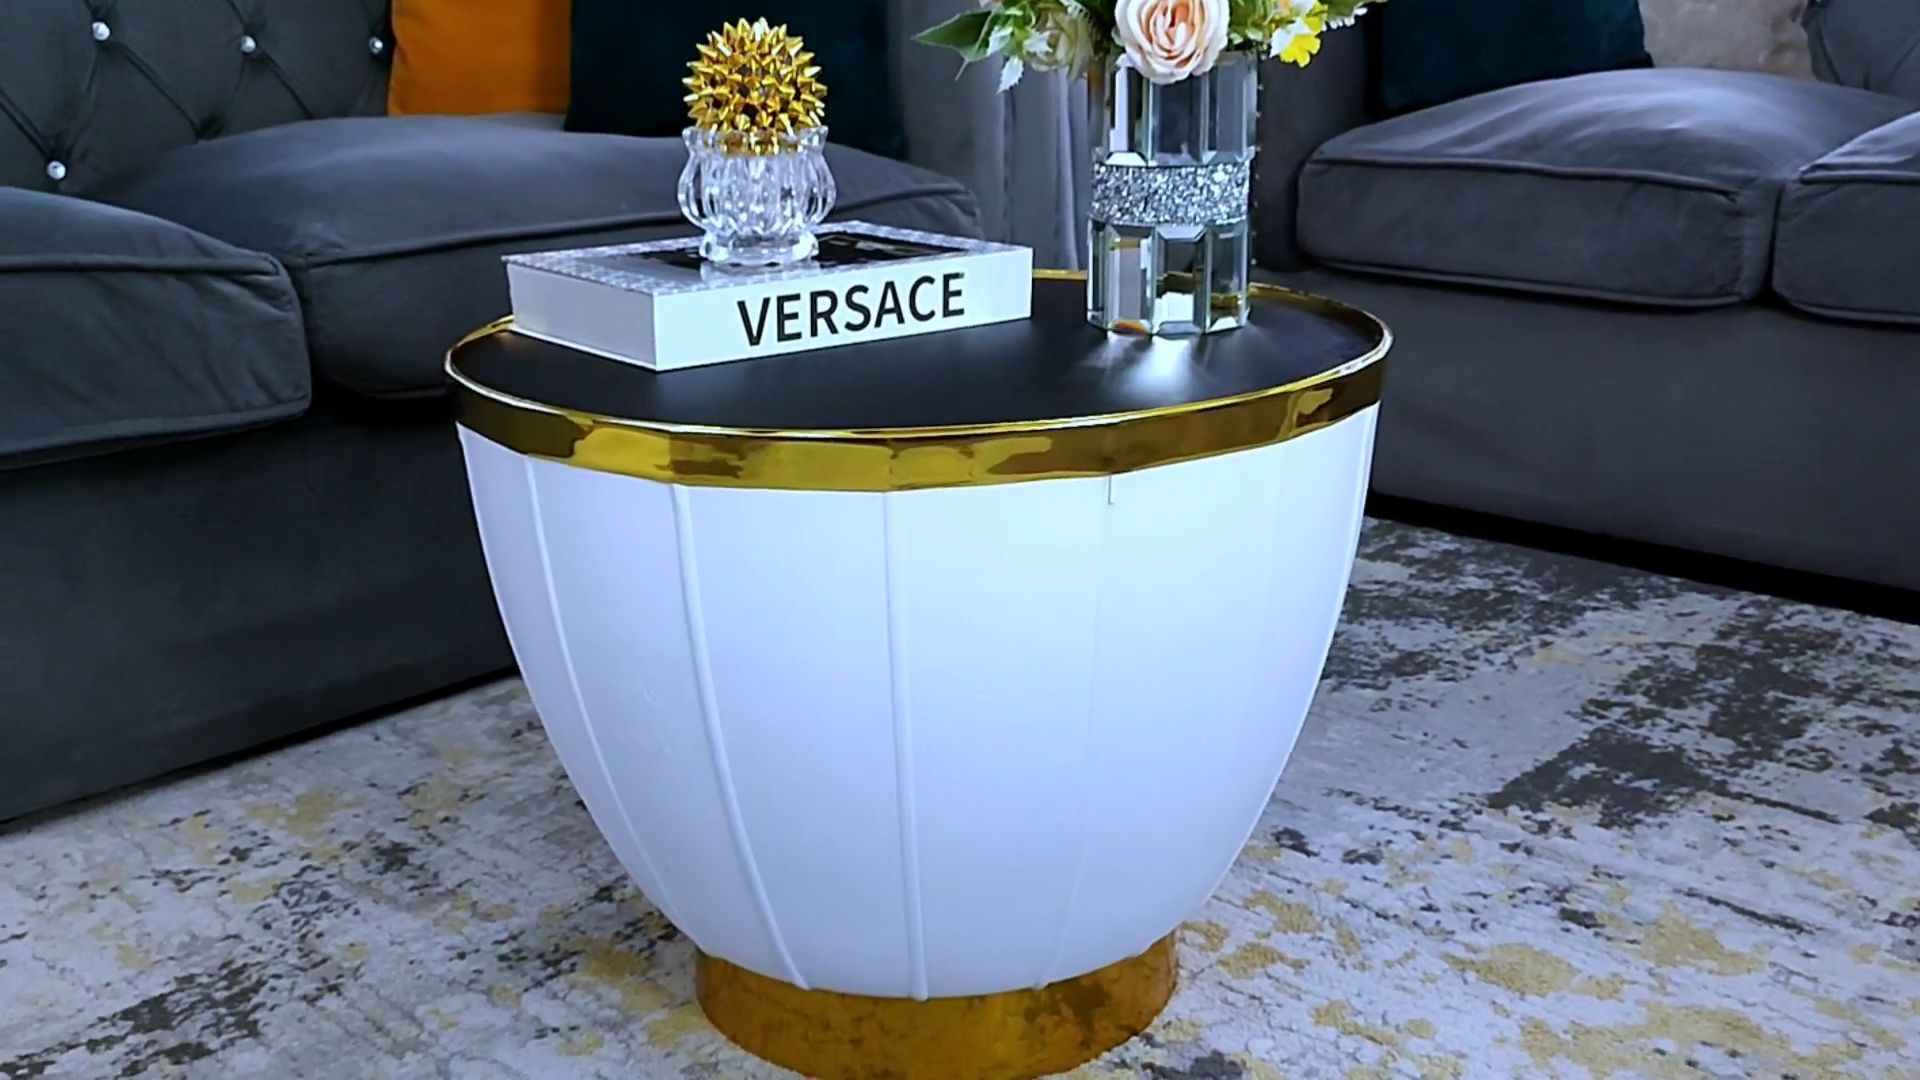
DIY Coffee Table projects are a fantastic way to add a personal touch to your living space, and I’m so excited to share some amazing ideas with you! Forget those generic, mass-produced tables – we’re diving headfirst into creating unique pieces that reflect your style and personality. Have you ever looked at a coffee table and thought, “I could make something way cooler than that?” Well, get ready, because you absolutely can!
The concept of the coffee table, a low table designed for casual use, has evolved significantly over time. While its modern form emerged in the late 19th century, the idea of a central gathering point in a living room has roots in various cultures. Think of the low tables used in Japanese tea ceremonies or the ornate tables found in Victorian drawing rooms. These pieces weren’t just functional; they were statements of artistry and hospitality.
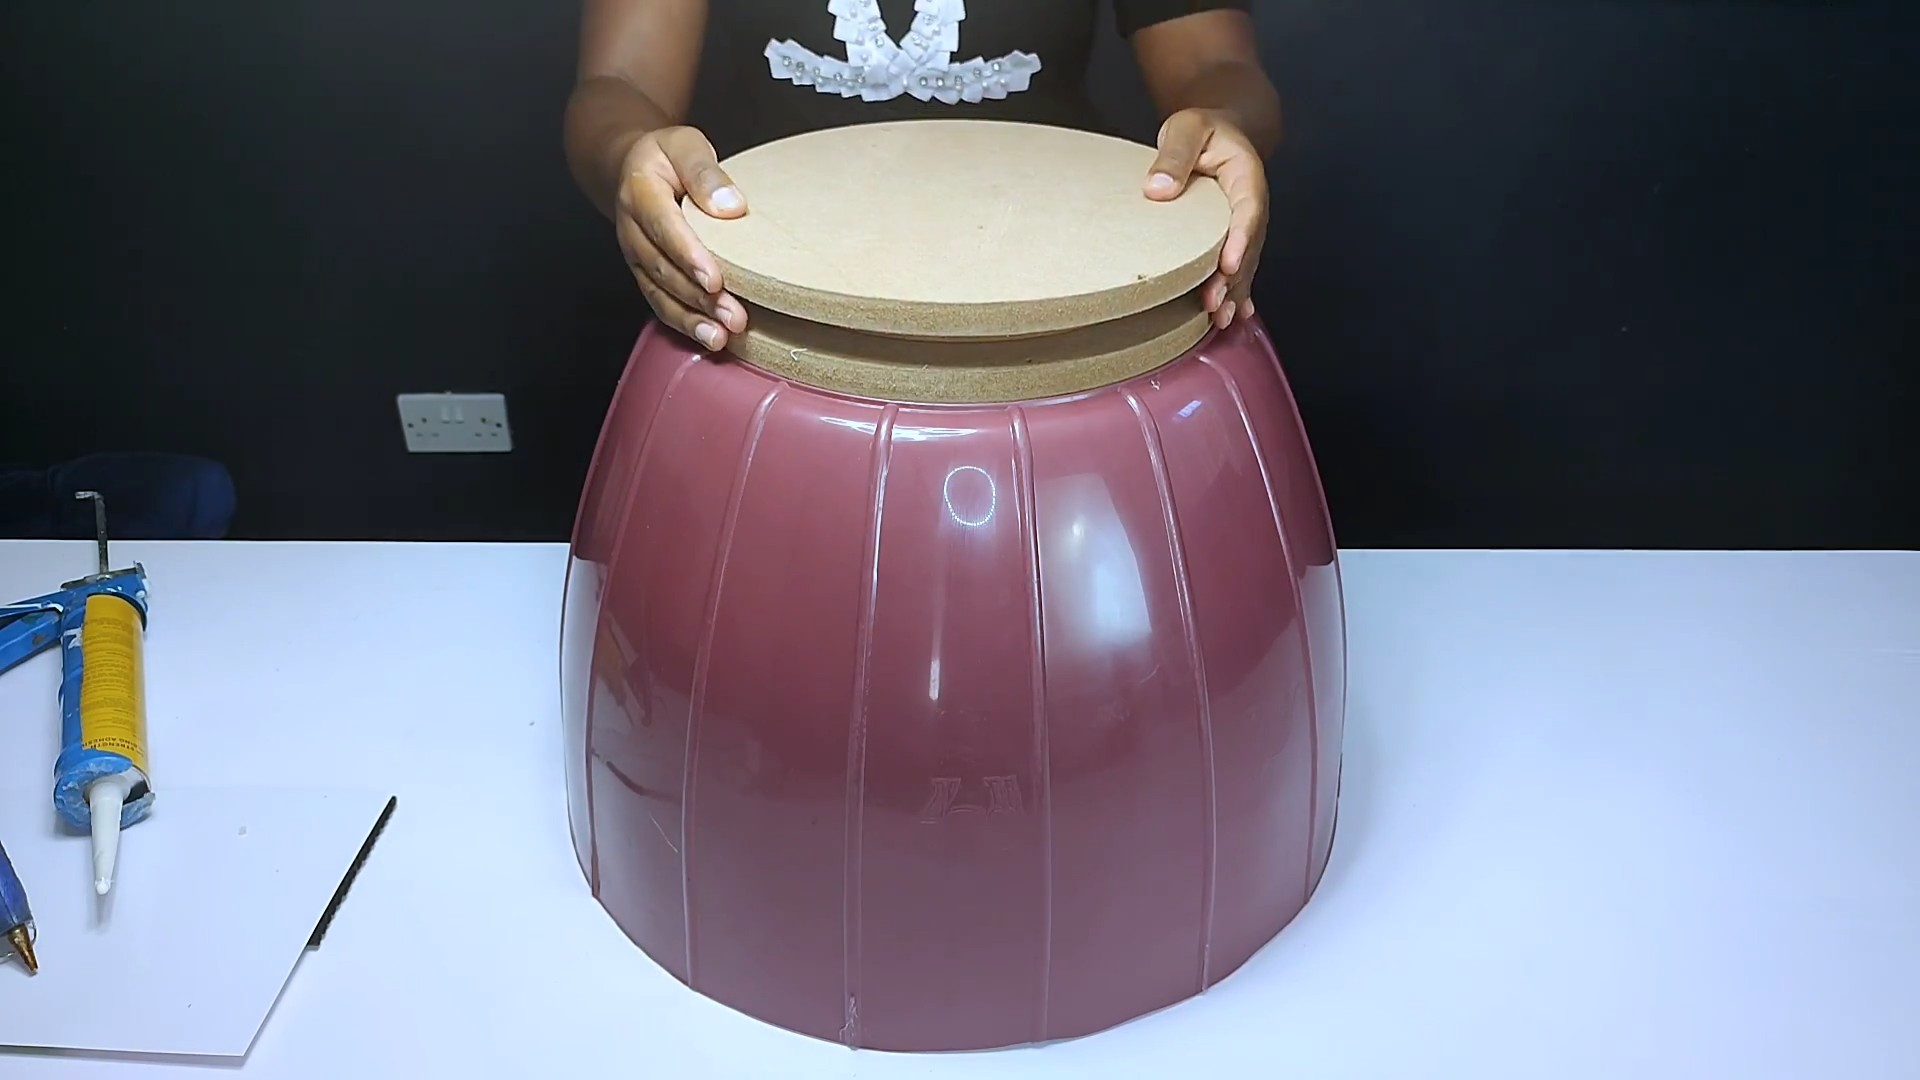
In today’s world, a DIY coffee table isn’t just about saving money (though that’s a definite perk!). It’s about reclaiming creativity and crafting something truly special. Let’s face it, finding the perfect coffee table that fits your exact needs, style, and budget can feel like searching for a unicorn. That’s where the magic of DIY comes in. I’m going to show you how to transform ordinary materials into extraordinary centerpieces, adding warmth, character, and a whole lot of “wow” factor to your home. Get ready to roll up your sleeves and unleash your inner artisan!
DIY Rustic Coffee Table: A Weekend Project You’ll Love
Hey there, fellow DIY enthusiasts! I’m so excited to share this project with you – building your own rustic coffee table. It’s surprisingly simple, incredibly rewarding, and adds a ton of character to your living room. Plus, you get to brag about making it yourself! This guide will walk you through every step, from gathering materials to the final finishing touches. Let’s get started!
Materials You’ll Need:
* Lumber: This is the heart of your coffee table. I used reclaimed wood for a truly rustic look, but you can use new lumber from your local hardware store. Here’s what I recommend:
* Four 4×4 posts (for the legs – about 16-18 inches long each)
* Two 2×6 boards (for the long sides of the table frame – length depends on your desired table length)
* Two 2×6 boards (for the short sides of the table frame – length depends on your desired table width)
* Several 1×6 boards (for the tabletop – enough to cover the entire surface with a little overhang if desired)
* Screws: I prefer using 2 1/2 inch wood screws for the frame and 1 1/4 inch wood screws for the tabletop.
* Wood Glue: This adds extra strength to your joints.
* Sandpaper: Various grits (80, 120, 220) for smoothing the wood.
* Stain or Finish: Choose a stain that complements your decor. I went with a dark walnut stain for a classic rustic feel. You’ll also need a sealant like polyurethane or varnish to protect the wood.
* Optional:
* Wood filler (for filling any gaps or imperfections)
* Metal corner brackets (for added stability – especially if using reclaimed wood)
* Felt pads (to protect your floors)
Tools You’ll Need:
* Measuring Tape: Essential for accurate cuts.
* Pencil: For marking your measurements.
* Saw: A circular saw or miter saw will make quick work of cutting the lumber. A hand saw will also work, but it will take longer.
* Drill: With drill bits for pilot holes and a screwdriver bit for driving in the screws.
* Sander: An electric sander will save you a lot of time and effort, but you can also sand by hand.
* Clamps: These are incredibly helpful for holding the frame together while the glue dries.
* Safety Glasses: Always protect your eyes!
* Dust Mask: To avoid inhaling sawdust.
* Paintbrushes or Rags: For applying stain and sealant.
Building the Table Frame:
1. Cut the Lumber:
* Using your measuring tape and pencil, carefully measure and mark the lumber according to your desired table dimensions. Remember to double-check your measurements before cutting!
* Cut the four 4×4 posts to the desired height for your table legs (I went with 16 inches).
* Cut the two 2×6 boards for the long sides of the frame.
* Cut the two 2×6 boards for the short sides of the frame.
* Cut the 1×6 boards for the tabletop. Determine how many you need to cover the surface. I recommend cutting them slightly longer than the frame to allow for a small overhang, which you can trim later.
2. Assemble the Frame:
* Apply wood glue to the ends of the short 2×6 boards.
* Attach the short boards to the inside of the long 2×6 boards, forming a rectangle. Use clamps to hold the frame together while the glue dries.
* Pre-drill pilot holes through the long boards into the ends of the short boards. This will prevent the wood from splitting when you drive in the screws.
* Secure the frame with 2 1/2 inch wood screws.
3. Attach the Legs:
* Apply wood glue to the top of each 4×4 leg.
* Position the legs inside the corners of the frame, ensuring they are flush with the top edge.
* Clamp the legs in place.
* Pre-drill pilot holes through the frame into the legs.
* Secure the legs with 2 1/2 inch wood screws. I recommend using at least two screws per side for each leg.
* Optional: For added stability, especially if you’re using reclaimed wood, you can attach metal corner brackets to the inside of the frame where the legs meet the frame.
Creating the Tabletop:
1. Prepare the Tabletop Boards:
* Sand each 1×6 board with 80-grit sandpaper to remove any rough spots or splinters.
* Then, sand with 120-grit sandpaper to smooth the surface.
* Finally, sand with 220-grit sandpaper for a super smooth finish.
* If you’re using reclaimed wood, you might want to leave some of the imperfections for a more rustic look.
2. Attach the Tabletop Boards:
* Position the 1×6 boards across the top of the frame, leaving a small gap between each board if desired. This adds to the rustic aesthetic.
* If you want an overhang, make sure the boards extend slightly beyond the frame on all sides.
* Pre-drill pilot holes through the tabletop boards into the frame.
* Secure the boards with 1 1/4 inch wood screws.
* If you have any gaps or imperfections in the tabletop, you can fill them with wood filler. Let the wood filler dry completely and then sand it smooth.
3. Trim the Overhang (Optional):
* If you chose to have an overhang, use a saw to trim the edges of the tabletop so they are even and consistent.
* Sand the edges smooth.
Finishing Touches:
1. Sanding:
* Give the entire table a final sanding with 220-grit sandpaper to ensure a smooth surface for staining or finishing.
* Pay special attention to the edges and corners.
* Wipe away all the sawdust with a clean cloth.
2. Staining (Optional):
* If you want to stain your coffee table, now is the time.
* Apply the stain evenly with a paintbrush or rag, following the manufacturer’s instructions.
* Let the stain sit for the recommended amount of time, then wipe off any excess.
* Allow the stain to dry completely.
3. Sealing:
* Apply a sealant like polyurethane or varnish to protect the wood from scratches, spills, and other damage.
* Apply the sealant evenly with a paintbrush, following the manufacturer’s instructions.
* Let the sealant dry completely.
* Sand lightly with 220-grit sandpaper between coats.
* Apply a second coat of sealant for added protection.
4. Final Touches:
* Attach felt pads to the bottom of the legs to protect your floors from scratches.
* Inspect the table for any imperfections and make any necessary repairs.
Alternative Tabletop Designs:
* Herringbone Pattern: Cut the 1×6 boards at a 45-degree angle and arrange them in a herringbone pattern on the tabletop. This creates a visually stunning and unique design.
* Epoxy Resin River Table: Create a “river” effect by pouring colored epoxy resin between two pieces of wood. This is a more advanced technique, but the results are breathtaking.
* Tile Inlay: Incorporate tiles into the tabletop for a decorative touch. You can use ceramic tiles, mosaic tiles, or even natural stone tiles.
Tips for Working with Reclaimed Wood:
* Source Your Wood Carefully: Make sure the reclaimed wood is free of nails, screws, and other debris.
* Clean the Wood Thoroughly: Use a wire brush and soap and water to remove any dirt, grime, or mildew.
* Embrace the Imperfections: Reclaimed wood is full of character, so don’t try to hide all the imperfections. They add to the rustic charm.
* Consider Using Metal Brackets: Reclaimed wood can be more prone to warping and cracking, so metal brackets can provide added stability.
Customization Ideas:
* Height: Adjust the height of the legs to create a coffee table that is the perfect height for your sofa.
* Size: Customize the length and width of the table to fit your space.
* Leg Style: Experiment with different leg styles, such
Conclusion
So, there you have it! Transforming an ordinary space with a unique, personalized coffee table is more achievable than you might think. This DIY coffee table project isn’t just about saving money; it’s about unleashing your creativity and crafting a piece that perfectly reflects your style and needs. Forget generic, mass-produced furniture – with a little effort and imagination, you can create a stunning centerpiece that will be a conversation starter for years to come.
The beauty of this DIY approach lies in its adaptability. Feeling adventurous? Experiment with different materials for the tabletop. Reclaimed wood offers rustic charm, while a sleek piece of glass adds a touch of modern elegance. Consider incorporating metal accents for an industrial vibe or painting the base in a bold, eye-catching color. Don’t be afraid to personalize the dimensions to perfectly fit your living room layout. A smaller, round table might be ideal for a cozy apartment, while a larger, rectangular one could be the perfect anchor for a spacious living area.
Beyond aesthetics, think about functionality. Add a lower shelf for storing books and magazines, or incorporate hidden compartments for remotes and other essentials. The possibilities are truly endless! This project is a fantastic opportunity to learn new skills, from basic woodworking to more advanced techniques like staining and finishing.
But the real magic happens when you put your own spin on it. Maybe you have a collection of vintage tiles you’ve been wanting to showcase – why not incorporate them into the tabletop design? Or perhaps you’re passionate about a particular artistic style – let that influence your choice of materials and finishes.
We wholeheartedly encourage you to give this DIY coffee table project a try. It’s a rewarding experience that will not only enhance your living space but also give you a sense of accomplishment. Don’t be intimidated if you’re a beginner – there are plenty of resources available online to guide you through the process. Start with a simple design and gradually work your way up to more complex projects as your skills improve.
And most importantly, we want to hear about your experience! Share your photos, tips, and challenges in the comments section below. Let’s create a community of DIY enthusiasts who inspire and support each other. Your unique creation could be the inspiration someone else needs to embark on their own DIY journey. So, grab your tools, unleash your creativity, and get ready to build a coffee table that you’ll be proud to call your own. Let’s see those amazing DIY coffee tables!
Frequently Asked Questions (FAQ)
What tools do I absolutely need for this DIY coffee table project?
The essential tools will depend on the specific design you choose, but generally, you’ll need:
* A saw (circular saw, jigsaw, or hand saw) for cutting wood.
* A drill with various drill bits for creating pilot holes and driving screws.
* A measuring tape and pencil for accurate measurements and marking.
* Sandpaper (various grits) for smoothing surfaces.
* Screws or nails for assembling the table.
* A level to ensure the table is stable.
* Safety glasses and a dust mask for protection.
* Clamps to hold pieces together while gluing or screwing.
Depending on your design, you might also need a router, a sander, or specialized tools for working with metal or other materials.
What type of wood is best for a DIY coffee table?
The best type of wood depends on your budget, desired aesthetic, and skill level. Here are a few popular options:
* **Pine:** Affordable, easy to work with, and readily available. It’s a good choice for beginners, but it’s relatively soft and prone to dents.
* **Poplar:** Another affordable option that’s slightly harder than pine. It paints well and is often used for furniture frames.
* **Oak:** A durable and attractive hardwood with a classic grain pattern. It’s more expensive than pine or poplar but offers superior strength and longevity.
* **Maple:** A hard and dense wood with a smooth, even grain. It’s ideal for staining and finishing and is often used for high-end furniture.
* **Reclaimed Wood:** Adds character and a rustic touch to your coffee table. It can be sourced from old barns, pallets, or other salvaged materials. Be sure to properly clean and prepare reclaimed wood before using it.
Consider the overall style you’re aiming for and choose a wood that complements your design.
How can I finish my DIY coffee table to protect it and enhance its appearance?
There are several options for finishing your coffee table:
* **Stain:** Adds color and enhances the natural grain of the wood. Choose a stain that complements your decor and apply it according to the manufacturer’s instructions.
* **Paint:** Provides a solid color finish and can be used to create a variety of looks, from modern to rustic. Use a primer before painting to ensure proper adhesion.
* **Polyurethane:** A durable and water-resistant clear coat that protects the wood from scratches, stains, and moisture. It’s available in various sheens, from matte to glossy.
* **Oil-Based Finishes:** Like linseed oil or tung oil, penetrate the wood and provide a natural, low-luster finish. They’re easy to apply and maintain but offer less protection than polyurethane.
* **Wax:** Provides a soft, satin finish and adds a layer of protection. It’s easy to apply and buff but requires regular maintenance.
Always test your chosen finish on a scrap piece of wood before applying it to the entire coffee table.
How do I ensure my DIY coffee table is sturdy and stable?
Several factors contribute to the sturdiness and stability of your coffee table:
* **Use strong joinery techniques:** Mortise and tenon joints, dovetail joints, or dowel joints are more robust than simple butt joints.
* **Use high-quality screws or nails:** Choose fasteners that are appropriate for the type of wood you’re using and the thickness of the materials.
* **Apply wood glue to all joints:** Glue adds significant strength to the joints and helps prevent them from loosening over time.
* **Ensure the legs are properly attached:** Use strong brackets or mortise and tenon joints to attach the legs to the tabletop.
* **Use a level to ensure the table is level:** Adjust the legs as needed to eliminate any wobble.
* **Consider adding a stretcher or apron:** A stretcher is a horizontal piece of wood that connects the legs, while an apron is a frame that surrounds the tabletop. Both add stability and prevent the legs from splaying.
What if I don’t have a lot of space for a large coffee table?
If space is limited, consider these options:
* **Build a smaller, round coffee table:** Round tables take up less visual space and are easier to navigate around.
* **Choose a coffee table with storage:** A coffee table with drawers or shelves can help you maximize your storage space.
* **Build a nesting coffee table:** Nesting tables can be pulled out when needed and stored away when not in use.
* **Consider a lift-top coffee table:** A lift-top coffee table can be used as a desk or dining table, making it a versatile option for small spaces.
* **Opt for a minimalist design:** A simple, uncluttered design will make your coffee table feel less bulky.
Remember to measure your space carefully before building your coffee table to ensure it fits comfortably.

Leave a Comment