

DIY Concrete Candle Holders: Ever feel like your home decor is missing that certain *je ne sais quoi*? Something that screams “stylish” and “unique,” but also whispers “I made this myself”? Well, you’re in luck! I’m about to share a super fun and surprisingly easy DIY project that will transform your space: crafting your own concrete candle holders.
Concrete, once relegated to sidewalks and skyscrapers, has made a serious comeback in the design world. Its raw, industrial aesthetic adds a touch of modern cool to any room. Think about it – from minimalist Scandinavian interiors to rustic farmhouse vibes, concrete seamlessly blends in, adding texture and visual interest. Historically, concrete has been a symbol of strength and permanence, used in structures meant to last for generations. Now, we’re bringing that same enduring quality into our homes, one candle holder at a time!
But why DIY concrete candle holders, you ask? Because store-bought versions can be pricey, and let’s be honest, a little generic. This project allows you to unleash your creativity, customize the size, shape, and finish to perfectly match your style, and save some money in the process! Plus, there’s nothing quite like the satisfaction of creating something beautiful and functional with your own two hands. So, grab your supplies, and let’s get crafting! I promise, you’ll be amazed at how simple and rewarding this project is.
DIY Concrete Candle Holders: A Step-by-Step Guide
Hey there, fellow DIY enthusiasts! I’m so excited to share this project with you – creating your own concrete candle holders. They’re surprisingly easy to make, incredibly stylish, and add a touch of modern industrial chic to any space. Plus, they make fantastic personalized gifts! Let’s dive in!
Materials You’ll Need
Before we get started, let’s gather all the necessary materials. Trust me, having everything ready beforehand will make the whole process much smoother.
* **Cement Mix:** I recommend using a rapid-setting cement mix for quicker results. You can find this at any hardware store. A small bag should be plenty for several candle holders.
* **Fine Sand:** This helps to create a smoother, more refined concrete finish.
* **Water:** For mixing the concrete.
* **Molds:** This is where you get creative! You can use anything from plastic containers (yogurt cups, small bowls), silicone molds (available online or at craft stores), or even cardboard boxes lined with plastic. Just make sure they’re sturdy enough to hold the wet concrete. I’ve even used old Pringles cans before!
* **Inner Molds (for the candle space):** These will create the cavity for your candles. Think smaller plastic cups, test tubes, or even metal washers stacked on top of each other. The size will depend on the type of candles you want to use (tea lights, votives, etc.).
* **Cooking Oil or Mold Release Spray:** This is crucial for easy removal of the concrete from the molds.
* **Mixing Container:** A bucket, large bowl, or even an old plastic tub will work.
* **Mixing Tool:** A trowel, sturdy spoon, or even a gloved hand will do the trick.
* **Safety Gloves:** Concrete can be harsh on your skin, so protect your hands!
* **Dust Mask:** Cement dust can be irritating to your lungs, so wear a mask, especially when mixing.
* **Sandpaper (various grits):** For smoothing and refining the finished concrete. I usually use 120, 220, and 400 grit.
* **Sealer (optional):** To protect the concrete from stains and moisture. Concrete sealers are available at most hardware stores.
* **Decorative Elements (optional):** Think paint, gold leaf, glitter, or even small stones to embed in the concrete.
* **Measuring Cups/Spoons:** To ensure accurate mixing ratios.
Preparing Your Molds
This step is all about preventing the concrete from sticking to your molds. A little preparation goes a long way!
1. Clean Your Molds: Make sure your molds are clean and dry. Any dirt or debris can affect the final finish.
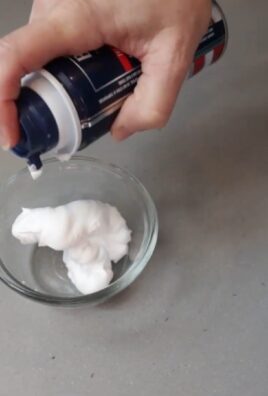
2. Apply Mold Release: Generously coat the inside of your outer molds and the outside of your inner molds with cooking oil or mold release spray. Don’t skimp on this step! It’s better to use too much than too little. I usually use a paper towel to spread the oil evenly.
3. Prepare Inner Molds: If you’re using something like stacked washers for your inner mold, secure them together with a bit of tape or glue to prevent them from shifting during the pouring process.
Mixing the Concrete
Now for the fun (and slightly messy) part!
1. Combine Dry Ingredients: In your mixing container, combine the cement mix and fine sand according to the instructions on your cement mix packaging. A general ratio is usually around 3 parts cement mix to 1 part sand, but always check the manufacturer’s recommendations.
2. Add Water Gradually: Slowly add water to the dry ingredients, mixing continuously. You want to achieve a thick, pancake batter-like consistency. The mixture should be wet enough to pour easily but not so watery that it separates. Add water a little at a time to avoid overwatering.
3. Mix Thoroughly: Make sure there are no dry clumps in the mixture. Mix for several minutes until the concrete is smooth and consistent. I usually mix for at least 5 minutes to ensure everything is properly combined.
Pouring the Concrete
This is where your candle holders start to take shape!
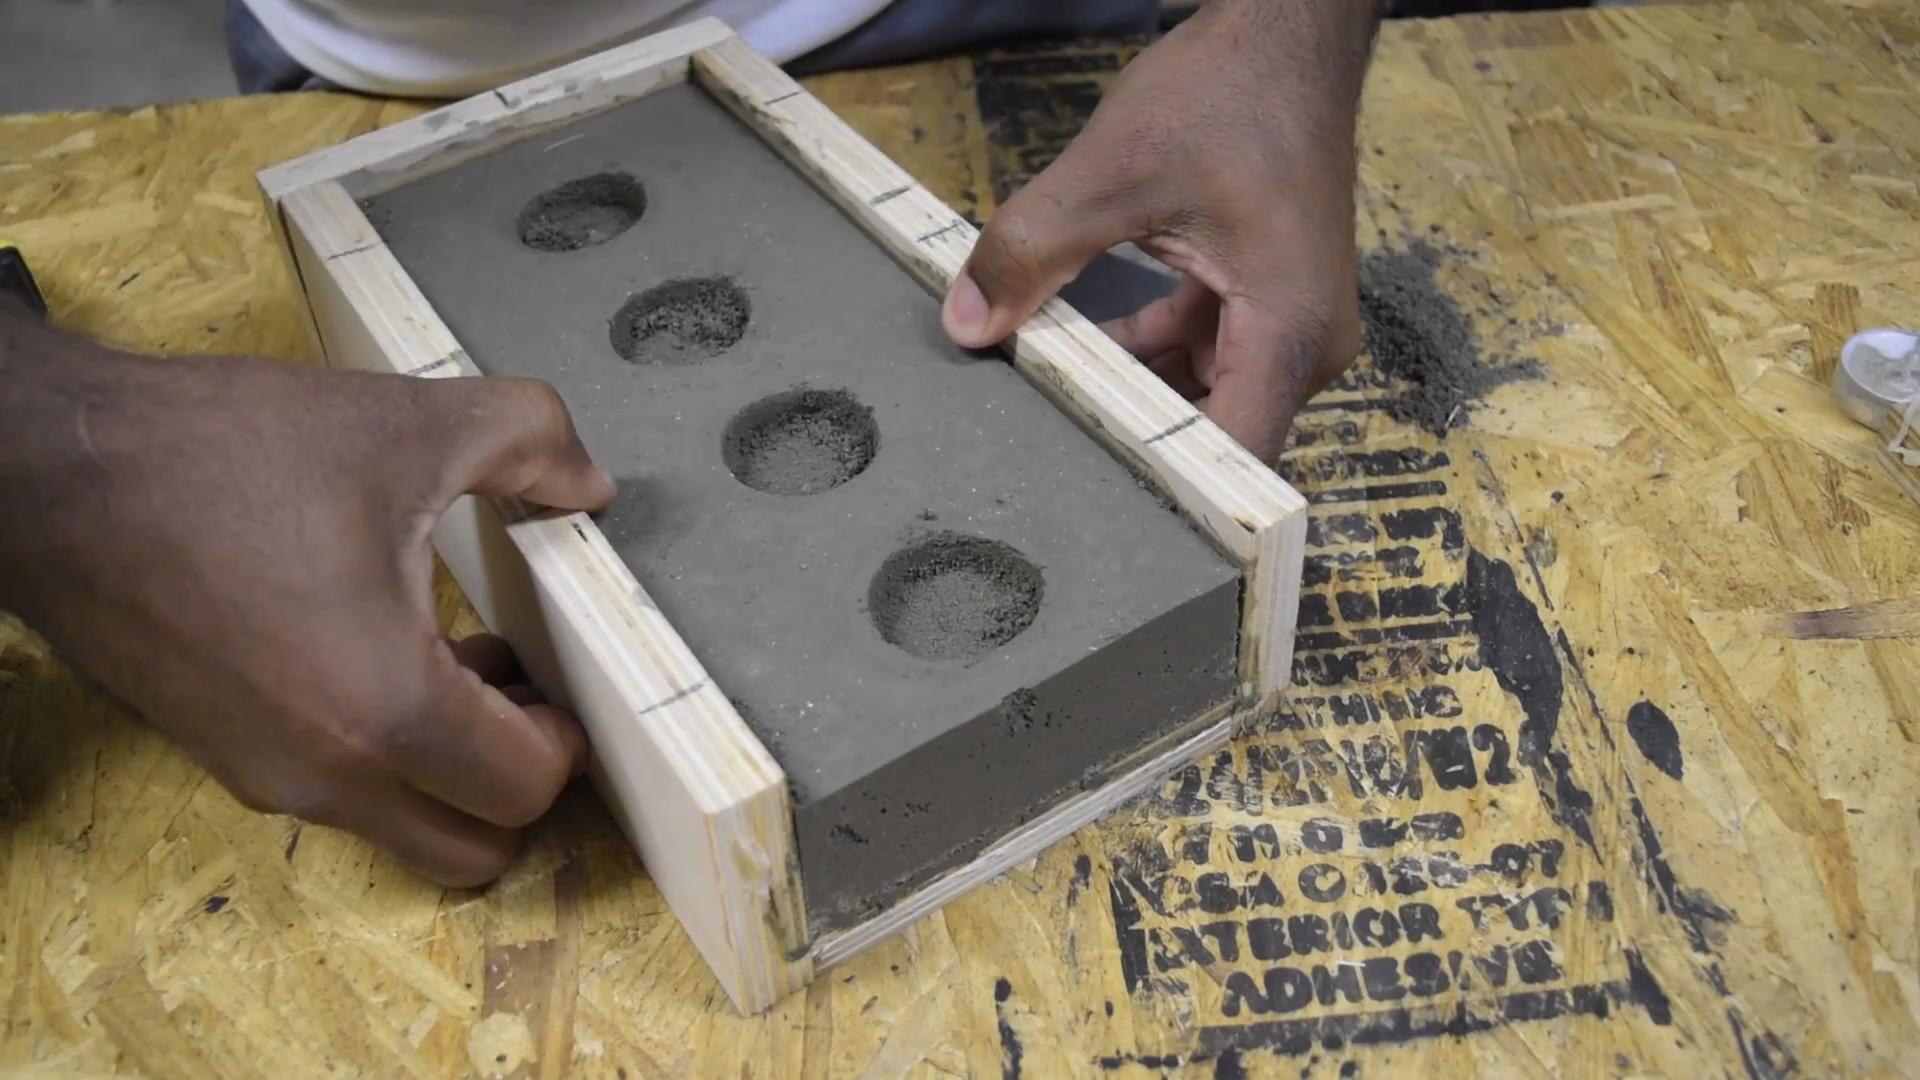
1. Pour into Outer Molds: Carefully pour the concrete mixture into your prepared outer molds, filling them about halfway.
2. Tap and Vibrate: Gently tap the sides of the molds to release any trapped air bubbles. You can also use a vibrating tool (like a sander without sandpaper) to help settle the concrete and remove air pockets. This will result in a smoother, more even finish.
3. Insert Inner Molds: Carefully center your prepared inner molds into the wet concrete. Gently press them down until they are submerged to the desired depth. Make sure they are stable and won’t shift during the curing process.
4. Add More Concrete: Pour more concrete around the inner molds, filling the outer molds to the top. Again, tap and vibrate to remove air bubbles.
5. Level the Surface: Use a trowel or flat edge to level the surface of the concrete. This will give your candle holders a clean, professional look.
Curing the Concrete
Patience is key here! Allowing the concrete to cure properly is essential for its strength and durability.
1. Cover the Molds: Cover the molds with plastic wrap or a damp cloth to prevent the concrete from drying out too quickly. Rapid drying can lead to cracking.
2. Let it Cure: Allow the concrete to cure for at least 24-48 hours, or according to the instructions on your cement mix packaging. The longer it cures, the stronger it will be. I usually let mine cure for at least 48 hours.
3. Check for Hardness: After the curing period, gently press on the surface of the concrete. It should feel hard and solid.
Demolding and Finishing
The moment of truth! Let’s see how your candle holders turned out.
1. Remove from Molds: Carefully remove the concrete candle holders from the outer molds. If they’re stuck, gently tap the molds or try running warm water around the edges. The mold release spray should help them slide out easily.
2. Remove Inner Molds: Remove the inner molds. You might need to use pliers or a small tool to gently pry them out.
3. Sanding: Once the candle holders are fully dry, use sandpaper to smooth any rough edges or imperfections. Start with a coarser grit (120) and gradually move to finer grits (220, 400) for a polished finish. I usually sand under running water to minimize dust.
4. Cleaning: Wipe down the candle holders with a damp cloth to remove any sanding dust.
5. Sealing (Optional): If you want to protect your candle holders from stains and moisture, apply a concrete sealer according to the manufacturer’s instructions. This will also enhance the color and finish of the concrete.
6. Decorative Touches (Optional): Now’s the time to get creative! You can paint your candle holders, add gold leaf accents, embed small stones, or even sprinkle glitter on them. Let your imagination run wild!
Troubleshooting
Sometimes things don’t go exactly as planned. Here are a few common issues and how to fix them:
* Cracking: Cracking can occur if the concrete dries out too quickly. Make sure to cover the molds during the curing process and keep them in a cool, humid environment.
* Air Bubbles: Air bubbles can create a rough, uneven surface. Tap and vibrate the molds thoroughly after pouring the concrete to release trapped air.
* Sticking: If the concrete is sticking to the molds, you may not have used enough mold release. Next time, apply a more generous coating. You can also try gently heating the molds with a hairdryer to help loosen the concrete.
* Weak Concrete: If the concrete is crumbly or weak, you may have added too much water to the mixture. Next time, add water more gradually and ensure the mixture is thick and consistent.
Tips and Tricks
Here are a few extra tips to help you create the perfect concrete candle holders:
* Experiment with Molds: Don’t be afraid to try different types of molds. The possibilities are endless!
* Add Pigment: You can add concrete pigment to the mixture to create colored candle holders.
* Embed Objects: Embed small objects like shells, stones, or glass beads into the concrete for a unique look.
* Create a Textured Finish: Use a textured roller or sponge to create a textured finish on the concrete.
* Seal the Bottom: Add felt pads to the bottom of your candle holders to protect your furniture from scratches.
Safety First!
Always wear safety gloves and a dust mask when working with concrete. Avoid getting concrete in your eyes or on your skin. If contact occurs, rinse thoroughly with water. Work in a well-ventilated area.
And that’
Conclusion
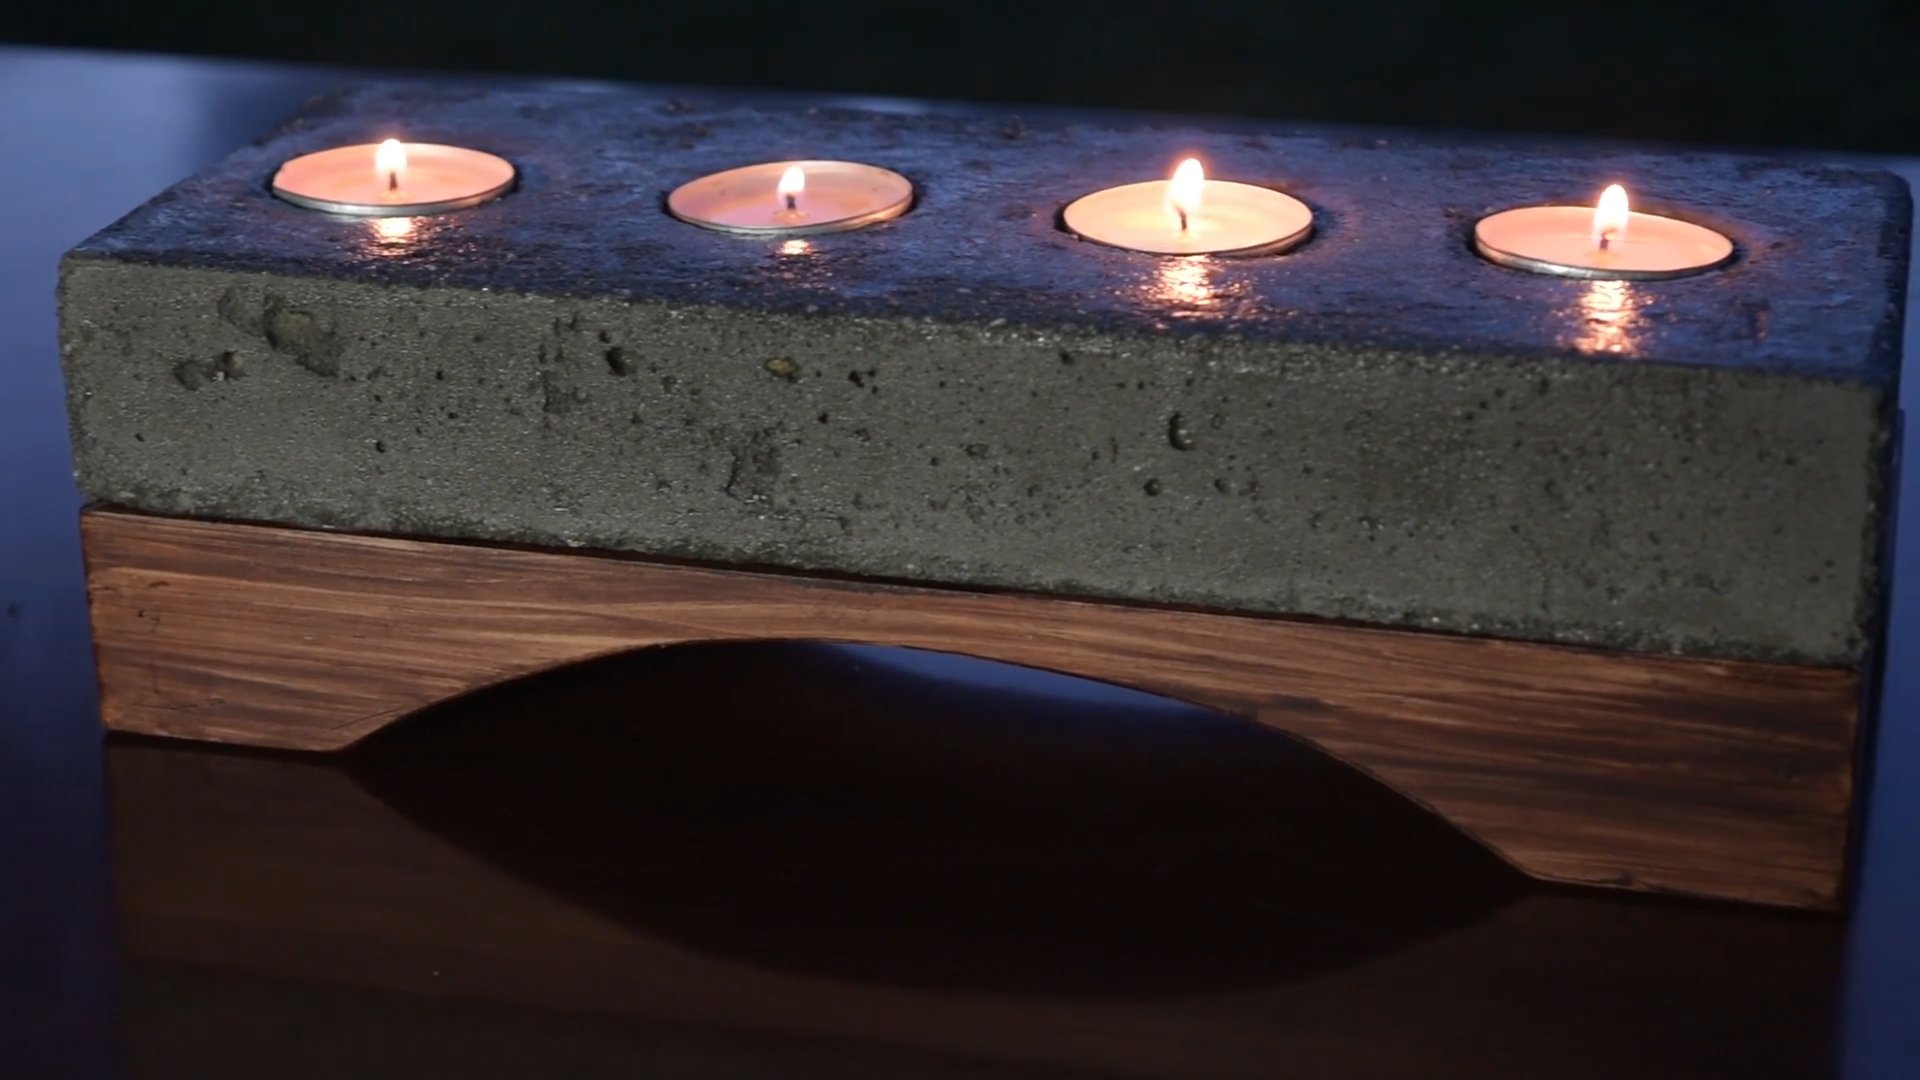
So, there you have it! Crafting your own DIY concrete candle holders isn’t just a project; it’s an experience. It’s about taking something raw and transforming it into something beautiful, functional, and uniquely yours. We’ve walked you through the process, highlighting the simplicity and affordability of creating these stylish accents for your home.
Why is this a must-try? Because in a world of mass-produced items, these candle holders offer a touch of individuality. They bring an industrial chic vibe to any space, blending seamlessly with minimalist, modern, or even rustic decor. Plus, the satisfaction of knowing you made them yourself is a reward in itself. Forget spending a fortune on trendy home decor; with a little concrete mix, some molds, and a dash of creativity, you can achieve a high-end look for a fraction of the cost.
But the beauty of this project lies in its versatility. Feel free to experiment with different molds. Think beyond the standard cylinder! Use silicone molds in geometric shapes, repurpose old yogurt containers for a more organic look, or even try creating a mold from cardboard for a truly custom design.
Consider adding pigments to your concrete mix for a pop of color. Earthy tones like terracotta or ochre can create a warm and inviting ambiance, while a touch of black pigment will give your candle holders a sleek, modern edge. You can also embed small decorative items like pebbles, glass beads, or even dried flowers into the concrete before it sets for a truly personalized touch.
Another variation to consider is the finish. While we’ve focused on a smooth, polished finish, you can also leave the concrete raw and textured for a more industrial aesthetic. Experiment with different sanding grits to achieve your desired level of smoothness. You can also seal the concrete with a sealant to protect it from moisture and stains, especially if you plan to use your candle holders outdoors.
Don’t be afraid to get creative with the type of candles you use. Pillar candles, tea lights, votives – they all work beautifully in these concrete holders. You can even create a larger holder to accommodate multiple candles for a dramatic centerpiece.
Ultimately, this DIY project is about unleashing your inner artist and creating something that reflects your personal style. It’s a chance to disconnect from the digital world and reconnect with the tactile experience of working with your hands.
We wholeheartedly encourage you to give this DIY concrete candle holders project a try. It’s easier than you think, and the results are incredibly rewarding. And most importantly, we want to hear about your experience! Share your creations with us on social media using #DIYConcreteCandles. We can’t wait to see what you come up with! Let us know what molds you used, what colors you experimented with, and any tips or tricks you discovered along the way. Your feedback will not only inspire others but also help us refine and improve this guide for future DIY enthusiasts. So, grab your supplies, get your hands dirty, and let’s create some beautiful concrete candle holders together!
Frequently Asked Questions
What kind of concrete mix should I use?
We recommend using a rapid-setting concrete mix for this project. It’s readily available at most hardware stores and dries much faster than standard concrete mix, allowing you to complete your project in a shorter amount of time. Look for a mix that is specifically designed for small projects and offers good workability. You can also use a fine-aggregate concrete mix for a smoother finish. Avoid using concrete mixes with large aggregates, as they can be difficult to work with and may not produce the desired aesthetic for your candle holders.
What type of mold is best for making concrete candle holders?
Silicone molds are generally considered the best option for making concrete candle holders. They are flexible, which makes it easy to remove the cured concrete without damaging it. They also come in a wide variety of shapes and sizes, allowing you to create unique and interesting designs. Plastic molds can also be used, but they may require a release agent (like cooking spray or petroleum jelly) to prevent the concrete from sticking. You can even repurpose everyday items like yogurt containers, cardboard boxes (lined with plastic), or even PVC pipes as molds. Just be sure to choose a mold that is sturdy enough to hold the weight of the wet concrete and that is the right size for your desired candle holder.
How long does it take for the concrete to dry?
The drying time for concrete depends on several factors, including the type of concrete mix used, the ambient temperature, and the humidity level. Rapid-setting concrete mixes typically dry within 24-48 hours. However, it’s always best to check the manufacturer’s instructions for specific drying times. To ensure proper curing, keep the concrete in a cool, dry place away from direct sunlight. You can also cover the mold with plastic wrap to help retain moisture and prevent cracking. Avoid demolding the concrete before it is fully cured, as this can lead to damage or breakage.
How can I add color to my concrete candle holders?
Adding color to your concrete candle holders is a great way to personalize them and match your home decor. You can use concrete pigments, which are specifically designed for coloring concrete. These pigments are available in a wide range of colors and can be added to the concrete mix before pouring. Start with a small amount of pigment and gradually add more until you achieve your desired color intensity. You can also use acrylic paints to paint the concrete after it has dried and cured. However, be sure to seal the painted surface with a sealant to protect it from moisture and wear. Another option is to add natural pigments like coffee grounds, cocoa powder, or turmeric to the concrete mix for subtle, earthy tones.
How do I seal my concrete candle holders?
Sealing your concrete candle holders is important to protect them from moisture, stains, and wear. There are several types of concrete sealers available, including acrylic sealers, epoxy sealers, and penetrating sealers. Acrylic sealers are a good option for indoor use, as they provide a durable and water-resistant finish. Epoxy sealers are more durable and chemical-resistant, making them suitable for outdoor use. Penetrating sealers penetrate the concrete and create a water-repellent barrier without changing the appearance of the concrete. Before applying the sealer, make sure the concrete is clean, dry, and free of any loose particles. Apply the sealer according to the manufacturer’s instructions, using a brush, roller, or sprayer. Allow the sealer to dry completely before using your candle holders.
What if my concrete candle holder cracks?
Cracking is a common issue with concrete projects, especially if the concrete dries too quickly or is not properly cured. Small hairline cracks are usually not a cause for concern and can even add to the rustic charm of the candle holder. However, larger cracks can compromise the structural integrity of the candle holder. To prevent cracking, make sure to use a high-quality concrete mix, follow the manufacturer’s instructions for mixing and curing, and avoid exposing the concrete to extreme temperatures or direct sunlight during the drying process. If your candle holder does crack, you can try to repair it using a concrete patching compound. Clean the crack thoroughly and apply the patching compound according to the manufacturer’s instructions. Allow the patching compound to dry completely before sanding and sealing the repaired area.
Can I use these candle holders outdoors?
Yes, you can use these candle holders outdoors, but it’s important to take certain precautions to protect them from the elements. First, make sure to use a concrete mix that is suitable for outdoor use. These mixes are typically more durable and resistant to weathering. Second, seal the concrete candle holders with a waterproof sealant to protect them from moisture and prevent cracking. Third, avoid placing the candle holders in direct sunlight or extreme temperatures, as this can cause the concrete to expand and contract, leading to cracking. Finally, consider adding drainage holes to the bottom of the candle holders to allow water to escape.
How do I clean my concrete candle holders?
Cleaning your concrete candle holders is relatively easy. For general cleaning, simply wipe them down with a damp cloth. For more stubborn stains, you can use a mild soap and water solution. Avoid using harsh chemicals or abrasive cleaners, as these can damage the concrete. If you spill wax on your candle holder, allow it to harden completely before gently scraping it off with a plastic scraper. You can also use a hairdryer to soften the wax before wiping it away with a cloth. To prevent stains, it’s a good idea to seal your concrete candle holders with a sealant before using them.


Leave a Comment