

DIY Cucumber Soap Recipe: Who knew crafting your own luxurious, skin-loving soap could be so easy and refreshing? Forget those harsh, chemical-laden bars from the store! I’m about to let you in on a little secret: you can create a gentle, hydrating cleanser right in your own kitchen.
The art of soapmaking stretches back millennia, with evidence suggesting its origins in ancient Babylon. While our ancestors might not have had cucumbers in their recipes, the desire for clean, healthy skin is timeless. Today, we’re taking that ancient craft and giving it a modern, DIY twist with the soothing power of cucumber.
Why should you bother making your own DIY Cucumber Soap Recipe? Well, for starters, you control exactly what goes into it! No more worrying about hidden ingredients or harsh chemicals irritating your skin. Cucumber is naturally hydrating and packed with antioxidants, making it perfect for soothing sensitive skin, reducing inflammation, and leaving you with a healthy, radiant glow. Plus, it’s incredibly satisfying to create something beautiful and useful with your own two hands. So, grab your apron, and let’s get started on this simple, yet rewarding project!
DIY Refreshing Cucumber Soap: A Step-by-Step Guide
Hey there, soap-making enthusiasts! I’m so excited to share this incredibly refreshing and skin-loving DIY cucumber soap recipe with you. This soap is perfect for summer, leaving your skin feeling cool, hydrated, and oh-so-clean. Plus, it’s a fantastic way to use up those extra cucumbers from your garden! Let’s dive in!
What You’ll Need: The Ingredients & Equipment
Before we get started, let’s gather all the necessary ingredients and equipment. Trust me, having everything ready beforehand will make the process much smoother and more enjoyable.
Ingredients:
* 1 lb (454g) Melt and Pour Soap Base (I prefer a clear or white base for the best color)
* 1 medium cucumber, peeled and roughly chopped
* 1-2 tablespoons of distilled water (if needed)
* 1 teaspoon of honey (optional, for extra moisturizing properties)
* 1/2 teaspoon of green soap colorant (optional, for a more vibrant green hue)
* 10-15 drops of cucumber fragrance oil or essential oil blend (optional, but highly recommended for a stronger cucumber scent)
* Dried cucumber slices for decoration (optional)
Equipment:
* Double boiler or heat-safe bowl and saucepan
* Sharp knife and cutting board
* Blender or food processor
* Spatula or spoon
* Soap molds (silicone molds are the easiest to use)
* Spray bottle with rubbing alcohol
* Measuring cups and spoons
* Heat-resistant gloves
* Eye protection (safety glasses or goggles)
Preparing the Cucumber Puree
This is a crucial step, as the quality of your cucumber puree will directly impact the final product. We want a smooth, fine puree to avoid any chunky bits in our soap.
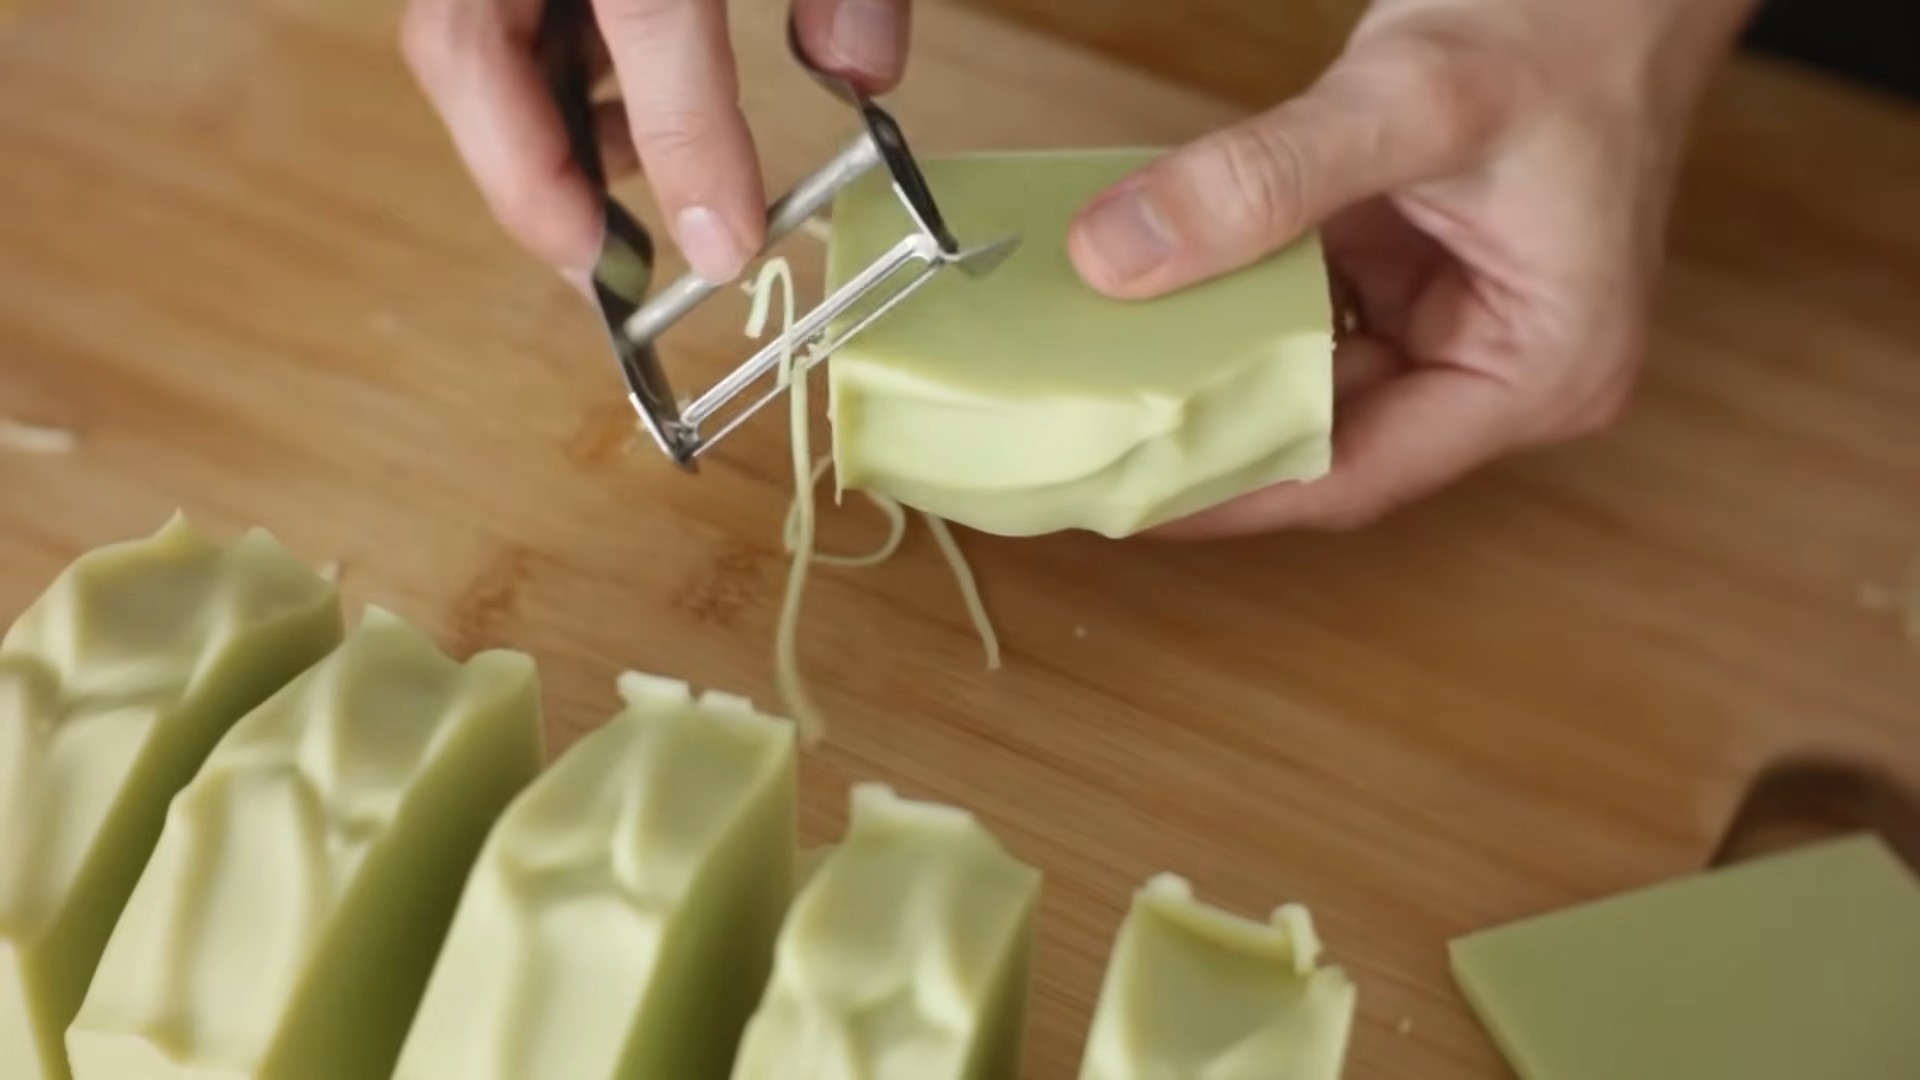
1. Peel and Chop the Cucumber: Start by thoroughly washing your cucumber. Then, using a sharp knife, peel the cucumber to remove the skin. Roughly chop the peeled cucumber into smaller pieces. This will make it easier for the blender to process.
2. Blend the Cucumber: Place the chopped cucumber into your blender or food processor. Blend until you achieve a smooth puree. If the mixture seems too thick and the blender is struggling, add distilled water, one tablespoon at a time, until it reaches a blendable consistency. Be careful not to add too much water, as it can affect the soap’s hardness.
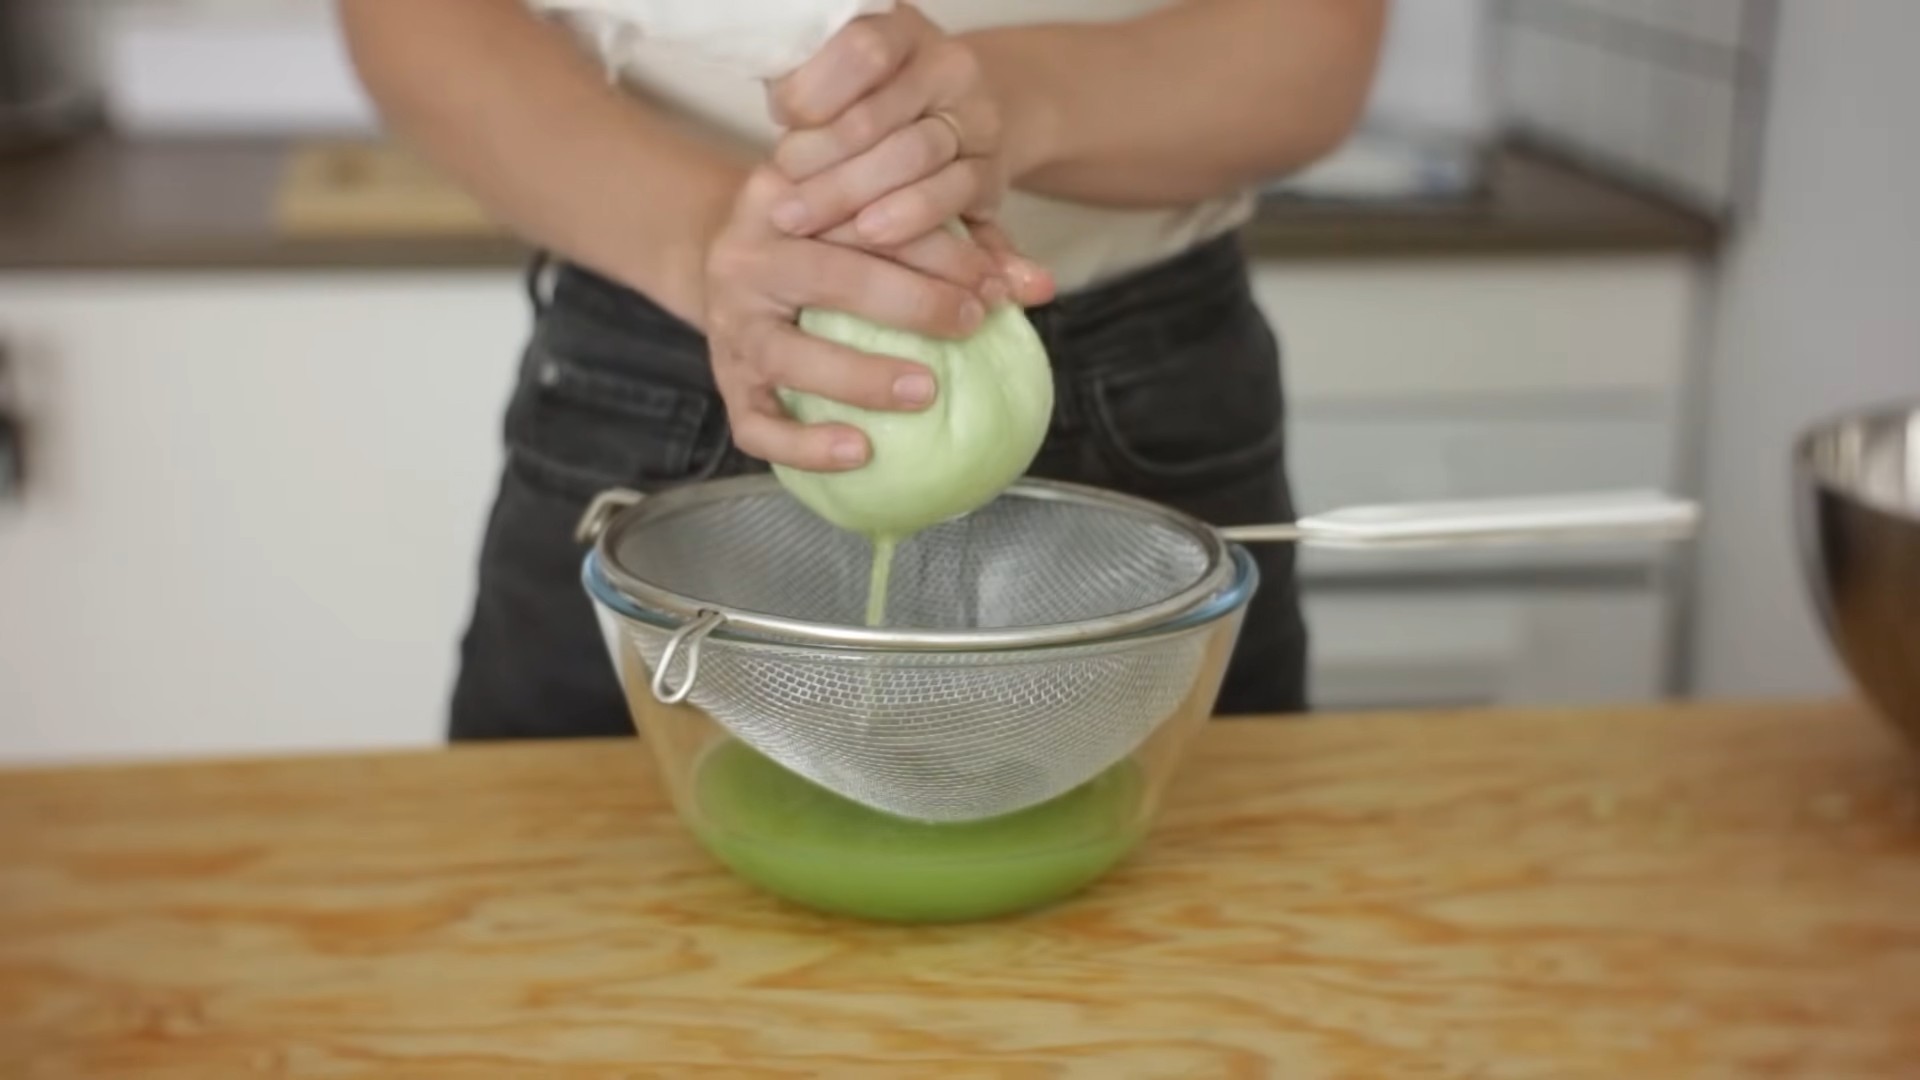
3. Strain the Puree (Optional): For an even smoother soap, you can strain the cucumber puree through a fine-mesh sieve or cheesecloth. This will remove any remaining pulp or seeds. I usually skip this step, but it’s a good option if you prefer a very refined texture.
Melting the Soap Base
Now, let’s move on to melting the soap base. It’s important to melt it gently and evenly to avoid burning or scorching.
1. Cut the Soap Base: Using a sharp knife, cut the melt and pour soap base into small, uniform cubes. This will help it melt more quickly and evenly.
2. Melt the Soap Base: There are two main methods for melting the soap base:
* Double Boiler Method: Fill a saucepan with about 2 inches of water and bring it to a simmer. Place a heat-safe bowl on top of the saucepan, ensuring the bottom of the bowl doesn’t touch the water. Add the cubed soap base to the bowl and stir occasionally until it’s completely melted.
* Microwave Method: Place the cubed soap base in a microwave-safe bowl. Microwave in 30-second intervals, stirring in between each interval, until the soap base is completely melted. Be careful not to overheat the soap, as it can burn.
3. Check the Temperature: Once the soap base is melted, use a thermometer to check the temperature. Ideally, it should be around 130-140°F (54-60°C). Avoid overheating the soap, as this can affect its quality and texture.
Combining the Ingredients
This is where the magic happens! We’ll combine the melted soap base with the cucumber puree and other additives to create our refreshing cucumber soap.
1. Add the Cucumber Puree: Carefully pour the cucumber puree into the melted soap base. Gently stir to combine. Be mindful of the temperature difference; adding cold puree to hot soap can cause it to seize up. If this happens, don’t panic! Just continue stirring gently until it smooths out.
2. Add Honey (Optional): If you’re using honey, add it to the mixture and stir well. Honey is a natural humectant, meaning it helps to draw moisture to the skin.
3. Add Colorant (Optional): If you want to enhance the green color of your soap, add a few drops of green soap colorant. Start with a small amount and add more until you achieve your desired shade. Remember, a little goes a long way!
4. Add Fragrance Oil or Essential Oil Blend (Optional): For a delightful cucumber scent, add your chosen fragrance oil or essential oil blend. I recommend using a cucumber-specific fragrance oil for the most authentic scent. Start with 10 drops and add more if needed, but be careful not to overdo it, as too much fragrance can irritate the skin.
5. Stir Thoroughly: Stir the mixture gently but thoroughly to ensure all the ingredients are evenly distributed. Avoid creating too many bubbles, as they can affect the appearance of the finished soap.
Pouring and Decorating the Soap
Now it’s time to pour the soap mixture into our molds and add any desired decorations.
1. Prepare the Molds: Make sure your soap molds are clean and dry. Silicone molds are the easiest to use, as they allow the soap to release easily once it’s hardened.
2. Pour the Soap: Carefully pour the soap mixture into the molds. Fill each mold to the desired level.
3. Spray with Rubbing Alcohol: Lightly spray the surface of the soap with rubbing alcohol. This will help to eliminate any bubbles that may have formed during pouring.
4. Add Decorations (Optional): If you’re using dried cucumber slices for decoration, gently press them into the surface of the soap while it’s still liquid. You can also add other decorative elements, such as dried herbs or flower petals.
Curing and Unmolding the Soap
The final step is to allow the soap to harden and cure before unmolding and using it.
1. Let the Soap Harden: Allow the soap to harden completely in the molds. This usually takes several hours, or even overnight. You can speed up the process by placing the molds in the refrigerator, but be careful not to freeze the soap.
2. Unmold the Soap: Once the soap is firm to the touch, gently unmold it from the molds. If the soap is sticking, you can try placing the molds in the freezer for a few minutes to help it release.
3. Cure the Soap (Optional): For a harder, longer-lasting soap, you can cure it for a few days. Place the unmolded soap bars on a wire rack in a cool, dry place with good air circulation. This will allow any excess moisture to evaporate, resulting in a harder, more durable soap.
Tips and Tricks for Perfect Cucumber Soap
Here are a few extra tips and tricks to help you create the perfect batch of DIY cucumber soap:
* Use Fresh, High-Quality Cucumbers: The better the quality of your cucumbers, the better the quality of your soap. Choose fresh, firm cucumbers that are free from blemishes.
* Adjust the Amount of Cucumber Puree: You can adjust the amount of cucumber puree to suit your preferences. More puree will result in a more moisturizing soap, but it can also make the soap softer.
* Experiment with Different Additives: Feel free to experiment with different additives, such as aloe vera gel, vitamin E oil, or other essential oils.
* Store Your Soap Properly: Store your finished soap bars in a cool, dry place away from direct sunlight. This will help to prevent them from melting or becoming discolored.
* Safety First: Always wear heat-resistant gloves and eye protection when working with hot soap base.
And there you have it! A simple and refreshing DIY cucumber soap recipe that you can easily make at home. I hope you enjoy this project as much as I do. Happy soap making!
Conclusion
So, there you have it! A simple, refreshing, and incredibly beneficial DIY cucumber soap recipe that you can whip up in your own kitchen. We’ve walked you through the process, highlighting the ease and affordability of creating your own skincare staple. But why is this DIY trick a must-try?
Firstly, you have complete control over the ingredients. No more deciphering long lists of chemicals and questionable additives. You know exactly what’s going into your soap, ensuring a gentle and nourishing cleanse for your skin. This is particularly important for those with sensitive skin or allergies, as you can tailor the recipe to exclude any potential irritants.
Secondly, the benefits of cucumber for your skin are undeniable. From its hydrating properties to its ability to soothe inflammation and reduce puffiness, cucumber is a powerhouse ingredient. By incorporating it directly into your soap, you’re infusing your daily cleansing routine with a dose of natural goodness. The gentle exfoliation provided by the cucumber pulp also helps to brighten and even out skin tone, leaving you with a healthy, radiant glow.
Thirdly, this DIY project is incredibly rewarding. There’s a certain satisfaction that comes from creating something with your own hands, especially when it’s something you use every day. Plus, it’s a fantastic way to reduce waste and embrace a more sustainable lifestyle. Think of all those plastic bottles you’ll be saving!
Looking for variations? Absolutely! Consider adding a few drops of essential oils to customize the scent and enhance the therapeutic benefits. Lavender essential oil can promote relaxation, while tea tree oil can help combat acne. You could also experiment with different herbs and botanicals, such as chamomile or calendula, for added soothing and anti-inflammatory properties. For a richer, more moisturizing soap, try incorporating a tablespoon of shea butter or cocoa butter into the melted soap base. And if you’re feeling adventurous, you can even create layered soaps by adding natural colorants like spirulina powder (for green) or beetroot powder (for pink).
The possibilities are endless! The key is to have fun and experiment until you find a combination that works perfectly for your skin.
We wholeheartedly encourage you to give this DIY cucumber soap recipe a try. It’s a simple, effective, and enjoyable way to elevate your skincare routine and experience the amazing benefits of natural ingredients. Don’t be intimidated – the process is much easier than you might think.
Once you’ve created your own batch of cucumber soap, we’d love to hear about your experience! Share your photos, tips, and variations in the comments below. Let’s build a community of DIY skincare enthusiasts and inspire others to embrace the power of homemade beauty. We are confident that you will love this DIY cucumber soap as much as we do!
Frequently Asked Questions (FAQ)
What type of soap base should I use for this recipe?
We recommend using a melt-and-pour soap base, such as glycerin, goat’s milk, or shea butter. These bases are easy to work with and readily available at craft stores or online. Glycerin soap base is a good option for all skin types, while goat’s milk soap base is particularly beneficial for dry or sensitive skin. Shea butter soap base adds extra moisture and is great for those with very dry skin. Avoid using harsh detergents or soaps that contain sulfates, as these can strip your skin of its natural oils.
How long does the soap need to cure before I can use it?
Melt-and-pour soap doesn’t require a long curing time like cold-process soap. Once the soap has cooled and hardened completely in the mold, it’s ready to use. This usually takes a few hours, but it’s best to leave it overnight to ensure it’s fully set.
Can I use regular cucumbers from the grocery store?
Yes, you can absolutely use regular cucumbers from the grocery store. However, organic cucumbers are always a better choice, as they are free from pesticides and other harmful chemicals. If you’re using non-organic cucumbers, be sure to wash them thoroughly before using them in your soap.
How do I prevent the cucumber from making the soap moldy?
The key to preventing mold is to use a minimal amount of cucumber pulp and to ensure that the soap dries completely after each use. The high water content in cucumber can potentially lead to mold growth if not properly managed. Finely grate the cucumber and squeeze out any excess juice before adding it to the soap base. You can also add a natural preservative, such as grapefruit seed extract, to help inhibit mold growth. Store your soap in a well-ventilated area and allow it to dry completely between uses. Using a soap dish with good drainage is also essential.
Can I add other ingredients to this soap recipe?
Absolutely! This recipe is highly customizable. You can add essential oils for fragrance and therapeutic benefits, herbs and botanicals for added soothing properties, or natural colorants for visual appeal. Some popular additions include lavender essential oil, chamomile flowers, calendula petals, spirulina powder, and beetroot powder. Just be sure to use skin-safe ingredients and to add them in moderation.
How long will the homemade cucumber soap last?
Homemade soap typically lasts for several months, depending on the ingredients and storage conditions. To prolong the shelf life of your cucumber soap, store it in a cool, dry place away from direct sunlight. Wrapping the soap in plastic wrap or storing it in an airtight container can also help prevent it from drying out or becoming discolored.
My soap is sweating. What should I do?
“Sweating” or glycerin dew is a common occurrence with melt-and-pour soap, especially in humid environments. It’s caused by the glycerin in the soap attracting moisture from the air. While it’s not harmful, it can be unsightly. To prevent sweating, try wrapping your soap in plastic wrap or storing it in an airtight container. If your soap is already sweating, simply wipe it off with a clean, dry cloth.
Can I use this soap on my face?
Yes, you can use this soap on your face, as long as you don’t have any known allergies to the ingredients. Cucumber is generally very gentle and soothing for the skin, making it a good choice for facial cleansing. However, it’s always a good idea to do a patch test on a small area of your skin before using it all over your face. If you experience any irritation, discontinue use.
What if I don’t have any molds?
If you don’t have any soap molds, you can use other containers as molds, such as silicone baking molds, plastic containers, or even cardboard boxes lined with parchment paper. Just make sure the container is clean and dry before pouring in the soap mixture.
Is this recipe safe for children?
This recipe is generally safe for children, but it’s always a good idea to supervise them during the soap-making process. Also, be sure to use gentle, skin-safe ingredients and to avoid adding any essential oils that may be irritating to children’s skin. A patch test is always recommended before using any new skincare product on a child.

Leave a Comment