

DIY Faucet Cleaning: Is your once-gleaming faucet now sporting a dull, crusty exterior? Don’t despair! Before you rush out to buy a replacement, let me tell you about a simple, effective, and surprisingly satisfying way to restore its sparkle. I’m talking about DIY faucet cleaning, and trust me, you’ll be amazed at the results you can achieve with just a few household items.
For generations, keeping our homes clean and functional has been a point of pride. Think about it – our ancestors didn’t have fancy cleaning products; they relied on ingenuity and readily available resources to maintain their homes. This tradition of resourcefulness is something we can all tap into, especially when it comes to tackling everyday cleaning tasks like, DIY faucet cleaning.
Why is this DIY trick so essential? Well, a grimy faucet isn’t just an eyesore; it can also harbor bacteria and affect the water flow. Hard water stains, soap scum, and mineral deposits can build up over time, making your faucet look older than it is and potentially impacting its performance. Plus, who wants to use a dirty faucet? With my easy-to-follow guide, you’ll learn how to banish those unsightly stains and restore your faucet to its former glory, saving you money and adding a touch of sparkle to your kitchen or bathroom. Let’s get started!
DIY Faucet Cleaning: Sparkling Clean Faucets Without Harsh Chemicals
Okay, let’s face it, faucets are magnets for grime, hard water stains, and soap scum. And nobody wants to start their day staring at a dull, crusty faucet! But don’t worry, you don’t need to resort to harsh chemicals to get them sparkling again. I’m going to walk you through some easy and effective DIY methods for cleaning your faucets, using ingredients you probably already have in your kitchen.
What You’ll Need
Before we dive in, let’s gather our supplies. The beauty of these methods is that they’re super budget-friendly!
* White Vinegar: This is our star player! Vinegar’s acidity helps dissolve hard water stains and soap scum.
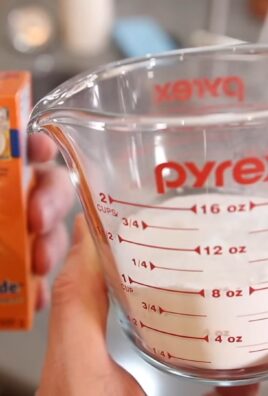
* Baking Soda: A gentle abrasive that helps scrub away stubborn grime.
* Dish Soap: For general cleaning and degreasing.
* Old Toothbrush: Perfect for getting into those hard-to-reach areas around the base of the faucet and handles.
* Microfiber Cloths: These are great for wiping down surfaces without leaving streaks.
* Spray Bottle: For applying vinegar solutions.
* Plastic Bag or Sandwich Bag: For soaking the faucet in vinegar.
* Rubber Bands or Twist Ties: To secure the bag around the faucet.
* Lemon (Optional): For extra cleaning power and a fresh scent.
* Olive Oil (Optional): For polishing and protecting your faucets.
* Soft Sponge: For gentle scrubbing.
* Water: For rinsing.
* Gloves (Optional): If you have sensitive skin, gloves are always a good idea.
Method 1: Vinegar Soak for Hard Water Stains
This method is fantastic for tackling stubborn hard water stains. It’s a little more involved, but the results are worth it!
Step-by-Step Instructions:
1. Prepare the Vinegar Solution: Pour white vinegar into a spray bottle. You can dilute it with a little water if you prefer, but for tough stains, I recommend using it undiluted.
2. Spray the Faucet: Generously spray the entire faucet with the vinegar solution, paying special attention to areas with visible hard water stains.
3. Soak the Faucet: This is the key to this method. Fill a plastic bag (sandwich bag for smaller faucets, larger bag for bigger ones) with white vinegar.
4. Secure the Bag: Carefully position the bag over the faucet, ensuring that the entire faucet head and any stained areas are submerged in the vinegar. Use rubber bands or twist ties to secure the bag tightly around the faucet neck. You want to make sure the vinegar stays in contact with the faucet.
5. Wait Patiently: Let the faucet soak in the vinegar for at least an hour, or even overnight for really stubborn stains. The longer it soaks, the better the vinegar can break down the mineral deposits. I usually leave it overnight if I have the time.
6. Remove the Bag: Carefully remove the bag and discard the vinegar.
7. Scrub with a Toothbrush: Use an old toothbrush to scrub away any remaining residue. Pay close attention to the base of the faucet, the handles, and any crevices where hard water stains tend to accumulate.
8. Rinse Thoroughly: Rinse the faucet thoroughly with clean water to remove any traces of vinegar.
9. Dry and Polish: Use a clean microfiber cloth to dry the faucet completely. For an extra shine, you can apply a small amount of olive oil to a clean cloth and buff the faucet. This will also help protect it from future water spots.
Method 2: Baking Soda Paste for Stubborn Grime
If you’re dealing with more than just hard water stains – like soap scum or general grime – a baking soda paste is your best friend.
Step-by-Step Instructions:
1. Make the Paste: In a small bowl, mix baking soda with a little water to form a thick paste. You want it to be thick enough to stick to the faucet.
2. Apply the Paste: Apply the baking soda paste to the faucet, focusing on areas with grime or soap scum.
3. Let it Sit: Allow the paste to sit on the faucet for about 15-20 minutes. This gives the baking soda time to loosen the grime.
4. Scrub Gently: Use a soft sponge or an old toothbrush to gently scrub the faucet. Avoid using abrasive scrubbers, as they can scratch the finish.
5. Rinse Thoroughly: Rinse the faucet thoroughly with clean water to remove all traces of baking soda.
6. Dry and Polish: Dry the faucet with a clean microfiber cloth. Again, you can use a little olive oil to polish and protect the faucet.
Method 3: Dish Soap and Water for General Cleaning
For regular maintenance and light cleaning, a simple solution of dish soap and water is often all you need.
Step-by-Step Instructions:
1. Prepare the Solution: Mix a few drops of dish soap with warm water in a bowl.
2. Apply the Solution: Dip a soft sponge or microfiber cloth into the soapy water and wipe down the entire faucet.
3. Scrub Gently: Use the sponge or cloth to gently scrub away any dirt or grime.
4. Rinse Thoroughly: Rinse the faucet thoroughly with clean water.
5. Dry and Polish: Dry the faucet with a clean microfiber cloth.
Method 4: Lemon Power for Extra Cleaning and Freshness
Lemons are not only great for cooking, but they’re also fantastic natural cleaners! The citric acid in lemons helps to dissolve hard water stains and leaves a fresh, clean scent.
Step-by-Step Instructions:
1. Cut the Lemon: Cut a lemon in half.
2. Rub the Faucet: Rub the cut side of the lemon directly onto the faucet, focusing on areas with hard water stains or grime.
3. Let it Sit: Allow the lemon juice to sit on the faucet for about 10-15 minutes.
4. Scrub Gently: Use a soft sponge or an old toothbrush to gently scrub the faucet.
5. Rinse Thoroughly: Rinse the faucet thoroughly with clean water.
6. Dry and Polish: Dry the faucet with a clean microfiber cloth.
Dealing with Specific Faucet Types
The cleaning method you choose might depend on the type of faucet you have. Here’s a quick guide:
* Chrome Faucets: These are generally durable and can withstand most cleaning methods. However, avoid using abrasive cleaners, as they can scratch the finish.
* Brushed Nickel Faucets: These faucets are more delicate than chrome and can be easily scratched. Use gentle cleaning methods and avoid harsh chemicals.
* Oil-Rubbed Bronze Faucets: These faucets have a special finish that can be damaged by harsh cleaners. Use mild dish soap and water or a gentle vinegar solution.
* Gold-Plated Faucets: These are the most delicate and require extra care. Use only mild dish soap and water and avoid scrubbing.
Preventative Measures: Keeping Your Faucets Clean Longer
Okay, so you’ve got your faucets sparkling clean. Now, how do you keep them that way? Here are a few tips:
* Wipe Down After Use: After each use, wipe down your faucets with a clean, dry cloth. This will prevent water spots and soap scum from building up.
* Address Leaks Promptly: Leaky faucets can contribute to hard water stains. Fix any leaks as soon as possible.
* Use a Water Softener: If you have hard water, consider installing a water softener. This will help reduce the amount of mineral buildup on your faucets and other fixtures.
* Regular Cleaning: Make it a habit to clean your faucets regularly, even if they don’t look dirty. A quick wipe-down with dish soap and water once a week can go a long way.
Troubleshooting Common Faucet Cleaning Problems
Sometimes, even with the best methods, you might encounter some challenges. Here are a few common problems and how to solve them:
* Stubborn Hard Water Stains: If the vinegar soak isn’t working, try repeating the process or using a stronger vinegar solution. You can also try using a commercial hard water stain remover, but be sure to test it in an inconspicuous area first.
* Scratched Faucet Finish: If you accidentally scratch your faucet, you can try using a metal polish to buff out the scratches. However, be careful not to damage the finish further.
* Clogged Aerator: The aerator is the small screen at the end of the faucet that controls the water flow. Over time, it can become clogged with mineral deposits. To clean it, unscrew the aer

Conclusion
So, there you have it! This simple, yet incredibly effective, DIY faucet cleaning method is a game-changer for anyone tired of battling stubborn hard water stains, soap scum, and the general grime that accumulates on our faucets. We’ve walked you through the process, highlighting how easy it is to achieve a sparkling clean faucet without resorting to harsh chemicals or expensive cleaning products.
Why is this a must-try? Because it’s economical, environmentally friendly, and, most importantly, it works! Think about the money you’ll save on commercial cleaners. Consider the reduced exposure to potentially harmful chemicals in your home. And, most of all, imagine the satisfaction of seeing your faucets gleam like new, reflecting the pride you take in maintaining a clean and healthy home.
But the benefits don’t stop there. This DIY faucet cleaning method is also incredibly versatile. For instance, if you’re dealing with particularly stubborn stains, you can try adding a tablespoon of baking soda to the vinegar solution to create a powerful cleaning paste. This paste can be applied directly to the affected areas and left to sit for a few minutes before scrubbing gently. Another variation involves using lemon juice instead of vinegar. Lemon juice is a natural disinfectant and has a pleasant citrus scent, making it a great alternative for those who are sensitive to the smell of vinegar. You can also use an old toothbrush to get into those hard-to-reach crevices around the base of the faucet and the handles.
Furthermore, consider the type of faucet you’re cleaning. For delicate finishes like brushed nickel or gold, it’s crucial to test the cleaning solution in an inconspicuous area first to ensure it doesn’t damage the finish. You might also want to use a softer cloth or sponge to avoid scratching the surface. Remember, gentle is key when dealing with sensitive materials.
This DIY faucet cleaning technique isn’t just about aesthetics; it’s about extending the life of your faucets. By regularly removing mineral buildup and grime, you’re preventing corrosion and ensuring that your faucets continue to function smoothly for years to come. A clean faucet is a happy faucet!
We are confident that once you try this DIY faucet cleaning trick, you’ll be amazed by the results. It’s a simple, effective, and affordable way to keep your faucets looking their best. So, ditch the expensive cleaners and embrace the power of natural ingredients.
We encourage you to give this DIY faucet cleaning method a try and see the difference for yourself. Don’t just take our word for it – experience the satisfaction of a sparkling clean faucet firsthand. And, most importantly, we want to hear about your experience! Share your before-and-after photos, your tips and tricks, and any variations you’ve discovered in the comments below. Let’s create a community of DIY enthusiasts who are passionate about keeping their homes clean and healthy. Your feedback will not only help other readers but also inspire us to continue sharing valuable DIY solutions. Let us know what worked for you, what challenges you faced, and any creative solutions you came up with. Together, we can make our homes shine, one faucet at a time!
Frequently Asked Questions (FAQ)
What kind of vinegar should I use for DIY faucet cleaning?
White distilled vinegar is generally recommended for DIY faucet cleaning. It’s readily available, inexpensive, and effective at dissolving mineral deposits and soap scum. Avoid using colored vinegars, such as apple cider vinegar or balsamic vinegar, as they may stain or discolor your faucet. The acidity of white distilled vinegar is ideal for breaking down grime without being overly harsh on most faucet finishes. However, always test in an inconspicuous area first, especially on delicate finishes.
How often should I clean my faucets using this DIY method?
The frequency of cleaning depends on several factors, including the hardness of your water, the amount of use your faucets get, and your personal preference. As a general guideline, cleaning your faucets every one to two weeks is a good starting point. If you live in an area with hard water, you may need to clean them more frequently to prevent mineral buildup. Regularly wiping down your faucets with a damp cloth after each use can also help to minimize the need for deep cleaning.
Can I use this DIY faucet cleaning method on all types of faucets?
While this method is generally safe for most types of faucets, it’s essential to exercise caution when cleaning faucets with delicate finishes, such as brushed nickel, gold, or oil-rubbed bronze. Always test the cleaning solution in an inconspicuous area first to ensure it doesn’t damage the finish. For these types of faucets, you may want to dilute the vinegar solution with water or use a gentler alternative, such as lemon juice. Avoid using abrasive cleaners or scrub brushes, as they can scratch or dull the finish.
What if the stains on my faucet are really stubborn and won’t come off?
For particularly stubborn stains, you can try a few different approaches. First, increase the concentration of vinegar in the cleaning solution. You can also try creating a paste by mixing baking soda with vinegar and applying it directly to the affected areas. Let the paste sit for 15-20 minutes before scrubbing gently with a soft cloth or toothbrush. If the stains persist, you may need to repeat the process several times. In extreme cases, you can consider using a commercial limescale remover, but be sure to follow the manufacturer’s instructions carefully and test it in an inconspicuous area first.
Is there a way to prevent hard water stains from forming on my faucets in the first place?
Yes, there are several things you can do to prevent hard water stains from forming on your faucets. The most effective solution is to install a water softener in your home. Water softeners remove the minerals that cause hard water stains, such as calcium and magnesium. Another option is to wipe down your faucets with a dry cloth after each use. This will help to prevent water droplets from evaporating and leaving behind mineral deposits. You can also apply a sealant specifically designed for faucets to create a protective barrier against hard water stains. Regularly cleaning your faucets with a mild cleaning solution can also help to prevent buildup.
Can I use this method to clean other bathroom fixtures, like showerheads and sinks?
Absolutely! This DIY faucet cleaning method is also effective for cleaning other bathroom fixtures, such as showerheads, sinks, and even toilets. The vinegar solution can help to dissolve mineral deposits, soap scum, and other types of grime that accumulate on these surfaces. Just be sure to test the solution in an inconspicuous area first, especially on delicate surfaces like marble or granite. For showerheads, you can soak them in a vinegar solution overnight to remove stubborn mineral buildup. For sinks and toilets, you can apply the vinegar solution directly to the affected areas and scrub gently with a brush or sponge.
What if I don’t have vinegar? Can I use something else?
If you don’t have vinegar on hand, you can try using lemon juice as a substitute. Lemon juice is a natural disinfectant and has a similar acidity to vinegar, making it effective at dissolving mineral deposits and soap scum. You can also try using a mixture of baking soda and water to create a cleaning paste. Baking soda is a mild abrasive that can help to scrub away stubborn stains. However, be careful not to scrub too hard, as it can scratch delicate surfaces. In some cases, a mild dish soap and warm water may be sufficient for removing light grime and dirt.

Leave a Comment