

DIY Gold Chain Wall Lamp: Ever dreamt of adding a touch of glamour and unique personality to your living space without breaking the bank? I know I have! Forget those generic, mass-produced lighting fixtures. We’re diving headfirst into a dazzling DIY project that will transform your walls and illuminate your creativity.
The concept of using chains in interior design isn’t entirely new. Think back to the opulent chandeliers of the Victorian era, where cascading chains added a sense of grandeur and sophistication. While we’re not building a chandelier (though, who knows, maybe that’s next!), we’re borrowing that same elegant aesthetic and giving it a modern, DIY twist.
Why a DIY Gold Chain Wall Lamp, you ask? Because everyone deserves a little sparkle in their lives! Seriously though, store-bought wall lamps can be expensive and often lack that personal touch. This project allows you to customize the size, shape, and overall style to perfectly match your décor. Plus, it’s a fantastic way to recycle materials and unleash your inner artist. Imagine the satisfaction of knowing you created something beautiful and functional with your own two hands. So, grab your tools, let’s get crafting, and prepare to light up your world with this stunning DIY project!
DIY Gold Chain Wall Lamp: A Touch of Glam for Your Walls
Okay, let’s be honest, who doesn’t love a little bit of glam? And what’s more glam than gold? I’ve been obsessed with those fancy, expensive wall lamps I’ve seen in design magazines, but my wallet definitely isn’t. So, I decided to take matters into my own hands and create a stunning gold chain wall lamp that looks like a million bucks, but costs way less. This project is surprisingly easy, and I’m so excited to share it with you!
Materials You’ll Need:
Before we dive in, let’s gather our supplies. Here’s what you’ll need to create your own dazzling gold chain wall lamp:
* Heavy-duty gold chain: This is the star of the show! I recommend a chain with larger links for a more dramatic effect. You can find this at most hardware stores or online. Measure the length you need based on how far you want the lamp to hang from the wall and how low you want the bulb to sit. I used about 6 feet for each side.
* Lamp cord with plug and socket: You can buy these pre-assembled at most hardware stores or online. Make sure the socket is compatible with the bulb you plan to use.
* Light bulb: Choose a bulb that complements the gold chain. I went with a vintage-style Edison bulb for a warm, inviting glow. LED bulbs are also a great option for energy efficiency.
* Wall hook or bracket: This will support the weight of the lamp. Choose a sturdy hook or bracket that can handle the weight of the chain, cord, and bulb. I opted for a decorative gold hook to match the chain.
* S-hooks (optional): These can be helpful for adjusting the length of the chain and attaching the lamp cord.
* Wire strippers: Essential for safely working with electrical wires.
* Screwdriver: You’ll need this to attach the wall hook or bracket.
* Drill (if needed): Depending on the type of wall hook or bracket you choose, you may need a drill to create pilot holes.
* Pencil: For marking where to drill holes.
* Measuring tape: To ensure accurate measurements.
* Safety glasses: Always protect your eyes when working with tools.
* Gloves (optional): To protect your hands.
Step-by-Step Instructions:
Alright, let’s get started! Here’s how to assemble your very own gold chain wall lamp:
1. Prepare the Chain: First, measure and cut your gold chain into two equal lengths. This will ensure that the lamp hangs evenly. I used bolt cutters to cut the chain, but you can also use heavy-duty wire cutters. Be careful when cutting the chain, as the links can fly off.
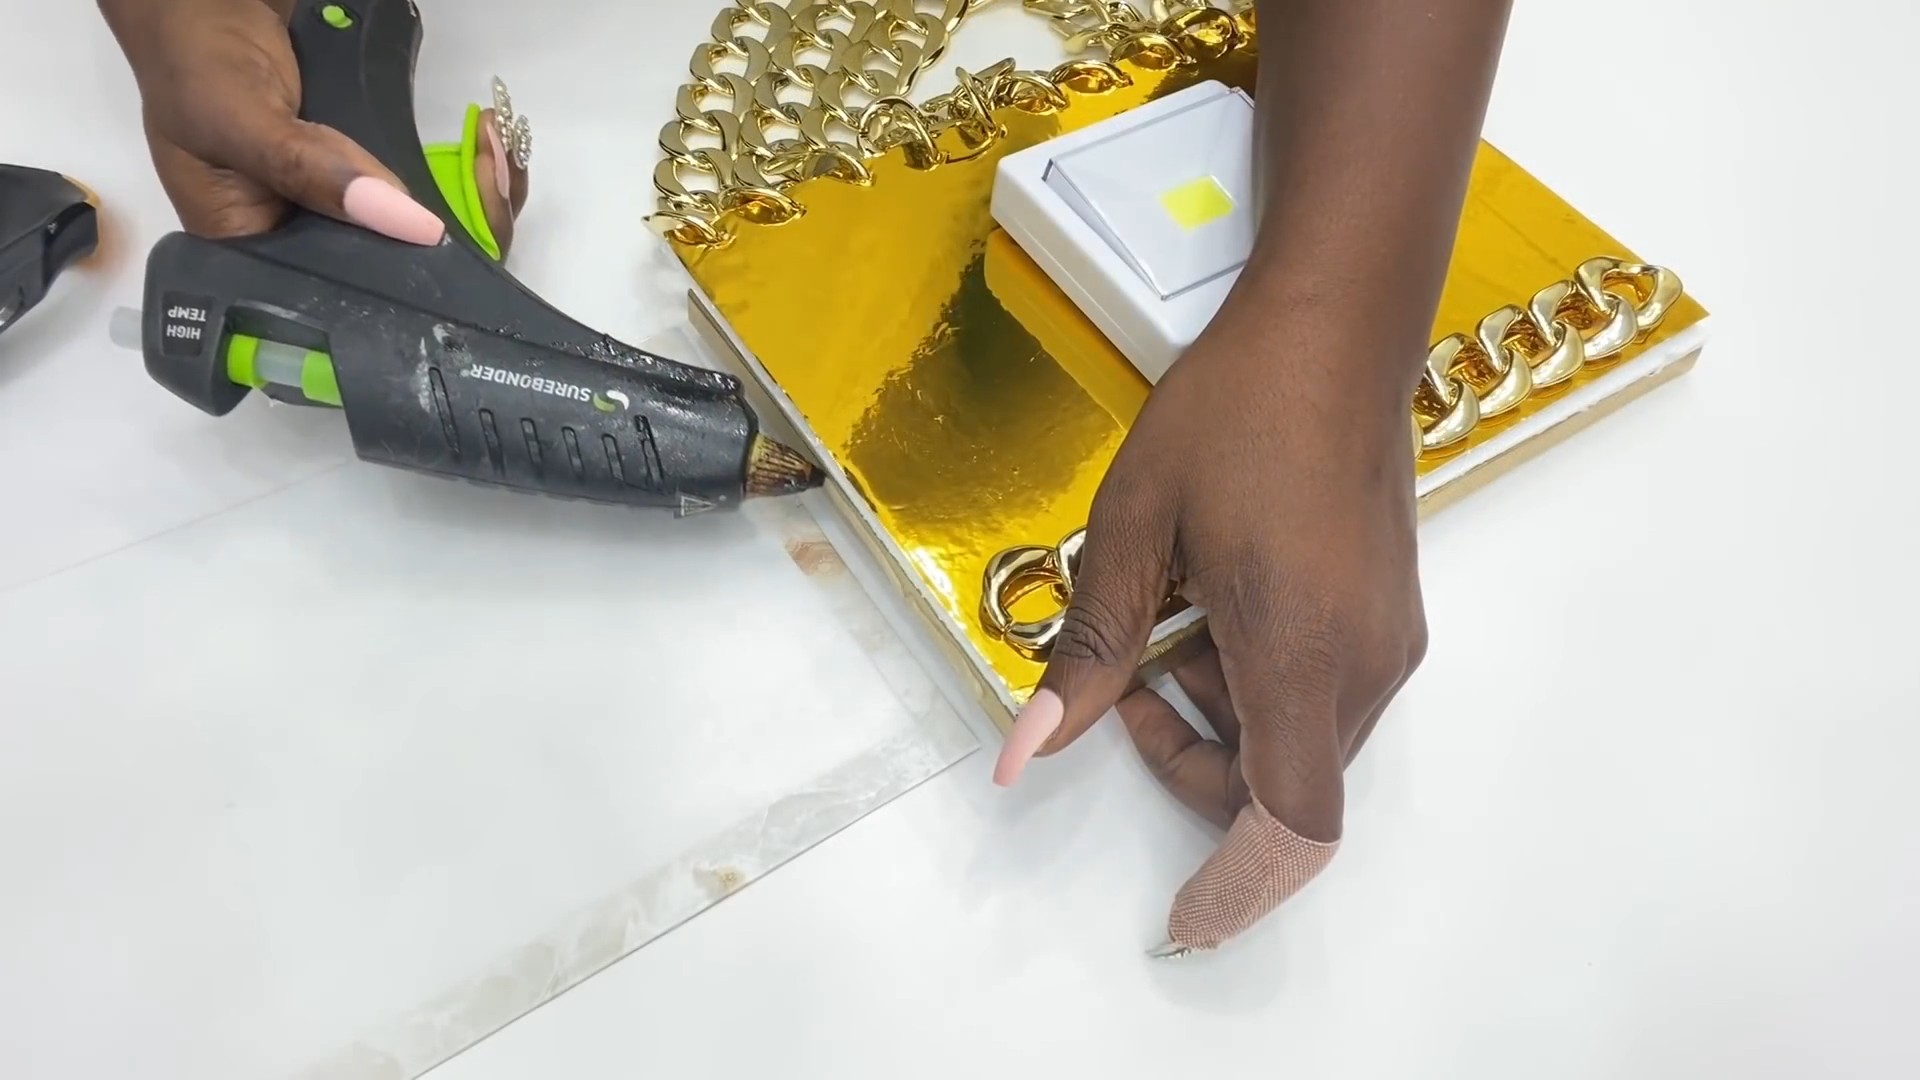
2. Attach the Lamp Cord: Now, let’s attach the lamp cord to the chain. This is where the S-hooks come in handy.
* If using S-hooks: Attach an S-hook to the top link of each chain. Then, attach the lamp cord to the S-hooks. This will allow you to easily adjust the length of the chain later on.
* If not using S-hooks: Carefully weave the lamp cord through the links of the chain. Make sure the cord is evenly distributed along the length of the chain.
3. Prepare the Wall Hook or Bracket: Next, let’s prepare the wall hook or bracket.
* Choose your location: Decide where you want to hang your lamp. Consider the placement of electrical outlets and the overall aesthetic of the room.
* Mark the spot: Use a pencil to mark the spot where you want to install the wall hook or bracket.
* Drill pilot holes (if needed): If your wall hook or bracket requires screws, use a drill to create pilot holes. This will make it easier to insert the screws and prevent the wood from splitting.
* Attach the hook or bracket: Use a screwdriver to attach the wall hook or bracket to the wall. Make sure it is securely fastened.
4. Hang the Chain: Now, it’s time to hang the chain from the wall hook or bracket.
* Evenly distribute the weight: Make sure the weight of the chain is evenly distributed on the hook or bracket.
* Adjust the length (if needed): If you used S-hooks, you can easily adjust the length of the chain to achieve the desired height.
5. Install the Light Bulb: Carefully screw the light bulb into the socket. Make sure the bulb is securely fastened.
6. Plug it In and Test: Finally, plug the lamp into an electrical outlet and test it to make sure it’s working properly. If the lamp doesn’t turn on, double-check the wiring and the bulb.
Adding Extra Flair (Optional):
Want to take your gold chain wall lamp to the next level? Here are a few ideas:
* Add a dimmer switch: A dimmer switch will allow you to adjust the brightness of the lamp, creating a more ambient atmosphere.
* Wrap the chain with fabric: For a softer look, try wrapping the chain with velvet or silk ribbon.
* Add decorative beads or charms: String beads or charms onto the chain for a personalized touch.
* Paint the chain: If gold isn’t your thing, you can paint the chain any color you like.
Safety First!
Before I forget, let’s talk about safety. Working with electricity can be dangerous, so it’s important to take precautions.
* Always disconnect the power: Before working on any electrical project, always disconnect the power at the circuit breaker.
* Use insulated tools: Use insulated tools to prevent electric shock.
* Wear safety glasses: Protect your eyes from flying debris.
* If you’re not comfortable working with electricity, consult a qualified electrician.
Troubleshooting Tips:
Sometimes, things don’t go exactly as planned. Here are a few troubleshooting tips to help you out:
* Lamp doesn’t turn on: Check the bulb, the wiring, and the circuit breaker.
* Chain is too long or too short: Adjust the length of the chain using S-hooks or by removing links.
* Wall hook or bracket is not secure: Use longer screws or a different type of wall anchor.
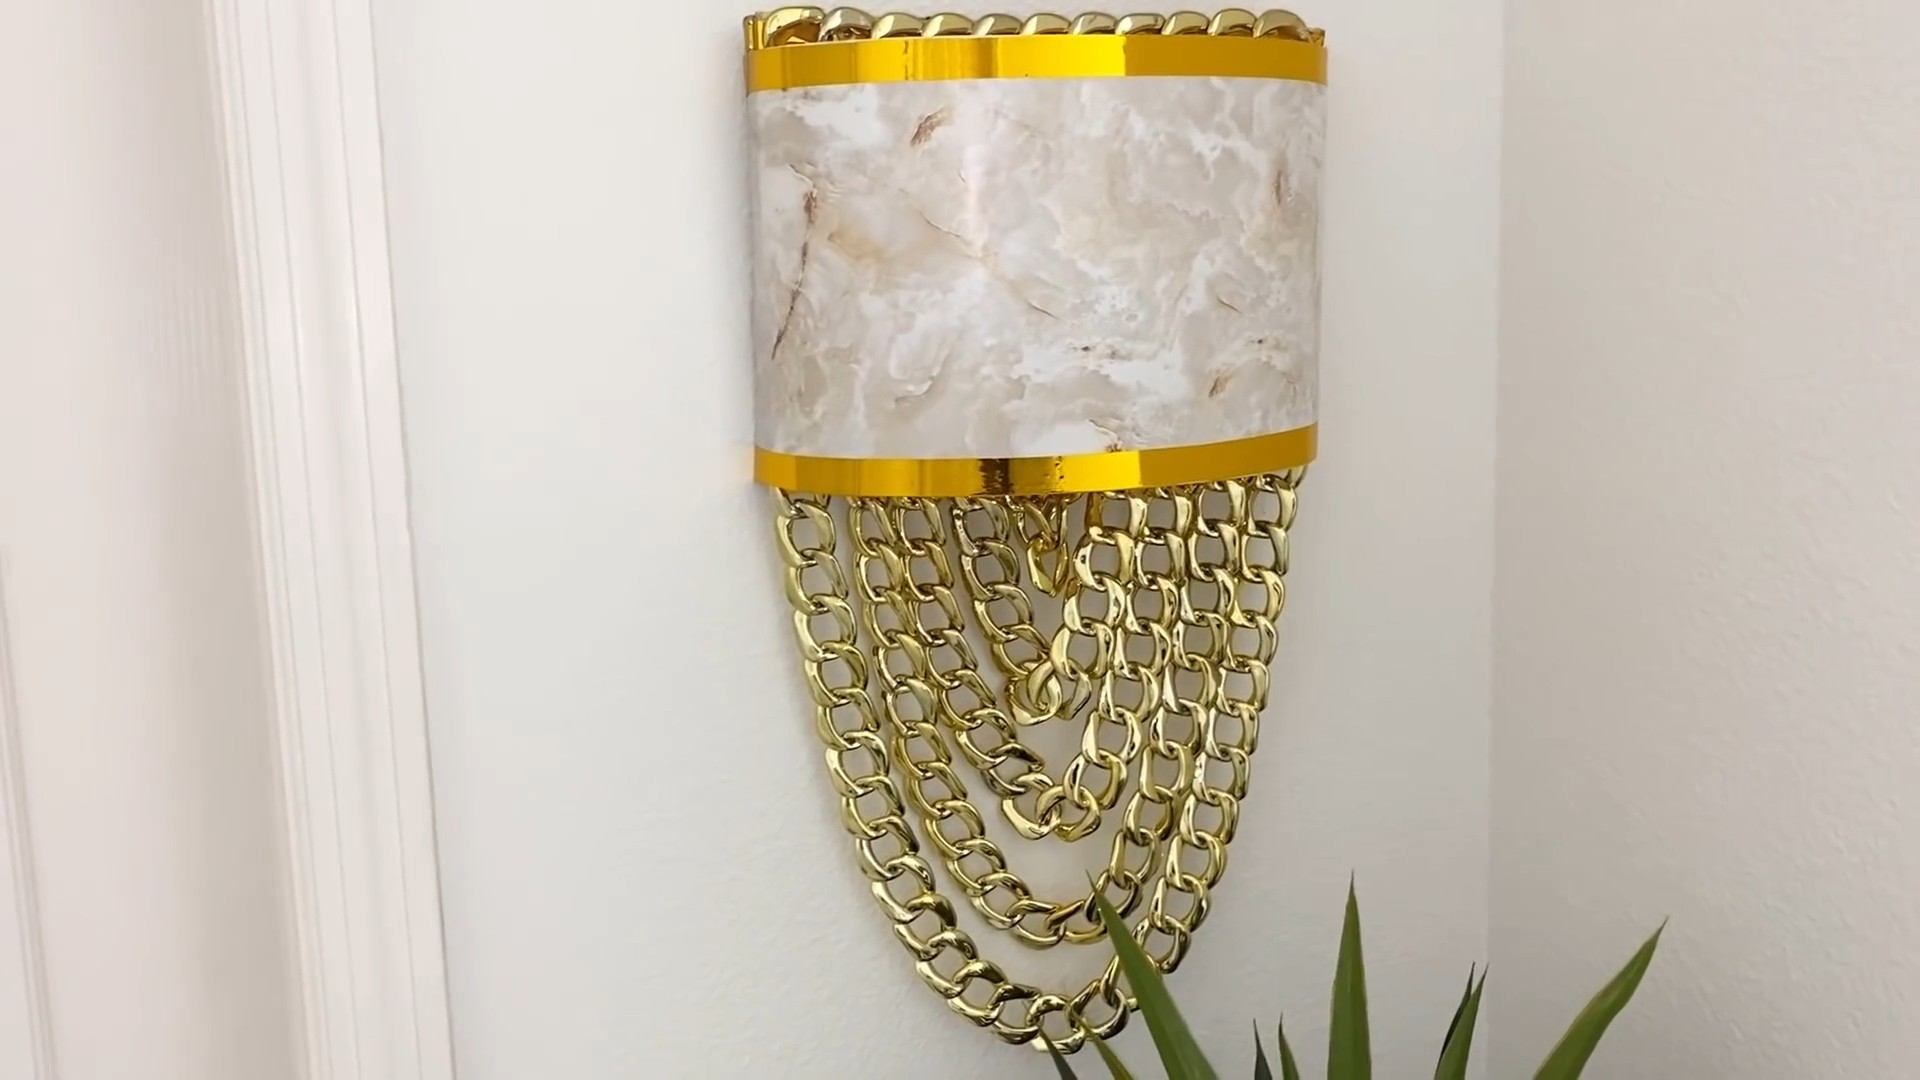
Enjoy Your New Gold Chain Wall Lamp!
And there you have it! Your very own DIY gold chain wall lamp. I hope you enjoyed this project as much as I did. Now, sit back, relax, and enjoy the warm, inviting glow of your new lamp. I’m sure it will add a touch of glam to any room in your home. I absolutely love how mine turned out, and I get compliments on it all the time! It’s a great conversation starter and a unique piece of decor that I made myself. Plus, knowing I saved a ton of money by DIYing it makes it even sweeter. Happy crafting!
Conclusion
So, there you have it! Transforming an ordinary space into a haven of chic sophistication is now within your reach with this incredibly simple, yet stunning, DIY gold chain wall lamp project. Forget expensive designer lighting; with a little creativity and minimal effort, you can achieve a high-end look that reflects your personal style and elevates your home decor.
Why is this DIY trick a must-try? Because it’s more than just a lighting solution; it’s a statement piece. It’s a conversation starter. It’s a testament to the power of resourcefulness and the beauty of handmade creations. This project allows you to inject personality into your space without breaking the bank. The warm glow emanating from the gold chain creates an inviting ambiance, perfect for reading nooks, bedrooms, or even as accent lighting in your living room.
But the beauty of DIY lies in its adaptability. Feel free to experiment with different chain styles. Consider using a thicker, more industrial chain for a bolder look, or opt for a delicate, finer chain for a more subtle and elegant feel. You can also play with the length of the chain to create varying levels of illumination and visual interest. Don’t be afraid to incorporate other embellishments, such as beads, crystals, or even small decorative charms, to further personalize your DIY gold chain wall lamp.
Another variation to consider is the type of light bulb you use. A warm-toned Edison bulb will cast a cozy, vintage glow, while a brighter LED bulb will provide more functional lighting. Experiment with different bulb shapes and sizes to find the perfect fit for your aesthetic. You could even explore smart bulbs that allow you to control the brightness and color temperature remotely.
The possibilities are truly endless! This project is a blank canvas for your creativity. It’s an opportunity to express your unique style and transform your space into a reflection of your personality.
We wholeheartedly encourage you to give this DIY gold chain wall lamp project a try. It’s a rewarding experience that will not only enhance your home decor but also ignite your creative spirit. And most importantly, we want to hear about your experience! Share your photos, tips, and variations with us. Let’s inspire each other and create a community of DIY enthusiasts who are passionate about transforming their homes with unique and affordable creations.
Don’t hesitate any longer! Gather your supplies, unleash your creativity, and embark on this exciting DIY adventure. We’re confident that you’ll be thrilled with the results. Happy crafting!
Frequently Asked Questions (FAQ)
What kind of chain should I use for this DIY project?
The type of chain you use is entirely up to your personal preference and the overall aesthetic you’re aiming for. For a more delicate and elegant look, consider using a finer, more delicate gold chain. For a bolder, more industrial feel, opt for a thicker, chunkier chain. You can find a wide variety of chains at most craft stores, hardware stores, or online retailers. Consider the weight of the chain as well, especially if you plan on using a heavier light fixture. You want to ensure the chain is strong enough to support the weight safely. Brass chains that are gold plated are a great option.
How do I hang the chain securely on the wall?
Safety is paramount when hanging anything on the wall, especially something that involves electricity. We recommend using sturdy hooks or anchors that are specifically designed for the weight of your light fixture and chain. Drywall anchors are suitable for lighter fixtures, while stud finders and screws are necessary for heavier items. Always follow the manufacturer’s instructions for installing the hooks or anchors. Before drilling any holes, double-check for any hidden wires or pipes in the wall. If you’re unsure about the proper installation techniques, it’s always best to consult with a professional.
What type of light fixture is best suited for this project?
A lightweight pendant light fixture is ideal for this DIY project. Look for fixtures that have a simple design and are easy to disassemble. You can often find affordable options at home improvement stores or online retailers. Consider the size and shape of the fixture in relation to the chain you’ve chosen. A smaller fixture will complement a finer chain, while a larger fixture may require a thicker, more substantial chain. Make sure the fixture has a secure attachment point for the chain.
Can I use a dimmer switch with this DIY gold chain wall lamp?
Yes, you can absolutely use a dimmer switch with this project, provided that the light bulb you’re using is compatible with dimming. LED bulbs specifically labeled as “dimmable” are required for use with dimmer switches. Using a non-dimmable bulb with a dimmer switch can cause flickering, buzzing, or even damage to the bulb or the switch. A dimmer switch allows you to adjust the brightness of the light, creating a more customized and versatile lighting solution.
How do I hide the electrical cord?
Hiding the electrical cord is crucial for achieving a clean and polished look. There are several options you can consider. You can use cord covers or cable concealers, which are paintable plastic channels that attach to the wall and hide the cord. Another option is to run the cord behind furniture or along baseboards to minimize its visibility. If you’re comfortable working with electrical wiring, you can also consider hardwiring the fixture directly into the wall, but this should only be done by a qualified electrician.
What if I don’t want to use a gold chain? What other options are there?
The beauty of this DIY project is its versatility. If gold isn’t your style, you can easily substitute it with other materials. Silver chains, copper chains, or even rope can create a completely different look. You can also experiment with different colors and finishes. Consider painting the chain a color that complements your existing decor. You could also use a combination of different materials, such as chain and beads, to create a unique and personalized design.
How much will this DIY project cost?
The cost of this DIY project will vary depending on the materials you choose and where you purchase them. However, it’s generally a very affordable project compared to buying a pre-made designer wall lamp. The chain will likely be the most significant expense, but you can often find affordable options at craft stores or online retailers. The light fixture can also be relatively inexpensive, especially if you opt for a simple design. Overall, you can expect to spend anywhere from $20 to $50 on this project, depending on your choices.
Is this DIY project safe for renters?
This project can be renter-friendly, but it’s important to consider your lease agreement and the rules of your rental property. If you’re not allowed to make any permanent changes to the walls, you can use removable hooks or adhesive strips to hang the chain. These hooks are designed to be easily removed without damaging the paint or drywall. However, it’s always a good idea to test the hooks in an inconspicuous area first to ensure they don’t leave any residue or damage. If you’re unsure about the rules of your rental property, it’s best to check with your landlord before starting the project.

Leave a Comment