

DIY Grout Cleaner: Are you tired of staring at dingy, stained grout lines that seem impossible to clean? I know I am! It’s like they’re mocking your best cleaning efforts. But don’t despair, because I’m about to share some amazing DIY grout cleaner tricks that will have your tiles sparkling like new again!
Grout, that porous material between your tiles, has been used for centuries, dating back to ancient Roman times. While its purpose is to bind and protect, it’s also a magnet for dirt, grime, and mildew. Over time, these build-ups can make even the most beautiful tile work look dull and uninviting. That’s why having a reliable DIY grout cleaner recipe in your arsenal is essential.
Let’s face it, store-bought grout cleaners can be expensive and often contain harsh chemicals that you might not want in your home. Plus, who doesn’t love the satisfaction of creating something effective with ingredients you probably already have? This DIY approach is not only budget-friendly but also allows you to control exactly what you’re using, making it a safer option for your family and the environment. So, get ready to ditch those stubborn stains and hello to gleaming grout with these simple and effective DIY solutions!
DIY Grout Cleaner: Say Goodbye to Grimy Grout!
Okay, let’s be honest, cleaning grout is nobody’s favorite chore. It’s tedious, back-breaking, and those store-bought cleaners can be harsh and expensive. But fear not! I’m going to share my go-to DIY grout cleaner recipe and method that’s not only effective but also uses ingredients you probably already have in your pantry. Get ready to transform your dingy grout into sparkling white lines!
What You’ll Need: The Grout-Busting Arsenal
Before we dive in, let’s gather our supplies. This is a simple recipe, so the list is short and sweet:
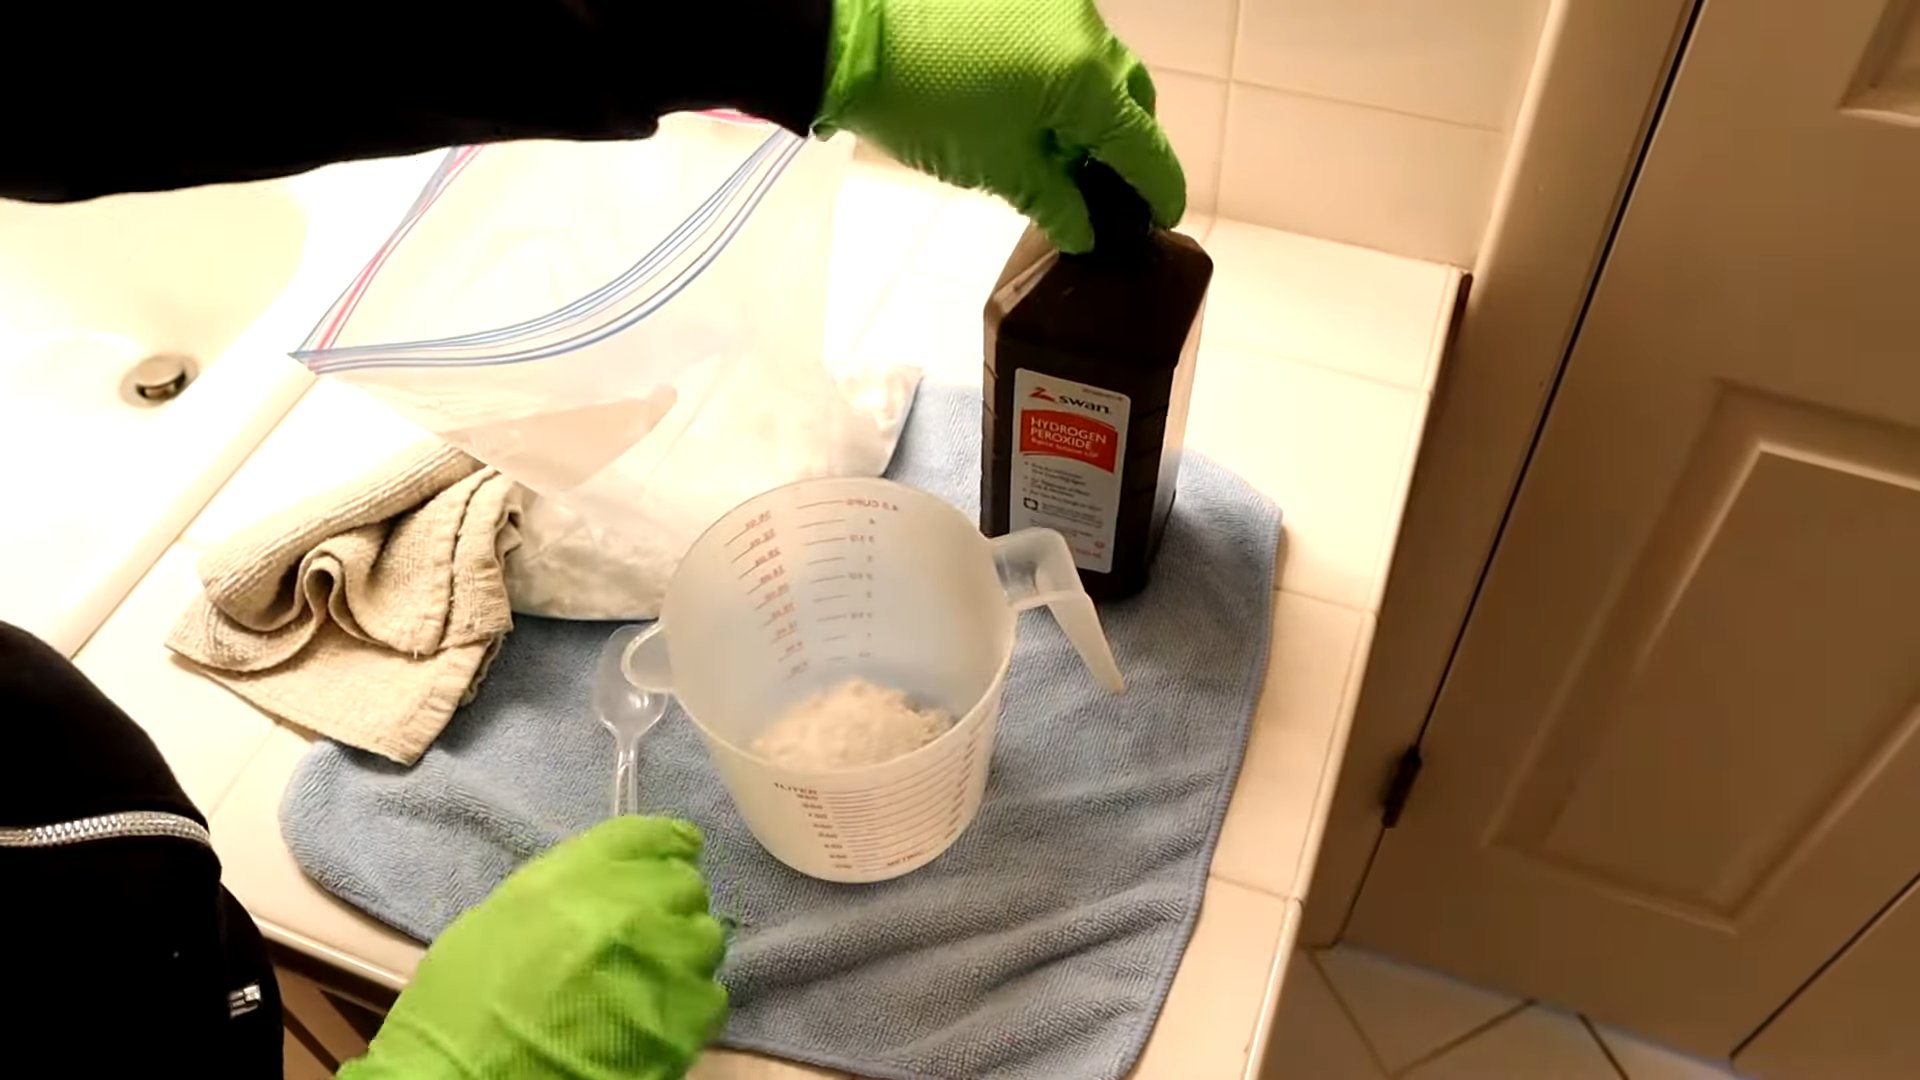
* Baking Soda: This is our gentle abrasive. It helps lift dirt and grime without scratching your tiles.
* Hydrogen Peroxide (3%): This is a mild bleaching agent and disinfectant. It helps whiten the grout and kill mold and mildew.
* Dish Soap (Optional): A little dish soap can help cut through grease and grime, especially in kitchen areas. I prefer using a natural dish soap.
* Spray Bottle: For easy application of the cleaner.
* Old Toothbrush or Grout Brush: This is your weapon of choice for scrubbing. An old toothbrush works great for small areas, but a grout brush with a handle will save your back on larger surfaces.
* Gloves: Protect your hands from the hydrogen peroxide and scrubbing.
* Eye Protection (Optional but Recommended): Just in case of splashes.
* Sponge or Cloth: For wiping away the cleaner.
* Warm Water: For rinsing.
* Small Bowl: For mixing the paste (if you choose the paste method).
* Paper Towels or Old Towels: For drying the grout.
Method 1: The Baking Soda Paste Powerhouse
This method is my go-to for really stubborn stains and heavily soiled grout. The paste allows the baking soda and hydrogen peroxide to really penetrate the grout lines and work their magic.
Step-by-Step Instructions:
1. Prepare the Paste: In your small bowl, mix baking soda and hydrogen peroxide to form a thick paste. I usually start with about ½ cup of baking soda and slowly add hydrogen peroxide until I get a consistency similar to toothpaste. If you’re using dish soap, add a squirt (about a teaspoon) to the mixture. Mix well.
2. Apply the Paste: Using your fingers (with gloves on, of course!) or a small spoon, apply the paste generously to the grout lines. Make sure you cover the entire area you want to clean.
3. Let it Sit: This is the crucial part! Let the paste sit on the grout for at least 5-10 minutes. For really tough stains, you can let it sit for up to 30 minutes. The longer it sits, the more time the baking soda and hydrogen peroxide have to work.
4. Scrub-a-dub-dub: Grab your toothbrush or grout brush and start scrubbing! Use firm, circular motions to loosen the dirt and grime. You’ll probably see the paste start to turn a bit gray or brown as it lifts the dirt.
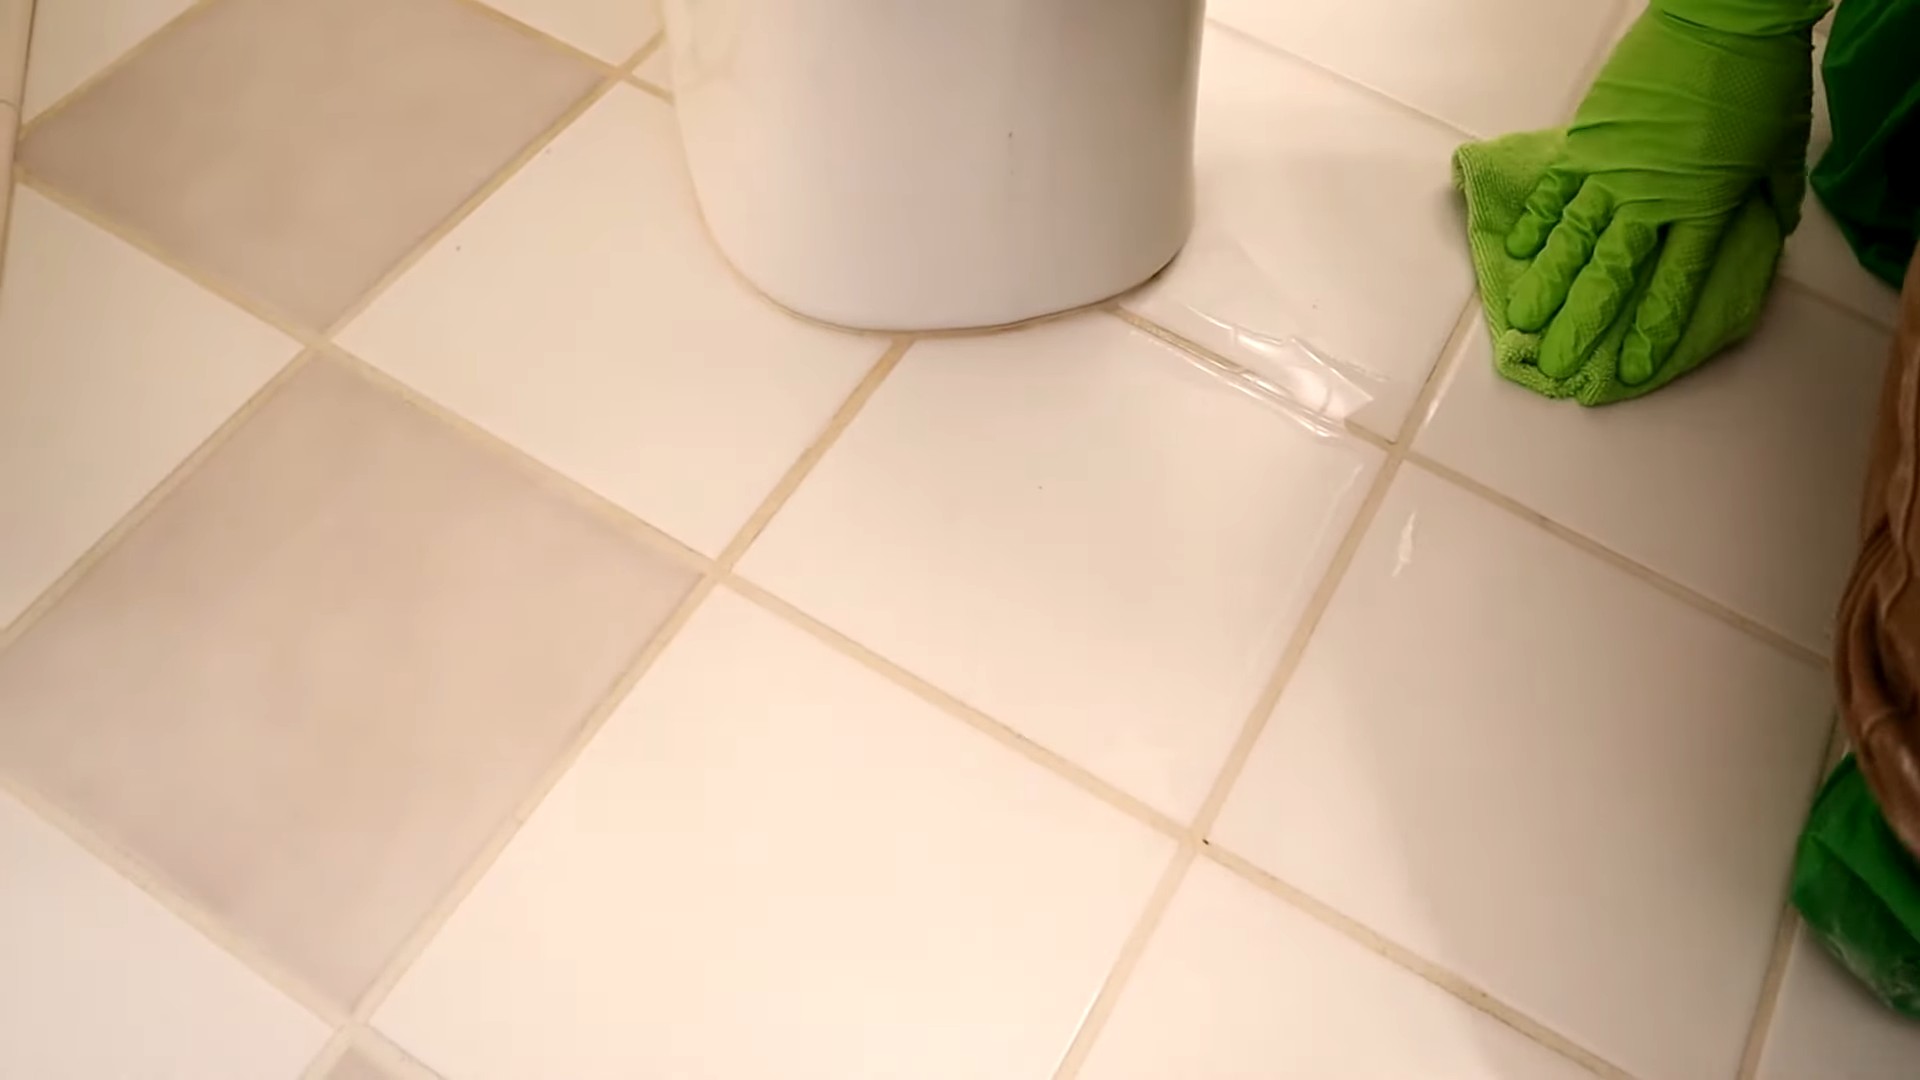
5. Rinse Thoroughly: Use a damp sponge or cloth to wipe away the paste. Rinse the sponge or cloth frequently with warm water. You may need to rinse several times to remove all the residue.
6. Dry the Grout: Use paper towels or old towels to dry the grout. This will help prevent water spots and allow you to see the results of your hard work.
Method 2: The Spray-and-Scrub Speed Cleaner
This method is perfect for regular maintenance cleaning or for areas that aren’t too heavily soiled. It’s quicker and easier than the paste method.
Step-by-Step Instructions:
1. Prepare the Spray: In your spray bottle, mix equal parts hydrogen peroxide and water. If you’re using dish soap, add a squirt (about a teaspoon) to the mixture. Gently swirl to combine. Avoid shaking vigorously, as this can create too many bubbles.
2. Spray the Grout: Spray the grout lines generously with the solution. Make sure you cover the entire area you want to clean.
3. Let it Sit (Briefly): Let the solution sit on the grout for a few minutes (2-3 minutes is usually sufficient). This gives the hydrogen peroxide time to loosen the dirt and grime.
4. Scrub-a-dub-dub (Again!): Grab your toothbrush or grout brush and start scrubbing! Use firm, circular motions to loosen the dirt and grime.
5. Rinse Thoroughly (Again!): Use a damp sponge or cloth to wipe away the solution. Rinse the sponge or cloth frequently with warm water. You may need to rinse several times to remove all the residue.
6. Dry the Grout (One Last Time!): Use paper towels or old towels to dry the grout.
Tackling Tough Stains: Advanced Grout Cleaning Techniques
Sometimes, you’ll encounter grout stains that are particularly stubborn. Don’t despair! Here are a few tricks I’ve learned over the years to tackle those toughies:
* For Mold and Mildew: If you’re dealing with mold or mildew, you can increase the concentration of hydrogen peroxide in your cleaner. Try using straight hydrogen peroxide (3%) for the paste method, or a 2:1 ratio of hydrogen peroxide to water for the spray method. Be sure to ventilate the area well when using higher concentrations of hydrogen peroxide.
* Baking Soda and Vinegar (Use with Caution!): While baking soda and vinegar are a classic cleaning combination, they can react vigorously and may not be the best choice for all types of grout. The reaction creates carbon dioxide and water, which doesn’t necessarily clean better than either ingredient alone. However, if you want to try it, sprinkle baking soda on the grout lines, then spray with vinegar. Let it fizz for a few minutes, then scrub and rinse. Important: Never mix vinegar and bleach, as this can create toxic fumes.
* Steam Cleaning: A steam cleaner can be a very effective way to clean grout, especially for large areas. The hot steam loosens dirt and grime, making it easier to wipe away. Follow the manufacturer’s instructions for your steam cleaner.
* Grout Whitening Pens: For grout that’s permanently stained or discolored, a grout whitening pen can be a quick and easy fix. These pens contain a special paint that covers the stains and restores the grout to its original color.
Preventing Future Grout Grime: Tips and Tricks
Once you’ve cleaned your grout, you’ll want to keep it looking its best. Here are a few tips to help prevent future grout grime:
* Seal Your Grout: Sealing your grout creates a barrier that prevents dirt, grime, and moisture from penetrating the grout lines. This makes it much easier to clean in the future. You can purchase grout sealant at most home improvement stores. Follow the manufacturer’s instructions for application.
* Wipe Up Spills Immediately: Don’t let spills sit on your grout. Wipe them up as soon as possible to prevent them from staining.
* Ventilate Your Bathroom: Proper ventilation helps prevent mold and mildew growth. Run the exhaust fan during and after showers.
* Regular Cleaning: Regular cleaning is key to preventing grout grime from building up. A quick wipe-down with a damp cloth or sponge after each shower can make a big difference. I like to keep a spray bottle of my DIY grout cleaner in the bathroom for quick touch-ups.
* Use Doormats: Place doormats at entrances to trap dirt and debris before they get tracked onto your floors.
Important Considerations and Safety Precautions
* Test in an Inconspicuous Area: Before cleaning your entire grout surface, test your cleaner in a small, inconspicuous area to make sure it doesn’t damage the tile or grout.
* Wear Gloves and Eye Protection: Hydrogen peroxide can irritate your skin and eyes. Always wear gloves and eye protection when cleaning with hydrogen peroxide.
* Ventilate the Area: Make sure the area you’re cleaning is well-ventilated. Open windows and doors to allow fresh air to circulate.
* Avoid Mixing Cleaners: Never mix different cleaning products together, as this can create dangerous fumes.
* Keep Out of Reach of Children and Pets: Store cleaning products out of reach of children and pets.
And there you have it! My tried-and-true DIY grout cleaning methods. With a little elbow grease and these simple ingredients, you can transform your grimy grout into sparkling white lines. Happy cleaning!
Conclusion
So, there you have it! This DIY grout cleaner isn’t just another cleaning hack; it’s a game-changer for anyone battling dingy, stained grout. We’ve all been there, scrubbing tirelessly with commercial cleaners that promise the world but deliver little more than a sore back and lingering chemical fumes. This method, however, is different. It’s effective, affordable, and uses ingredients you likely already have in your pantry.
Why is this DIY grout cleaner a must-try? Because it tackles the root of the problem without harsh chemicals that can damage your grout and harm your health. The combination of baking soda, hydrogen peroxide, and dish soap creates a powerful cleaning synergy. The baking soda acts as a gentle abrasive, lifting dirt and grime, while the hydrogen peroxide bleaches away stains and disinfects. The dish soap helps to break down grease and grime, ensuring a thorough clean.
But the beauty of this DIY grout cleaner lies in its versatility. Feel free to experiment with variations to suit your specific needs and preferences. For instance, if you’re dealing with particularly stubborn stains, you can add a few drops of tea tree oil for its antifungal and antibacterial properties. Or, if you prefer a more paste-like consistency, simply reduce the amount of hydrogen peroxide. For colored grout, test the solution in an inconspicuous area first to ensure it doesn’t affect the color. You can also use white vinegar instead of hydrogen peroxide, but be cautious when using it on natural stone grout, as it can be acidic.
This DIY grout cleaner is a cost-effective and environmentally friendly alternative to store-bought cleaners. It’s a win-win for your wallet and the planet.
We understand that trying a new cleaning method can be daunting, but we’re confident that you’ll be amazed by the results. Imagine transforming your grimy grout lines into sparkling clean surfaces with minimal effort and maximum impact. Think of the satisfaction of knowing you’ve achieved a professional-level clean without breaking the bank or exposing yourself to harmful chemicals.
Don’t just take our word for it, though. We wholeheartedly encourage you to give this DIY grout cleaner a try. We’re eager to hear about your experiences, your variations, and your before-and-after transformations. Share your photos and stories in the comments below. Let’s build a community of grout-cleaning enthusiasts and help each other achieve sparkling clean homes, one grout line at a time! We believe that everyone deserves a clean and healthy home, and this DIY grout cleaner is a simple yet powerful step in that direction. So, grab your ingredients, put on your gloves, and get ready to say goodbye to dirty grout for good!
Frequently Asked Questions (FAQ)
What kind of baking soda should I use?
Plain, old baking soda (sodium bicarbonate) is all you need. There’s no need to buy anything fancy or specialized. The baking soda you use for baking is the same baking soda you use for cleaning. Make sure it’s fresh and hasn’t absorbed any odors from your pantry.
Can I use this DIY grout cleaner on all types of grout?
While this DIY grout cleaner is generally safe and effective, it’s always best to test it in an inconspicuous area first, especially if you have colored grout or natural stone grout. The hydrogen peroxide can potentially lighten colored grout, and vinegar (if you choose to use it as a variation) can etch natural stone. If you’re unsure about your grout type, consult with a professional before proceeding.
How often should I clean my grout?
The frequency of grout cleaning depends on several factors, including the amount of foot traffic, the presence of moisture, and the type of grout you have. In high-traffic areas like bathrooms and kitchens, you may need to clean your grout every few weeks. In less frequently used areas, you can clean it every few months. Regular cleaning will prevent the buildup of dirt and grime, making it easier to maintain your grout’s appearance.
What if the stains are really stubborn?
For particularly stubborn stains, you can try a few different approaches. First, let the DIY grout cleaner sit on the grout for a longer period of time, up to an hour. Second, you can use a stiffer brush or a grout brush to scrub the grout more vigorously. Third, you can try making a paste of baking soda and water and applying it directly to the stain. Let it sit for a few hours or even overnight before scrubbing and rinsing. As mentioned earlier, adding a few drops of tea tree oil can also help with stubborn stains due to its antifungal properties.
Can I use bleach instead of hydrogen peroxide?
While bleach is a powerful disinfectant, it’s not recommended for use in this DIY grout cleaner. Bleach can be harsh on grout and can potentially damage it over time. It can also release harmful fumes when mixed with other cleaning agents. Hydrogen peroxide is a safer and more environmentally friendly alternative.
What kind of brush should I use?
A grout brush is ideal for cleaning grout, as it’s designed with stiff bristles that can reach into the narrow grout lines. However, you can also use an old toothbrush or a scrub brush with stiff bristles. Avoid using metal brushes, as they can scratch the grout.
How do I prevent grout from getting dirty in the first place?
Prevention is key to keeping your grout clean. Here are a few tips:
* Wipe up spills immediately.
* Ventilate your bathroom after showering to prevent moisture buildup.
* Use a sealant on your grout to protect it from stains.
* Place mats at entrances to trap dirt and debris.
* Regularly sweep or vacuum your floors to remove loose dirt and grime.
Is this DIY grout cleaner safe for pets and children?
While the ingredients in this DIY grout cleaner are generally considered safe, it’s still important to keep pets and children away from the area while you’re cleaning. Hydrogen peroxide can be irritating if ingested, and dish soap can cause stomach upset. After cleaning, rinse the area thoroughly with water to remove any residue.
How do I store the leftover DIY grout cleaner?
If you have any leftover DIY grout cleaner, you can store it in a sealed container in a cool, dark place. However, it’s best to make a fresh batch each time you clean your grout, as the hydrogen peroxide can lose its effectiveness over time.
My grout is crumbling. Will this DIY grout cleaner help?
If your grout is crumbling, it’s likely damaged and needs to be repaired or replaced. This DIY grout cleaner can help to clean the remaining grout, but it won’t fix the underlying problem. Consult with a professional to determine the best course of action.
Can I use essential oils other than tea tree oil?
Yes, you can experiment with other essential oils that have cleaning and disinfecting properties. Lemon, eucalyptus, and lavender essential oils are all good options. Just be sure to use them sparingly, as essential oils can be potent. A few drops should be sufficient.
What if I don’t have hydrogen peroxide?
If you don’t have hydrogen peroxide, you can try using white vinegar instead. However, as mentioned earlier, be cautious when using vinegar on natural stone grout. You can also try making a paste of baking soda and water and applying it directly to the grout.
How long does it take to see results?
You should see noticeable results immediately after scrubbing and rinsing the grout. However, for heavily stained grout, you may need to repeat the process a few times to achieve the desired level of cleanliness.
Can I use this DIY grout cleaner on shower grout?
Yes, this DIY grout cleaner is perfect for cleaning shower grout. The combination of baking soda, hydrogen peroxide, and dish soap is effective at removing soap scum, mildew, and other common shower stains. Be sure to ventilate your bathroom well while cleaning.


Leave a Comment