

DIY Raffia Wall Hanging: Ready to add a touch of bohemian charm and natural texture to your home? I’m so excited to share this simple yet stunning DIY project with you! Forget those expensive store-bought decorations; we’re diving into the world of crafting a gorgeous raffia wall hanging that will instantly elevate any space.
The art of weaving and fiber art has been around for centuries, with raffia, a natural fiber derived from palm trees, playing a significant role in various cultures. From creating baskets and textiles to decorative items, raffia’s versatility and earthy appeal have made it a beloved material. Now, we’re bringing that timeless tradition into our modern homes with a personalized twist.
In today’s fast-paced world, creating something with your own hands can be incredibly therapeutic and rewarding. This DIY raffia wall hanging isn’t just about adding a beautiful piece of decor; it’s about connecting with your creativity, embracing sustainable materials, and adding a unique, personal touch to your living space. Plus, it’s a fantastic way to impress your friends and family with your crafting skills! So, grab your supplies, and let’s get started on this fun and easy project that will transform your walls from drab to fab!
DIY Raffia Wall Hanging: A Step-by-Step Guide to Bohemian Bliss
Hey there, fellow crafters! I’m so excited to share this super fun and surprisingly easy DIY project with you: a gorgeous raffia wall hanging. It’s the perfect way to add a touch of bohemian charm and natural texture to any room. Plus, it’s a fantastic way to unwind and get creative. Let’s dive in!
What You’ll Need: Your Raffia Wall Hanging Supply List
Before we get started, let’s gather all the materials you’ll need. Trust me, having everything organized beforehand will make the whole process much smoother and more enjoyable.
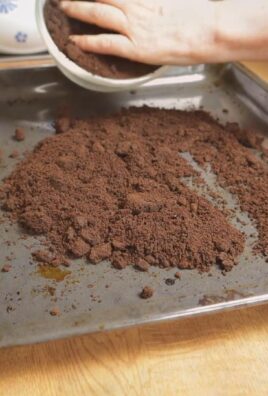
* Raffia: This is the star of the show! You can find raffia in natural colors or dyed in a variety of shades. I recommend getting a generous amount, especially if you’re planning a large wall hanging. I usually buy at least one large bundle (around 200-300 grams) to be safe.
* Dowel Rod or Branch: This will be the base of your wall hanging. A wooden dowel rod from a craft store works perfectly, or you can get creative and use a cool-looking branch you find on a nature walk. Just make sure it’s sturdy enough to support the weight of the raffia. I prefer a dowel rod that’s about 12-18 inches long for a medium-sized hanging.
* Scissors: A good pair of sharp scissors is essential for cutting the raffia.
* Measuring Tape or Ruler: This will help you cut the raffia strands to the desired length.
* Comb or Brush: This is optional, but it can be helpful for smoothing out the raffia and creating a more polished look. A wide-tooth comb works best.
* Yarn or String (for hanging): Choose a yarn or string that complements the color of your raffia. Macrame cord, jute twine, or even a simple cotton string will do the trick.
* Optional Embellishments: Feel free to personalize your wall hanging with beads, feathers, shells, or anything else that sparks your creativity!
* Hot Glue Gun (optional): If you’re adding embellishments, a hot glue gun can be super handy for securing them in place.
Getting Started: Preparing Your Raffia and Dowel
Okay, now that we have everything we need, let’s get down to business!
1. Prepare the Raffia: Unpack your raffia and gently separate the strands. Raffia can be a bit tangled, so take your time and be patient. I like to lay it out on a large surface to make it easier to work with.
2. Cut the Raffia Strands: Decide on the length you want your raffia strands to be. Remember that the length you cut will be doubled when you attach it to the dowel rod. For example, if you want your raffia to hang down 10 inches, you’ll need to cut strands that are 20 inches long. I usually start with strands around 18-24 inches long for a medium-sized wall hanging. Cut a bunch of strands – you can always cut more later if you need them. I find it easiest to cut a few strands at a time, using the first one as a template.
3. Prepare the Dowel Rod or Branch: If you’re using a branch, make sure it’s clean and dry. You can sand it down a bit if it’s rough. If you’re using a dowel rod, you can leave it as is or paint it a color that complements your raffia. I often leave mine natural for a rustic look.
Attaching the Raffia: The Larks Head Knot Method
We’re ready to start attaching the raffia to the dowel rod! We’ll be using a simple knot called the larks head knot. It’s easy to learn and creates a nice, even look.
1. Fold a Raffia Strand in Half: Take one of your cut raffia strands and fold it in half, creating a loop at the top.
2. Position the Loop: Place the loop behind the dowel rod, with the two loose ends hanging down in front.
3. Pull the Loose Ends Through the Loop: Reach through the loop from the front of the dowel rod and grab the two loose ends of the raffia strand. Pull them through the loop.
4. Tighten the Knot: Gently pull the loose ends down to tighten the knot around the dowel rod. Make sure the knot is snug but not too tight.
5. Repeat: Repeat steps 1-4 with the remaining raffia strands, placing each knot next to the previous one. Keep going until you’ve covered the entire dowel rod or reached your desired width. I like to pack the knots in tightly for a fuller look.
Creating Patterns and Designs: Adding Your Personal Touch
This is where the fun really begins! You can create all sorts of patterns and designs with your raffia. Here are a few ideas to get you started:
* Varying Lengths: Cut the raffia strands to different lengths to create a layered or asymmetrical look. I love creating a V-shape by gradually shortening the strands towards the center.
* Color Blocking: Use different colors of raffia to create stripes, blocks, or other geometric patterns.
* Adding Texture: Try braiding some of the raffia strands or creating small tassels to add texture and visual interest.
* Creating Shapes: You can trim the raffia into different shapes, such as triangles, curves, or even abstract designs.
Tips for Creating Patterns:
* Plan Ahead: Before you start attaching the raffia, sketch out your design on paper. This will help you visualize the finished product and avoid mistakes.
* Use a Guide: If you’re creating a symmetrical design, use a ruler or measuring tape to ensure that both sides are even.
* Don’t Be Afraid to Experiment: The best way to discover new patterns and designs is to experiment! Try different techniques and see what you come up with.
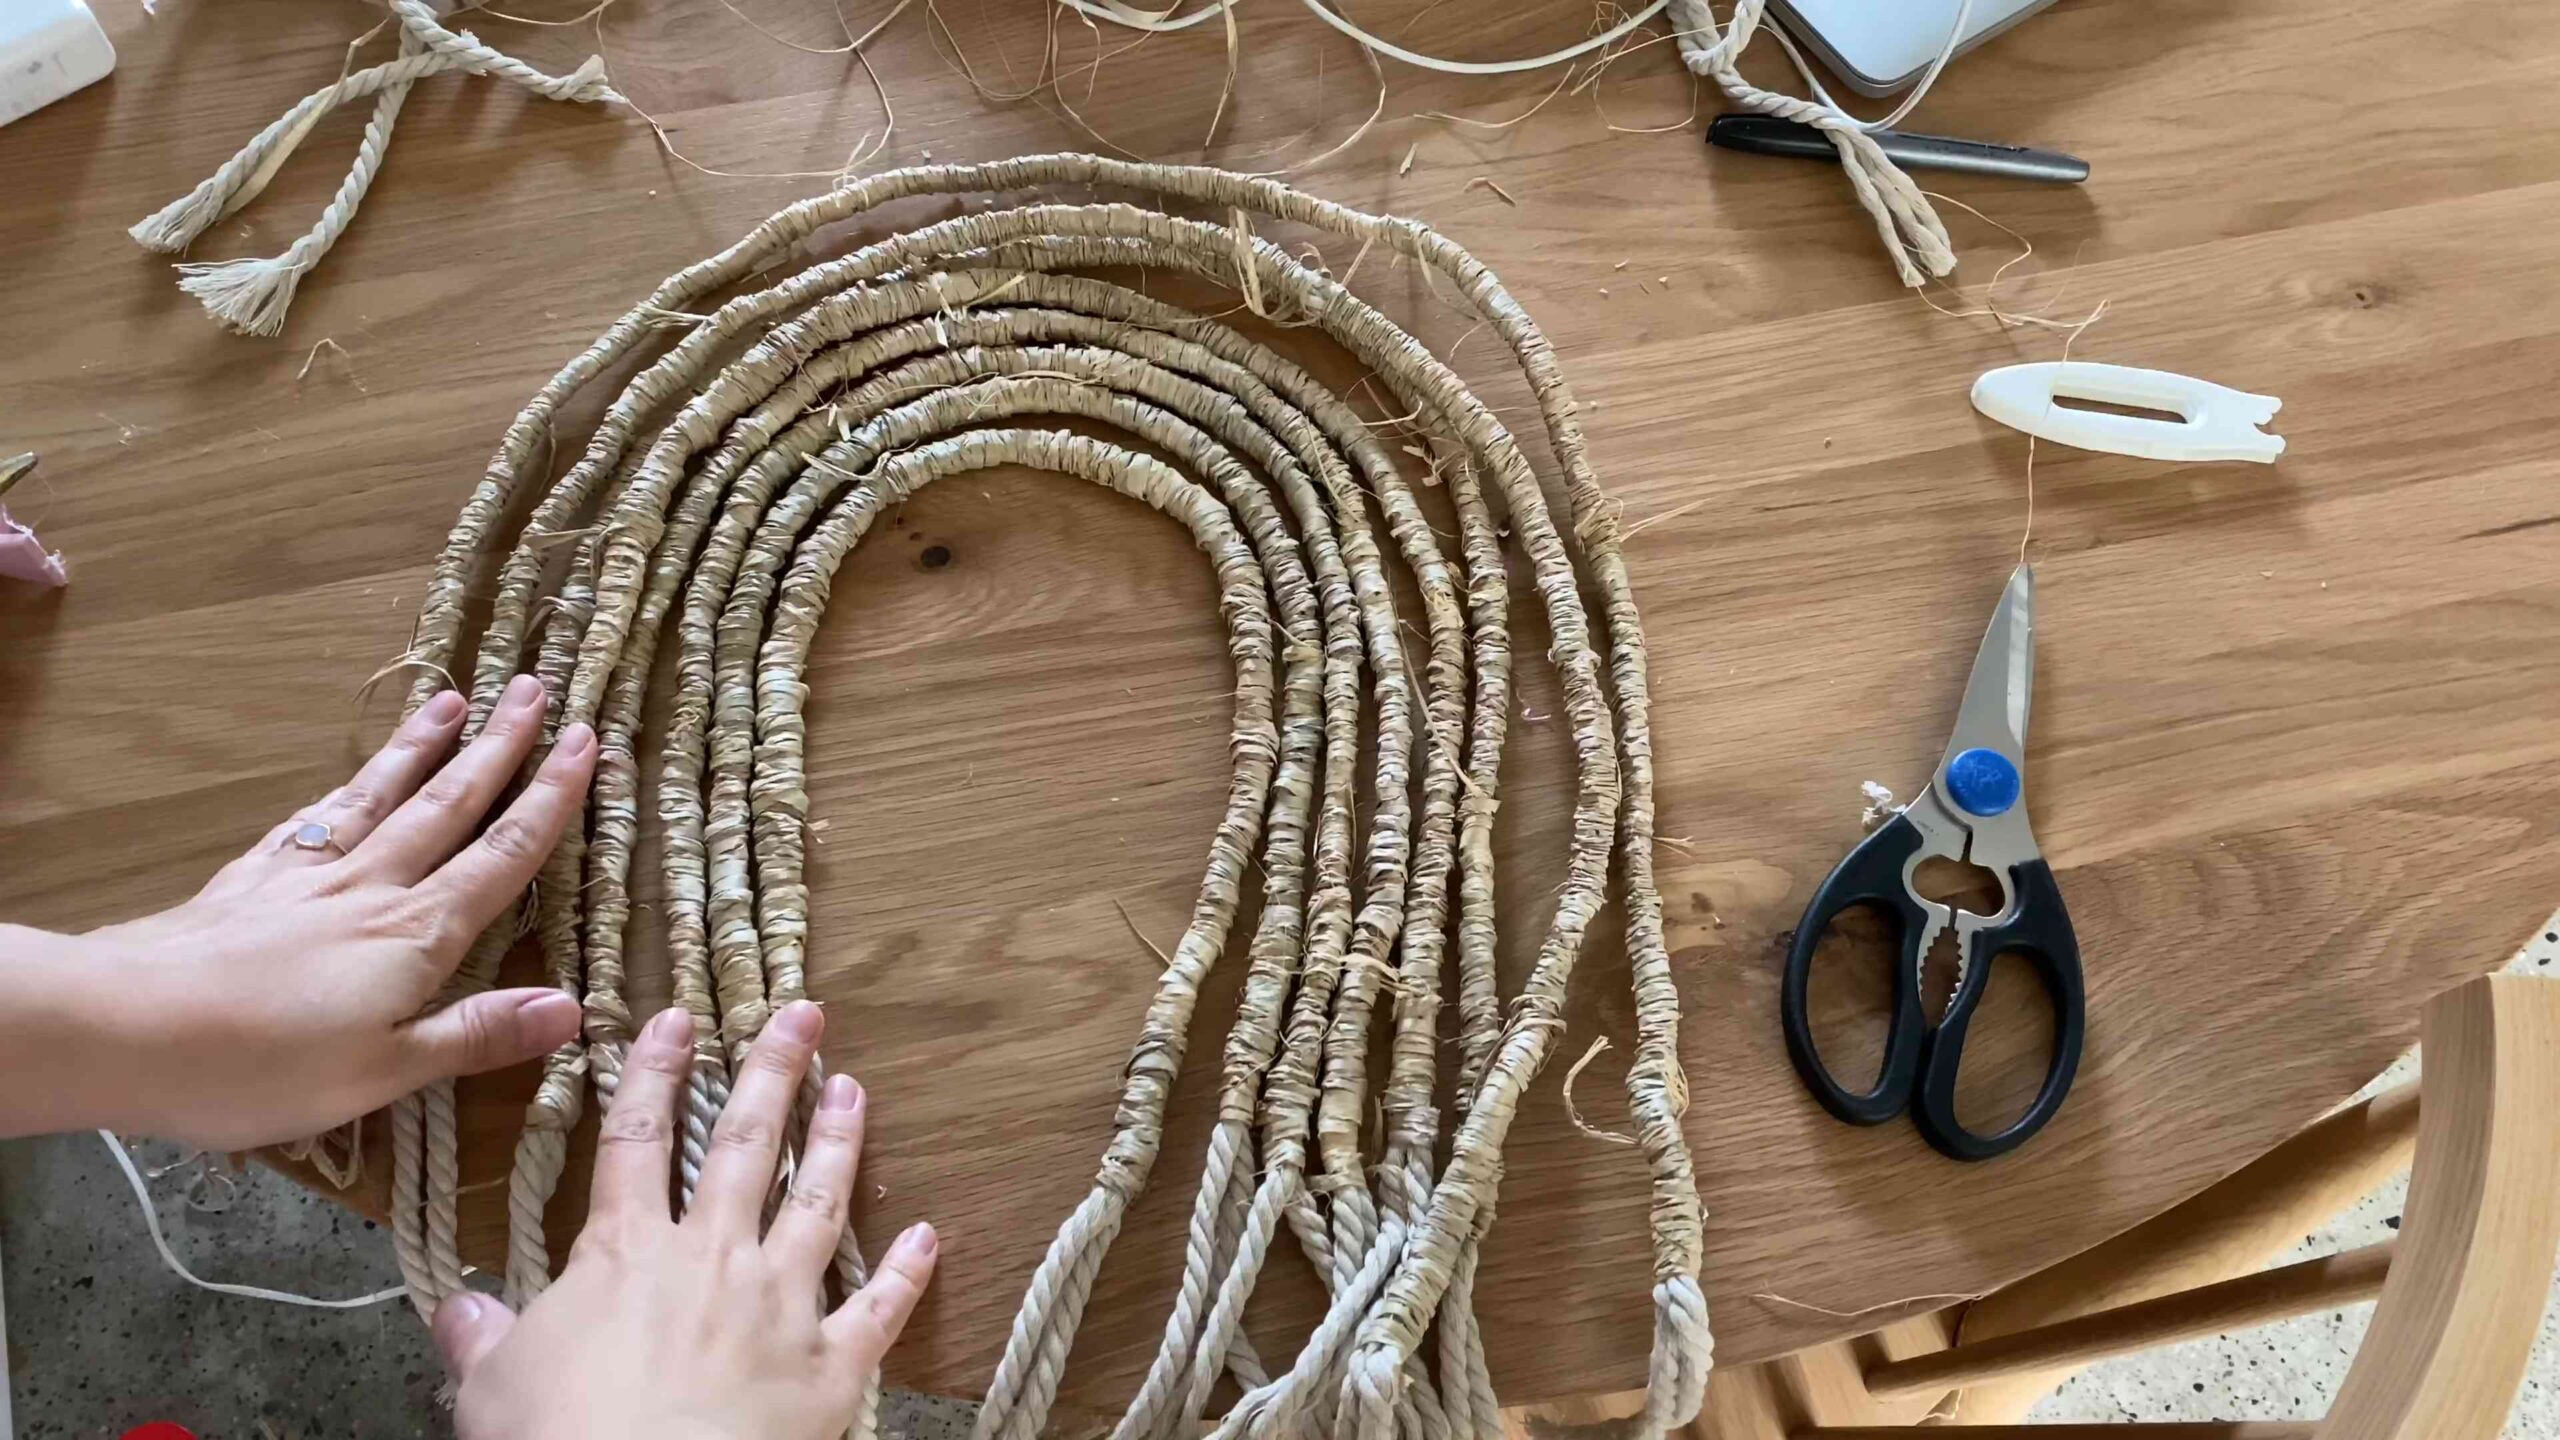
Trimming and Shaping: Refining Your Wall Hanging
Once you’ve attached all the raffia and created your desired pattern, it’s time to trim and shape your wall hanging.
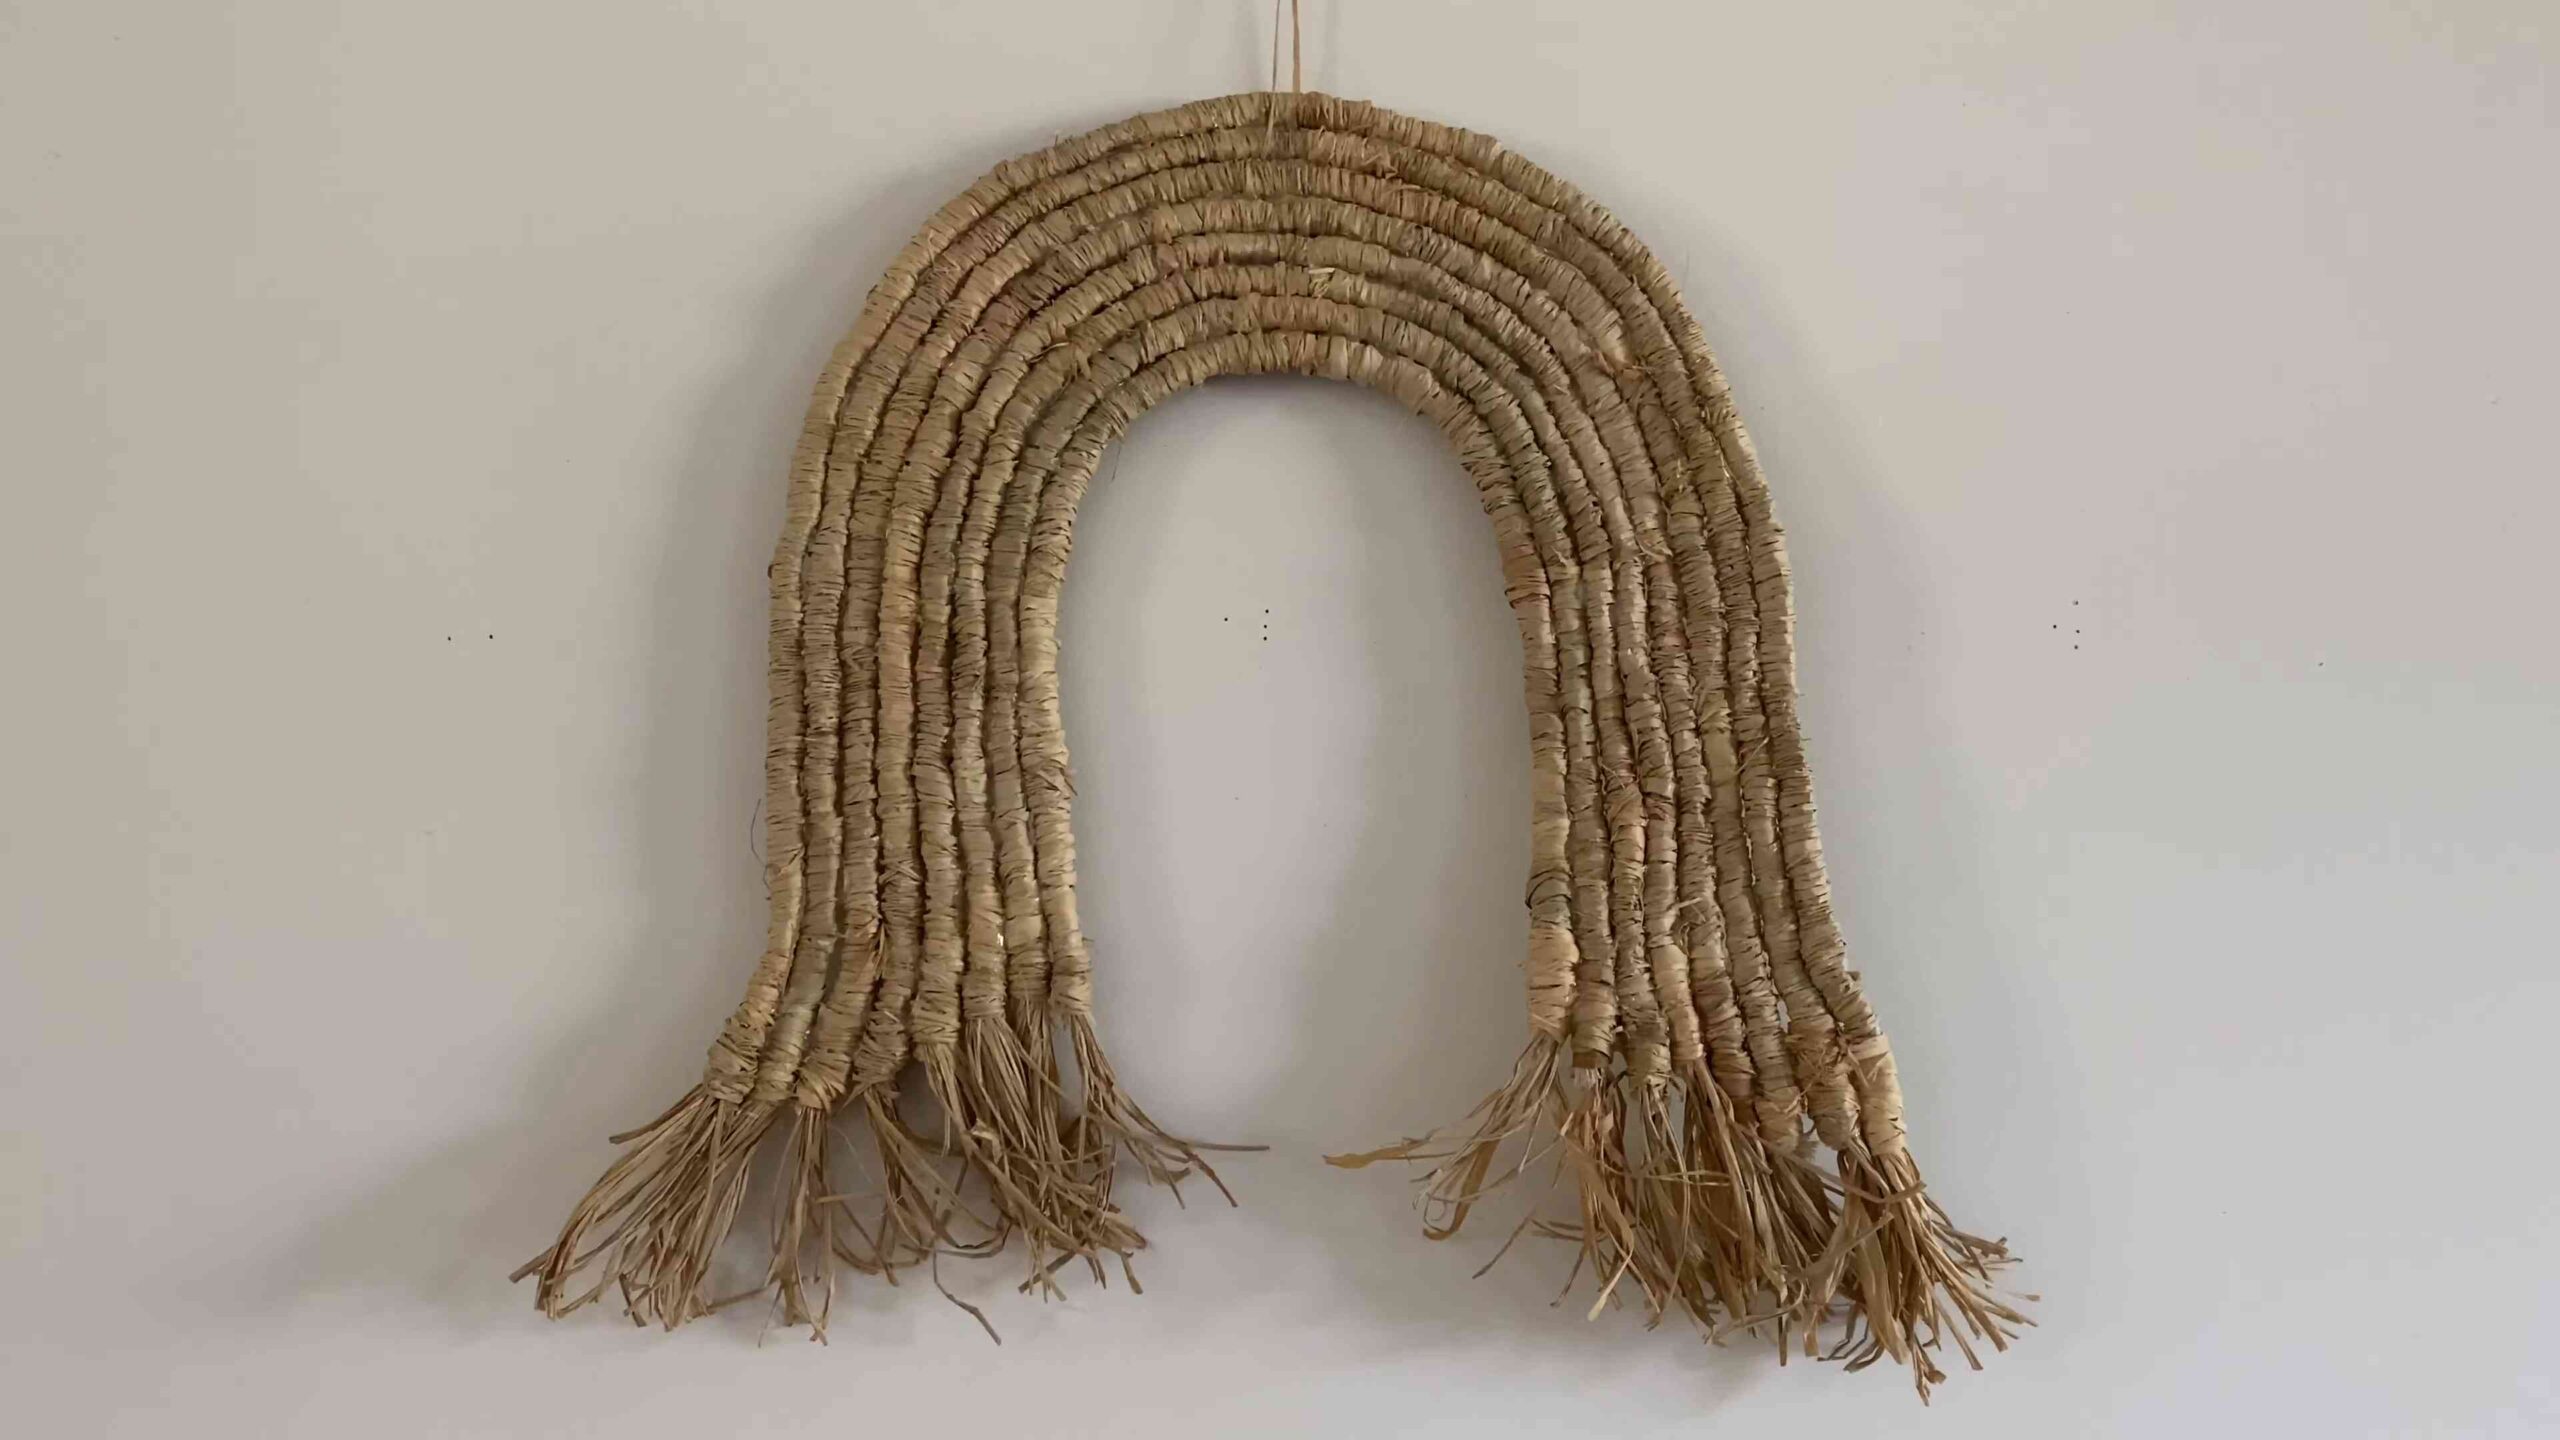
1. Hang Your Wall Hanging: Hang your wall hanging on a wall or door so you can see it from a distance. This will give you a better perspective and help you identify any areas that need to be trimmed or shaped.
2. Trim the Raffia: Use your scissors to trim the raffia to your desired length and shape. Take your time and be precise. I like to start by trimming off any uneven ends and then gradually shaping the raffia until I’m happy with the overall look.
3. Comb or Brush the Raffia: If you want a smoother, more polished look, use a comb or brush to smooth out the raffia strands. This will also help to remove any loose fibers.
Adding Embellishments (Optional): Taking It to the Next Level
If you want to add even more personality to your wall hanging, consider adding some embellishments.
1. Choose Your Embellishments: Gather your beads, feathers, shells, or other embellishments.
2. Attach the Embellishments: Use a hot glue gun or needle and thread to attach the embellishments to the raffia. Be creative and have fun! I love adding a few strategically placed beads or feathers to create a focal point.
Creating the Hanging Loop: The Final Touch
Almost there! Now we just need to create a loop for hanging your masterpiece.
1. Cut a Length of Yarn or String: Cut a length of yarn or string that’s long enough to create a loop for hanging. I usually cut a piece that’s about 12-18 inches long.
2. Attach the Yarn or String to the Dowel Rod: Tie the ends of the yarn or string to the dowel rod, near each end. Make sure the knots are secure.
3. Adjust the Loop: Adjust the length of the loop until you’re happy with the way it hangs.
Final Touches and Display: Admire Your Handiwork!
Congratulations! You’ve created your very own raffia wall hanging. Now it’s time to find the perfect spot to display it and admire your handiwork.
* Hang it on a Wall: A raffia wall hanging looks great in a living room, bedroom, or even a hallway.
* Hang it on a Door: Add a touch of bohemian charm to your front door or bedroom door.
* Give it as a Gift: A handmade raffia wall hanging makes a thoughtful and unique gift for friends and family.
Tips for Displaying Your Wall Hanging:
* Consider the Lighting: Natural light will enhance the texture and colors of your raffia.
* Choose a Complementary Background: A neutral
Conclusion
So, there you have it! Creating your own DIY raffia wall hanging isn’t just a craft project; it’s an opportunity to infuse your living space with warmth, texture, and a touch of bohemian charm. We’ve walked you through the simple steps, highlighting how accessible and budget-friendly this project truly is. Forget those expensive store-bought decorations – with a little time and creativity, you can craft a stunning piece of art that reflects your unique personality.
The beauty of this DIY raffia wall hanging lies in its versatility. Feel free to experiment with different colors of raffia to match your existing décor. Imagine a vibrant, multi-hued piece for a kid’s room, or a sophisticated, monochromatic design for a minimalist living room. You can also play with different weaving techniques to create unique patterns and textures. Try incorporating beads, feathers, or small pieces of driftwood for an added touch of natural elegance. Don’t be afraid to get creative and personalize your wall hanging to truly make it your own.
Beyond the aesthetic appeal, this project offers a therapeutic and rewarding experience. The repetitive motions of weaving can be incredibly calming and meditative, providing a welcome escape from the stresses of daily life. And the satisfaction of creating something beautiful with your own hands is simply unmatched.
We firmly believe that anyone, regardless of their crafting experience, can successfully create a beautiful DIY raffia wall hanging. The instructions are straightforward, the materials are readily available, and the possibilities are endless. This isn’t just about making a decoration; it’s about embracing your creativity, adding a personal touch to your home, and enjoying the process along the way.
We are incredibly excited for you to embark on this creative journey! We encourage you to gather your materials, follow our guide, and unleash your inner artist. Once you’ve completed your masterpiece, we would absolutely love to see it! Share your creations with us on social media using [Your Hashtag Here] and tell us about your experience. What colors did you use? What unique embellishments did you add? What challenges did you overcome? Your feedback and inspiration will not only motivate us but also inspire other crafters to try their hand at this rewarding project. So go ahead, give it a try, and let your creativity shine! You’ll be amazed at what you can create with a little raffia and a lot of imagination.
Frequently Asked Questions (FAQ)
What exactly is raffia, and where can I buy it?
Raffia is a natural fiber made from the raffia palm tree. It’s known for its durability, flexibility, and natural texture, making it an ideal material for crafting. You can find raffia at most craft stores, online retailers like Amazon and Etsy, and even some garden centers. Look for it in hanks or spools, and choose the color that best suits your project. Natural raffia is a great starting point, as it can be easily dyed if you want to customize the color.
What kind of frame or base should I use for my wall hanging?
The choice of frame or base depends on the desired size and style of your wall hanging. A simple wooden dowel is a popular and affordable option. You can also use a metal ring, a branch of driftwood, or even a piece of reclaimed wood for a more rustic look. Consider the weight of the raffia when selecting your base – a heavier base will be necessary for larger, more elaborate wall hangings. Make sure the base is sturdy enough to support the weight of the finished piece.
How do I prevent the raffia from unraveling or fraying?
Raffia can sometimes fray, especially at the ends. To minimize fraying, you can try a few different techniques. One option is to apply a small amount of clear glue or fabric sealant to the cut ends of the raffia. Another option is to wrap the ends tightly with thread or yarn. You can also use a lighter to carefully singe the ends, but be extremely cautious when doing this, as raffia is flammable.
Can I dye the raffia to create custom colors?
Yes, absolutely! Dyeing raffia is a great way to create custom colors that perfectly match your décor. You can use fabric dye, natural dyes (like coffee or tea), or even food coloring to dye the raffia. Follow the instructions on the dye package carefully, and be sure to test the dye on a small piece of raffia first to ensure you achieve the desired color. Remember to wear gloves and protect your work surface when dyeing.
How do I clean my raffia wall hanging?
Raffia is a natural fiber and should be cleaned with care. Avoid getting it wet, as this can cause it to shrink or become damaged. The best way to clean your raffia wall hanging is to gently dust it with a soft brush or a microfiber cloth. You can also use a vacuum cleaner with a brush attachment to remove dust and debris. If necessary, you can spot clean the raffia with a damp cloth and a mild detergent, but be sure to dry it thoroughly afterwards.
What are some other embellishments I can add to my raffia wall hanging?
The possibilities are endless when it comes to embellishing your raffia wall hanging! Consider adding beads, feathers, shells, small pieces of driftwood, yarn, macrame knots, or even dried flowers. You can also incorporate different weaving techniques to create unique patterns and textures. Let your imagination run wild and experiment with different materials and techniques to create a truly one-of-a-kind piece of art.
My raffia wall hanging looks a bit uneven. How can I fix it?
Don’t worry if your wall hanging isn’t perfectly symmetrical! Part of the charm of handmade items is their unique imperfections. However, if you want to even things out, you can trim the raffia with scissors to create a more uniform shape. You can also adjust the tension of the raffia strands to create a more balanced look. Step back and assess your work from a distance to get a better perspective.
How long will it take to complete this DIY raffia wall hanging project?
The time it takes to complete this project will depend on the size and complexity of your design, as well as your crafting experience. A small, simple wall hanging can be completed in a few hours, while a larger, more elaborate piece may take several days. Don’t rush the process – enjoy the creative journey and take breaks when needed.
Is this DIY raffia wall hanging project suitable for beginners?
Yes, absolutely! This project is perfect for beginners. The basic weaving technique is simple to learn, and the materials are readily available. Start with a small, simple design and gradually work your way up to more complex projects as you gain confidence. Don’t be afraid to experiment and make mistakes – that’s how you learn!
Where is the best place to hang my finished raffia wall hanging?
Your raffia wall hanging will look beautiful in any room of your home! Consider hanging it in your living room, bedroom, entryway, or even your bathroom. Choose a location that complements the style and color scheme of your wall hanging. Avoid hanging it in direct sunlight or in areas with high humidity, as this can damage the raffia over time.
Leave a Comment