

DIY Reed Diffuser: Ever walk into a spa and instantly feel a wave of calm wash over you? Or perhaps you’ve admired the subtle, consistent fragrance in a friend’s home? Chances are, a reed diffuser was working its magic! For centuries, cultures around the world have used natural reeds and essential oils to gently scent their living spaces. From ancient Egyptians using fragrant oils in clay vessels to modern aromatherapy practices, the desire to create a pleasant and inviting atmosphere is deeply rooted in human history.
But let’s be honest, those store-bought diffusers can be pricey, and sometimes the scents are a little…artificial. That’s where the magic of DIY comes in! I’m going to show you how to create your very own DIY reed diffuser, customized with your favorite essential oils and designed to perfectly complement your home’s aesthetic.
Why do you need this DIY trick? Because you deserve a home that smells amazing without breaking the bank! Plus, crafting your own diffuser allows you to control the ingredients, ensuring you’re only breathing in natural, beneficial aromas. Get ready to ditch the chemical-laden air fresheners and embrace the simple, satisfying art of creating your own signature scent. Let’s get started!
DIY Reed Diffuser: Freshen Your Home Naturally
Hey there, fellow DIY enthusiasts! Are you tired of those artificial-smelling air fresheners that cost a fortune and are packed with chemicals? I know I was! That’s why I decided to dive into the world of DIY reed diffusers. It’s surprisingly easy, cost-effective, and allows you to create a personalized scent that perfectly matches your mood and style. Plus, it’s a much more eco-friendly option. So, let’s get started on making your own amazing reed diffuser!
What You’ll Need: Gathering Your Supplies
Before we jump into the step-by-step instructions, let’s make sure you have everything you need. This is crucial for a smooth and enjoyable DIY experience. Trust me, nothing’s worse than getting halfway through a project and realizing you’re missing a key ingredient!
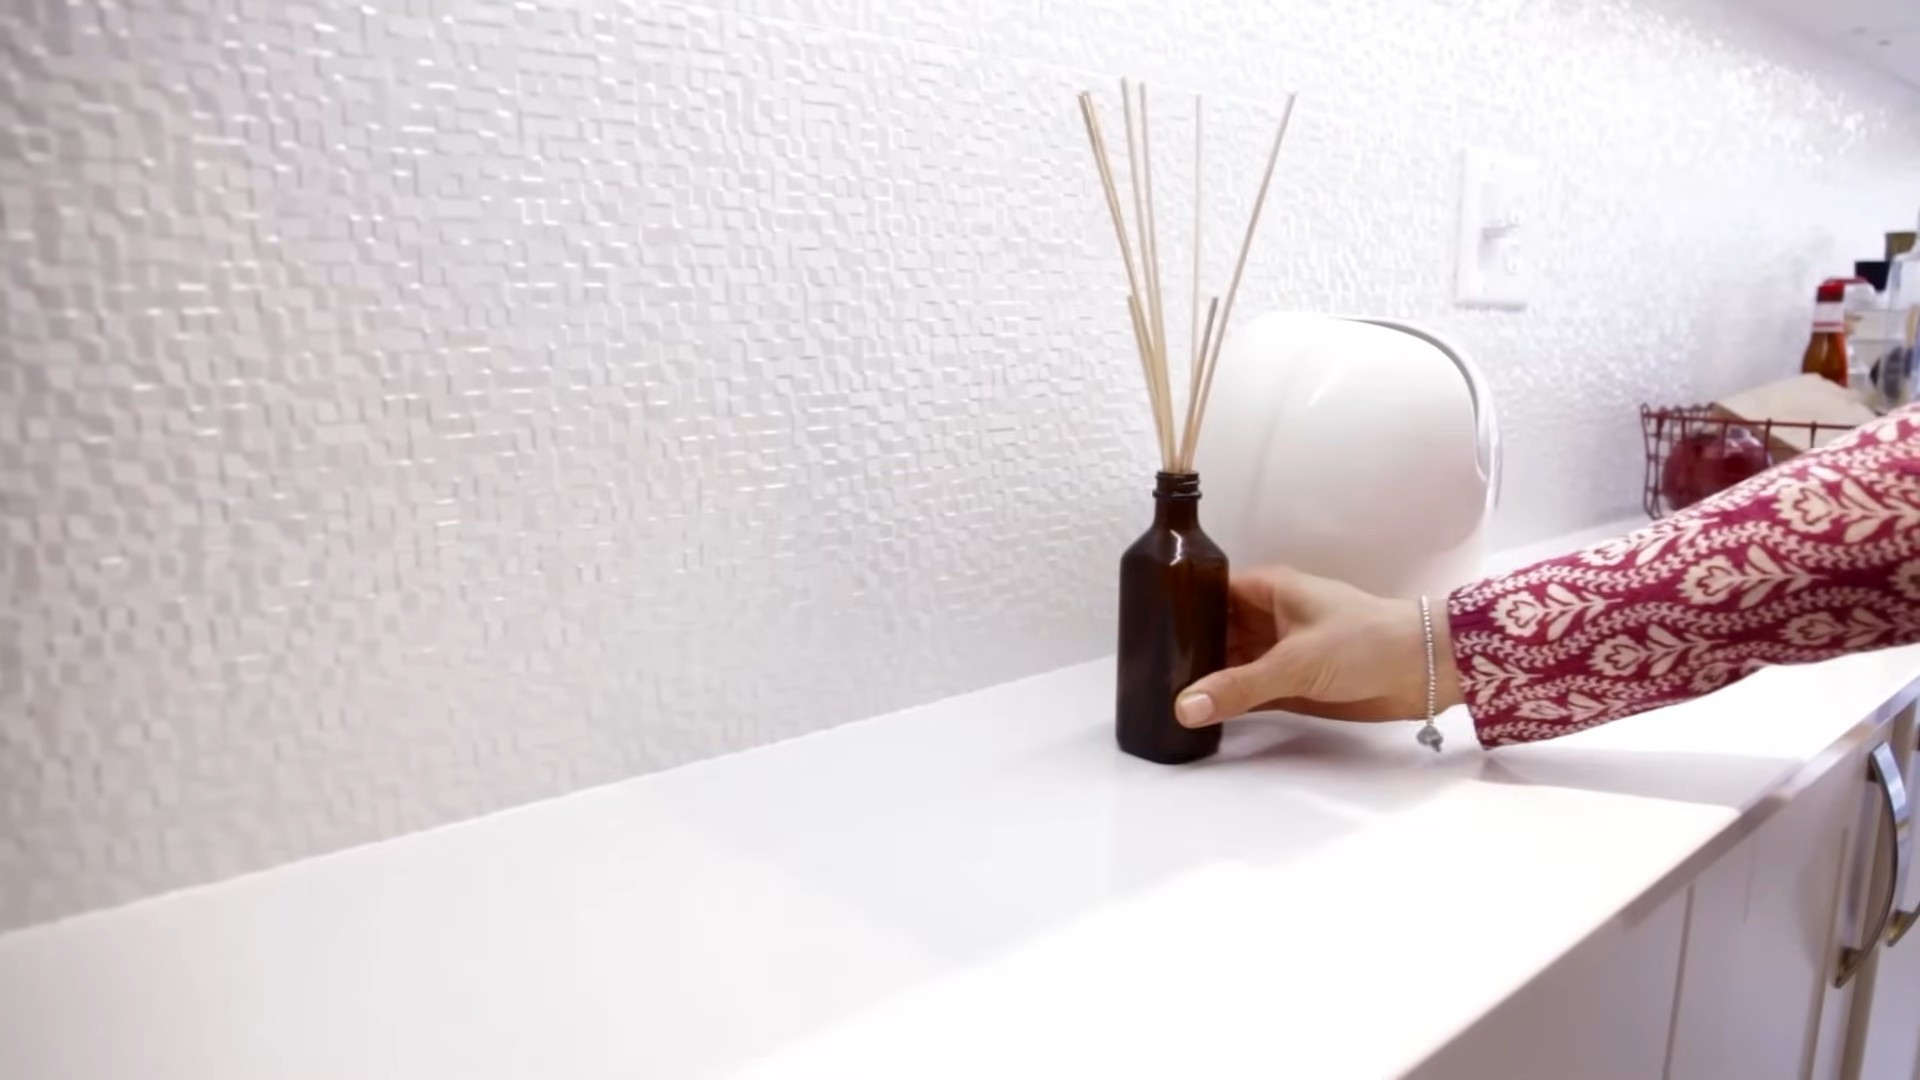
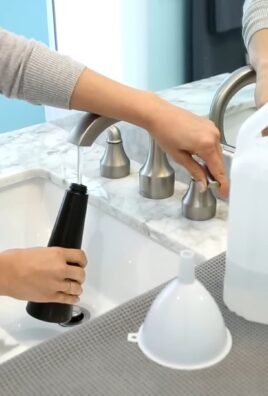
* **A Glass Container:** This will hold your fragrance oil blend. Look for something with a narrow opening to minimize evaporation. Small vases, decorative bottles, or even repurposed jars work great. I personally love using vintage apothecary bottles for a touch of elegance.
* **Reed Diffuser Reeds:** These are essential for drawing the fragrance oil up and dispersing it into the air. Rattan reeds are the most common and effective. You can find them online or at craft stores. Make sure they’re long enough to extend well above the top of your container. Usually, 10-12 inches is a good length.
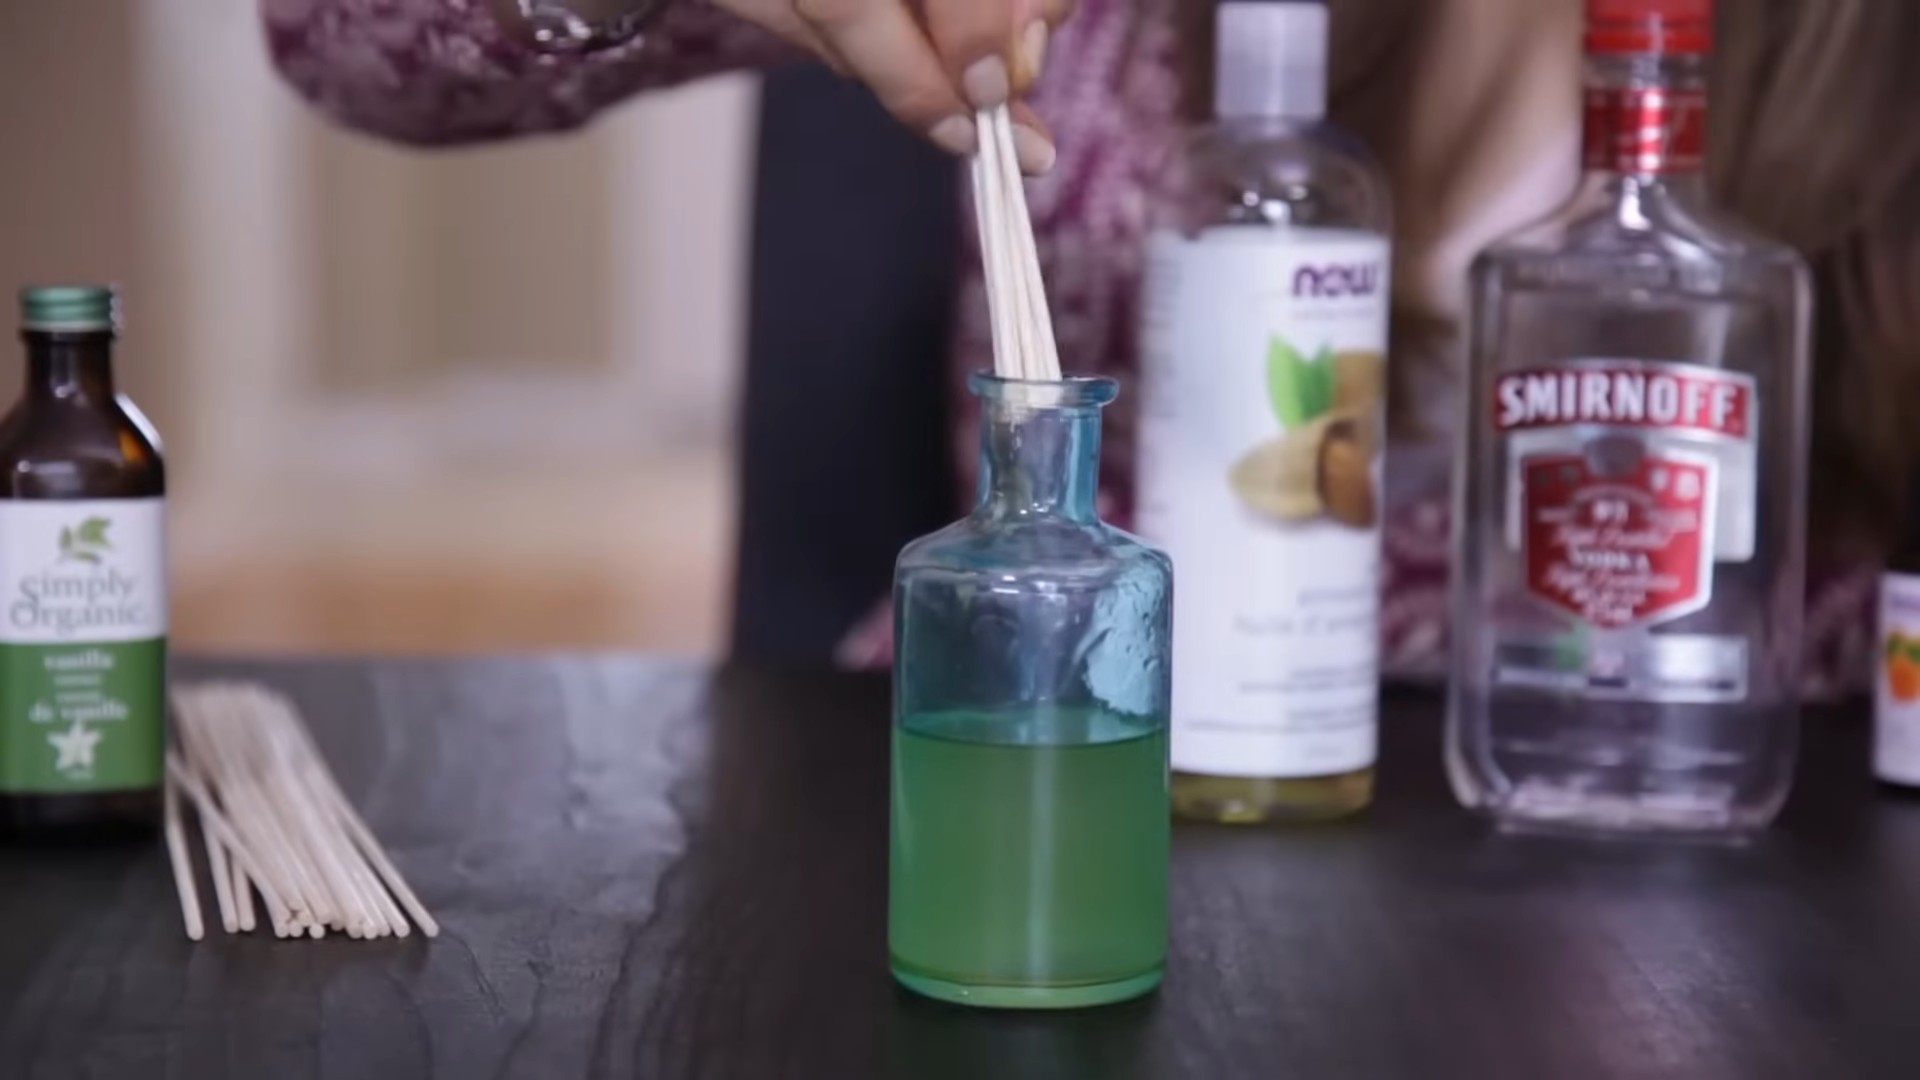
* **Carrier Oil:** This dilutes the essential oils and helps them travel up the reeds. Fractionated coconut oil, safflower oil, sweet almond oil, or dipropylene glycol (DPG) are all excellent choices. I prefer fractionated coconut oil because it’s odorless, colorless, and has a long shelf life. DPG is a synthetic solvent that is specifically designed for reed diffusers and will make the scent throw stronger and last longer.
* **Essential Oils:** This is where you get to unleash your creativity! Choose your favorite essential oils or create a custom blend. Consider the mood you want to create – lavender for relaxation, citrus for energy, or eucalyptus for a refreshing spa-like atmosphere.
* **Optional: Alcohol (Vodka or Rubbing Alcohol):** A small amount of alcohol helps the essential oils and carrier oil blend better and can improve the scent throw.
* **Measuring Spoons or Droppers:** For precise measurements of your oils.
* **Funnel (Optional):** To help pour the mixture into your container without spills.
* **Gloves (Optional):** To protect your hands from essential oils, especially if you have sensitive skin.
Step-by-Step Instructions: Creating Your Reed Diffuser
Now that you have all your supplies, let’s get down to the fun part – making your reed diffuser! Follow these steps carefully, and you’ll have a beautifully scented home in no time.
1. **Prepare Your Container:** Make sure your glass container is clean and dry. This will prevent any unwanted odors from interfering with your fragrance. I usually wash mine with soap and water and then let it air dry completely.
2. **Choose Your Scent Blend:** This is where your creativity shines! Think about the kind of atmosphere you want to create. Here are a few of my favorite blends to get you started:
* **Relaxing Lavender:** 20 drops lavender essential oil, 10 drops chamomile essential oil.
* **Energizing Citrus:** 15 drops orange essential oil, 10 drops grapefruit essential oil, 5 drops lemon essential oil.
* **Refreshing Eucalyptus:** 20 drops eucalyptus essential oil, 10 drops peppermint essential oil.
* **Cozy Vanilla Spice:** 15 drops vanilla essential oil, 10 drops cinnamon essential oil, 5 drops clove essential oil.
* **Uplifting Rose Garden:** 20 drops rose essential oil, 10 drops geranium essential oil.
Remember to research the safety of each essential oil before using it, especially if you have pets or allergies.
3. **Mix Your Oils:** In a separate small bowl or measuring cup, combine your essential oils. This allows them to blend together before adding them to the carrier oil.
4. **Add the Carrier Oil:** Now, add your carrier oil to the essential oil blend. A good ratio is typically 75-80% carrier oil and 20-25% essential oils. For example, if you’re using a 4-ounce container, you’ll need about 3 ounces of carrier oil and 1 ounce of essential oil blend.
5. **Add Alcohol (Optional):** If you’re using alcohol, add a small amount – about 1 tablespoon per 4 ounces of mixture. This will help the oils blend better and improve the scent throw.
6. **Thoroughly Combine:** Gently stir the mixture with a spoon or glass rod until all the ingredients are well combined. Avoid shaking, as this can create bubbles.
7. **Pour into Your Container:** Carefully pour the mixture into your prepared glass container. A funnel can be helpful to prevent spills.
8. **Insert the Reeds:** Place the reed diffuser reeds into the container, making sure they are submerged in the oil mixture.
9. **Wait and Flip:** Allow the reeds to soak up the oil for a few hours, or even overnight. This will saturate the reeds and allow them to start dispersing the fragrance. After a few hours, flip the reeds so that the saturated ends are now facing up. This will help to kickstart the diffusion process.
10. **Enjoy!** Place your reed diffuser in a well-ventilated area where you want to enjoy the fragrance. The scent will gradually fill the room.
Maintaining Your Reed Diffuser: Keeping the Scent Fresh
To keep your reed diffuser working its best, here are a few tips:
* **Flip the Reeds Regularly:** Flip the reeds every week or so to refresh the scent. When the reeds become saturated and clogged, they won’t diffuse the fragrance as effectively.
* **Replace the Reeds:** Over time, the reeds will become less effective. Replace them every 1-2 months for optimal performance.
* **Refill the Oil:** When the oil level gets low, refill the container with a fresh batch of your fragrance oil blend.
* **Adjust the Number of Reeds:** If the scent is too strong, remove a few reeds. If it’s not strong enough, add more reeds.
* **Keep Away from Direct Sunlight:** Direct sunlight can cause the essential oils to degrade and lose their scent.
* **Choose the Right Location:** Place your reed diffuser in a well-ventilated area, but avoid placing it near drafts or vents, as this can cause the oil to evaporate too quickly.
Troubleshooting: Common Issues and Solutions
Sometimes, things don’t go exactly as planned. Here are a few common issues you might encounter and how to fix them:
* **No Scent:**
* **Problem:** The reeds may not be saturated enough.
* **Solution:** Flip the reeds and wait a few hours. If that doesn’t work, try replacing the reeds.
* **Problem:** The essential oil concentration may be too low.
* **Solution:** Add more essential oils to the mixture.
* **Problem:** The reeds may be clogged.
* **Solution:** Replace the reeds.
* **Problem:** The room may be too large for the diffuser.
* **Solution:** Move the diffuser to a smaller room or use multiple diffusers.
* **Scent Too Strong:**
* **Problem:** The essential oil concentration may be too high.
* **Solution:** Dilute the mixture with more carrier oil.
* **Problem:** There may be too many reeds.
* **Solution:** Remove a few reeds.
* **Problem:** The room may be too small for the diffuser.
* **Solution:** Move the diffuser to a larger room.
* **Oil Evaporating Too Quickly:**
* **Problem:** The diffuser may be in a drafty area.
* **Solution:** Move the diffuser to a less drafty location.
* **Problem:** The essential oils may be highly volatile.
* **Solution:** Use a carrier oil with a lower evaporation rate, such as DPG.
Essential Oil Safety: A Quick Reminder
Before I wrap up, I want to emphasize the importance of essential oil safety. While essential oils are natural, they are also highly concentrated and can cause irritation or allergic reactions if used improperly.
* **Always dilute essential oils before using them.**
* **Perform a patch test before using a new essential oil on your skin.**
* **Avoid using essential oils on infants and young children.**
* **If you are pregnant or breastfeeding, consult with your doctor before using essential oils.**
* **Keep essential oils out of reach of children and pets.**
* **Store essential oils in a cool, dark place.**
Experiment and Enjoy!
Creating your own reed diffuser is a fun and rewarding DIY project. Don’t
Conclusion
So, there you have it! Crafting your own DIY reed diffuser isn’t just a cost-effective alternative to store-bought options; it’s a gateway to a personalized aromatic experience that perfectly complements your home and lifestyle. Forget those generic, mass-produced scents – with a little creativity and a few simple ingredients, you can curate a fragrance that truly reflects your individual taste and creates the ambiance you desire.
The beauty of this DIY project lies in its adaptability. Feel like a burst of citrus to energize your mornings? Combine lemon, grapefruit, and orange essential oils. Seeking a calming sanctuary for relaxation? Lavender, chamomile, and sandalwood are your allies. The possibilities are truly endless, limited only by your imagination and the vast world of essential oil blends.
Beyond the scent itself, consider experimenting with the visual aspects of your diffuser. Use a uniquely shaped bottle, add dried flowers or decorative stones to the base, or even tint the diffuser oil with a natural dye for a pop of color. These small touches can elevate your DIY reed diffuser from a simple air freshener to a stylish decorative accent that enhances your home décor.
Don’t be afraid to play around with different carrier oils too. While fractionated coconut oil is a popular choice due to its light texture and neutral scent, other options like sweet almond oil or safflower oil can also work well. Just be sure to choose an oil that is thin and easily absorbed by the reeds.
And speaking of reeds, remember that the quality of your reeds can significantly impact the performance of your diffuser. Opt for natural rattan reeds, as they have open channels that allow the fragrance to travel up and disperse effectively. Avoid using bamboo skewers or other materials that may not wick the oil properly.
This DIY project is not just about saving money; it’s about taking control of the scents that fill your home and creating a healthier, more sustainable environment. Many commercial air fresheners contain harmful chemicals and synthetic fragrances that can irritate allergies and even pose health risks. By making your own reed diffuser, you can avoid these toxins and enjoy a natural, eco-friendly way to freshen your air.
We wholeheartedly encourage you to give this DIY reed diffuser project a try. It’s a fun, rewarding, and surprisingly simple way to elevate your home’s ambiance and create a personalized fragrance experience. Once you’ve created your masterpiece, we’d love to hear about your experience! Share your favorite essential oil blends, any creative variations you’ve tried, and any tips or tricks you’ve discovered along the way. Let’s build a community of DIY fragrance enthusiasts and inspire each other to create beautiful, fragrant homes. So go ahead, unleash your inner perfumer and transform your space with the power of scent!
Frequently Asked Questions (FAQ)
What exactly is a reed diffuser, and how does it work?
A reed diffuser is a simple and elegant way to fragrance a room without the need for heat or electricity. It consists of a bottle or container filled with a scented oil, typically a blend of carrier oil and essential oils, and a set of reeds that are inserted into the oil. The reeds act as wicks, drawing the oil up through their porous structure and releasing the fragrance into the air through evaporation. The more reeds you use, the stronger the scent will be. The process is continuous and provides a subtle, consistent fragrance that can last for weeks or even months, depending on the size of the bottle, the type of oil used, and the environmental conditions.
What are the best essential oils to use in a DIY reed diffuser?
The best essential oils for your DIY reed diffuser are entirely dependent on your personal preferences and the desired effect. For a relaxing and calming atmosphere, lavender, chamomile, and sandalwood are excellent choices. To energize and uplift your mood, consider citrus oils like lemon, grapefruit, and orange. For a warm and inviting scent, try cinnamon, clove, and vanilla. Eucalyptus and peppermint are great for clearing sinuses and promoting focus. Experiment with different combinations to create your own unique signature scent. Remember to research the properties of each essential oil before using it, especially if you have any allergies or sensitivities. A good starting point is to use a blend of 2-3 essential oils, aiming for a total concentration of 15-20% essential oil in your carrier oil.
What type of carrier oil should I use?
The carrier oil is the base of your reed diffuser and helps to dilute the essential oils, allowing them to disperse evenly and safely. Fractionated coconut oil is a popular choice because it’s odorless, colorless, and has a very thin consistency, which allows it to travel up the reeds easily. Sweet almond oil and safflower oil are also good options, but they may have a slightly stronger scent than fractionated coconut oil. Avoid using thick or heavy oils like olive oil or vegetable oil, as they will not wick properly and may clog the reeds. Mineral oil is another option, but it’s not as natural or eco-friendly as the other choices.
How many reeds should I use in my diffuser?
The number of reeds you use will depend on the size of your bottle and the desired strength of the fragrance. As a general rule, start with 5-7 reeds for a small bottle (around 4 ounces) and increase the number as needed. The more reeds you use, the stronger the scent will be. You can always add or remove reeds to adjust the fragrance intensity. Remember to flip the reeds regularly (every week or two) to refresh the scent.
How often should I flip the reeds?
Flipping the reeds is essential for maintaining a consistent fragrance. Over time, the reeds can become saturated with oil, which can slow down the evaporation process. Flipping the reeds exposes the saturated ends to the air, allowing the fragrance to be released more effectively. We recommend flipping the reeds every week or two, or whenever you notice the scent fading.
How long will my DIY reed diffuser last?
The lifespan of your DIY reed diffuser will depend on several factors, including the size of the bottle, the type of oil used, the number of reeds, and the environmental conditions. In general, a 4-ounce bottle of diffuser oil should last for 1-2 months. Warmer temperatures and drier air can cause the oil to evaporate more quickly. To extend the life of your diffuser, keep it away from direct sunlight and heat sources, and flip the reeds regularly.
Can I reuse the reeds?
While you can technically reuse the reeds, it’s generally not recommended. Over time, the reeds can become clogged with oil and dust, which can reduce their effectiveness. Additionally, the reeds may retain the scent of the previous oil, which can interfere with the fragrance of your new blend. For best results, it’s best to replace the reeds whenever you refill your diffuser with new oil.
Is it safe to use essential oils around pets and children?
While essential oils offer many benefits, it’s important to use them safely, especially around pets and children. Some essential oils can be toxic to pets, so it’s crucial to research which oils are safe to use around them. Keep diffusers out of reach of children and pets to prevent accidental ingestion or spills. If you are pregnant or breastfeeding, consult with your doctor before using essential oils. Always dilute essential oils properly before using them, and never apply them directly to the skin.
How do I clean up spilled diffuser oil?
Spilled diffuser oil can be messy and can damage surfaces if not cleaned up promptly. The best way to clean up spilled oil is to blot it up with a clean cloth or paper towel as quickly as possible. Avoid rubbing the spill, as this can spread the oil further. For stubborn stains, you can try using a mixture of baking soda and water or a mild dish soap. Always test any cleaning solution on an inconspicuous area first to ensure it doesn’t damage the surface.
Where is the best place to put my reed diffuser?
The best place to put your reed diffuser is in a well-ventilated area where the fragrance can circulate easily. Avoid placing it in direct sunlight or near heat sources, as this can cause the oil to evaporate more quickly. Consider placing it in a central location in the room, such as on a coffee table or shelf. You can also place it in smaller spaces like bathrooms or closets to freshen the air. Experiment with different locations to find the spot where the fragrance is most noticeable and effective.
Leave a Comment