

DIY Scrapbooking for Beginners: Unleash Your Inner Artist and Preserve Precious Memories!
Ever feel like your photos are just languishing on your phone or computer, begging to be brought to life? I know I have! That’s where the magic of DIY scrapbooking for beginners comes in. It’s more than just sticking pictures in a book; it’s about weaving stories, preserving emotions, and creating tangible heirlooms that will be cherished for generations.
Scrapbooking has a rich history, evolving from simple memory albums in the 16th century to the elaborate, personalized art form we know and love today. Think of it as a modern-day illuminated manuscript, where you’re the artist and your life is the story. But don’t let the intricate designs you see online intimidate you! This guide is designed specifically for beginners, offering easy-to-follow tips and tricks to get you started on your scrapbooking journey.
In today’s digital age, where everything feels fleeting, the act of physically creating something beautiful and lasting is incredibly rewarding. Plus, DIY scrapbooking for beginners is a fantastic way to de-stress, unleash your creativity, and connect with loved ones as you reminisce over shared memories. So, grab your photos, gather your supplies, and let’s dive into the wonderful world of scrapbooking!
DIY Scrapbooking for Beginners: A Step-by-Step Guide
Hey there, fellow crafters! Ever looked at those gorgeous scrapbooks and thought, “I wish I could do that!”? Well, guess what? You absolutely can! Scrapbooking might seem intimidating at first, but trust me, it’s a super fun and rewarding hobby. This guide is designed for complete beginners, so don’t worry if you’ve never even held a paper trimmer before. We’ll walk through everything together, step by step. Let’s dive in!
Gathering Your Supplies: The Essentials
Before we start gluing and glittering, we need to gather our supplies. Don’t feel like you need to buy everything at once. Start with the basics and build your collection as you go. Here’s a list of essentials:
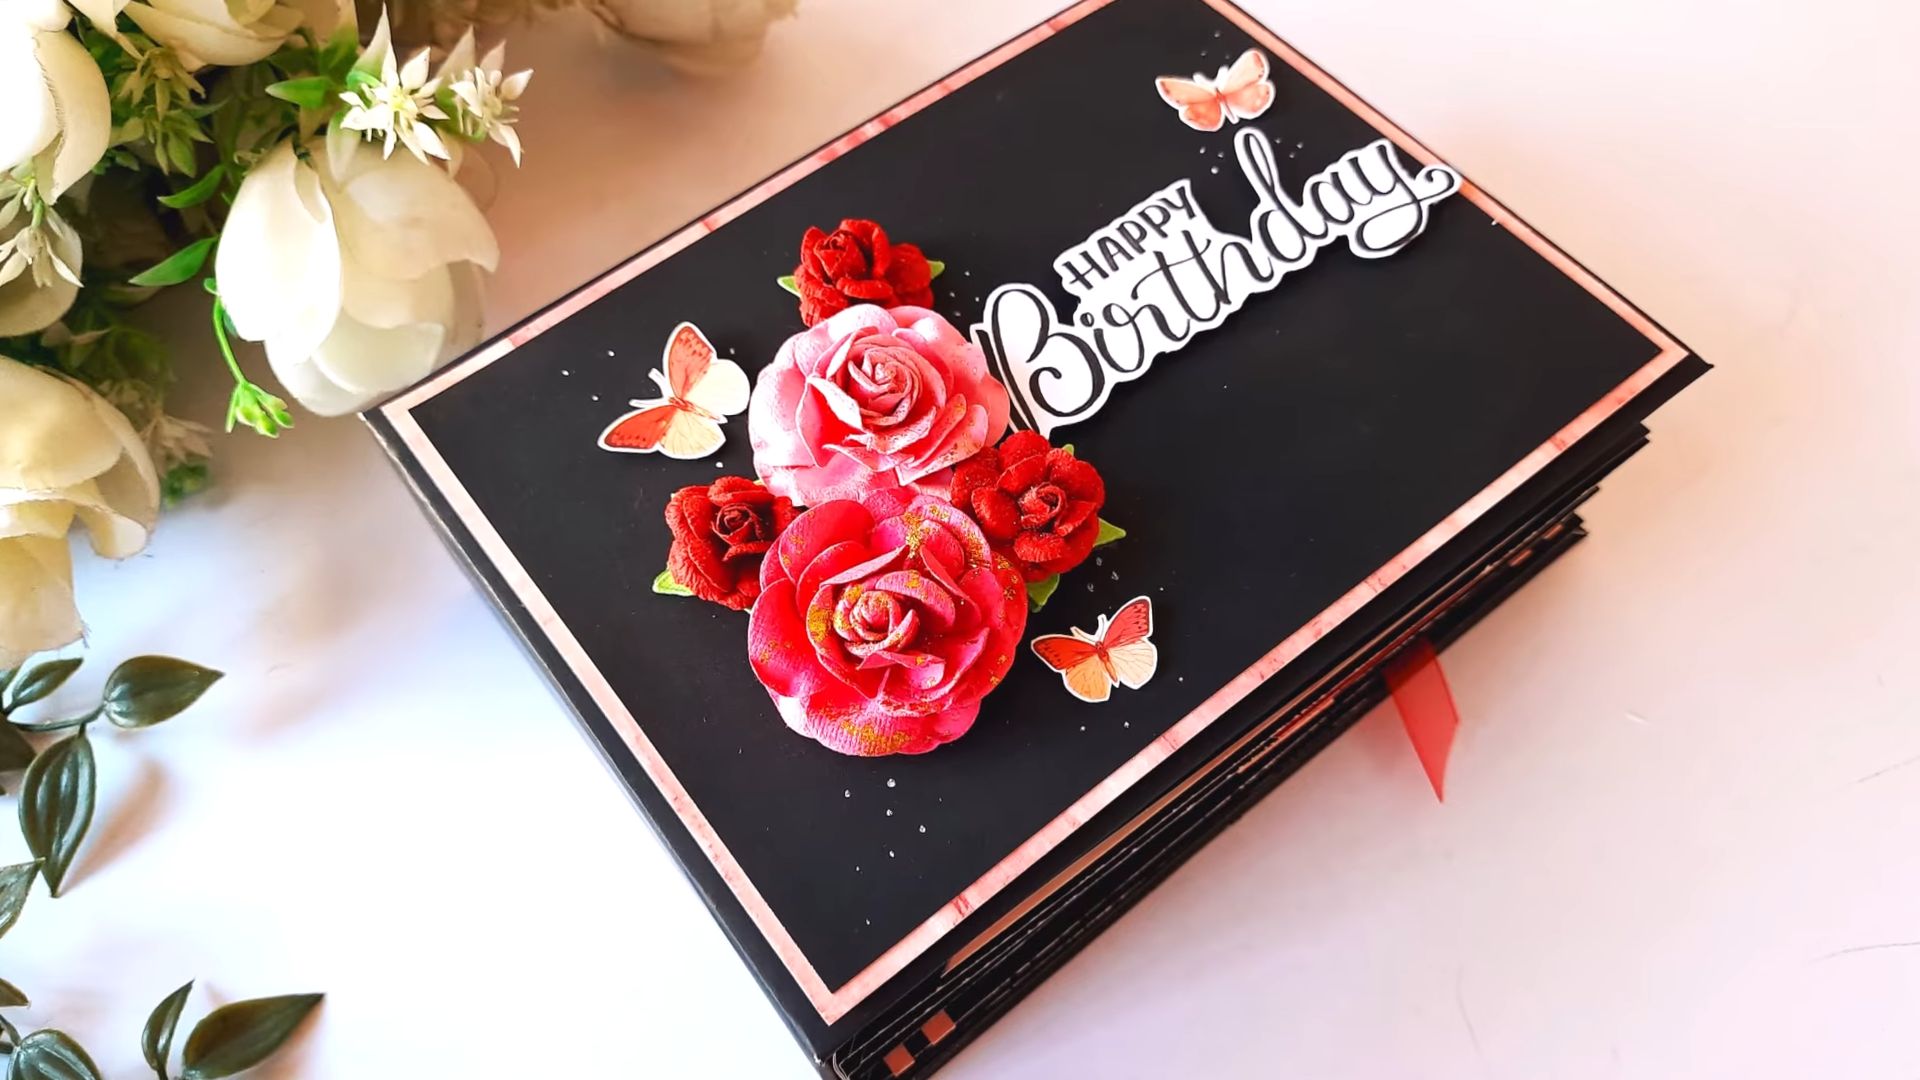
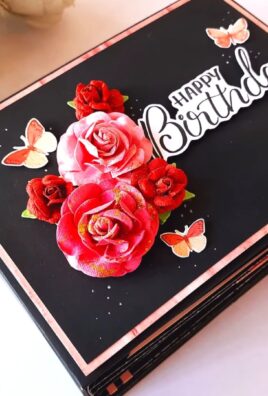
* Scrapbook Album: This is the foundation of your scrapbook. Choose a size that appeals to you. 12×12 inch albums are popular because they offer plenty of space, but 8.5×11 inch albums are also a great option, especially for beginners. Look for albums that are expandable, meaning you can add more pages as needed.
* Scrapbook Paper: This is where the fun begins! Scrapbook paper comes in a huge variety of colors, patterns, and textures. Look for acid-free and lignin-free paper to ensure your photos and memories are preserved for years to come.
* Photos: Obviously! Choose photos that tell a story or capture a special moment. Print them in various sizes to add visual interest to your pages.
* Adhesive: This is crucial for attaching everything to your pages. I recommend using photo-safe adhesive, such as double-sided tape, glue dots, or a glue runner. Avoid using regular glue, as it can damage your photos over time.
* Paper Trimmer: A paper trimmer is essential for cutting paper and photos to the correct size. A guillotine-style trimmer is great for straight cuts, while a rotary trimmer is good for curved cuts.
* Scissors: A good pair of scissors is always handy for trimming small details and embellishments.
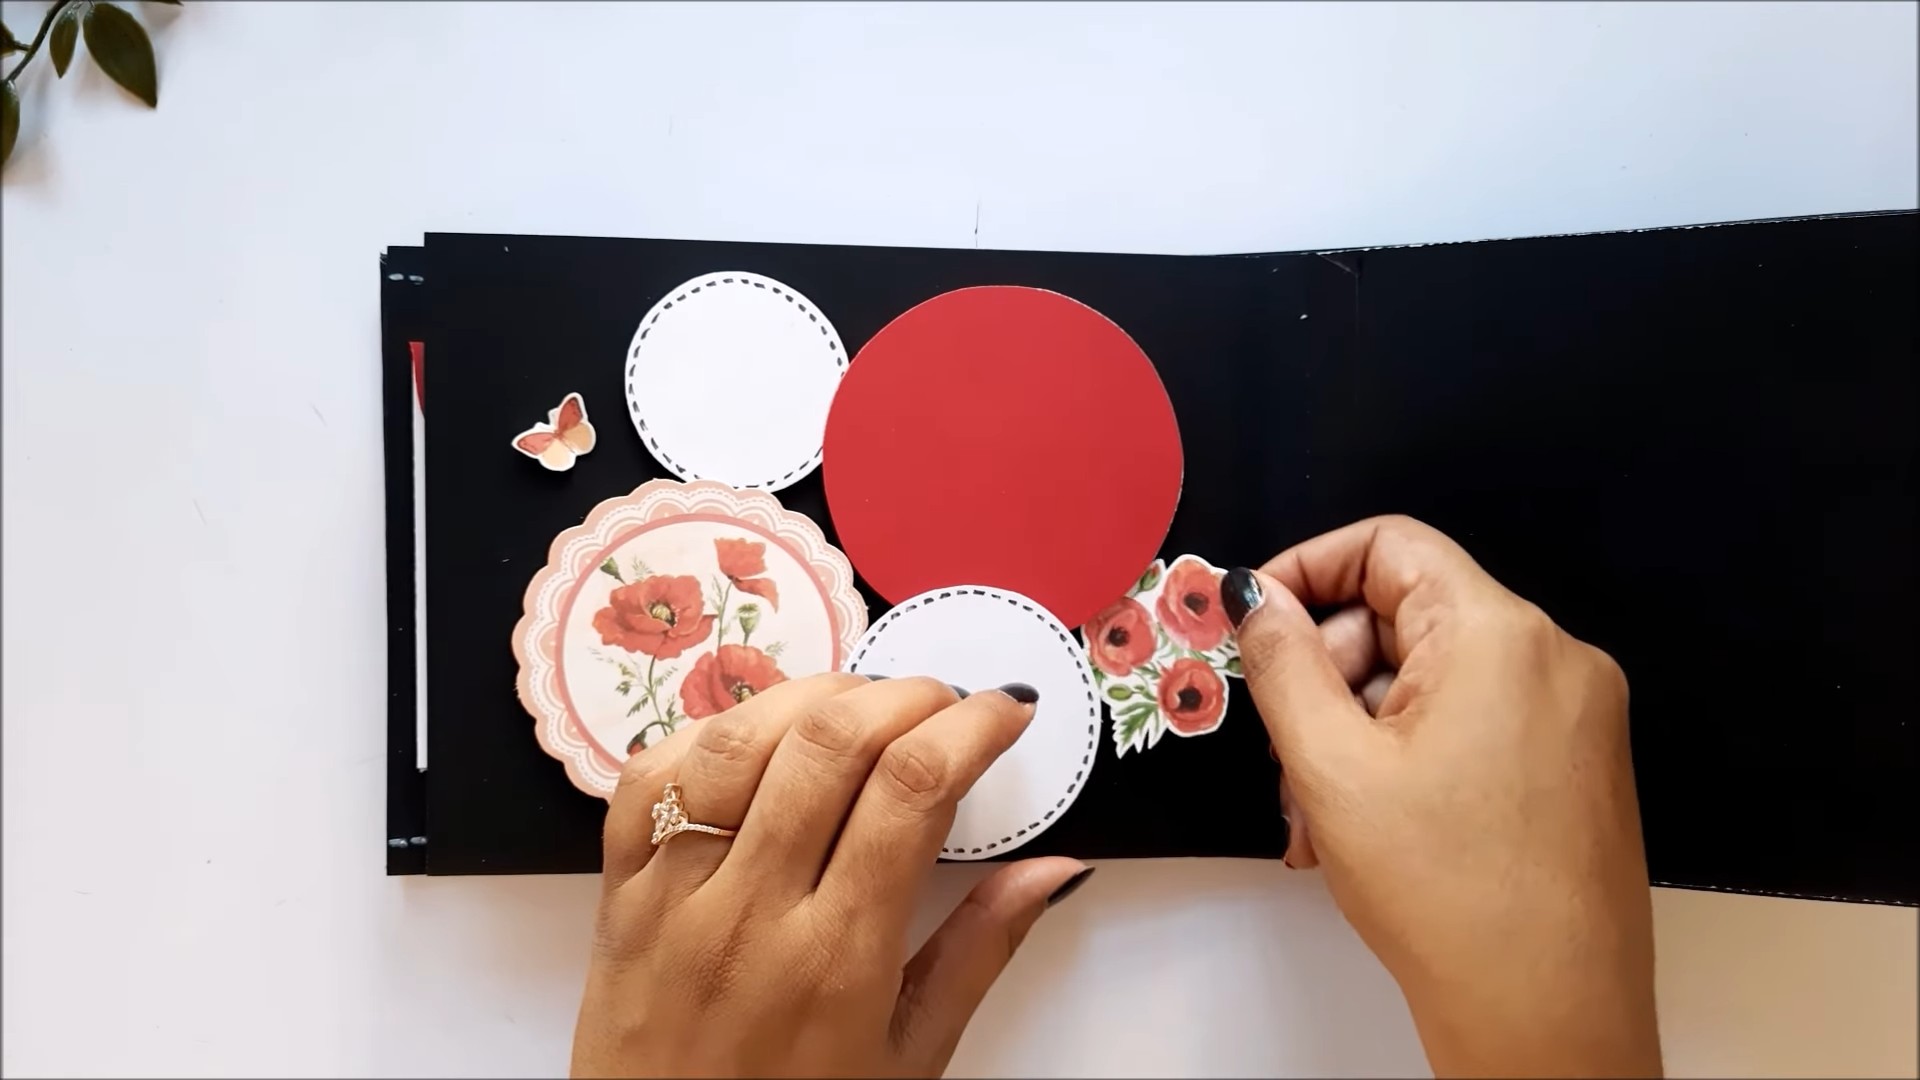
* Embellishments: This is where you can really let your creativity shine! Embellishments include things like stickers, buttons, ribbons, brads, die cuts, and more. Choose embellishments that complement your photos and the overall theme of your scrapbook.
* Pens and Markers: Use pens and markers to journal about your photos and add personal touches to your pages. Look for acid-free and archival-quality pens to ensure your writing lasts.
* Ruler: A ruler is helpful for measuring and aligning elements on your pages.
* Corner Rounder (Optional): A corner rounder can add a nice finishing touch to your photos and paper.
Planning Your Layout: The Blueprint for Success
Before you start gluing things down, it’s a good idea to plan your layout. This will help you create a balanced and visually appealing page. Here are a few tips for planning your layout:
* Choose a Focal Point: Every page should have a focal point, which is the main element that draws the eye. This could be a large photo, a title, or a cluster of embellishments.
* Create a Visual Triangle: Arrange your elements in a visual triangle to create a sense of balance and harmony.
* Use Layers: Layering paper, photos, and embellishments adds depth and dimension to your pages.
* Leave White Space: Don’t overcrowd your pages. Leave some white space (also known as negative space) to give the eye a place to rest.
* Consider a Theme: Choose a theme for your scrapbook, such as a vacation, a birthday, or a holiday. This will help you choose coordinating paper and embellishments.
Creating Your Scrapbook Pages: Step-by-Step Instructions
Okay, now for the fun part! Let’s create our first scrapbook page. I’m going to walk you through a simple layout that’s perfect for beginners.
1. Choose Your Photos: Select 2-3 photos that you want to feature on your page. I’m going to use two photos from a recent trip to the beach.
2. Select Your Paper: Choose a background paper that complements your photos. I’m going to use a light blue paper with a subtle wave pattern. You’ll also need a few coordinating papers for layering. I’m choosing a darker blue paper and a sand-colored paper.
3. Trim Your Photos and Paper: Use your paper trimmer to cut your photos and paper to the desired sizes. I’m going to trim one photo to 4×6 inches and the other to 3×5 inches. I’m also going to cut a piece of the darker blue paper to 5×7 inches and a piece of the sand-colored paper to 4×6 inches.
4. Layer Your Photos: Layer your photos on top of the coordinating papers. Adhere the 4×6 inch photo to the sand-colored paper and the 3×5 inch photo to the darker blue paper. This will create a nice layered effect.
5. Arrange Your Elements: Arrange your layered photos on the background paper. I’m going to place the larger photo on the left side of the page and the smaller photo on the right side. Leave some space between the photos for embellishments and journaling.
6. Add Embellishments: Now it’s time to add some embellishments! I’m going to use a few beach-themed stickers, such as seashells and starfish. I’m also going to add a piece of ribbon and a few brads.
7. Journal About Your Photos: Use a pen or marker to journal about your photos. Write down the date, location, and any special memories you want to remember. I’m going to write a short paragraph about our fun day at the beach.
8. Adhere Everything to the Page: Once you’re happy with your layout, use your adhesive to attach everything to the page. Make sure everything is securely attached.
9. Add a Title (Optional): If you want, you can add a title to your page. I’m going to use letter stickers to spell out “Beach Day Fun!”
10. Step Back and Admire Your Work: Congratulations! You’ve created your first scrapbook page. Take a step back and admire your work. You did it!
Tips and Tricks for Stunning Scrapbook Pages
Here are a few extra tips and tricks to help you create even more stunning scrapbook pages:
* Use a Color Palette: Choose a color palette for each page to create a cohesive look.
* Mix and Match Patterns: Don’t be afraid to mix and match different patterns of paper. Just make sure they coordinate well together.
* Add Texture: Add texture to your pages by using different types of paper, such as textured cardstock or vellum. You can also add texture with embellishments, such as buttons, ribbons, and fabric scraps.
* Use Die Cuts: Die cuts are a great way to add intricate shapes and designs to your pages. You can buy pre-cut die cuts or use a die-cutting machine to create your own.
* Create Clusters: Create clusters of embellishments to add visual interest to your pages.
* Use Stamps: Stamps are a versatile tool for adding designs and patterns to your pages.
* Add Washi Tape: Washi tape is a decorative tape that comes in a variety of colors and patterns. It’s a great way to add a pop of color or pattern to your pages.
* Don’t Be Afraid to Experiment: The most important thing is to have fun and experiment with different techniques and styles. There are no rules in scrapbooking!
Preserving Your Memories: Keeping Your Scrapbook Safe
Once you’ve created your beautiful scrapbook, you’ll want to make sure it’s preserved for years to come. Here are a few tips for preserving your memories:
* Use Acid-Free and Lignin-Free Materials: As mentioned earlier, it’s important to use acid-free and lignin-free paper and adhesive to prevent your photos and memories from fading or deteriorating over time.
* Store Your Scrapbook in a Cool, Dry Place: Avoid storing your scrapbook in direct sunlight or in a humid environment, as this can damage the paper and photos.
* Handle Your Scrapbook with Care: When handling your scrapbook, be sure to wash your hands first to remove any oils or dirt that could damage the pages.
* Consider Using Page Protectors: Page protectors are clear plastic sleeves that protect your scrapbook pages from dust, dirt, and fingerprints.
Finding Inspiration: Where to Look for Ideas
Feeling stuck for ideas? Don’t worry! There are tons of places to find inspiration for your scrapbook pages:
* Scrapbooking Magazines: Scrapbooking magazines are a great source of inspiration for layouts, techniques, and embellishments.
* Scrapbooking
Conclusion
So, there you have it! This simple yet effective DIY scrapbooking trick is a game-changer for beginners and seasoned scrapbookers alike. It’s more than just a way to save money; it’s about unlocking your creativity and personalizing your projects in a way that store-bought embellishments simply can’t match. The beauty of this method lies in its adaptability. You’re not confined to pre-designed patterns or limited color palettes. Instead, you have the freedom to create elements that perfectly complement your photos and tell your unique story.
Think about the possibilities! You could use fabric scraps from a beloved old shirt to add a sentimental touch to a family history scrapbook. Or, you could incorporate pressed flowers from your garden to create a nature-themed spread. Don’t be afraid to experiment with different textures, colors, and materials. Try using old maps, sheet music, or even ticket stubs to add depth and interest to your pages.
Consider variations like using different adhesives. While glue sticks are great for general use, double-sided tape offers a stronger hold for heavier embellishments. For a more dimensional look, try using foam squares to lift certain elements off the page. You can also explore different cutting techniques. Instead of just cutting straight lines, try using decorative scissors or punches to create interesting shapes and borders.
Another fantastic variation is to incorporate mixed media techniques. Combine your DIY embellishments with paint, ink, or stamps to create truly unique and artistic pages. You could even try adding hand-lettered titles or journaling to personalize your scrapbook even further. The possibilities are truly endless!
This DIY scrapbooking for beginners trick is not just about saving money; it’s about fostering creativity, personalizing your projects, and creating lasting memories. It’s about turning ordinary materials into extraordinary embellishments that tell your story in a unique and meaningful way.
We wholeheartedly encourage you to give this DIY trick a try. Gather your supplies, unleash your creativity, and start crafting! We’re confident that you’ll be amazed at the beautiful and personalized embellishments you can create. And most importantly, we want to hear about your experience! Share your creations, tips, and variations in the comments below. Let’s inspire each other and build a community of creative scrapbookers! We can’t wait to see what you come up with!
Frequently Asked Questions (FAQ)
What exactly are the benefits of using DIY embellishments instead of store-bought ones?
DIY embellishments offer a multitude of benefits. Firstly, they are significantly more cost-effective. You can utilize materials you already have on hand, reducing the need to purchase expensive embellishments. Secondly, they allow for unparalleled personalization. You can create elements that perfectly match your photos, theme, and personal style. Thirdly, they foster creativity and allow you to express yourself in a unique way. Finally, they add a sentimental touch to your scrapbook, as you can incorporate materials that hold special meaning.
What types of materials can I use to create DIY scrapbook embellishments?
The possibilities are endless! Consider using fabric scraps, paper scraps (including patterned paper, wrapping paper, and old book pages), buttons, ribbons, lace, yarn, beads, dried flowers, leaves, ticket stubs, maps, sheet music, photographs (printed at a smaller size), and even natural elements like small twigs or pebbles. The key is to think outside the box and experiment with different textures, colors, and materials.
What kind of adhesive should I use for my DIY embellishments?
The best adhesive depends on the type of embellishment and the surface you’re adhering it to. Glue sticks are a good all-around option for lightweight paper embellishments. Double-sided tape provides a stronger hold for heavier embellishments or textured surfaces. Foam squares or dots can be used to create a dimensional effect. For delicate materials like fabric or lace, consider using a fabric glue or a glue gun on a low setting. Always test the adhesive on a scrap piece of paper or material before applying it to your scrapbook page.
How can I make my DIY embellishments look more professional?
Attention to detail is key. Use sharp scissors or a craft knife to ensure clean cuts. Consider using decorative scissors or punches to create interesting shapes and borders. Layer your embellishments to add depth and dimension. Use a ruler or cutting mat to ensure straight lines and accurate measurements. Experiment with different techniques like distressing, inking, or stamping to add texture and visual interest.
What if I’m not very artistic? Can I still create DIY scrapbook embellishments?
Absolutely! You don’t need to be a professional artist to create beautiful DIY embellishments. Start with simple techniques like cutting out shapes from patterned paper or layering different materials. Use templates or stencils to create more intricate designs. Don’t be afraid to experiment and make mistakes. The most important thing is to have fun and express yourself. There are tons of tutorials online for easy DIY embellishments.
How do I store my DIY embellishments?
Proper storage is essential to keep your DIY embellishments organized and protected. Use clear plastic containers or storage boxes to separate different types of embellishments. Label each container clearly so you can easily find what you’re looking for. Store delicate embellishments like dried flowers or lace in acid-free tissue paper to prevent damage. Keep your embellishments in a cool, dry place away from direct sunlight to prevent fading or discoloration.
Can I use my DIY embellishments in other craft projects besides scrapbooking?
Definitely! DIY embellishments are incredibly versatile and can be used in a wide range of craft projects. Use them to decorate greeting cards, gift tags, journals, home decor items, and even clothing. They’re also great for creating mixed media art, collage, and other artistic projects. Let your imagination run wild and explore the endless possibilities!
What are some easy DIY embellishment ideas for beginners?
Here are a few simple ideas to get you started:
* **Paper shapes:** Cut out simple shapes like hearts, stars, or circles from patterned paper or cardstock.
* **Fabric banners:** Cut small triangles from fabric scraps and string them together to create a mini banner.
* **Button clusters:** Glue buttons of different sizes and colors together to create a unique embellishment.
* **Ribbon bows:** Tie ribbons into simple bows and attach them to your scrapbook page.
* **Stamped images:** Use rubber stamps and ink to create custom designs on paper or cardstock.
How can I incorporate my own photos into my DIY embellishments?
Print your photos at a smaller size and cut them into interesting shapes. You can also create photo collages or use photo editing software to add filters and effects. Consider adding captions or journaling directly onto your photos. Use photo corners or double-sided tape to attach your photos to your scrapbook page.
Where can I find inspiration for DIY scrapbook embellishments?
There are countless sources of inspiration online and in print. Browse Pinterest, Instagram, and other social media platforms for ideas. Check out scrapbooking magazines and blogs for tutorials and inspiration. Visit craft stores and observe the different types of embellishments that are available. And most importantly, look around you! Everyday objects can often be transformed into unique and beautiful embellishments.

Leave a Comment