

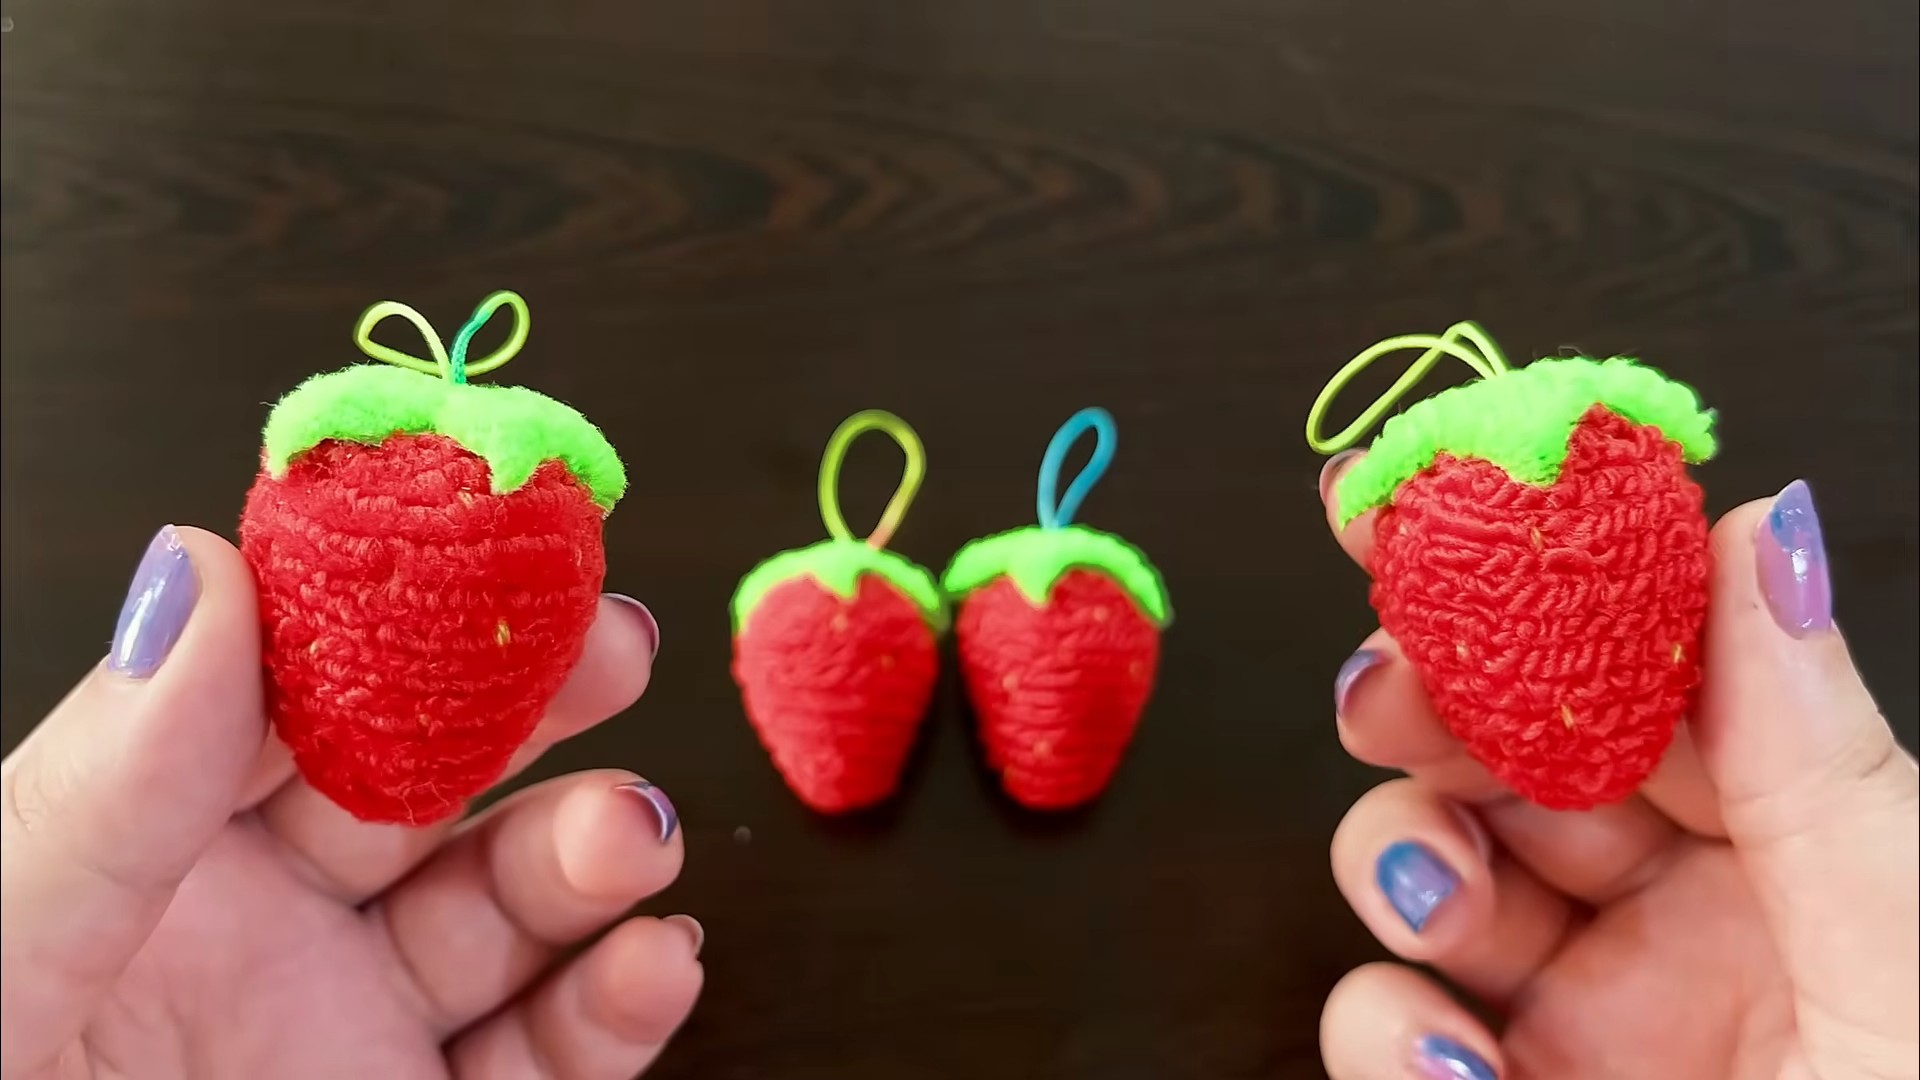
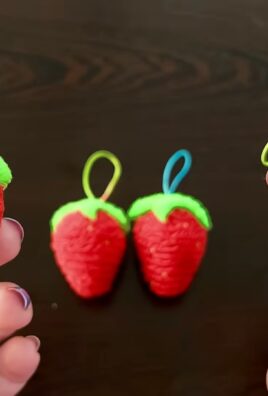
DIY Strawberry Keychain: Who doesn’t love a little burst of summery sweetness dangling from their keys or backpack? I know I do! And what if I told you that you could create your very own adorable strawberry keychain, adding a touch of handmade charm to your everyday life? This isn’t just about crafting; it’s about embracing a tradition of resourcefulness and creativity that stretches back generations.
For centuries, people have been crafting small, meaningful objects to personalize their belongings and express their individuality. From intricately beaded key fobs to hand-stitched charms, these little treasures have always held a special significance. Today, we’re carrying on that tradition with a fun and easy DIY Strawberry Keychain project that anyone can tackle.
Let’s face it, mass-produced accessories can feel a little impersonal. But a handmade keychain? That’s a conversation starter, a little piece of your personality that you carry with you. Plus, in a world increasingly focused on sustainability, creating your own accessories is a fantastic way to reduce waste and express your unique style. So, grab your supplies, and let’s dive into this delightful DIY project! I promise, you’ll love the process and the adorable result.
DIY Adorable Strawberry Keychain: A Sweet Project!
Hey there, fellow crafters! Today, I’m super excited to share a fun and easy DIY project with you: creating an adorable strawberry keychain! This little charm is perfect for adding a touch of sweetness to your keys, backpack, or even as a cute gift for a friend. It’s a great way to use up scraps of felt and get creative. Let’s get started!
What You’ll Need:
Before we dive in, let’s gather all the materials. Trust me, having everything ready makes the process so much smoother.
* Red Felt: This will be the main body of our strawberry.
* Green Felt: For the leaves and stem.
* White Felt (optional): For the seeds. You can also use white embroidery floss.
* Embroidery Floss: Red, green, and white (if using floss for seeds).
* Keychain Ring: The essential part that attaches the strawberry to your keys.
* Stuffing: Polyester fiberfill is perfect for giving our strawberry a plump shape.
* Scissors: For cutting the felt.
* Needle: For hand sewing.
* Pins: To hold the felt pieces together while sewing.
* Pencil or Fabric Marker: For tracing the patterns.
* Paper: For creating the strawberry and leaf templates.
* Hot Glue Gun (optional): For attaching the seeds if you prefer not to sew them.
Creating the Templates
This is a crucial step for ensuring your strawberry looks just right. Don’t worry, it’s easier than it sounds!
1. Draw the Strawberry Shape: On a piece of paper, draw a simple strawberry shape. Think of a rounded triangle with a slightly curved bottom. I usually make mine about 2-3 inches tall, but you can adjust the size to your liking.
2. Draw the Leaf Shape: Next, draw a small leaf shape. I like to make mine with 3-5 points for a more realistic look. The leaf should be proportionate to the strawberry, about 1-1.5 inches wide.
3. Cut Out the Templates: Carefully cut out both the strawberry and leaf templates. These will be your guides for cutting the felt.
Cutting the Felt Pieces
Now for the fun part – bringing our strawberry to life!
1. Pin the Strawberry Template: Place the strawberry template on the red felt and pin it in place. This will prevent the template from shifting while you cut.
2. Cut Out Two Strawberry Pieces: Carefully cut out two identical strawberry shapes from the red felt, using the template as a guide.
3. Pin the Leaf Template: Place the leaf template on the green felt and pin it in place.
4. Cut Out the Leaves: Cut out 2-3 leaf shapes from the green felt. I like to use different shades of green felt if I have them, to add some dimension.
5. Cut out the stem: Cut out a small rectangle from the green felt. This will be the stem of the strawberry.
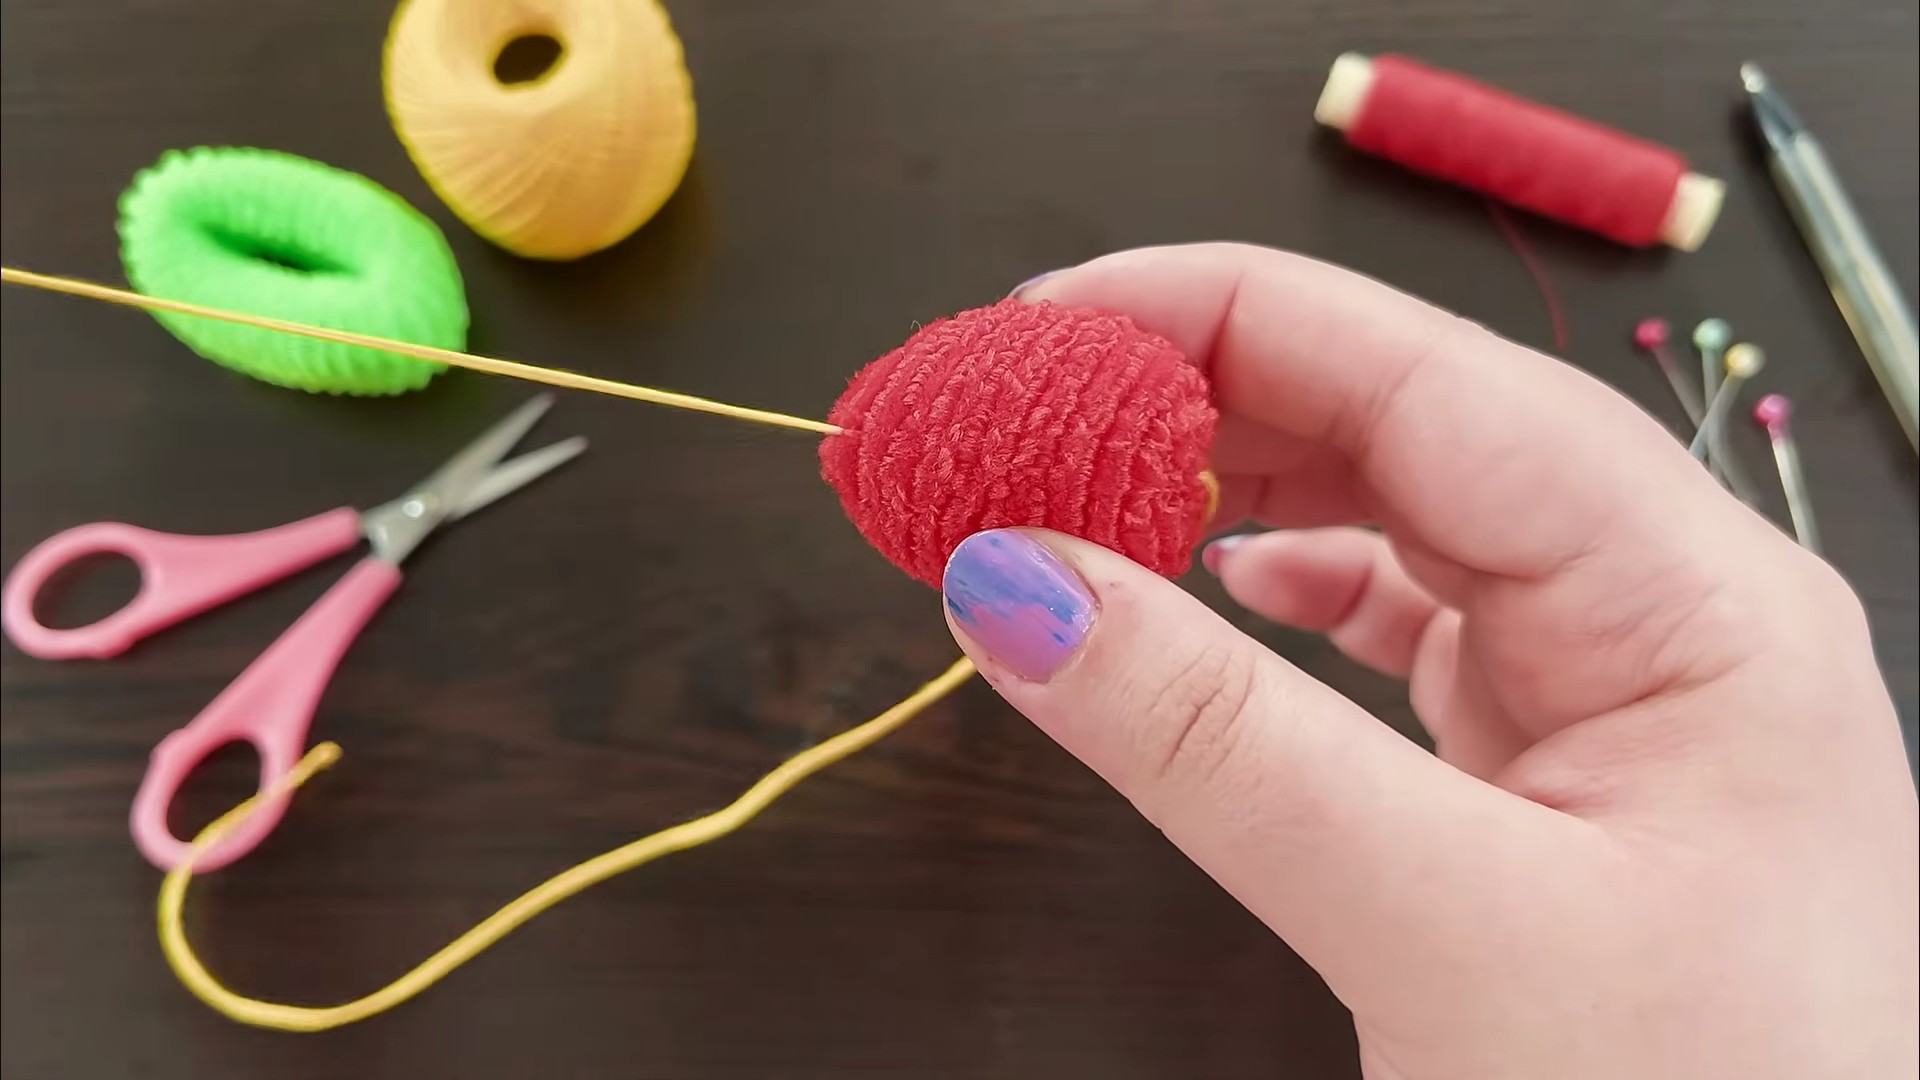
Sewing the Strawberry Body
This is where the magic happens! We’ll be sewing the two strawberry pieces together to create the main body of our keychain.
1. Pin the Strawberry Pieces Together: Place the two red felt strawberry pieces together, aligning the edges. Pin them together to keep them from shifting while you sew.
2. Start Sewing: Thread your needle with red embroidery floss and tie a knot at the end. Starting at the top of the strawberry, begin sewing around the edges using a blanket stitch or a simple running stitch. I personally prefer the blanket stitch because it gives a nice, clean edge.
* Blanket Stitch: Bring the needle up through both layers of felt near the edge. Then, bring the needle down through the same spot, creating a loop. Before pulling the thread tight, bring the needle up through the loop. Pull tight to create the stitch. Repeat this process around the entire edge.
* Running Stitch: Simply sew in and out of the felt, creating a dashed line around the edge.
3. Leave an Opening: When you’re about two-thirds of the way around, stop sewing and leave an opening for stuffing.
4. Stuff the Strawberry: Gently stuff the strawberry with polyester fiberfill until it’s plump and firm. Be careful not to overstuff it, or the seams might burst.
5. Finish Sewing: Once the strawberry is stuffed to your liking, continue sewing around the remaining edge to close the opening. Tie off the thread and hide the knot inside the strawberry.
Adding the Seeds
Now, let’s add those iconic strawberry seeds!
1. Thread the Needle: Thread your needle with white embroidery floss (or use a hot glue gun if you prefer).
2. Sew the Seeds (Option 1): If sewing, make small stitches all over the strawberry to represent the seeds. I like to scatter them randomly for a more natural look.
3. Glue the Seeds (Option 2): If using a hot glue gun, carefully apply a small dot of glue to the strawberry and quickly attach a tiny piece of white felt or a small bead. Repeat this process until you’ve added enough seeds.
Attaching the Leaves and Stem
Time to add the finishing touches!
1. Arrange the Leaves: Position the green felt leaves at the top of the strawberry. Play around with the arrangement until you’re happy with how they look.
2. Sew or Glue the Leaves: You can either sew the leaves onto the strawberry using green embroidery floss or attach them with a hot glue gun. If sewing, use small stitches to secure the leaves in place.
3. Attach the Stem: Position the stem at the top of the strawberry, behind the leaves. Sew or glue it in place.
Adding the Keychain Ring
Almost there! This is the final step to transform our strawberry into a functional keychain.
1. Find the Center: Locate the center of the top of the strawberry, between the leaves.
2. Attach the Keychain Ring: Use a needle and thread to create a loop at the top of the strawberry. Make sure the loop is strong enough to hold the keychain ring. Alternatively, you can use a small jump ring and pliers to attach the keychain ring to the felt loop.
3. Secure the Ring: Reinforce the loop by sewing over it several times to ensure it’s securely attached.
Alternative Method: Using a Sewing Machine
If you’re comfortable using a sewing machine, you can speed up the process significantly!
1. Cut the Felt Pieces: Follow the same steps as above to cut out the strawberry and leaf shapes.
2. Pin the Pieces Together: Pin the strawberry pieces together, right sides facing out.
3. Sew Around the Edges: Using a sewing machine, sew around the edges of the strawberry, leaving an opening for stuffing. Use a short stitch length for a neat finish.
4. Stuff the Strawberry: Stuff the strawberry with polyester fiberfill.
5. Close the Opening: Sew the opening closed using the sewing machine or hand-sew it with a hidden stitch.
6. Add the Seeds, Leaves, and Keychain Ring: Follow the same steps as above to add the seeds, leaves, and keychain ring.
Tips and Tricks for a Perfect Strawberry Keychain
* Use High-Quality Felt: Using high-quality felt will make your keychain more durable and give it a professional look.
* Experiment with Colors: Don’t be afraid to experiment with different colors of felt. You could make a pink strawberry, a yellow strawberry, or even a rainbow strawberry!
* Add Embellishments: Get creative and add other embellishments to your keychain, such as beads, sequins, or buttons.
* Make it a Gift: This strawberry keychain makes a wonderful handmade gift for friends and family.
* Vary the Leaf Shapes: Try cutting different leaf shapes for a more unique look.
* Use Different Stitches: Experiment with different embroidery stitches to add texture and detail to your keychain.
* Personalize it: Add initials or a small charm to personalize the keychain.
Troubleshooting
* Seams are Bursting: If your seams are bursting, you’re probably overstuffing the strawberry. Remove some of the stuffing and try again.
* Seeds are Falling Off: If your seeds are falling off, make sure you’re using a strong glue or sewing them on securely.
* Keychain Ring is Coming Loose: If your keychain ring is coming loose, reinforce the loop by sewing over it several times.
And there you have it! Your very own adorable strawberry keychain. I hope you enjoyed this DIY project as much as I did. Now go ahead and make a whole bunch for yourself and your friends! Happy crafting!
Conclusion
So, there you have it! Crafting your own DIY strawberry keychain isn’t just a fun afternoon project; it’s a gateway to personalized style and a delightful way to express your creativity. We’ve walked you through the steps, highlighting the simplicity and affordability of this charming craft. But why is this DIY trick a must-try?
Firstly, it’s incredibly versatile. Forget mass-produced keychains that everyone else has. With this method, you can tailor the size, color, and embellishments to perfectly match your personality or the recipient’s taste if you’re making it as a gift. Imagine a miniature, hyper-realistic strawberry dangling from your keys, or perhaps a whimsical, cartoonish version with googly eyes! The possibilities are truly endless.
Secondly, it’s a fantastic way to de-stress and engage in mindful crafting. In our increasingly digital world, taking the time to create something tangible with your own hands can be incredibly therapeutic. The repetitive motions of shaping the clay, adding the seeds, and attaching the hardware can be surprisingly calming and meditative.
Thirdly, it’s a budget-friendly alternative to buying a similar item. Craft supplies are generally inexpensive, and you likely already have some of the necessary materials lying around your home. This makes it a perfect project for crafters of all skill levels and budgets.
Variations and Suggestions:
Don’t feel limited to just strawberries! Once you’ve mastered the basic technique, you can easily adapt it to create keychains featuring other fruits, vegetables, or even abstract shapes. Consider making a whole fruit salad of keychains!
* Experiment with different types of clay. Polymer clay is a popular choice for its durability and vibrant colors, but air-dry clay can also be used for a more rustic look.
* Add glitter or metallic flakes to the clay for a touch of sparkle.
* Use acrylic paints to create intricate designs or patterns on your strawberry.
* Incorporate beads, charms, or other embellishments to personalize your keychain further.
* Consider using resin to coat your finished keychain for added durability and shine. This will also protect the paint and prevent the clay from chipping.
* Make a larger version to use as a bag charm or zipper pull.
* Create a matching set of keychains for you and a friend or loved one.
We genuinely believe that this DIY strawberry keychain project is a winner. It’s fun, affordable, customizable, and a great way to unleash your inner artist. So, gather your supplies, follow our instructions, and get ready to create a charming accessory that you’ll be proud to show off.
We’re confident that you’ll love the process and the result. But don’t just take our word for it! We encourage you to try this DIY trick yourself and share your creations with us. Post photos of your finished keychains on social media using #DIYStrawberryKeychain and tag us so we can see your amazing work. We can’t wait to see what you come up with! Happy crafting!
Frequently Asked Questions (FAQ)
What kind of clay is best for making a strawberry keychain?
Polymer clay is generally considered the best option for making a durable and long-lasting strawberry keychain. It’s easy to work with, comes in a wide range of colors, and hardens when baked in the oven. This creates a strong and waterproof finish. Air-dry clay is another option, but it’s not as durable as polymer clay and may be more prone to cracking or chipping. If you choose to use air-dry clay, be sure to seal it with a varnish or sealant to protect it from moisture.
How do I bake polymer clay properly?
Follow the baking instructions provided on the packaging of your polymer clay. Generally, it involves preheating your oven to the recommended temperature (usually around 275°F or 135°C) and baking the clay for the specified amount of time (typically 15-30 minutes per 1/4 inch of thickness). It’s crucial to use an oven thermometer to ensure that your oven is at the correct temperature, as overheating can cause the clay to burn or release harmful fumes. Place your strawberry keychain on a baking sheet lined with parchment paper or aluminum foil to prevent it from sticking. After baking, let the keychain cool completely before handling it.
How do I make the strawberry seeds look realistic?
There are several ways to create realistic-looking strawberry seeds. One option is to use a toothpick or needle to poke small indentations into the clay surface. Another option is to use tiny black or brown beads and carefully press them into the clay. You can also use a fine-tipped paint pen or marker to draw the seeds onto the strawberry. For a more textured look, consider using a small brush to stipple black or brown paint onto the surface. Experiment with different techniques to find the one that works best for you.
How do I attach the keychain hardware to the strawberry?
Before baking the clay, insert an eye pin or screw eye into the top of the strawberry. Make sure the eye pin is securely embedded in the clay so that it won’t pull out after baking. After baking, you can attach a jump ring to the eye pin and then attach the keychain ring to the jump ring. If you forget to insert the eye pin before baking, you can try drilling a small hole into the top of the strawberry after it has cooled and then gluing the eye pin in place. However, this method is not as secure as embedding the eye pin in the clay before baking.
Can I use paint on my polymer clay strawberry keychain?
Yes, you can use acrylic paints to add details or designs to your polymer clay strawberry keychain. However, it’s important to use paints that are specifically designed for use on polymer clay. Regular acrylic paints may not adhere well to the clay and may peel or chip over time. After painting, seal the keychain with a varnish or sealant to protect the paint and prevent it from fading or scratching.
How do I clean my DIY strawberry keychain?
To clean your DIY strawberry keychain, simply wipe it down with a damp cloth. Avoid using harsh chemicals or abrasive cleaners, as these can damage the clay or paint. If your keychain is particularly dirty, you can use a mild soap and water solution. Be sure to rinse the keychain thoroughly and allow it to dry completely before using it again.
What if my clay cracks after baking?
Cracking can sometimes occur in polymer clay, especially if it’s not conditioned properly or if it’s baked at too high a temperature. If your clay cracks after baking, you can try filling the cracks with more clay and then re-baking the keychain. You can also use a flexible glue to repair the cracks. To prevent cracking in the future, make sure to condition your clay thoroughly before using it and bake it at the recommended temperature.
Where can I find the materials needed for this project?
You can find the materials needed for this project at most craft stores, online retailers, or even some dollar stores. Look for polymer clay, eye pins or screw eyes, jump rings, keychain rings, acrylic paints (optional), and varnish or sealant (optional). You may also need tools such as a toothpick, needle, baking sheet, parchment paper, and oven thermometer.
Is this project suitable for children?
This project is suitable for children with adult supervision. Polymer clay is non-toxic, but it’s not meant to be ingested. Children should be supervised while working with clay and baking it in the oven. The small parts, such as beads and eye pins, can also be a choking hazard for young children.
How can I make my strawberry keychain waterproof?
While polymer clay is water-resistant after baking, it’s not completely waterproof. To make your strawberry keychain more waterproof, you can seal it with a varnish or sealant. Choose a sealant that is specifically designed for use on polymer clay. Apply several coats of sealant, allowing each coat to dry completely before applying the next. This will create a protective barrier that will help to prevent water from seeping into the clay. Resin can also be used to create a waterproof coating.


Leave a Comment