

DIY wood stain removal can feel like a Herculean task, especially when your favorite wooden table or antique dresser falls victim to an unsightly stain. But fear not, fellow home enthusiasts! I’m here to tell you that rescuing your beloved wooden pieces is entirely possible, and you don’t need to be a professional restorer to do it.
Wood, a material cherished for centuries, has been a cornerstone of human civilization, from humble dwellings to magnificent cathedrals. Its natural beauty and durability have made it a staple in our homes. However, life happens, and sometimes, those beautiful wooden surfaces get marred by spills and stains. While some might see a stain as a permanent blemish, I see it as a challenge – a chance to unleash your inner DIY warrior!
Why is mastering DIY wood stain removal so crucial? Because replacing furniture is expensive and often unnecessary. With a few simple tricks and readily available household items, you can breathe new life into your stained wood, saving money and preserving the character of your cherished pieces. This article is your ultimate guide to tackling those stubborn stains, offering practical, step-by-step instructions and proven techniques. Let’s get started and restore the natural beauty of your wood!
DIY Wood Stain Removal: A Comprehensive Guide
Okay, so you’ve got a stain on your beautiful wood furniture or flooring. Don’t panic! I’ve been there, done that, and learned a few tricks along the way. Removing wood stains can seem daunting, but with the right approach and a little elbow grease, you can often restore your wood to its former glory. This guide will walk you through several methods, from gentle to more aggressive, so you can choose the best approach for your specific stain and wood type. Remember to always test in an inconspicuous area first!
Assessing the Stain
Before you dive in, let’s figure out what we’re dealing with. Knowing the type of stain and the finish on your wood will help you choose the most effective removal method.
* **Type of Stain:** Is it water-based (like coffee or juice), oil-based (like grease or paint), or something else entirely (like ink or pet stains)?
* **Type of Wood:** Is it hardwood (oak, maple, cherry) or softwood (pine, fir)? Softwoods are more porous and absorb stains more readily.
* **Type of Finish:** Is it a varnish, lacquer, polyurethane, or wax finish? This will affect how easily the stain can be removed without damaging the wood itself.
Method 1: The Gentle Approach – Soap and Water
Sometimes, the simplest solution is the best. This method is ideal for fresh, water-based stains on finished wood.
1. **Gather your supplies:** You’ll need warm water, a mild dish soap (like Dawn), a soft cloth, and a clean, dry cloth.
2. **Mix your solution:** In a bowl, mix a few drops of dish soap with warm water. Don’t use too much soap, or you’ll have a hard time rinsing it off.
3. **Dampen the cloth:** Dip the soft cloth into the soapy water and wring it out well. You want the cloth to be damp, not soaking wet.
4. **Gently blot the stain:** Blot the stain with the damp cloth, working from the outside in. Avoid rubbing, as this can spread the stain.
5. **Rinse with a clean, damp cloth:** Use a separate clean cloth dampened with plain water to rinse away any soap residue.
6. **Dry thoroughly:** Use a clean, dry cloth to dry the area completely.
7. **Evaluate:** If the stain is still visible, move on to the next method.
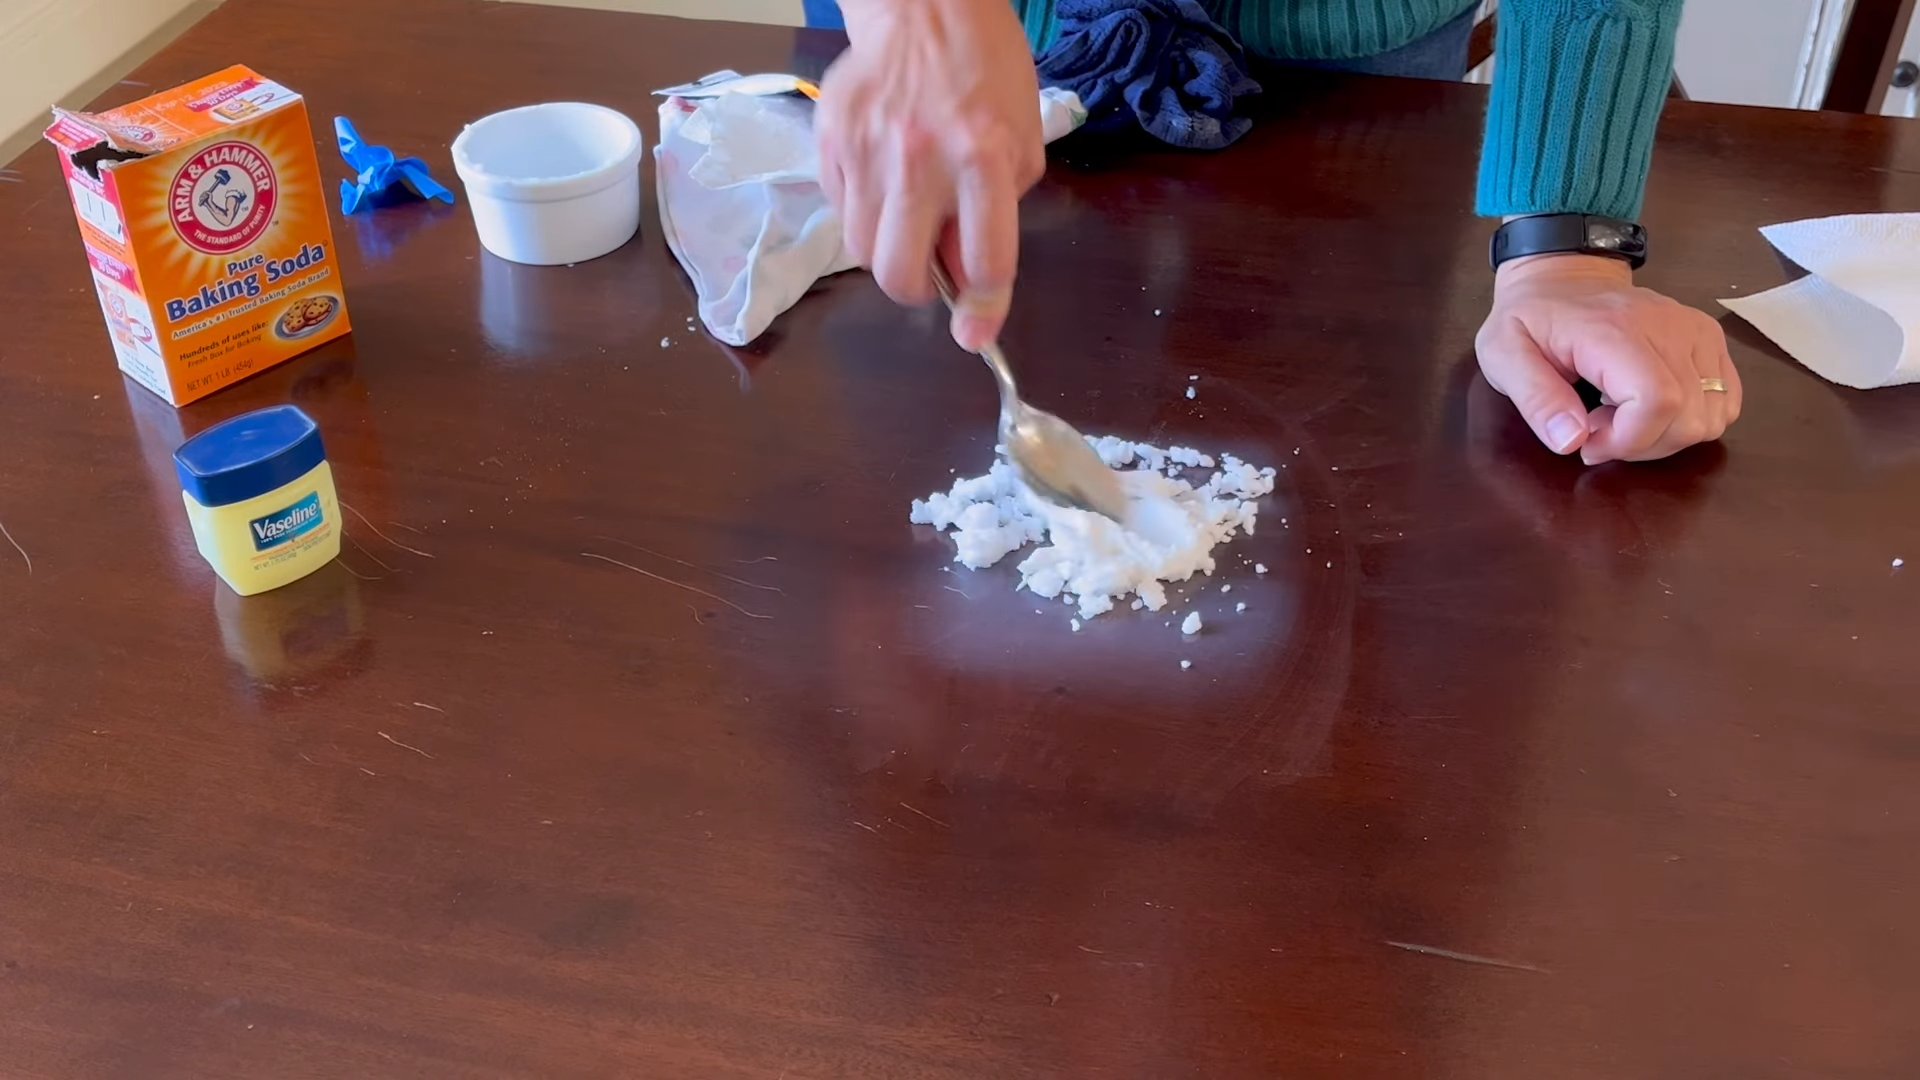
Method 2: Baking Soda Paste
Baking soda is a mild abrasive that can help lift stains without being too harsh on the wood. This works well on many types of stains, especially those that have penetrated slightly.
1. **Gather your supplies:** You’ll need baking soda, water, a small bowl, a soft cloth, and a clean, dry cloth.
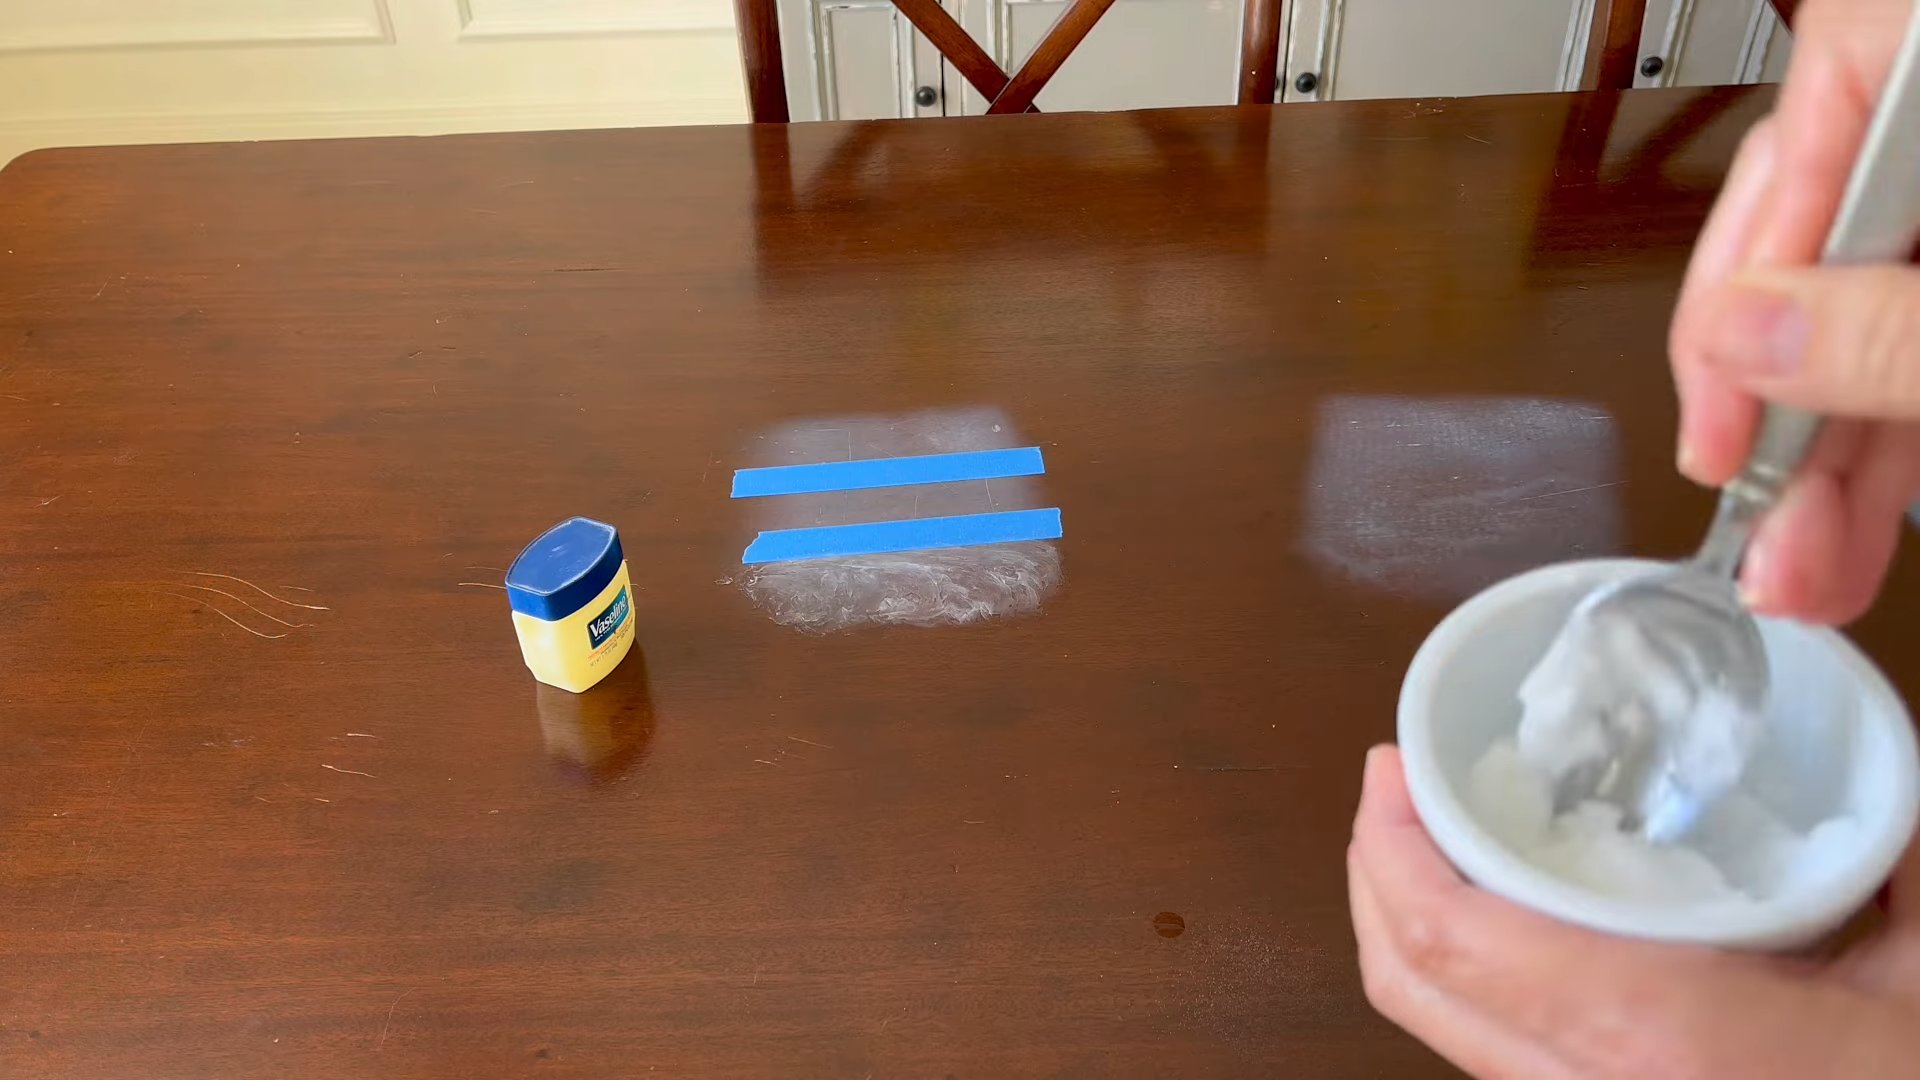
2. **Make a paste:** In the bowl, mix baking soda with a small amount of water to form a thick paste. The consistency should be similar to toothpaste.
3. **Apply the paste:** Apply the baking soda paste to the stain, covering it completely.
4. **Let it sit:** Allow the paste to sit on the stain for 15-30 minutes. This gives the baking soda time to absorb the stain.
5. **Gently scrub:** Use a soft cloth to gently scrub the area in a circular motion. Be careful not to scrub too hard, as this could damage the wood finish.
6. **Rinse with a damp cloth:** Use a clean, damp cloth to rinse away the baking soda paste.
7. **Dry thoroughly:** Use a clean, dry cloth to dry the area completely.
8. **Evaluate:** If the stain persists, repeat the process or try another method.
Method 3: Vinegar Solution
Vinegar is a natural cleaner and deodorizer that can be effective for removing certain types of stains, especially water stains and mineral deposits.
1. **Gather your supplies:** You’ll need white vinegar, water, a spray bottle (optional), a soft cloth, and a clean, dry cloth.
2. **Mix your solution:** In a spray bottle or bowl, mix equal parts white vinegar and water.
3. **Apply the solution:** If using a spray bottle, spray the solution onto the stain. If using a bowl, dampen a soft cloth with the solution and apply it to the stain.
4. **Let it sit:** Allow the solution to sit on the stain for 5-10 minutes.
5. **Gently blot:** Gently blot the stain with a clean cloth, working from the outside in.
6. **Rinse with a damp cloth:** Use a separate clean cloth dampened with plain water to rinse away the vinegar solution.
7. **Dry thoroughly:** Use a clean, dry cloth to dry the area completely.
8. **Evaluate:** If the stain remains, try a different method.
Method 4: Mayonnaise (Yes, Really!)
This might sound strange, but mayonnaise can actually help remove water rings and some other types of stains from wood. The oil in mayonnaise helps to loosen the stain and restore moisture to the wood.
1. **Gather your supplies:** You’ll need mayonnaise (full-fat works best), a soft cloth, and a clean, dry cloth.
2. **Apply the mayonnaise:** Apply a generous amount of mayonnaise to the stain, covering it completely.
3. **Let it sit:** Allow the mayonnaise to sit on the stain for several hours, or even overnight.
4. **Wipe away the mayonnaise:** Use a soft cloth to wipe away the mayonnaise.
5. **Clean with a damp cloth:** Use a clean, damp cloth to remove any remaining mayonnaise residue.
6. **Dry thoroughly:** Use a clean, dry cloth to dry the area completely.
7. **Evaluate:** This method often requires patience, but it can be surprisingly effective.
Method 5: Ironing (For Water Stains)
This method uses heat to draw out moisture trapped in the wood, which can help remove water stains.
1. **Gather your supplies:** You’ll need an iron (set to low heat, no steam), a clean, dry cotton cloth, and water (optional).
2. **Place the cloth over the stain:** Place the clean, dry cotton cloth over the water stain.
3. **Iron the cloth:** Gently iron the cloth over the stain in a circular motion. Check the cloth frequently to see if the stain is transferring to it.
4. **Repeat as needed:** If the stain is still visible, dampen the cloth slightly with water and repeat the ironing process. Be careful not to overheat the wood.
5. **Dry thoroughly:** Once the stain is gone or significantly reduced, remove the cloth and allow the wood to dry completely.
6. **Evaluate:** This method works best on fresh water stains.
Method 6: Oxalic Acid (Wood Bleach) – Use with Caution!
Oxalic acid is a powerful bleaching agent that can remove stubborn stains, including ink, rust, and some types of water stains. However, it’s also corrosive and should be used with extreme caution. **Always wear gloves and eye protection when working with oxalic acid.**
1. **Gather your supplies:** You’ll need oxalic acid crystals (available at hardware stores), warm water, a plastic container, a plastic spoon, gloves, eye protection, a soft brush, a clean cloth, and a neutralizer (baking soda and water).
2. **Prepare the solution:** In the plastic container, dissolve the oxalic acid crystals in warm water according to the manufacturer’s instructions. **Always add the acid to the water, never the other way around.**
3. **Apply the solution:** Wearing gloves and eye protection, use the soft brush to apply the oxalic acid solution to the stain. Be careful not to get the solution on surrounding areas.
4. **Let it sit:** Allow the solution to sit on the stain for 1-2 hours, or until the stain disappears.
5. **Neutralize the acid:** Mix baking soda with water to create a neutralizing solution. Apply this solution to the treated area to neutralize the oxalic acid.
6. **Rinse thoroughly:** Rinse the area thoroughly with clean water.
7. **Dry completely:** Allow the wood to dry completely.
8. **Evaluate:** Oxalic acid can lighten the wood, so you may need to re-stain or refinish the area to match the surrounding wood.
Method 7: Sanding and Refinishing (For Deep or Stubborn Stains)
If all else fails, sanding and refinishing may be necessary to remove deep or stubborn stains. This method involves removing the top layer of wood to eliminate the stain and then applying a new finish.
1. **Gather your supplies:** You’ll need sandpaper (various grits, starting with a coarser grit and ending with a fine grit), a sanding block or orbital sander, a tack cloth, wood stain (optional), and wood finish (varnish, lacquer, polyurethane, etc.).
2. **Sand the stained area:** Start with a coarser grit sandpaper (e.g., 80-grit) and sand the
Conclusion
So, there you have it! This DIY wood stain removal method isn’t just a clever trick; it’s a game-changer for anyone who loves the beauty of wood but dreads the inevitable stains. We’ve walked you through a simple, effective, and budget-friendly way to tackle those unsightly marks, breathing new life into your furniture, floors, and cherished wooden items.
Why is this a must-try? Because it empowers you to take control. Instead of resorting to harsh chemicals or expensive professional services, you can confidently address stains with ingredients you likely already have in your pantry. This method is gentle on your wood, minimizing the risk of damage while maximizing the chances of a successful stain removal. Plus, the satisfaction of restoring your wood’s natural beauty yourself is truly rewarding.
But don’t stop there! Feel free to experiment with variations to suit your specific needs. For instance, if you’re dealing with a particularly stubborn stain, you might try increasing the concentration of the cleaning agent or allowing it to sit for a longer period. For delicate wood surfaces, consider diluting the solution further and using a softer cloth to avoid scratching. You can also add a few drops of essential oil, like lemon or orange, to the mixture for a pleasant scent. Remember to always test any solution on an inconspicuous area first to ensure it doesn’t damage the finish.
Beyond the basic method, consider these additional tips for optimal results:
* Pre-treat the stain: Before applying the DIY solution, gently blot the stain with a clean, dry cloth to remove any excess liquid or debris.
* Work in small sections: Focus on one area at a time to ensure even application and prevent the solution from drying out too quickly.
* Rinse thoroughly: After removing the stain, rinse the area with clean water to remove any residue from the cleaning solution.
* Dry completely: Use a clean, dry cloth to thoroughly dry the wood surface. You can also use a fan to speed up the drying process.
* Protect the wood: Once the wood is dry, consider applying a sealant or finish to protect it from future stains and damage.
We are confident that this DIY wood stain removal technique will become your go-to solution for keeping your wood looking its best. It’s a simple, effective, and eco-friendly way to maintain the beauty and longevity of your wooden possessions.
Now, it’s your turn! We encourage you to try this DIY wood stain removal method and see the amazing results for yourself. Don’t be afraid to experiment and find what works best for your specific type of wood and stain. And most importantly, share your experience with us! We’d love to hear your success stories, tips, and variations. Leave a comment below, share your photos on social media, and let’s build a community of wood-loving DIYers who are passionate about keeping their wood looking beautiful. Your insights could help others discover the magic of this simple yet powerful stain removal trick. Let’s reclaim the beauty of our wood, one stain at a time!
Frequently Asked Questions (FAQ)
What types of stains does this DIY wood stain removal work on?
This method is effective on a variety of common household stains, including water rings, coffee spills, food stains, and even some ink marks. However, the success rate may vary depending on the type of stain, the age of the stain, and the type of wood. For particularly stubborn or old stains, you may need to repeat the process or try a stronger solution. Always test the solution on an inconspicuous area first to ensure it doesn’t damage the finish.
Is this DIY wood stain removal safe for all types of wood?
While this method is generally safe for most types of wood, it’s always best to exercise caution and test the solution on an inconspicuous area first. Some types of wood, such as antique furniture or delicate veneers, may be more susceptible to damage. In these cases, it’s best to dilute the solution further and use a softer cloth to avoid scratching. If you’re unsure about the type of wood you’re dealing with, consult a professional before proceeding.
What ingredients do I need for this DIY wood stain removal?
The specific ingredients will vary depending on the method you choose, but common ingredients include:
* White vinegar
* Baking soda
* Lemon juice
* Olive oil
* Dish soap
* Hydrogen peroxide
* Water
You may also need a clean cloth, a soft brush, and a spray bottle.
How long does it take to remove a stain using this method?
The amount of time it takes to remove a stain will vary depending on the type of stain, the age of the stain, and the type of wood. Some stains may be removed in a matter of minutes, while others may require several applications or a longer soaking time. Be patient and persistent, and don’t be afraid to experiment with different solutions and techniques.
Can I use this method on finished wood?
Yes, this method can be used on finished wood, but it’s important to be careful not to damage the finish. Always test the solution on an inconspicuous area first to ensure it doesn’t strip or dull the finish. If you’re concerned about damaging the finish, you can try diluting the solution further or using a gentler cleaning agent. After removing the stain, you may need to reapply a sealant or finish to protect the wood.
What if the stain doesn’t come out after trying this method?
If the stain doesn’t come out after trying this method, don’t give up! You can try repeating the process, using a stronger solution, or allowing the solution to sit for a longer period. You can also try a different DIY method or consult a professional for advice. In some cases, the stain may be too deep or too old to be removed completely.
How can I prevent future wood stains?
Prevention is always better than cure! Here are some tips for preventing future wood stains:
* Use coasters and placemats to protect wood surfaces from spills and condensation.
* Clean up spills immediately to prevent them from soaking into the wood.
* Apply a sealant or finish to protect the wood from moisture and stains.
* Avoid placing hot or wet items directly on wood surfaces.
* Regularly dust and clean wood furniture to prevent dirt and grime from building up.
Is this DIY wood stain removal environmentally friendly?
Yes, this method is generally considered to be environmentally friendly, as it uses natural ingredients that are less harmful than harsh chemicals. However, it’s important to dispose of any leftover solutions properly and to avoid using excessive amounts of water. You can also choose to use eco-friendly cleaning products and materials.
Where can I find more information about DIY wood stain removal?
There are many resources available online and in libraries that can provide more information about DIY wood stain removal. You can also consult with a professional woodworker or furniture restorer for advice. Remember to always do your research and test any solution on an inconspicuous area before proceeding.
Leave a Comment