

Dusting hacks for cleaner home – who doesn’t want that, right? I know I do! Let’s be honest, dusting is probably nobody’s favorite chore. It’s tedious, time-consuming, and feels like a never-ending battle. You dust one day, and the next, it’s back! But what if I told you there were some clever, easy-to-implement dusting hacks that could revolutionize your cleaning routine and leave your home sparkling?
The concept of keeping our homes free from dust and dirt is ancient. From using simple cloths in ancient civilizations to the invention of the feather duster in the 19th century, people have always sought ways to combat dust. But in today’s world, with our busy lives and increased awareness of allergens and indoor air quality, effective dusting hacks for cleaner home are more important than ever.
That’s why I’ve compiled this ultimate guide to DIY dusting tricks. These aren’t your grandma’s dusting methods (though, respect to grandma!). We’re talking about innovative, cost-effective, and surprisingly simple solutions that will not only make your home cleaner but also save you time and effort. Get ready to say goodbye to endless dusting and hello to a fresher, healthier, and more inviting living space!
DIY Dusting Hacks for a Spotless Home
Okay, let’s face it, dusting is nobody’s favorite chore. But a dusty home just feels… bleh. So, I’m going to share some of my favorite DIY dusting hacks that will make the process easier, faster, and even a little bit fun (okay, maybe not fun, but definitely less painful!). These tips and tricks will help you tackle dust bunnies, grimy surfaces, and everything in between.
Understanding the Enemy: Dust
Before we dive into the hacks, let’s quickly understand what we’re fighting. Dust isn’t just dirt; it’s a complex mixture of dead skin cells (gross, I know!), pet dander, pollen, textile fibers, soil, and even microscopic bugs (double gross!). Knowing this helps us choose the right tools and techniques.
Hack #1: The Microfiber Magic
Microfiber cloths are your best friend when it comes to dusting. They have a unique weave that traps dust instead of just pushing it around.
Why Microfiber?
* Superior Dust Collection: The split fibers create a larger surface area, grabbing and holding more dust.
* Lint-Free: Unlike cotton cloths, microfiber won’t leave behind annoying lint.
* Reusable and Washable: Save money and reduce waste by washing and reusing your microfiber cloths.
* Gentle on Surfaces: Microfiber is soft and won’t scratch delicate finishes.
Step-by-Step Guide:
1. Choose the Right Cloth: I like to have a few different types of microfiber cloths. A thicker, plush cloth is great for general dusting, while a thinner, smoother cloth is ideal for delicate surfaces like electronics.
2. Dampen (Slightly!): A slightly damp microfiber cloth is even more effective at trapping dust. Just spritz it with water and wring it out thoroughly. You don’t want it soaking wet, just barely damp.
3. Dust in Sections: Work in small sections, folding the cloth as you go to expose a clean surface. This prevents you from just spreading the dust around.
4. Wash Regularly: Wash your microfiber cloths after each use or when they become visibly dirty. Use a mild detergent and avoid fabric softener, which can reduce their effectiveness.
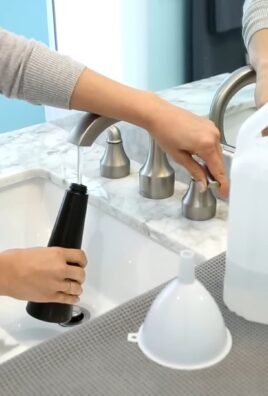
Hack #2: The Homemade Dusting Spray
Commercial dusting sprays can be expensive and often contain harsh chemicals. I prefer to make my own using simple, natural ingredients.
My Go-To Recipe:
* 1 cup water
* 1/4 cup white vinegar (the acidity helps cut through grime)
* 2 tablespoons olive oil (adds a nice shine and helps repel dust)
* 10-15 drops of your favorite essential oil (lemon, lavender, or tea tree are great choices)
Step-by-Step Instructions:
1. Gather Your Ingredients: Make sure you have all the ingredients on hand before you start.
2. Mix It Up: Combine all the ingredients in a spray bottle. Shake well to ensure everything is properly mixed.
3. Test It Out: Before spraying directly onto furniture, test the spray on an inconspicuous area to make sure it doesn’t damage the finish.
4. Spray and Wipe: Lightly spray the surface you want to dust and immediately wipe it with a clean microfiber cloth.
5. Buff to Shine: For extra shine, buff the surface with a dry microfiber cloth after wiping.
Important Note: Always shake the spray bottle before each use, as the oil and water may separate.
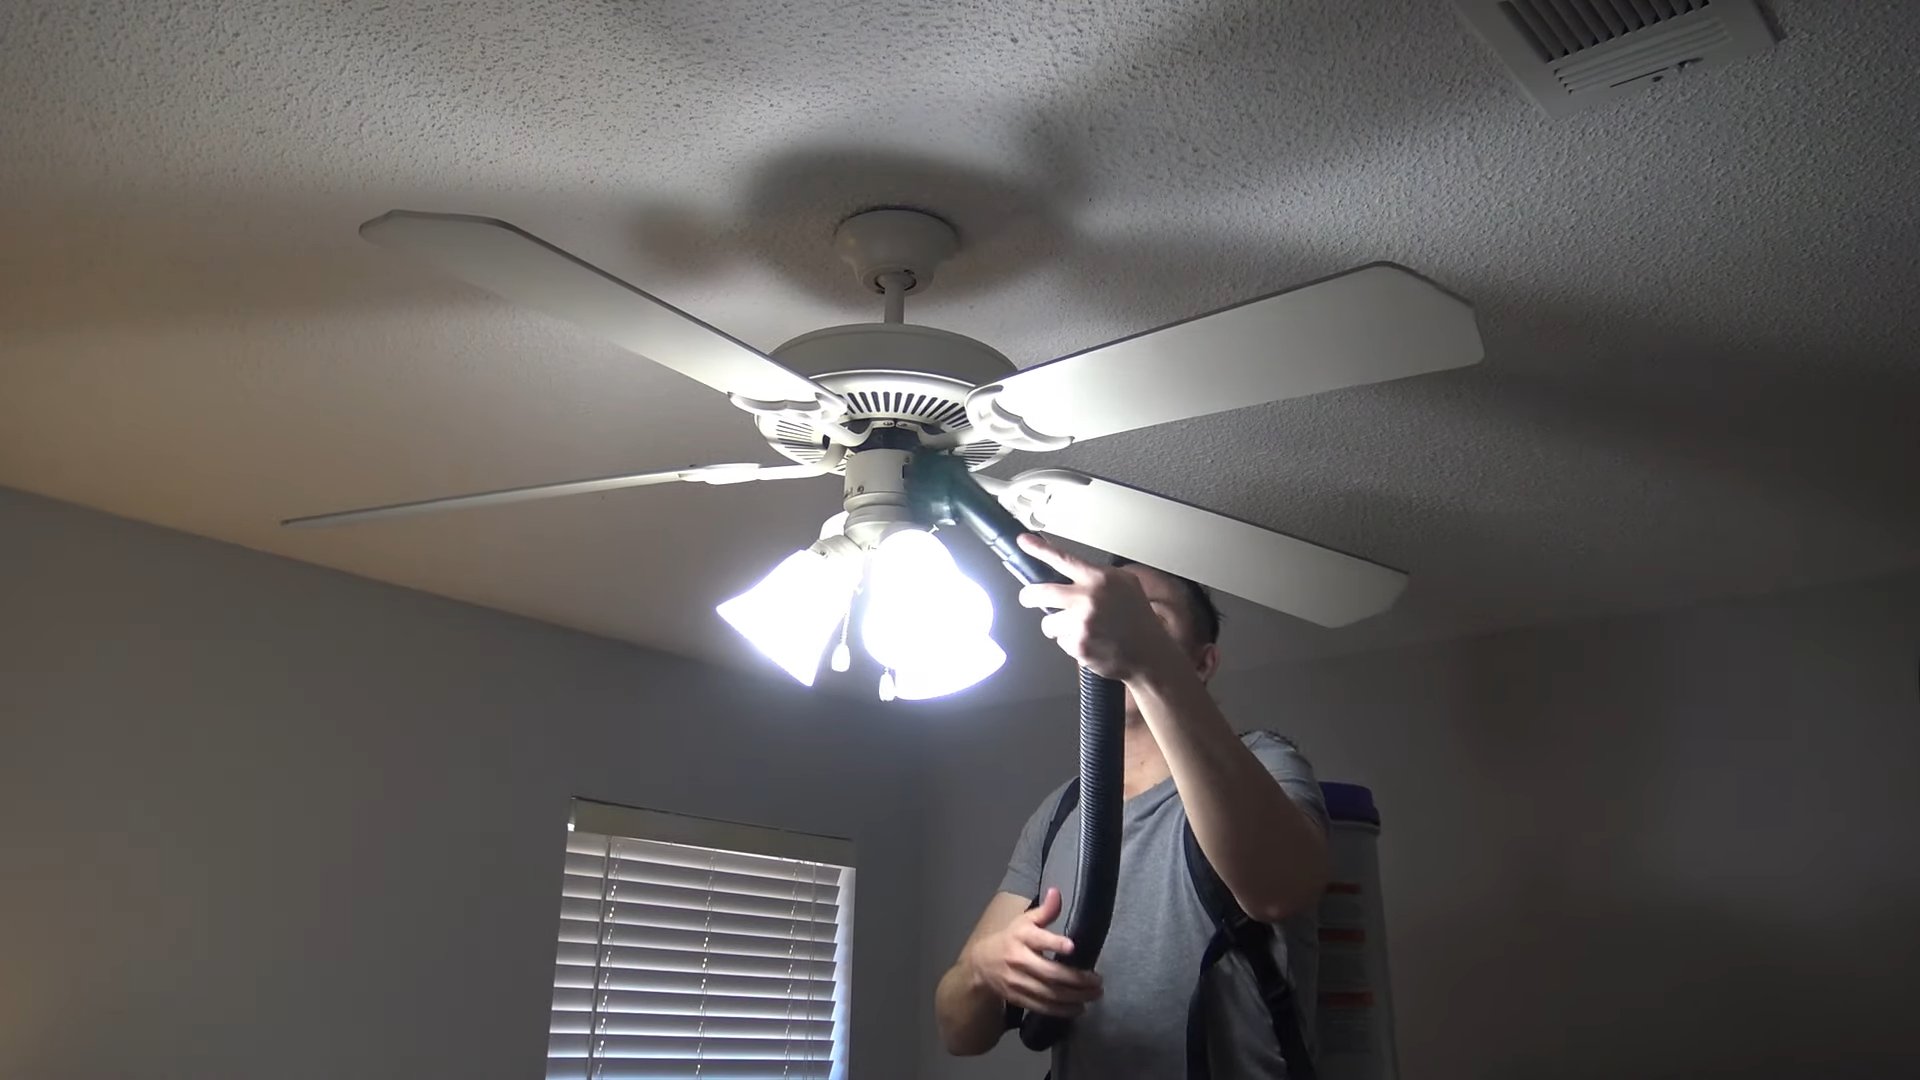
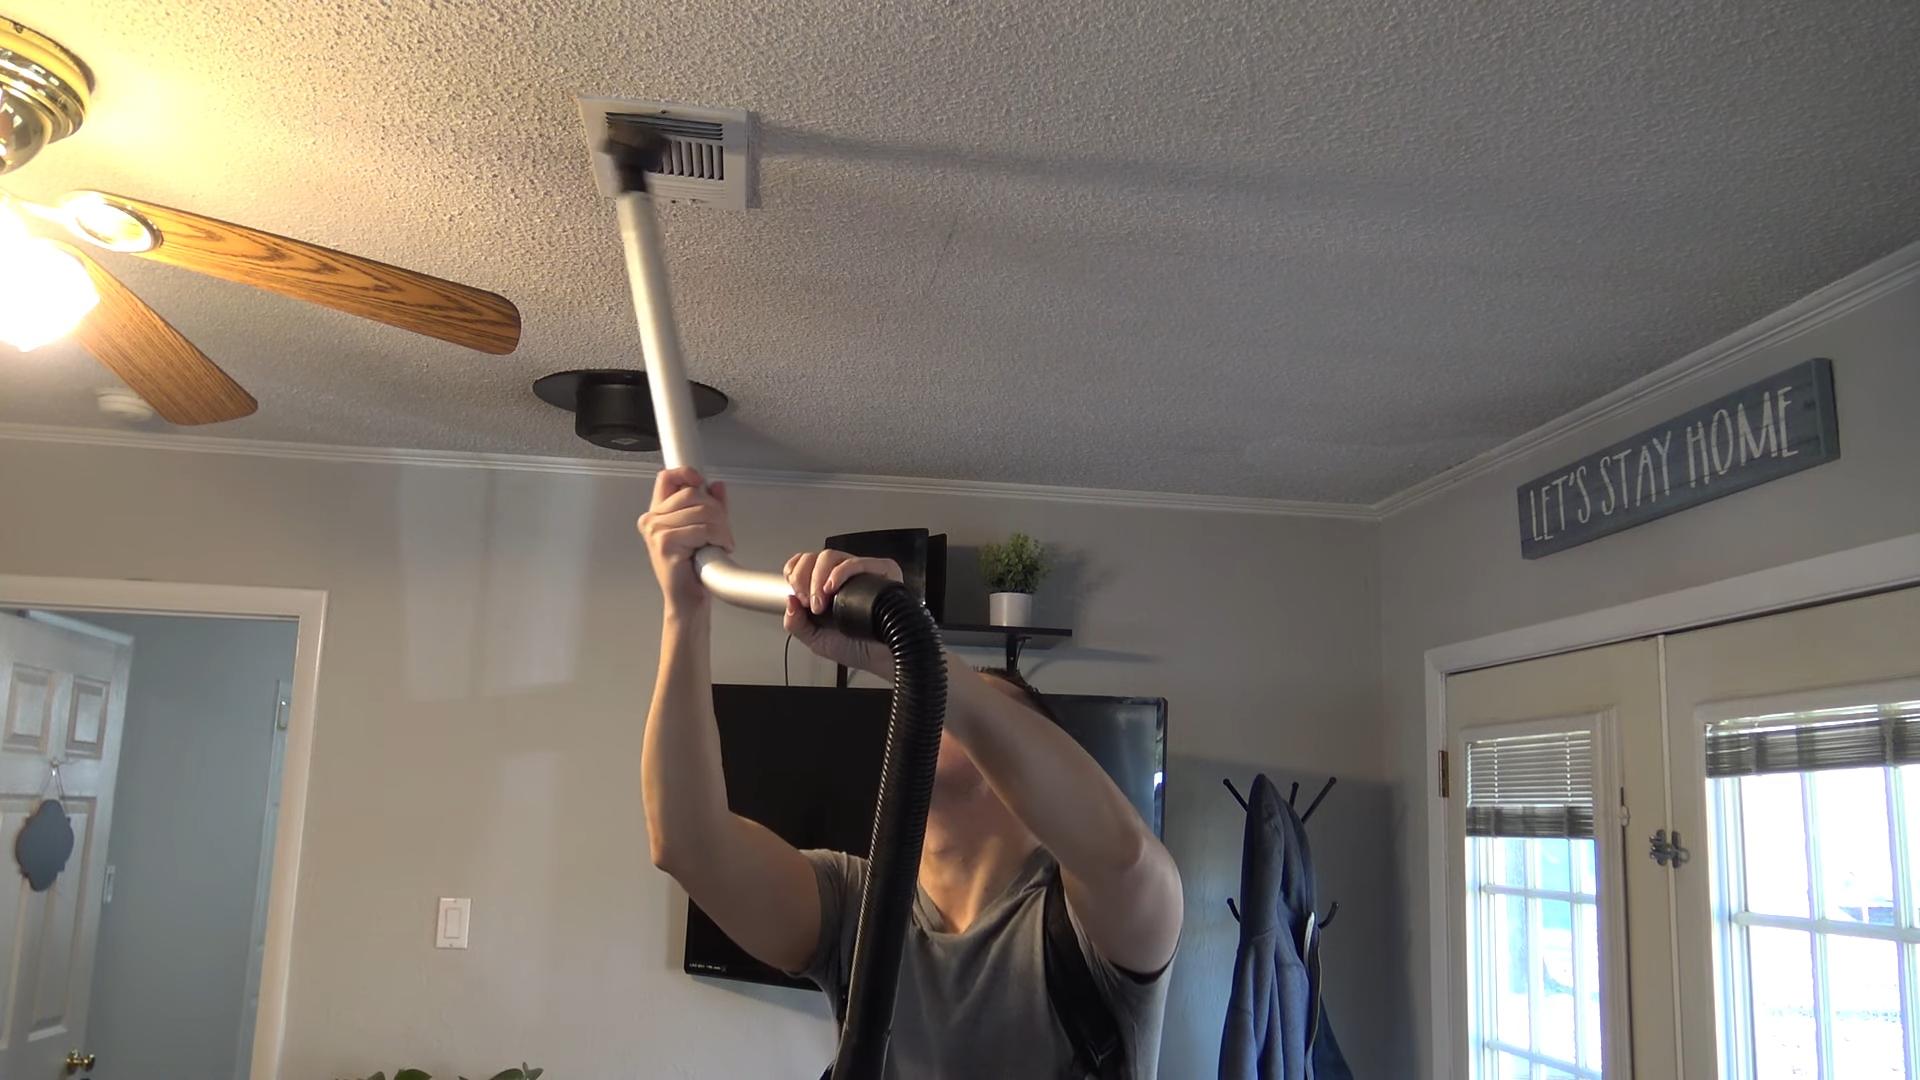
Hack #3: Conquering High Places
Dusting ceiling fans, light fixtures, and other high places can be a real pain. But with the right tools, it’s much easier.
Tools You’ll Need:
* Extension Duster: These dusters have a long handle that allows you to reach high places without having to climb on a ladder.
* Vacuum with Brush Attachment: A vacuum with a brush attachment is great for removing dust from textured ceilings and walls.
* Old Pillowcase: This is a clever trick for dusting ceiling fan blades.
Step-by-Step Guide:
1. Ceiling Fans: Slide an old pillowcase over each fan blade, trapping the dust inside as you wipe. This prevents dust from falling all over you and the room.
2. Light Fixtures: Use an extension duster or a vacuum with a brush attachment to remove dust from light fixtures. Be careful not to break any bulbs!
3. High Shelves: An extension duster is also perfect for reaching high shelves.
Safety First: Always use caution when working at heights. If you’re not comfortable climbing on a ladder, ask someone for help.
Hack #4: Taming the Tech: Dusting Electronics
Electronics are dust magnets! But cleaning them requires a gentle touch.
What You’ll Need:
* Canned Air: This is essential for blasting dust out of keyboards, vents, and other hard-to-reach areas.
* Microfiber Cloth: Use a dry microfiber cloth to wipe down screens and other surfaces.
* Cotton Swabs: Cotton swabs are great for cleaning around buttons and other small details.
Step-by-Step Instructions:
1. Power Down: Always turn off and unplug electronics before cleaning them.
2. Canned Air: Use canned air to blast dust out of keyboards, vents, and other crevices. Hold the can upright and use short bursts to avoid damaging the electronics.
3. Microfiber Cloth: Gently wipe down screens and other surfaces with a dry microfiber cloth. Avoid using water or cleaning solutions, as they can damage the electronics.
4. Cotton Swabs: Use cotton swabs to clean around buttons, ports, and other small details. You can slightly dampen the cotton swab with isopropyl alcohol for stubborn grime.
Pro Tip: Avoid spraying canned air directly into ports or openings, as this can push dust further inside.
Hack #5: Furniture Facelift: Dusting Upholstery
Upholstered furniture can accumulate a lot of dust and dirt over time. Regular dusting can help keep it looking fresh and clean.
Tools of the Trade:
* Vacuum with Upholstery Attachment: This is the most effective way to remove dust and dirt from upholstery.
* Lint Roller: A lint roller is great for removing pet hair and other surface debris.
* Baking Soda: Baking soda can help absorb odors and freshen up upholstery.
Step-by-Step Guide:
1. Vacuum Thoroughly: Use the upholstery attachment on your vacuum to thoroughly vacuum all surfaces of the furniture, including cushions, crevices, and under the furniture.
2. Lint Roll: Use a lint roller to remove any remaining pet hair or other surface debris.
3. Baking Soda Treatment (Optional): Sprinkle baking soda over the upholstery and let it sit for at least 30 minutes (or even overnight) to absorb odors. Then, vacuum up the baking soda.
4. Spot Clean: If you have any stains or spills, spot clean them with a mild detergent and water. Test the solution on an inconspicuous area first to make sure it doesn’t damage the fabric.
Important Note: Always check the manufacturer’s instructions for cleaning your upholstery. Some fabrics may require professional cleaning.
Hack #6: The Power of Prevention
The best way to deal with dust is to prevent it from accumulating in the first place.
Preventative Measures:
* Change Air Filters Regularly: Dirty air filters can circulate dust throughout your home. Change them every 1-3 months, depending on the type of filter and the air quality in your area.
* Use Doormats: Place doormats at all entrances to your home to trap dirt and debris before they get inside.
* Close Windows and Doors: Keep windows and doors closed as much as possible to prevent dust from entering your home.
* Dust Regularly: Make dusting a part of your regular cleaning routine. Even a quick dusting once a week can make a big difference.
* Groom Your Pets: Regularly grooming your pets can help reduce the amount of pet dander in your home.
* Declutter: The less stuff you have, the less dust will accumulate.
Hack #7: The Air Purifier Advantage
Consider investing in an air purifier, especially if you have allergies or pets. Air purifiers can help remove dust, pollen, and other allergens from the air, making your home cleaner and healthier.
Choosing the Right Air Purifier:
* HEPA Filter: Look for an air purifier with a HEPA (High-Efficiency Particulate Air) filter. HEPA filters are designed to capture 99.97% of particles as small as 0.3 microns, including dust, pollen, and pet dander.
* Room Size: Choose an air purifier that is
Conclusion
So, there you have it! This simple, yet incredibly effective, DIY dusting hack is a game-changer for anyone looking to achieve a cleaner, healthier home without breaking the bank or relying on harsh chemicals. We’ve shown you how to transform readily available materials into a powerful dusting tool that will leave your surfaces sparkling and your air fresher.
Why is this a must-try? Because it’s not just about removing dust; it’s about creating a more pleasant living environment. Think about it: less dust means fewer allergens circulating, which translates to easier breathing and reduced allergy symptoms. Plus, a dust-free home simply *feels* cleaner and more inviting. This DIY dusting hack is a small investment of time that yields significant returns in terms of comfort and well-being.
But the beauty of this method lies in its adaptability. Feel free to experiment with different essential oils to customize the scent of your dusting spray. Lavender for relaxation, lemon for a fresh, clean aroma, or eucalyptus for its decongestant properties – the possibilities are endless! You can also adjust the ratio of ingredients to suit your specific needs. If you have particularly delicate surfaces, you might want to use a slightly diluted solution.
Consider these variations to elevate your dusting game:
* For Wood Furniture: Add a teaspoon of olive oil to your dusting spray for extra shine and to help protect the wood.
* For Electronics: Always spray the cloth, not the electronic device directly. Use a microfiber cloth to gently wipe down screens and keyboards.
* For Plants: Gently wipe down plant leaves with a damp cloth using your DIY dusting solution to remove dust and allow them to photosynthesize more efficiently.
* For Leather: Test the solution on an inconspicuous area first. If it works well, use a very light application and buff with a clean, dry cloth.
This DIY dusting hack isn’t just a cleaning method; it’s a sustainable and cost-effective way to maintain a healthy and happy home. It’s about taking control of the products you use and minimizing your exposure to potentially harmful chemicals. It’s about creating a space that is not only clean but also reflects your commitment to a healthier lifestyle.
We are confident that once you try this DIY dusting hack, you’ll be amazed by the results. It’s simple, effective, and customizable to your specific needs and preferences. So, ditch the expensive store-bought dusting products and embrace this natural, budget-friendly alternative.
Now it’s your turn! We encourage you to give this DIY dusting hack a try and see the difference it can make in your home. Don’t be afraid to experiment with different variations and find what works best for you. And most importantly, we want to hear about your experience! Share your tips, tricks, and results in the comments below. Let’s build a community of clean-home enthusiasts who are passionate about natural and sustainable cleaning solutions. Let us know what essential oil combinations you loved the most, or if you found a particular cloth that worked wonders. Your feedback is invaluable and will help others discover the joy of a dust-free home.
Frequently Asked Questions
What exactly is this DIY dusting hack, and what makes it better than store-bought products?
This DIY dusting hack involves creating your own dusting spray and using specific techniques to effectively remove dust from your home. The spray typically consists of simple, natural ingredients like water, vinegar, and essential oils. It’s superior to many store-bought products because it avoids harsh chemicals, is more cost-effective, and allows you to customize the scent and ingredients to your preferences and sensitivities. Many commercial dusting sprays contain volatile organic compounds (VOCs) that can be harmful to your health, while this DIY version is a safer and more sustainable alternative. Plus, you know exactly what’s going into your cleaning solution!
What are the basic ingredients needed for this DIY dusting spray?
The most basic recipe includes:
* Water: Acts as the base of the solution.
* White Vinegar: A natural disinfectant and cleaning agent that helps to dissolve grime and dust.
* Essential Oils (optional): Adds a pleasant scent and can provide additional cleaning or antibacterial properties. Popular choices include lemon, lavender, tea tree, and eucalyptus.
You’ll also need a spray bottle to store and dispense the solution, and microfiber cloths for dusting.
Can I use something other than white vinegar? I don’t like the smell.
Yes, you can substitute white vinegar with other options, although vinegar is generally the most effective and economical. Some alternatives include:
* Lemon Juice: A natural cleaner and deodorizer. Use fresh lemon juice diluted with water.
* Witch Hazel: A gentle astringent that can help to remove dust and grime.
* Distilled Water with a few drops of dish soap: This is a milder option, suitable for delicate surfaces.
Keep in mind that these alternatives may not have the same disinfecting properties as vinegar. The smell of vinegar dissipates quickly, especially when combined with essential oils.
What kind of essential oils are best for dusting?
The best essential oils for dusting depend on your personal preferences and desired benefits. Here are some popular choices:
* Lemon: A fresh, clean scent with antibacterial properties.
* Lavender: A calming and relaxing scent with antiseptic properties.
* Tea Tree: A powerful antibacterial and antifungal oil.
* Eucalyptus: A refreshing scent that can help to clear sinuses.
* Orange: A cheerful and uplifting scent with degreasing properties.
* Peppermint: A refreshing scent that can also deter pests.
Always use pure essential oils and follow dilution guidelines. A few drops are usually sufficient for a standard-sized spray bottle.
How do I use the DIY dusting spray effectively?
1. Shake the spray bottle well before each use to ensure the ingredients are properly mixed.
2. Lightly spray the microfiber cloth with the dusting solution. Avoid oversaturating the cloth, as this can leave streaks or damage delicate surfaces.
3. Wipe down surfaces in a consistent motion, such as from left to right or top to bottom.
4. For hard-to-reach areas, use a duster with a long handle or attach a microfiber cloth to a paint stick.
5. Rinse the microfiber cloth frequently with clean water to remove accumulated dust and grime.
6. For electronics, spray the cloth lightly and gently wipe the screen and other surfaces. Never spray directly onto the device.
Is this DIY dusting spray safe for all surfaces?
While this DIY dusting spray is generally safe for most surfaces, it’s always a good idea to test it on an inconspicuous area first, especially on delicate or antique furniture. Avoid using vinegar-based solutions on marble, granite, or other natural stone surfaces, as the acidity can damage them. For these surfaces, use a solution of distilled water and a few drops of mild dish soap. Also, be cautious when using essential oils on painted surfaces, as some oils can potentially cause discoloration.
How often should I dust my home?
The frequency of dusting depends on several factors, including the number of occupants, pets, and the presence of allergies. As a general guideline:
* Weekly: Dust frequently used surfaces like tables, countertops, and shelves.
* Bi-weekly: Dust less frequently used surfaces like baseboards, window sills, and picture frames.
* Monthly: Dust hard-to-reach areas like ceiling fans, light fixtures, and blinds.
If you have allergies or pets, you may need to dust more frequently.
How do I store the DIY dusting spray?
Store the DIY dusting spray in a cool, dark place away from direct sunlight. A pantry or cleaning supply cabinet is ideal. Make sure the spray bottle is tightly sealed to prevent evaporation and contamination. The solution should last for several months if stored properly. If you notice any changes in color, odor, or consistency, discard the solution and make a fresh batch.
Can I add other ingredients to the DIY dusting spray?
Yes, you can experiment with other ingredients to customize your DIY dusting spray. Some popular additions include:
* Olive Oil: Adds shine to wood furniture. Use sparingly to avoid a greasy residue.
* Glycerin: Helps to attract and retain moisture, preventing dust from settling.
* Castile Soap: A gentle and natural soap that can help to remove stubborn grime.
Always research the potential effects of any new ingredient before adding it to your dusting spray.
What type of cloth is best for dusting?
Microfiber cloths are the best choice for dusting because they are highly absorbent, lint-free, and effectively trap dust and dirt. They are also gentle on surfaces and can be washed and reused multiple times. Avoid using paper towels or old rags, as they can leave behind lint or scratches. You can find microfiber cloths at most grocery stores, hardware stores, and online retailers.
Leave a Comment