

Garbage Disposal Cleaning DIY: Let’s face it, your garbage disposal is probably the unsung hero (or maybe the smelly villain?) of your kitchen. It diligently chomps through food scraps, saving you from overflowing trash cans and potential plumbing nightmares. But when was the last time you actually gave it some TLC? If you’re drawing a blank, you’re not alone! Many of us neglect this vital appliance, leading to unpleasant odors, sluggish performance, and even potential damage.
Throughout history, humans have sought ways to manage food waste, from composting in ancient civilizations to the modern marvel of the garbage disposal. While not as ancient as composting, the garbage disposal has become a staple in modern kitchens, offering convenience and helping to reduce landfill waste. But just like any tool, it needs proper maintenance to function optimally.
That’s where this garbage disposal cleaning DIY guide comes in! I’m going to share some simple, effective, and budget-friendly tricks to keep your disposal sparkling clean and smelling fresh. You don’t need to be a plumbing expert to tackle these projects. I’ll walk you through each step, using common household items. Trust me, a little effort now can save you from costly repairs and embarrassing kitchen smells later. So, let’s roll up our sleeves and get that garbage disposal back to its best!
DIY Deep Clean: Revive Your Smelly Garbage Disposal!
Okay, let’s be honest, nobody *loves* cleaning the garbage disposal. It’s dark, it’s kinda gross, and it smells… well, let’s just say it’s not a bouquet of roses. But a clean garbage disposal is a happy garbage disposal, and a happy garbage disposal means a less smelly kitchen! I’m going to walk you through a super effective DIY cleaning method that will have your disposal singing a fresh, clean tune in no time.
What You’ll Need: Your Arsenal of Clean
Before we dive in, let’s gather our supplies. Trust me, having everything ready to go makes the whole process much smoother.
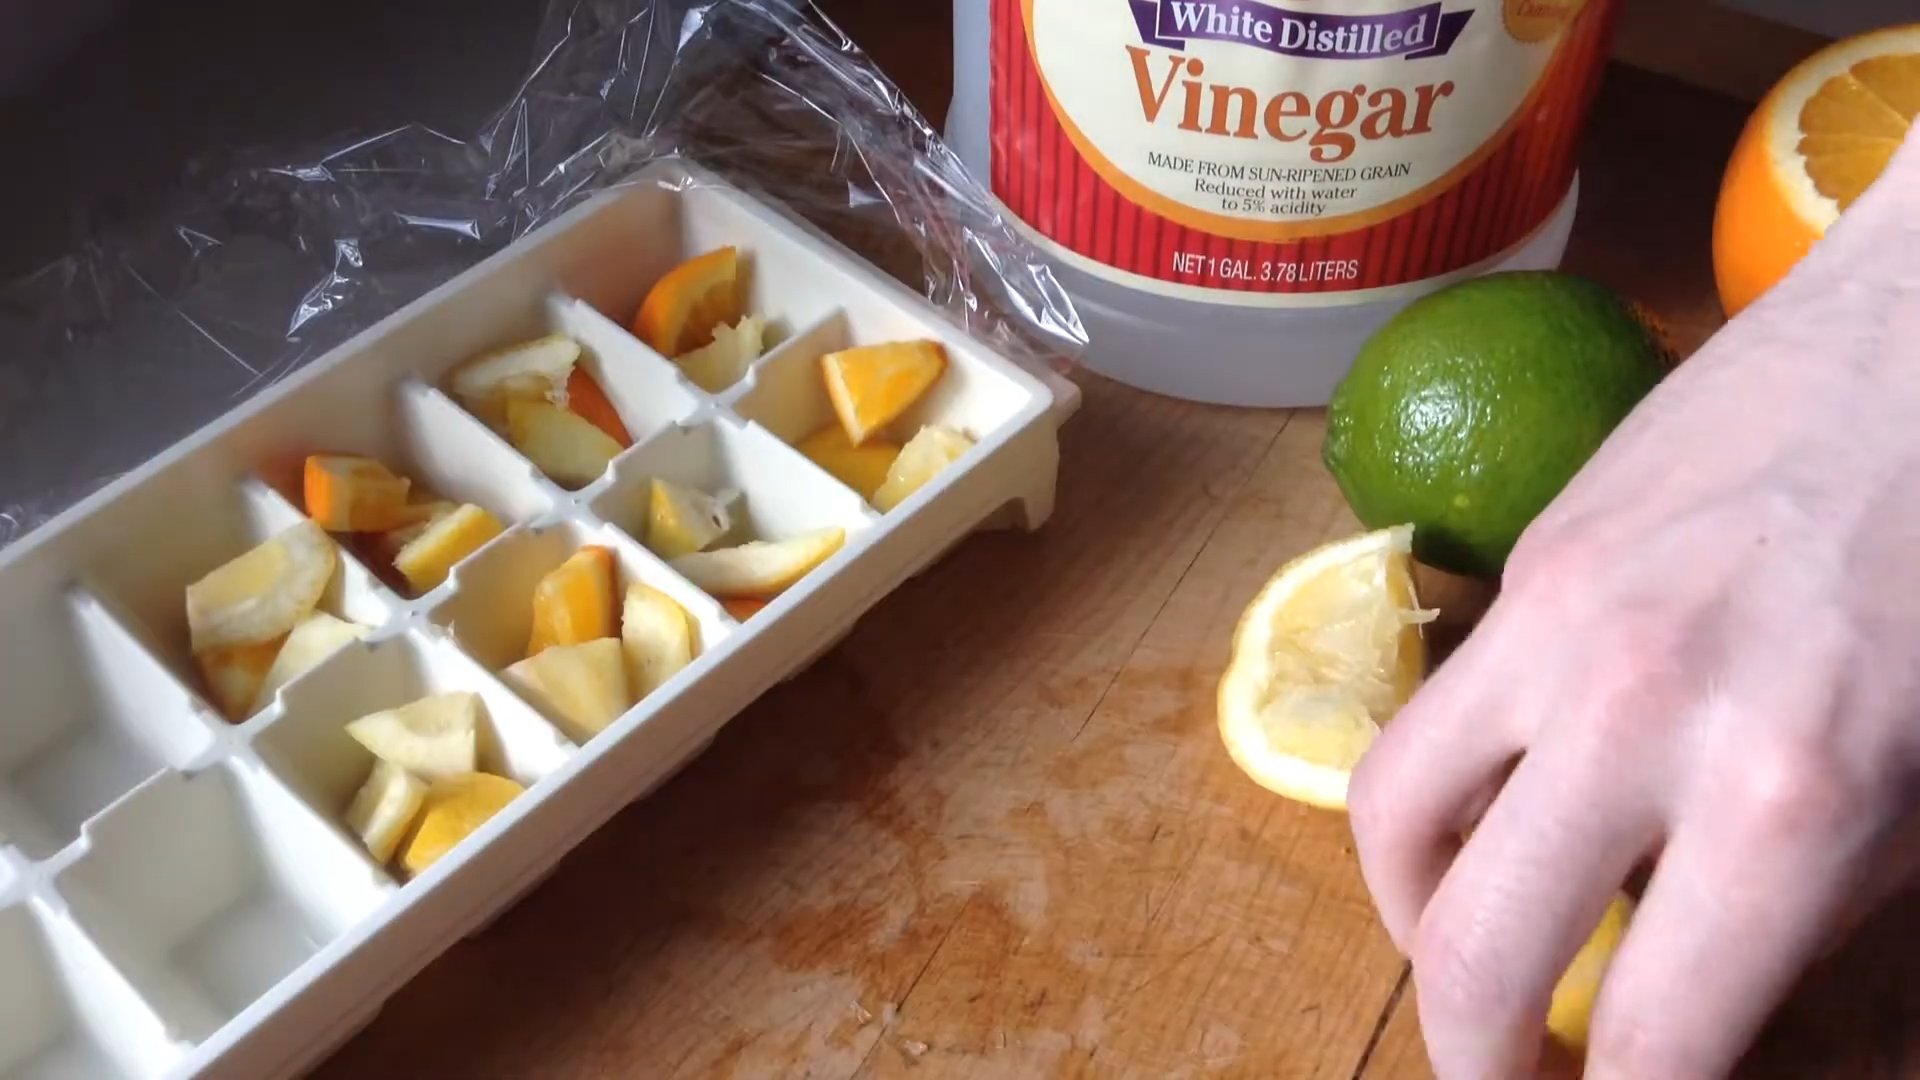
* **Ice Cubes:** Lots of them! At least a tray or two.
* **Coarse Salt:** Rock salt is ideal, but table salt will work in a pinch.
* **Baking Soda:** The all-purpose cleaning champion.
* **White Vinegar:** The baking soda’s bubbly best friend.
* **Lemon or Lime:** For a fresh, citrusy scent and extra cleaning power.
* **Dish Soap:** Your everyday grease fighter.
* **Tongs or Pliers:** For safely removing any large debris.
* **Old Toothbrush or Scrub Brush:** For scrubbing those hard-to-reach areas.
* **Rubber Gloves:** Because, let’s face it, we’re dealing with gunk.
* **Kettle or Pot:** For boiling water.
Safety First!
Before we even *think* about sticking our hands near the disposal, let’s make sure it’s completely off.
1. Turn off the power! Locate the circuit breaker that controls your garbage disposal and flip it to the “off” position. This is absolutely crucial to prevent any accidental activations while you’re working. Seriously, don’t skip this step!
2. Double-check! Just to be extra safe, try flipping the disposal switch to make sure it doesn’t turn on. Peace of mind is priceless.
Phase 1: The Initial Clean – Removing the Big Stuff
Alright, now that we’re safe and sound, let’s tackle the visible gunk.
1. Inspect the Disposal: Grab your flashlight (or use your phone’s light) and peer into the disposal. Look for any large pieces of food or debris that might be stuck.
2. Remove Debris: Using your tongs or pliers, carefully remove any visible debris. Avoid using your bare hands! You never know what’s lurking down there.
3. Flush with Cold Water: Run cold water into the disposal for about a minute to flush away any loose particles.
Phase 2: The Ice and Salt Scrub – Grinding Away the Grime
This is where the magic happens! The ice and salt act as a natural abrasive, scrubbing the inside of the disposal and dislodging built-up grime.
1. Fill with Ice: Fill the garbage disposal about halfway with ice cubes.
2. Add Salt: Sprinkle a generous amount of coarse salt (about 1/2 cup) over the ice.
3. Run the Disposal: Turn on the cold water to a slow, steady stream. Then, flip the disposal switch to the “on” position. Let the ice and salt grind away for about a minute or two. You should hear a satisfying crunching sound!
4. Repeat if Necessary: If you feel like the disposal needs a little extra scrubbing, repeat steps 1-3.
Phase 3: The Baking Soda and Vinegar Volcano – Bubbling Away the Odors
This step is all about neutralizing odors and breaking down any remaining grease and grime. Get ready for some bubbly action!
1. Pour in Baking Soda: Pour about 1/2 cup of baking soda down the drain of the garbage disposal.
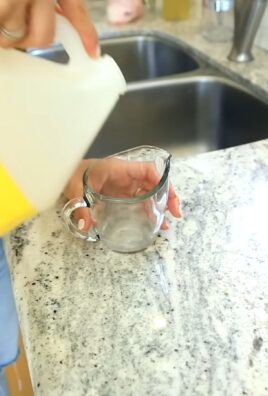
2. Add Vinegar: Immediately follow with 1 cup of white vinegar.
3. Let it Fizz: Stand back and watch the magic happen! The baking soda and vinegar will react, creating a fizzy, bubbling mixture. Let this mixture sit for about 5-10 minutes. This gives it time to break down any lingering gunk and neutralize odors.
4. Rinse Thoroughly: After the fizzing subsides, run hot water into the disposal for about a minute to flush away the baking soda and vinegar.
Phase 4: The Citrus Refresh – A Zesty Finish
Now, let’s give our disposal a fresh, citrusy scent and a final cleaning boost.
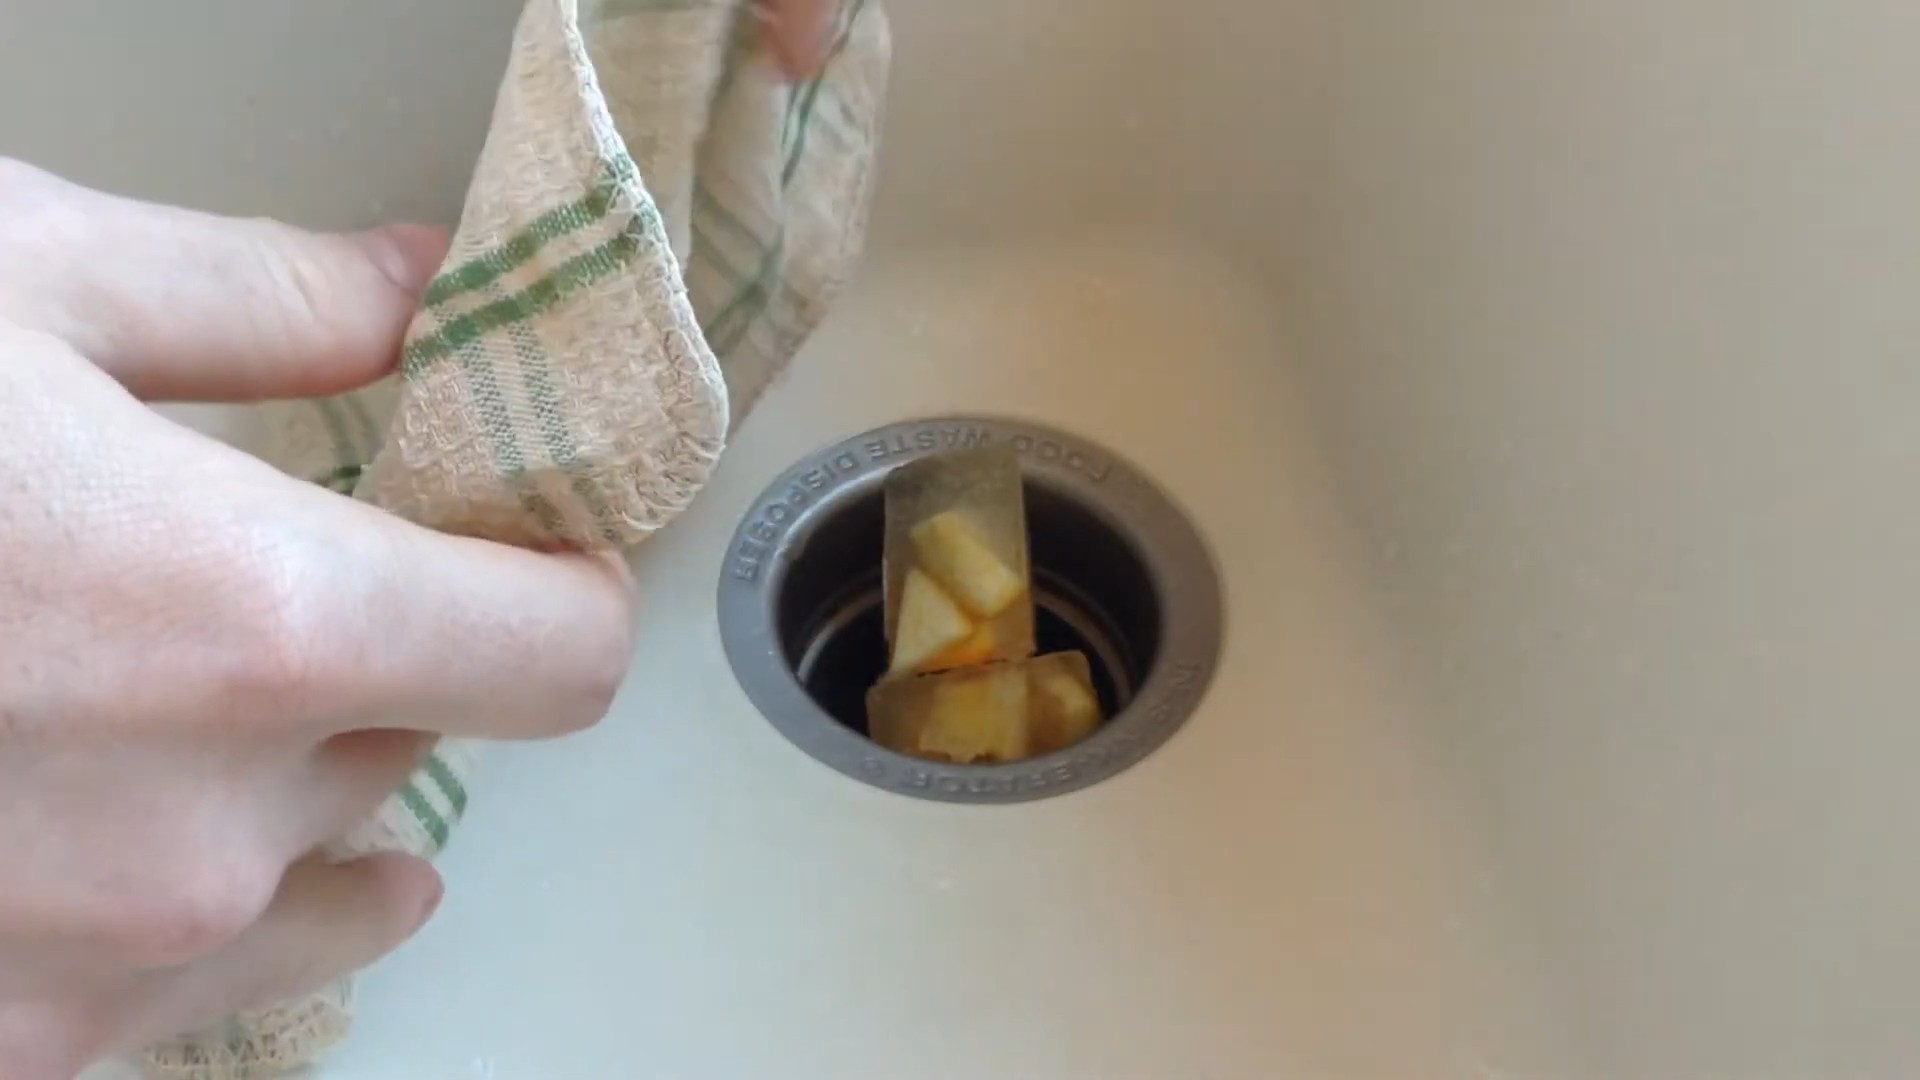
1. Cut the Citrus: Cut your lemon or lime into wedges.
2. Grind the Citrus: Turn on the cold water to a slow, steady stream. Then, one at a time, drop the citrus wedges into the running disposal. Let them grind away for about 30 seconds. The citrus oils will help to deodorize the disposal and leave it smelling fresh and clean.
3. Bonus Tip: You can also freeze lemon or lime wedges into ice cubes and grind those for an extra burst of freshness!
Phase 5: The Final Scrub – Getting into the Nitty-Gritty
This is where we get down and dirty (well, cleaner, actually!). We’re going to manually scrub those hard-to-reach areas.
1. Apply Dish Soap: Squirt a small amount of dish soap onto your old toothbrush or scrub brush.
2. Scrub the Baffle: The baffle is the rubber or plastic splash guard that sits at the top of the disposal. It tends to accumulate a lot of grime and food particles. Use your brush to scrub the baffle thoroughly, paying attention to any crevices or folds.
3. Scrub the Inside Walls: Reach down into the disposal (with the power still off, of course!) and scrub the inside walls as far as you can reach.
4. Rinse Again: Rinse the disposal thoroughly with hot water to remove any remaining soap and debris.
Phase 6: The Boiling Water Flush – The Ultimate Cleanse
This final step is crucial for flushing away any remaining grease and grime that might be clinging to the pipes.
1. Boil Water: Bring a kettle or pot of water to a rolling boil.
2. Carefully Pour: Carefully pour the boiling water down the drain of the garbage disposal. Be careful not to splash yourself!
3. Let it Drain: Allow the boiling water to drain completely.
Maintenance Tips: Keeping Your Disposal Happy
Now that your garbage disposal is sparkling clean, let’s talk about how to keep it that way! Regular maintenance is key to preventing future clogs and odors.
* Run Cold Water: Always run cold water when using the disposal. Cold water helps to solidify grease, allowing it to be ground up and flushed away more easily. Hot water can melt the grease, causing it to stick to the pipes and create clogs.
* Grind Small Amounts: Avoid overloading the disposal with large amounts of food waste. Grind food in small batches to prevent clogs.
* Avoid Certain Foods: There are certain foods that you should never put down the garbage disposal, including:
* **Grease and Oil:** As mentioned above, grease and oil can solidify and clog the pipes.
* **Coffee Grounds:** Coffee grounds can accumulate and form a sludge that clogs the drain.
* **Pasta and Rice:** These starchy foods can expand in water and create a sticky mess.
* **Eggshells:** While some people believe that eggshells sharpen the blades, they can actually get stuck in the drain and cause clogs.
* **Bones:** Bones are too hard for the disposal to grind and can damage the blades.
* **Fibrous Vegetables:** Celery, corn husks, and other fibrous vegetables can get tangled in the blades and cause clogs.
* Regular Cleaning: Repeat this deep cleaning process every month or two to keep your disposal fresh and clean.
* Use Disposal Cleaners: Consider using a commercial garbage disposal cleaner on a regular basis. These cleaners are designed to break down grease and grime and keep your disposal smelling fresh. Follow the instructions on the product label.
* Don’t Forget the Stopper: Clean the underside of the sink stopper regularly. This area can accumulate a lot of grime and bacteria.
Troubleshooting: What to Do When Things Go Wrong
Even with regular maintenance, sometimes things can go wrong. Here are a few common garbage disposal problems and how to fix them:
* Disposal is Humming but Not Grinding: This usually means that something is stuck in the blades. Turn off the power to the disposal and use tongs or pliers to remove the obstruction.
* Disposal is Clogged: Try using a plunger to dislodge the clog. If that doesn’t work, you may need to use a drain snake.
* Disposal is Leaking: Check the connections to the disposal to make sure they are tight. If the leak persists
Conclusion
So, there you have it! This simple, effective, and surprisingly satisfying DIY garbage disposal cleaning trick is a game-changer for any homeowner. No more lingering odors, no more mysterious gurgling sounds, just a fresh and functional kitchen sink. We’ve explored a method that utilizes readily available household ingredients, saving you money and avoiding harsh chemicals that can damage your plumbing and the environment.
Why is this a must-try? Because a clean garbage disposal isn’t just about eliminating unpleasant smells; it’s about maintaining a healthy and hygienic kitchen environment. Food scraps trapped in your disposal can become breeding grounds for bacteria and mold, potentially contaminating your dishes and food preparation surfaces. Regular cleaning, especially with this easy DIY method, prevents these issues and extends the lifespan of your garbage disposal unit.
Beyond the basic recipe, feel free to experiment! For an extra boost of freshness, add a few drops of your favorite essential oil, such as lemon, tea tree, or eucalyptus, to the ice cubes before freezing. These oils not only provide a pleasant scent but also possess natural antibacterial properties. Another variation involves using vinegar ice cubes instead of lemon juice ice cubes for a more potent cleaning action. Vinegar is a powerful disinfectant and deodorizer, making it an excellent choice for tackling stubborn odors. You can also add a tablespoon of baking soda to the disposal after the ice cubes have melted for an extra fizzing clean.
Remember, prevention is key. Avoid pouring grease, oil, or fibrous foods like celery stalks and banana peels down your garbage disposal. These items can clog the drain and damage the motor. Instead, dispose of them in the trash or compost bin. Run cold water while operating the disposal to help flush food particles down the drain.
We are confident that this garbage disposal cleaning DIY will become a staple in your cleaning routine. It’s quick, easy, affordable, and effective. But don’t just take our word for it! We encourage you to try it out for yourself and see the difference it makes.
Once you’ve given it a whirl, we’d love to hear about your experience. Share your results, variations, and any tips you’ve discovered in the comments section below. Did you find a particular essential oil blend that worked wonders? Did you encounter any challenges? Your feedback will help other readers and contribute to a community of clean and happy kitchens! Let’s banish those garbage disposal odors together!
Frequently Asked Questions (FAQ)
1. How often should I clean my garbage disposal?
The frequency of cleaning depends on how often you use your garbage disposal. As a general rule, aim to clean it at least once a month. If you frequently dispose of food scraps, you might want to clean it more often, perhaps every two weeks. If you notice any unpleasant odors or hear unusual noises coming from the disposal, that’s a sure sign it’s time for a cleaning. Regular cleaning prevents buildup and keeps your disposal functioning optimally.
2. What kind of ice cubes should I use?
Regular tap water ice cubes work perfectly fine for this DIY cleaning method. However, you can also use filtered water ice cubes if you prefer. The key is the cold temperature of the ice, which helps to dislodge food particles and grease from the disposal blades and walls. The addition of lemon juice or vinegar to the ice cubes enhances the cleaning power.
3. Can I use this method if I have a septic system?
Yes, this DIY garbage disposal cleaning method is generally safe for septic systems. The ingredients used – lemon juice, vinegar, and baking soda – are all natural and biodegradable. However, it’s always a good idea to check with your septic system manufacturer or a qualified plumber if you have any concerns. Avoid pouring large amounts of grease or oil down the drain, as this can cause problems with your septic system regardless of whether you clean your disposal regularly.
4. What if I don’t have lemons or vinegar? Can I use something else?
While lemon juice and vinegar are the most effective natural cleaning agents for this DIY method, you can try using other citrus fruits like limes or oranges. The citric acid in these fruits helps to break down grease and deodorize the disposal. If you don’t have any citrus fruits on hand, you can try using a mixture of baking soda and water. Pour about half a cup of baking soda down the drain, followed by a cup of hot water. Let it sit for about 30 minutes, then flush with cold water. This method is less potent than using lemon juice or vinegar, but it can still help to freshen up your disposal.
5. My garbage disposal is making a loud grinding noise. Will this cleaning method fix it?
A loud grinding noise could indicate that there’s a foreign object stuck in your garbage disposal. Before attempting to clean it, turn off the power to the disposal at the circuit breaker. Then, carefully inspect the disposal chamber with a flashlight to see if you can identify and remove the object. Use tongs or pliers to remove any visible debris. Once you’ve removed the object, you can try cleaning the disposal using this DIY method. If the grinding noise persists after cleaning, it’s best to consult a qualified plumber.
6. Can I use bleach to clean my garbage disposal?
While bleach is a powerful disinfectant, it’s generally not recommended for cleaning garbage disposals. Bleach can corrode the metal components of the disposal and damage your plumbing system. It can also release harmful fumes when mixed with other cleaning agents. Stick to natural cleaning solutions like lemon juice, vinegar, and baking soda for a safe and effective way to clean your garbage disposal.
7. How do I prevent my garbage disposal from smelling in the first place?
Prevention is key to keeping your garbage disposal fresh and odor-free. Avoid pouring grease, oil, or fibrous foods down the drain. Run cold water while operating the disposal to help flush food particles down the drain. Clean your disposal regularly using this DIY method or another suitable cleaning solution. You can also toss a few citrus peels down the disposal every now and then to freshen it up.
8. What if the smell persists even after cleaning?
If the smell persists even after cleaning your garbage disposal, there might be a buildup of food debris in the drainpipe. In this case, you can try using a drain cleaner specifically designed for garbage disposals. Follow the instructions on the product label carefully. If the smell still persists, it’s best to consult a qualified plumber to inspect your drainpipe for any blockages or other issues.
9. Is it safe to put ice down my garbage disposal?
Yes, it is generally safe to put ice down your garbage disposal. In fact, ice is a great way to clean and sharpen the blades of your disposal. The cold temperature of the ice helps to dislodge food particles and grease, while the hard ice cubes can help to grind away any buildup on the blades. Just be sure to run cold water while operating the disposal to help flush the ice and debris down the drain.
10. Can I use this method on any type of garbage disposal?
This DIY cleaning method is generally safe for most types of garbage disposals. However, it’s always a good idea to consult your garbage disposal’s user manual or the manufacturer’s website to ensure that the ingredients used in this method are compatible with your specific model. If you have any concerns, it’s best to err on the side of caution and consult a qualified plumber.


Leave a Comment