

Grow Aloe Vera from Leaf: Unlock the secrets to propagating your own soothing succulent! Have you ever admired the lush, green leaves of an Aloe Vera plant and wished you could have an endless supply? Well, you’re in luck! This DIY guide will walk you through the surprisingly simple process of growing Aloe Vera from a single leaf, transforming your home into a haven of natural remedies and vibrant greenery.
Aloe Vera has a rich history, dating back thousands of years. Ancient Egyptians revered it as the “plant of immortality,” using it for its medicinal properties and beauty benefits. Cleopatra herself is said to have used Aloe Vera in her skincare routine! Today, its popularity continues to soar, and for good reason. But buying multiple plants can get expensive. That’s where our DIY trick comes in!
Why learn to grow Aloe Vera from leaf? Because it’s an incredibly cost-effective and rewarding way to expand your collection. Imagine having a constant supply of fresh Aloe Vera gel to soothe sunburns, moisturize your skin, or even add to your smoothies. Plus, it’s a fantastic way to share the gift of natural healing with friends and family. I’m excited to show you how easy it is to propagate these amazing plants and bring a touch of ancient wisdom into your modern home. Let’s get started!
Growing Aloe Vera from a Single Leaf: A DIY Guide
Hey there, plant enthusiasts! Ever wanted to multiply your aloe vera collection without spending a dime? Well, you’re in the right place! I’m going to walk you through the surprisingly simple process of propagating aloe vera from a single leaf. It’s a bit of a gamble, I won’t lie, as it’s not always successful, but when it works, it’s incredibly rewarding. Let’s get started!
Understanding the Challenge
Before we dive in, it’s important to understand that aloe vera propagation from a leaf is different from propagating other succulents. Aloe vera leaves don’t typically have nodes like some plants, which are the points where roots readily emerge. So, we’re essentially encouraging the leaf to produce a callus and, hopefully, eventually sprout roots. It’s more about creating the right environment and hoping for the best!
Materials You’ll Need
* A healthy aloe vera leaf (more on this below!)
* A sharp, clean knife or scissors
* Rooting hormone powder (optional, but recommended)
* A small pot (2-4 inches in diameter)
* Well-draining potting mix (cactus or succulent mix is ideal)
* Spray bottle with water
* A warm, bright location (indirect sunlight)
Choosing the Right Leaf
This is crucial! You can’t just grab any old leaf and expect it to work. Here’s what to look for:
* Maturity: Choose a leaf that’s mature and healthy. This usually means it’s one of the outer leaves, closer to the base of the plant. These leaves are thicker and have more stored energy.
* Health: The leaf should be firm, plump, and free from any blemishes, spots, or signs of damage. Avoid leaves that are yellowing, browning, or mushy.
* Size: A larger leaf generally has a better chance of success because it has more resources to draw upon. Aim for a leaf that’s at least 4-6 inches long.
Step-by-Step Instructions
Alright, let’s get our hands dirty!
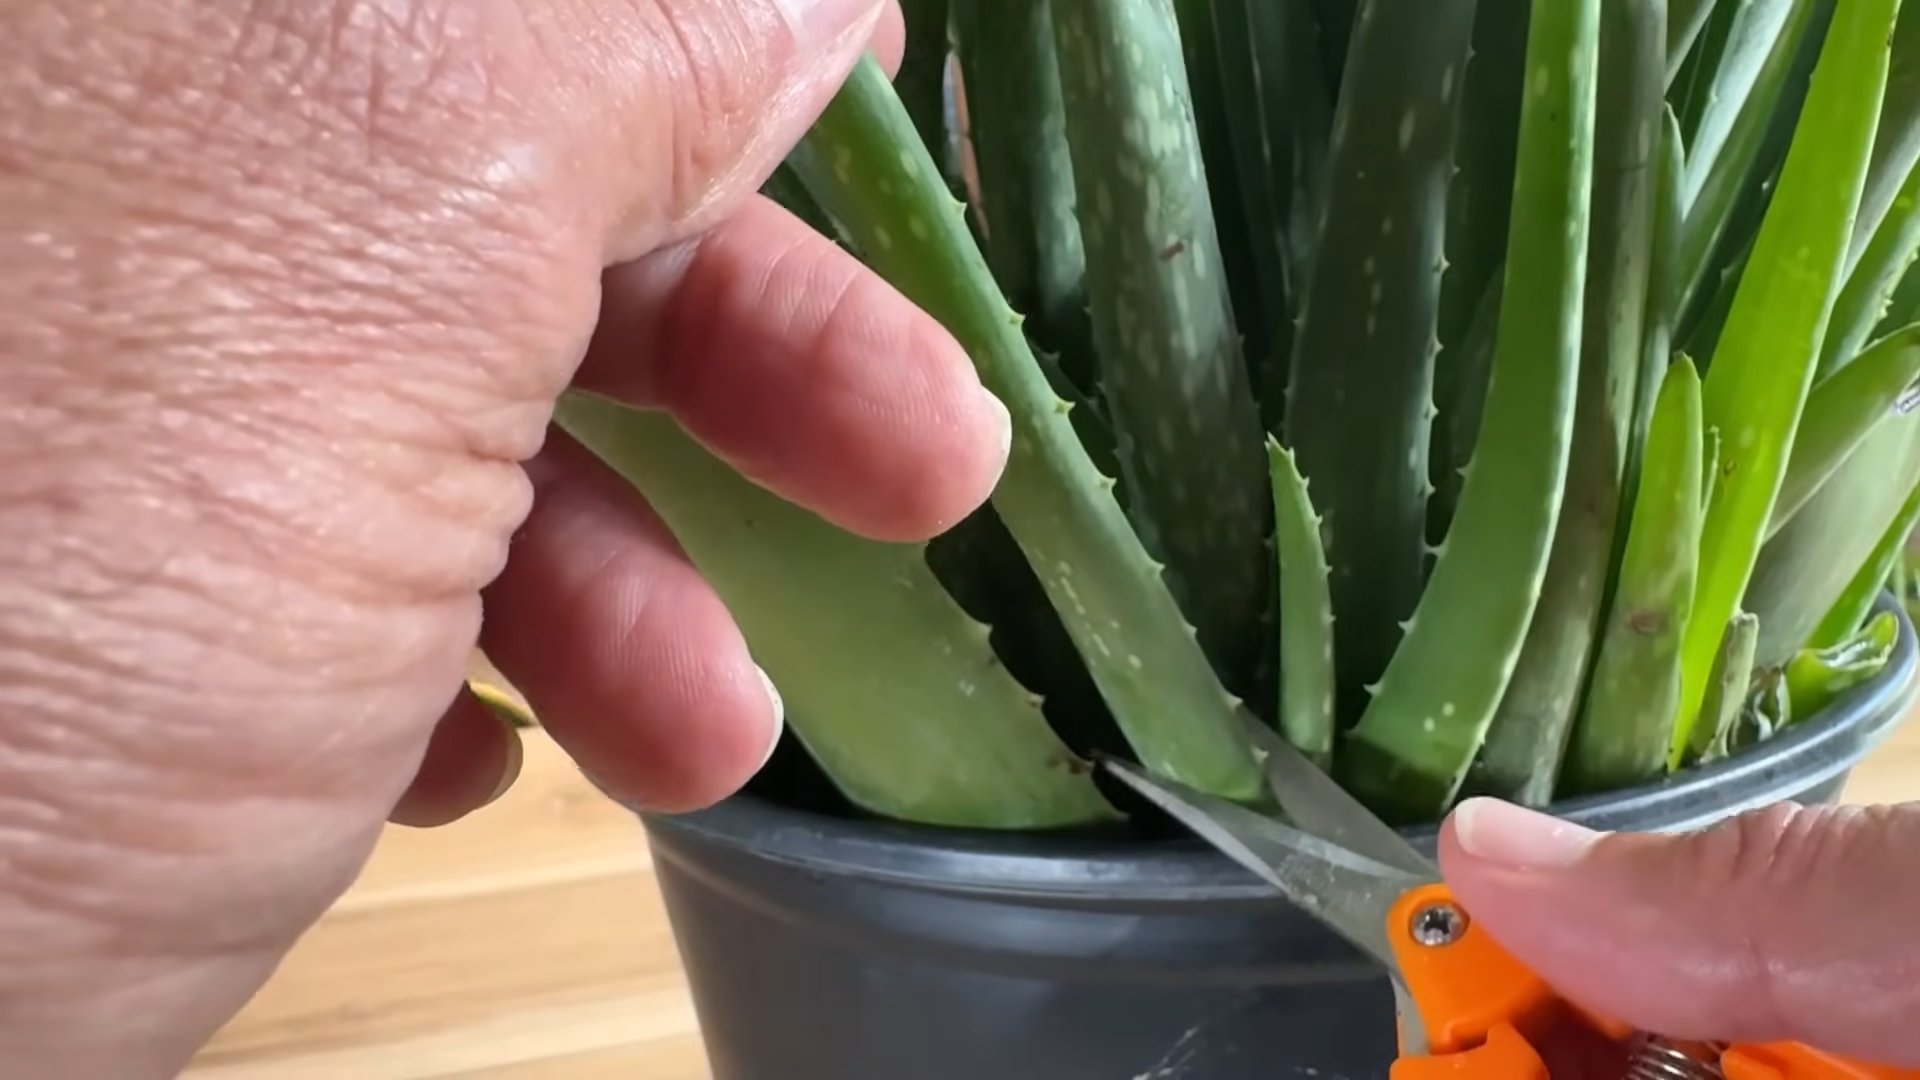
1. Prepare Your Cutting Tool: Sanitize your knife or scissors with rubbing alcohol to prevent any fungal or bacterial infections. This is a really important step, so don’t skip it!
2. Carefully Remove the Leaf: Using your clean knife or scissors, carefully cut the leaf as close to the base of the plant as possible. Make a clean, straight cut. Try to avoid tearing the leaf, as this can increase the risk of rot.
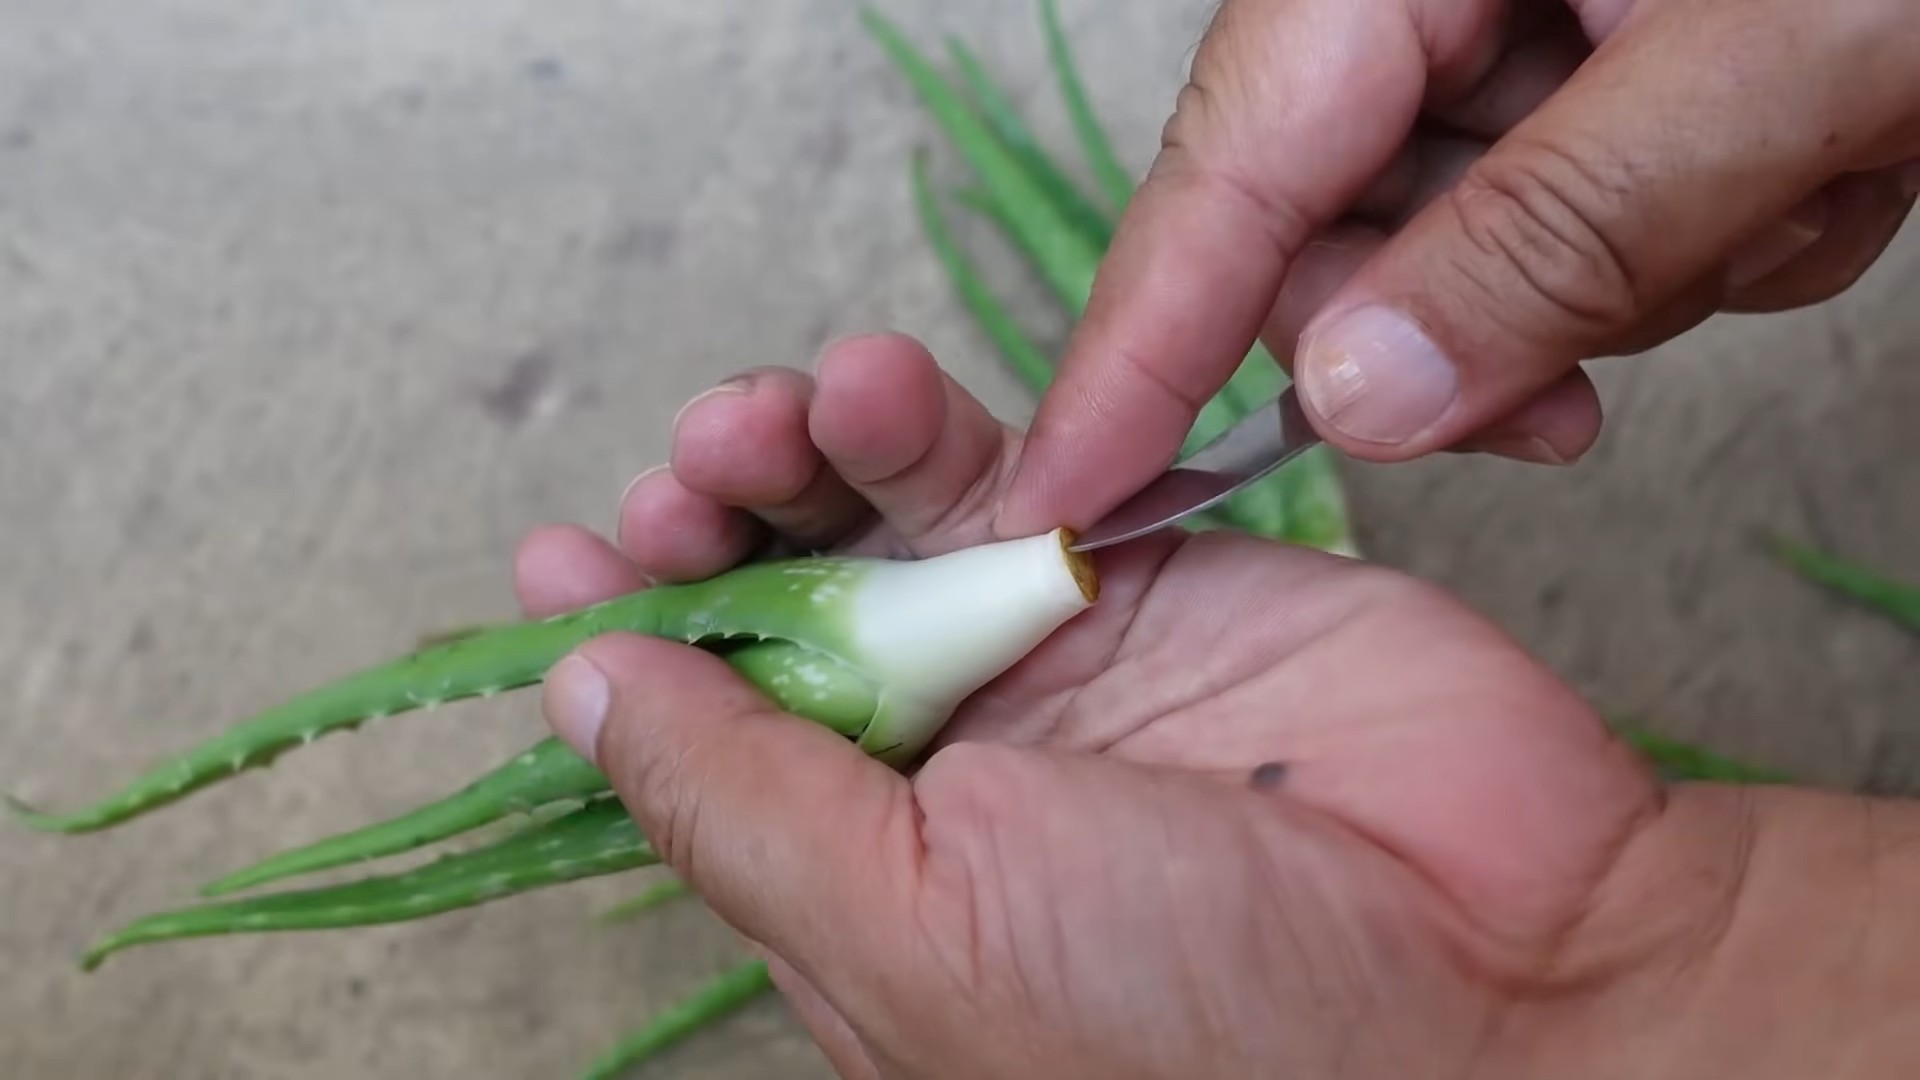
3. Allow the Cut End to Callus: This is perhaps the most crucial step. Place the cut end of the leaf on a paper towel in a cool, dry place, away from direct sunlight. This allows the cut surface to dry out and form a callus, which will protect it from rotting when you plant it. This process can take anywhere from 3 days to a week, or even longer depending on the humidity. You’ll know it’s ready when the cut end is dry and slightly hardened.
4. Apply Rooting Hormone (Optional): While not essential, rooting hormone can significantly increase your chances of success. Dip the calloused end of the leaf into the rooting hormone powder, tapping off any excess. This will encourage root development.
5. Prepare Your Pot: Fill your small pot with well-draining potting mix. Cactus or succulent mix is ideal because it allows excess water to drain away quickly, preventing root rot.
6. Plant the Leaf: Make a small hole in the potting mix, about 1-2 inches deep. Gently insert the calloused end of the leaf into the hole. You can either plant it straight up or at a slight angle. The key is to make sure the calloused end is buried in the soil.
7. Water Sparingly: After planting, lightly mist the soil with water. Avoid overwatering, as this can lead to rot. The soil should be slightly moist, but not soggy.
8. Provide Indirect Sunlight: Place the pot in a warm, bright location that receives indirect sunlight. Avoid direct sunlight, as this can scorch the leaf. A windowsill facing east or west is usually a good choice.
9. Be Patient! This is where the real test of patience comes in. It can take several weeks, or even months, for roots to develop. During this time, keep the soil lightly moist, but avoid overwatering. You can check for root development by gently tugging on the leaf. If it resists, it means roots are starting to form.
10. Care After Rooting: Once roots have developed, you can gradually increase the amount of water you give the plant. Allow the soil to dry out completely between waterings. Continue to provide bright, indirect sunlight.
Troubleshooting
Even with the best care, things don’t always go as planned. Here are some common problems you might encounter and how to deal with them:
* Leaf Rotting: This is the most common problem. If the leaf starts to turn brown or mushy, it’s likely rotting. This is usually caused by overwatering or planting the leaf before it has calloused properly. Remove the rotting leaf immediately to prevent the rot from spreading. Start again with a fresh leaf, making sure to allow it to callus completely before planting and being very careful not to overwater.
* No Root Development: Sometimes, despite your best efforts, the leaf just won’t root. This can be due to a variety of factors, such as the leaf not being mature enough, the environment not being suitable, or simply bad luck. Don’t give up! Try again with a different leaf.
* Leaf Drying Out: If the leaf starts to shrivel and dry out, it may not be getting enough moisture. Lightly mist the soil more frequently, but still avoid overwatering.
Tips for Success
Here are a few extra tips to increase your chances of successfully propagating aloe vera from a leaf:
* Use a Humidity Dome: Creating a humid environment can help encourage root development. You can do this by placing a clear plastic bag or container over the pot, creating a mini-greenhouse. Just make sure to remove the bag or container for a few hours each day to allow for air circulation and prevent mold growth.
* Bottom Watering: Instead of watering from the top, try bottom watering. Place the pot in a shallow dish of water and allow the soil to absorb the water from the bottom. This can help prevent overwatering and root rot.
* Experiment with Different Leaves: Not all leaves are created equal. Try propagating multiple leaves at the same time to increase your chances of success.
* Don’t Give Up! Propagating aloe vera from a leaf can be challenging, but it’s also incredibly rewarding. Don’t be discouraged if your first attempt fails. Keep trying, and eventually, you’ll get the hang of it.
Frequently Asked Questions
* How long does it take for aloe vera to grow from a leaf? It can take anywhere from a few weeks to several months for roots to develop. Be patient!
* Can I propagate aloe vera in water? While it’s possible, it’s generally not recommended. Aloe vera is prone to rot in water. It’s better to propagate it in well-draining potting mix.
* What do I do with the mother plant after taking a leaf? The mother plant will be fine! Just make sure to avoid overwatering it and provide it with plenty of sunlight. The cut area will callus over on its own.
* My aloe vera leaf is turning brown. What should I do? If the leaf is turning brown and mushy, it’s likely rotting. Remove it immediately. If it’s just turning brown at the tips, it may be getting too much sunlight. Move it to a location with indirect sunlight.
Final Thoughts
Growing aloe vera from a single leaf is a fun and rewarding DIY project. It requires patience and a little bit of luck, but with the right care, you can successfully propagate new aloe vera plants from just a single leaf. So, grab a healthy leaf, follow these steps, and get ready to expand your aloe vera collection! Happy planting!
Conclusion
So, there you have it! Growing aloe vera from a single leaf might seem like a horticultural magic trick, but it’s a surprisingly accessible and rewarding project for anyone, regardless of their gardening experience. We’ve walked you through the steps, from selecting the right leaf to nurturing its growth into a thriving plant. But why should you bother with this DIY endeavor?
Firstly, it’s incredibly cost-effective. Instead of purchasing multiple aloe vera plants, you can propagate them from a single, healthy leaf. This is especially beneficial if you already have a mature aloe vera plant from which you can harvest leaves. Think of all the money you’ll save, which you can then invest in other gardening projects or, perhaps, a stylish new pot for your burgeoning aloe vera collection!
Secondly, it’s a fantastic way to connect with nature and learn about plant propagation. Witnessing the transformation of a simple leaf into a fully formed plant is a truly fascinating process. It fosters a deeper appreciation for the natural world and the resilience of plants. Plus, it’s a great conversation starter! Imagine proudly showing off your home-grown aloe vera plants to friends and family, explaining the process and sharing your newfound knowledge.
Thirdly, having multiple aloe vera plants at your disposal means you’ll always have a readily available source of its soothing gel. Aloe vera is renowned for its medicinal properties, particularly its ability to soothe burns, cuts, and skin irritations. Having a constant supply means you can address minor skin ailments naturally and effectively.
But don’t stop there! Once you’ve mastered the basic technique, feel free to experiment with variations. Try using different types of potting mix to see which one yields the best results. You could also experiment with different rooting hormones to accelerate the process. Consider using different sized containers as the plant grows. You can even try propagating leaves from different varieties of aloe vera to create a diverse collection.
One exciting variation is to try propagating aloe vera leaves in water. While the success rate might be slightly lower than with soil propagation, it’s a visually appealing method that allows you to observe the root development firsthand. Simply place the cut end of the leaf in a glass of water, ensuring that only the very tip is submerged. Change the water every few days to prevent bacterial growth.
Another fun experiment is to create a mini aloe vera garden by planting multiple propagated leaves in a single, large container. This creates a visually stunning display and provides you with an abundance of aloe vera gel.
Ultimately, the best way to learn is by doing. So, we wholeheartedly encourage you to give this DIY trick a try. Don’t be discouraged if your first attempt isn’t entirely successful. Plant propagation can be a bit of a learning curve, and even experienced gardeners encounter setbacks. The key is to be patient, persistent, and observant.
We are confident that you’ll find growing aloe vera from leaf to be a rewarding and fulfilling experience. And we’d love to hear about your journey! Share your successes, your challenges, and any tips or tricks you discover along the way. Post photos of your growing aloe vera plants on social media using #DIYAloeVera and tag us so we can celebrate your green thumb achievements! Let’s create a community of aloe vera enthusiasts, sharing our knowledge and inspiring others to embrace the joys of plant propagation. Remember, with a little patience and care, you can easily **grow aloe vera from leaf** and enjoy all the benefits this amazing plant has to offer.
Frequently Asked Questions (FAQ)
1. What is the best type of aloe vera leaf to use for propagation?
The best leaves to use for propagation are mature, healthy leaves from a well-established aloe vera plant. Look for leaves that are plump, firm, and free from any signs of damage or disease. Avoid using leaves that are too young or too old, as they may not root as easily. Ideally, the leaf should be at least 6-8 inches long. The closer to the base of the plant you can harvest the leaf, the better the chances of success.
2. How long does it take for an aloe vera leaf to root?
The time it takes for an aloe vera leaf to root can vary depending on several factors, including the temperature, humidity, and the specific variety of aloe vera. Generally, you can expect to see roots forming within 4-8 weeks. However, it’s important to be patient and avoid disturbing the leaf too often. Check for root development gently by carefully lifting the leaf from the soil. If you don’t see any roots after 8 weeks, don’t give up! Continue to provide the leaf with proper care, and it may eventually root.
3. What type of soil is best for propagating aloe vera leaves?
Aloe vera plants thrive in well-draining soil. A cactus or succulent potting mix is ideal, as it provides the necessary drainage and aeration. You can also create your own potting mix by combining equal parts of potting soil, perlite, and coarse sand. Avoid using heavy, clay-based soils, as they can retain too much moisture and lead to root rot.
4. How often should I water the aloe vera leaf during propagation?
Water sparingly during the propagation process. Overwatering is a common mistake that can lead to root rot. Allow the soil to dry out completely between waterings. When you do water, do so thoroughly, ensuring that the water drains freely from the bottom of the pot. During the initial stages of propagation, you may only need to water once every 2-3 weeks. As the plant develops roots, you can gradually increase the frequency of watering.
5. What is the best location for propagating aloe vera leaves?
Aloe vera leaves need bright, indirect sunlight to root properly. Avoid placing the leaf in direct sunlight, as this can scorch the leaf and hinder root development. A location near a window that receives filtered sunlight is ideal. You can also use a grow light to supplement natural light, especially during the winter months.
6. Can I use rooting hormone to propagate aloe vera leaves?
Yes, using rooting hormone can help to accelerate the rooting process and increase the chances of success. Dip the cut end of the leaf in rooting hormone powder before planting it in the soil. Follow the instructions on the rooting hormone package for proper application. While rooting hormone isn’t strictly necessary, it can be particularly helpful if you’re having difficulty getting the leaf to root.
7. What are the signs that my aloe vera leaf is not rooting properly?
Several signs can indicate that your aloe vera leaf is not rooting properly. These include:
* The leaf turning brown or yellow
* The leaf becoming soft or mushy
* The leaf developing mold or fungus
* The leaf not showing any signs of root development after several weeks
If you notice any of these signs, it’s important to take action immediately. Remove the leaf from the soil and inspect it for signs of rot. If the rot is minimal, you may be able to salvage the leaf by cutting away the affected area and replanting it in fresh soil. However, if the rot is extensive, it’s best to discard the leaf and start with a new one.
8. How do I care for my newly rooted aloe vera plant?
Once your aloe vera leaf has developed a healthy root system, you can begin to care for it as you would a mature aloe vera plant. Provide it with bright, indirect sunlight, well-draining soil, and water sparingly. Allow the soil to dry out completely between waterings. Fertilize the plant sparingly with a balanced fertilizer diluted to half strength. Repot the plant into a larger container as needed.
9. Can I propagate aloe vera leaves in water instead of soil?
Yes, you can propagate aloe vera leaves in water, although the success rate may be slightly lower than with soil propagation. To propagate in water, place the cut end of the leaf in a glass of water, ensuring that only the very tip is submerged. Change the water every few days to prevent bacterial growth. Once roots have developed, you can transplant the leaf into a pot filled with well-draining soil.
10. My aloe vera leaf has rooted, but the new plant is very small. When can I start using the gel from the leaves?
It’s best to wait until the new aloe vera plant is well-established and has grown to a reasonable size before harvesting the gel from its leaves. Harvesting gel from a very small plant can weaken it and hinder its growth. Ideally, wait until the plant has at least 6-8 mature leaves before harvesting. When harvesting, only take a few leaves at a time, and avoid cutting the plant back too severely. This will allow the plant to recover quickly and continue to thrive.

Leave a Comment