

Grow cabbage at home easily? Absolutely! Imagine stepping into your backyard and harvesting crisp, fresh cabbage heads, ready to be transformed into delicious coleslaw, hearty soups, or flavorful stir-fries. Forget those bland, mass-produced cabbages from the supermarket – with a few simple tricks and a little DIY spirit, you can cultivate your own vibrant, nutrient-packed cabbages right in your own garden.
Cabbage cultivation boasts a rich history, dating back thousands of years to ancient Europe. The Romans prized it for its medicinal properties, and it has since become a staple in cuisines worldwide. But let’s be honest, sometimes growing cabbage can feel a bit daunting, especially for beginner gardeners. Pests, diseases, and the sheer size of some cabbage varieties can be intimidating. That’s where these DIY tricks and hacks come in!
I’m here to show you that you don’t need a sprawling farm or a green thumb of steel to grow cabbage at home easily. Whether you have a sprawling backyard or just a sunny balcony, these simple, effective techniques will empower you to nurture healthy, thriving cabbage plants. We’ll cover everything from choosing the right varieties for your climate to protecting your precious cabbages from pesky critters. So, grab your gardening gloves, and let’s embark on this exciting journey to homegrown cabbage bliss!
Growing Cabbage at Home: A Beginner’s Guide
Hey there, fellow gardening enthusiasts! Ever thought about growing your own cabbage? It’s surprisingly easy and rewarding, and nothing beats the taste of fresh, homegrown veggies. I’m going to walk you through everything you need to know to cultivate your own thriving cabbage patch, right in your backyard (or even in containers!).
Choosing Your Cabbage Variety
Before we get our hands dirty, let’s talk cabbage varieties. There’s a whole world beyond the standard green cabbage you see in the grocery store! Consider these factors when making your choice:
* Growing Season: Some varieties are early-season (ready in about 60-70 days), while others are late-season (taking 80-100 days). Choose based on your climate and the length of your growing season.
* Head Size: Do you want giant heads for sauerkraut or smaller ones for individual meals?
* Color: Green is classic, but you can also find red, purple, and even savoy (crinkled leaves) cabbages.
* Disease Resistance: Look for varieties that are resistant to common cabbage diseases in your area.
Some popular and reliable varieties include:
* Early Jersey Wakefield: An early-season, cone-shaped cabbage.
* Golden Acre: Another early variety, known for its compact size.
* Copenhagen Market: A mid-season, round-headed cabbage.
* Red Acre: A beautiful red cabbage with a slightly peppery flavor.
* Savoy Ace: A savoy cabbage with a mild, sweet taste.
Starting Your Cabbage: Seeds vs. Transplants
You have two options for starting your cabbage: seeds or transplants.
* Seeds: Starting from seed gives you more control over the process and is generally cheaper. You’ll need to start your seeds indoors about 6-8 weeks before the last expected frost.
* Transplants: Buying transplants from a nursery is a quicker and easier option, especially if you’re short on time or space. Just make sure the transplants look healthy and vigorous.
Starting Cabbage from Seeds (Indoors)
If you’re going the seed route, here’s how to get started:
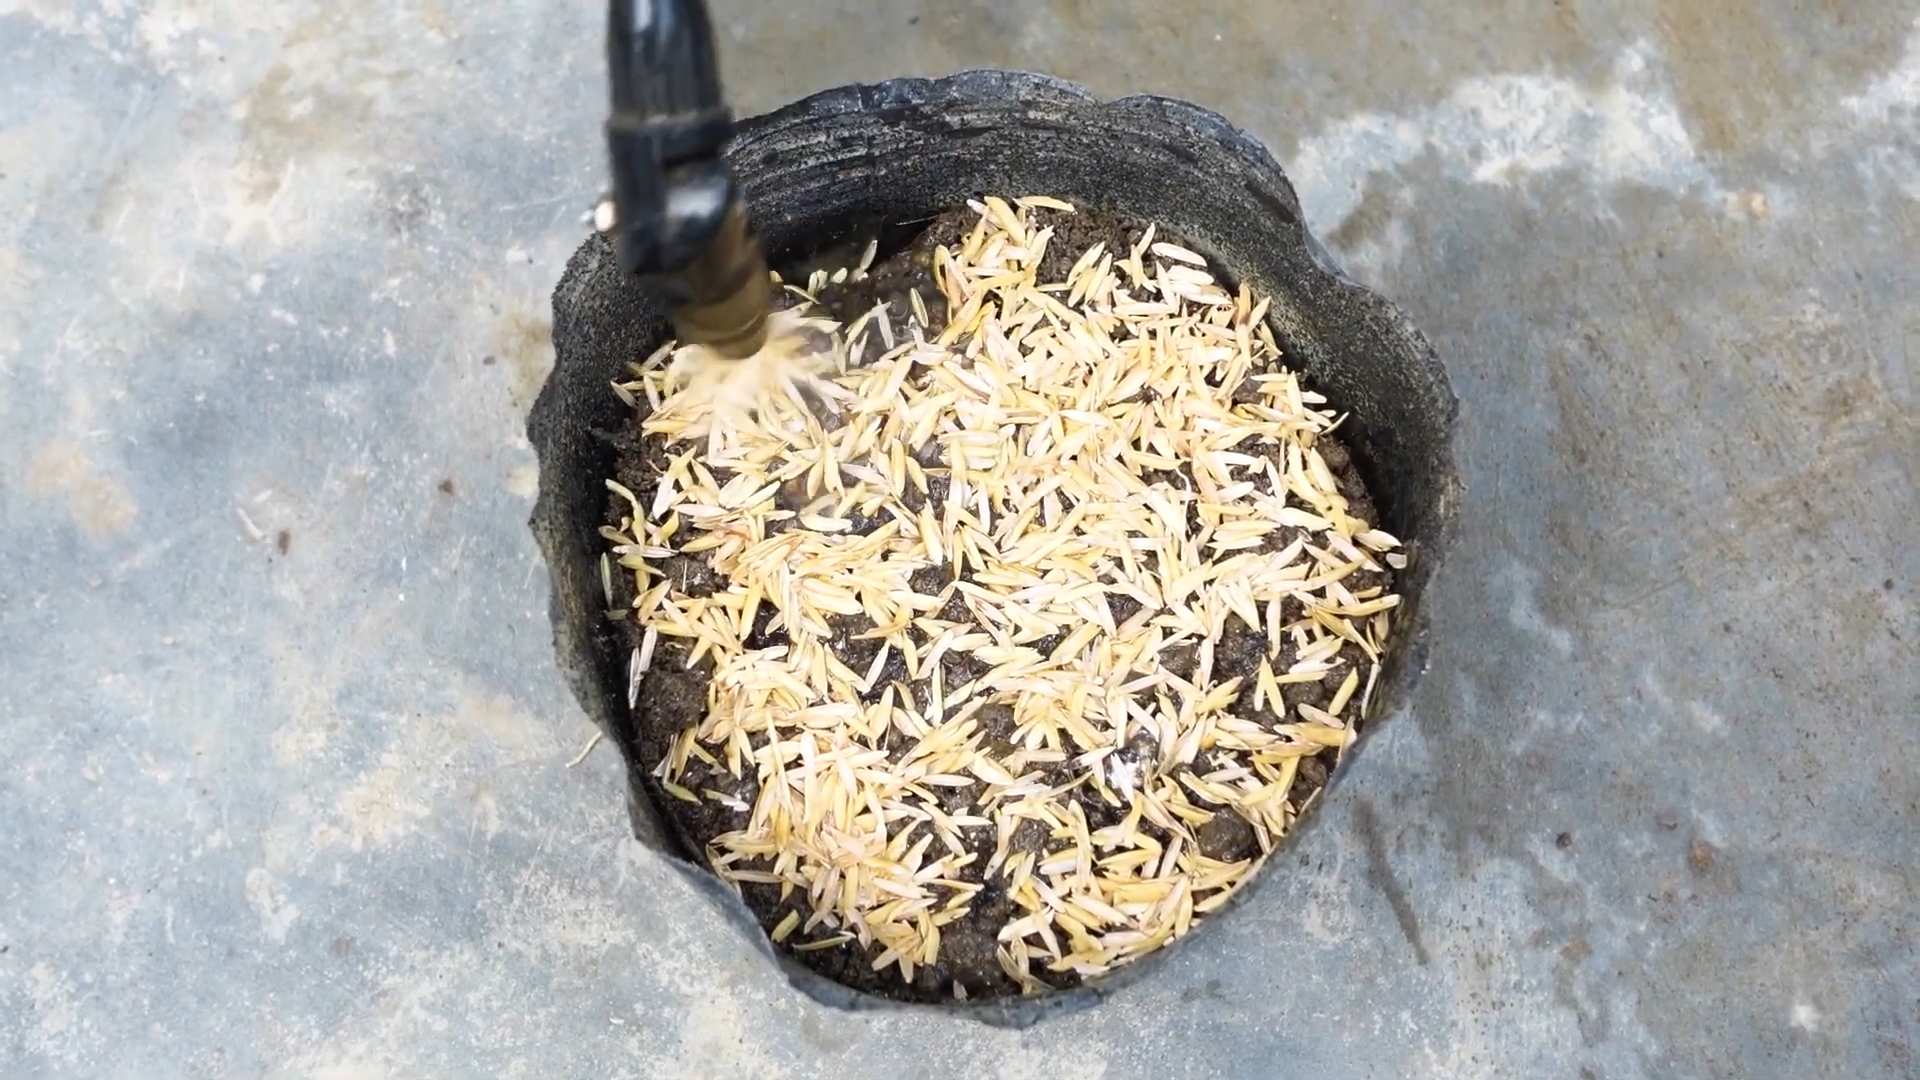
1. Gather Your Supplies: You’ll need seed starting trays or small pots, seed starting mix (a light, sterile soil mix), cabbage seeds, a spray bottle, and a grow light (optional, but highly recommended).
2. Sow the Seeds: Fill your trays or pots with seed starting mix. Moisten the mix with the spray bottle. Sow 2-3 cabbage seeds per cell or pot, about ¼ inch deep.
3. Provide Light and Warmth: Place the trays or pots in a warm location (around 70-75°F). If you’re using a grow light, position it a few inches above the seedlings. If not, place them near a sunny window, rotating them regularly to prevent them from leaning towards the light.
4. Keep the Soil Moist: Water gently with the spray bottle whenever the soil surface feels dry. Avoid overwatering, which can lead to damping off (a fungal disease that kills seedlings).
5. Thin the Seedlings: Once the seedlings have their first true leaves (the second set of leaves), thin them to one seedling per cell or pot. Snip off the weaker seedlings at the soil line with scissors.
6. Harden Off the Seedlings: About a week before you plan to transplant them outdoors, you’ll need to “harden off” the seedlings. This means gradually exposing them to outdoor conditions to acclimate them to the sun, wind, and temperature changes. Start by placing them outdoors in a sheltered location for a few hours each day, gradually increasing the amount of time they spend outside.
Preparing the Garden Bed
Cabbage needs a sunny spot with well-drained soil. Here’s how to prepare your garden bed:
1. Choose a Sunny Location: Cabbage needs at least 6 hours of sunlight per day.
2. Test the Soil: Ideally, your soil should have a pH between 6.0 and 7.5. You can test your soil with a home soil test kit or send a sample to your local extension office for analysis.
3. Amend the Soil: Cabbage is a heavy feeder, so it needs rich, fertile soil. Amend your soil with plenty of compost or well-rotted manure. This will improve drainage, add nutrients, and help retain moisture.
4. Till or Dig the Soil: Loosen the soil to a depth of at least 12 inches. This will allow the cabbage roots to grow easily.
5. Add Fertilizer: Incorporate a balanced fertilizer (such as 10-10-10) into the soil according to the package directions.
Transplanting Your Cabbage
Whether you started your cabbage from seed or bought transplants, here’s how to transplant them into the garden:
1. Choose the Right Time: Transplant your cabbage seedlings outdoors after the last expected frost. The soil temperature should be at least 50°F.
2. Space the Plants: Space the plants according to the variety. Early varieties can be spaced 12-18 inches apart, while later varieties need 18-24 inches of space. Rows should be 24-36 inches apart.
3. Dig the Holes: Dig holes that are slightly larger than the root balls of the transplants.
4. Remove the Transplants: Gently remove the transplants from their containers. If the roots are circling the bottom of the container, gently loosen them before planting.
5. Plant the Transplants: Place the transplants in the holes, making sure the top of the root ball is level with the soil surface.
6. Fill the Holes: Fill the holes with soil and gently firm the soil around the plants.
7. Water Thoroughly: Water the transplants thoroughly after planting.
Caring for Your Cabbage
Once your cabbage is in the ground, here’s how to keep it healthy and productive:
1. Watering: Cabbage needs consistent moisture, especially during head formation. Water deeply whenever the top inch of soil feels dry. Avoid overhead watering, which can promote disease.
2. Fertilizing: Side-dress your cabbage plants with a nitrogen-rich fertilizer (such as ammonium nitrate or urea) about 3-4 weeks after transplanting. Repeat this every 3-4 weeks until the heads start to form.
3. Weeding: Keep the area around your cabbage plants free of weeds. Weeds compete with cabbage for water and nutrients.
4. Mulching: Apply a layer of mulch around your cabbage plants to help retain moisture, suppress weeds, and regulate soil temperature. Organic mulches, such as straw or wood chips, are best.
5. Pest Control: Cabbage is susceptible to several pests, including cabbage worms, cabbage loopers, aphids, and flea beetles. Inspect your plants regularly for signs of pests. You can control pests with organic insecticides, such as Bacillus thuringiensis (Bt) for cabbage worms and loopers, and insecticidal soap for aphids and flea beetles. You can also use row covers to protect your plants from pests.
6. Disease Control: Cabbage is also susceptible to several diseases, including black rot, clubroot, and downy mildew. Choose disease-resistant varieties and practice good sanitation to prevent disease. Remove any infected plants immediately.
Harvesting Your Cabbage
The moment you’ve been waiting for! Here’s how to harvest your cabbage:
1. Check for Firmness: Cabbage is ready to harvest when the heads are firm and solid.
2. Cut the Head: Use a sharp knife to cut the head from the stem, leaving a few outer leaves attached.
3. Store the Cabbage: Store your cabbage in the refrigerator for up to several weeks.
Troubleshooting Common Cabbage Problems
Even with the best care, you might encounter some problems along the way. Here are some common issues and how to address them:
* Cabbage Worms: These green caterpillars can devour your cabbage leaves. Handpick them off the plants or spray with Bt.
* Aphids: These tiny insects suck the sap from cabbage leaves, causing them to curl and yellow. Spray with insecticidal soap.
* Clubroot: This soilborne disease causes the roots to swell and distort, stunting plant growth. Improve soil drainage and raise the soil pH to above 7.0.
* Splitting Heads: This can happen when cabbage heads grow too quickly after a heavy rain. To prevent splitting, cut a few roots on one side of the plant to slow down growth.
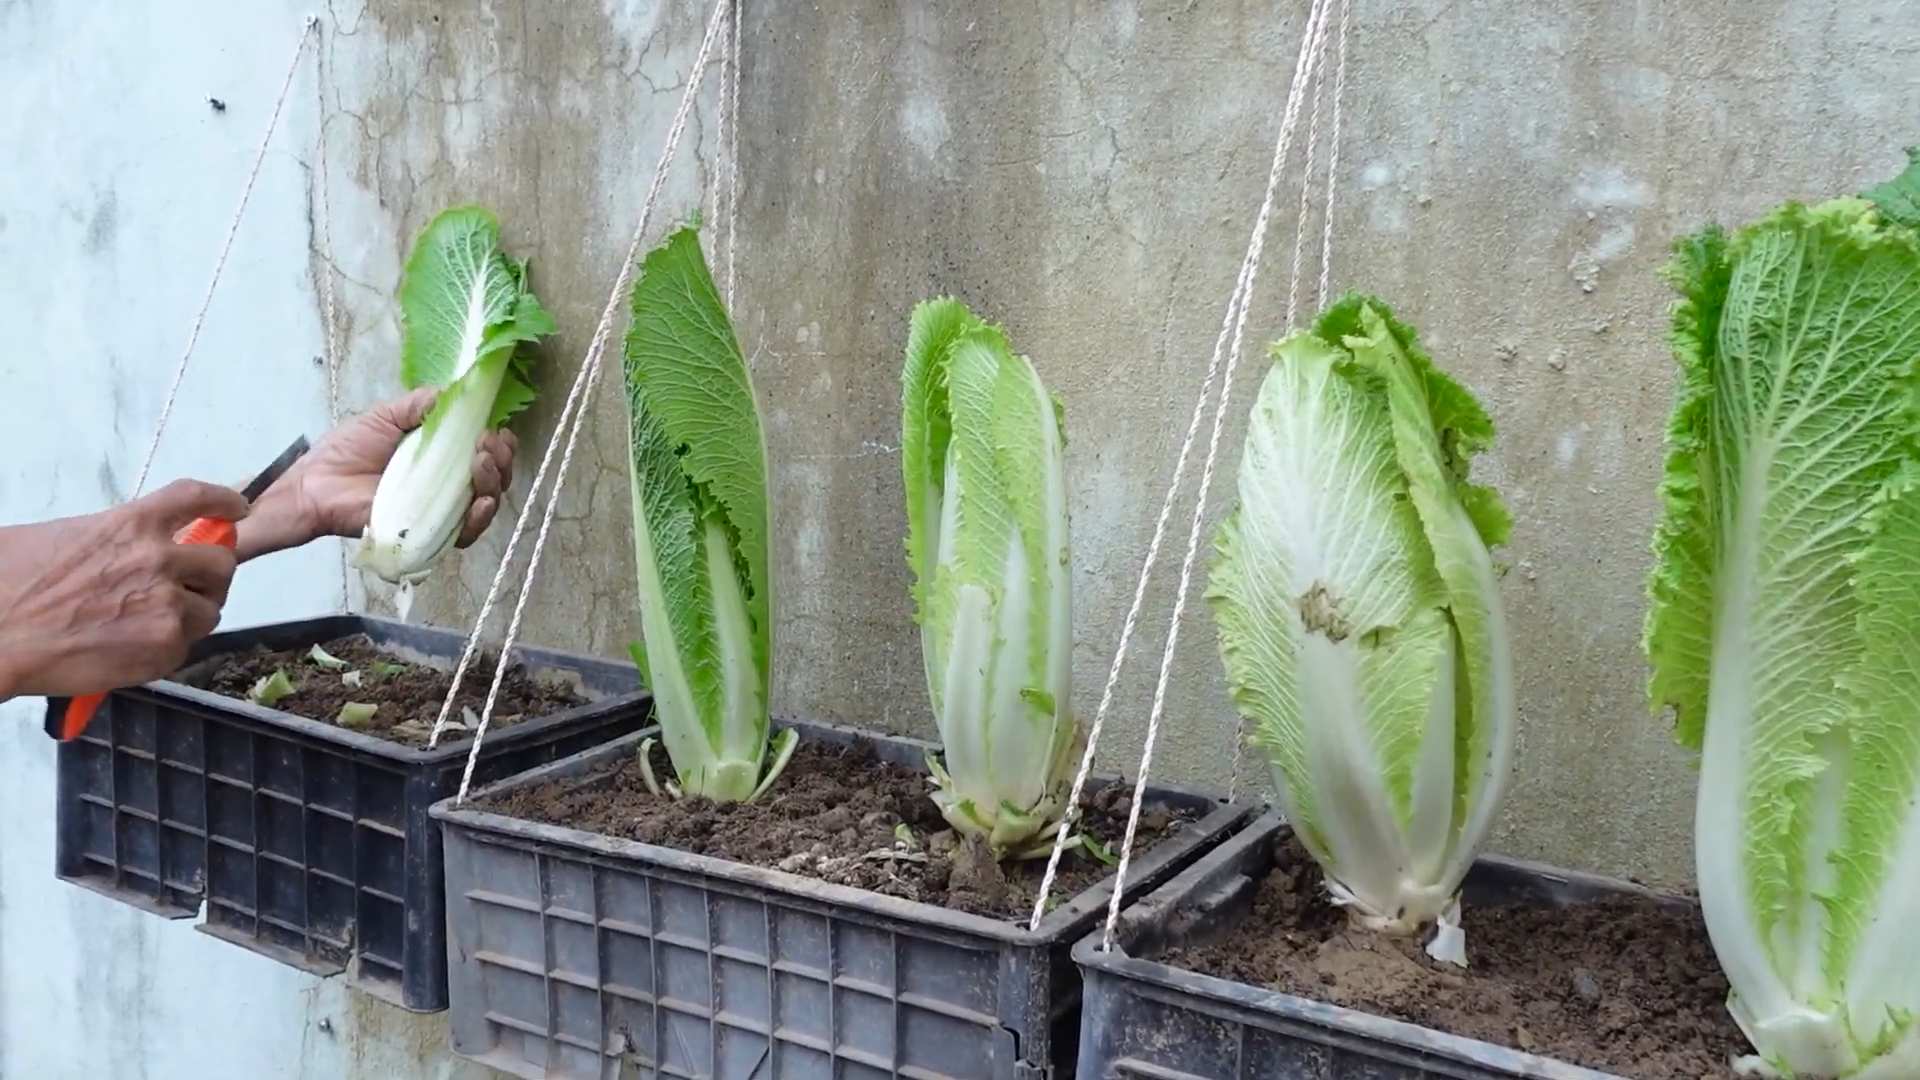
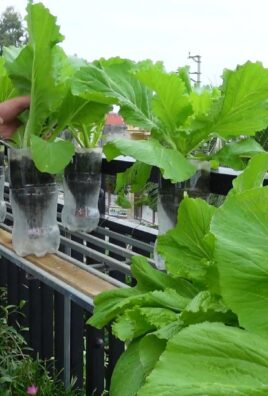
Growing Cabbage in Containers
Don’t have a garden? No problem! You can grow cabbage in containers.
1. Choose a Large Container: Select a container that
Conclusion
So, there you have it! Growing cabbage at home easily isn’t just a pipe dream; it’s an achievable reality with a little planning and effort. We’ve walked you through the essential steps, from selecting the right variety to nurturing your seedlings and protecting them from pests. But why should you bother with all this when you can simply buy cabbage at the store? The answer lies in the unparalleled freshness, flavor, and satisfaction that comes from harvesting your own homegrown produce.
Imagine biting into a crisp, sweet cabbage head, knowing that you nurtured it from a tiny seed. The taste is simply incomparable to anything you can find on a supermarket shelf. Plus, you have complete control over the growing process, ensuring that your cabbage is free from harmful pesticides and chemicals. You’re not just growing cabbage; you’re growing a healthier, more sustainable lifestyle.
Beyond the basic method we’ve outlined, there’s plenty of room for experimentation and customization. Consider these variations to tailor your cabbage-growing experience:
* Succession Planting: Plant new cabbage seeds every few weeks to ensure a continuous harvest throughout the growing season. This is especially useful if you have a large family or enjoy cabbage in many different dishes.
* Companion Planting: Cabbage thrives when planted alongside certain companion plants. Dill, rosemary, and thyme can help deter pests, while legumes like beans and peas can fix nitrogen in the soil, benefiting your cabbage plants.
* Container Gardening: If you’re short on space, don’t despair! Cabbage can be successfully grown in containers, provided they are large enough to accommodate the plant’s root system. Choose a pot that is at least 12 inches in diameter and filled with a well-draining potting mix.
* Different Varieties: Don’t limit yourself to just one type of cabbage. Experiment with different varieties like red cabbage, Savoy cabbage, or Napa cabbage to add variety to your meals. Each variety has its own unique flavor and texture.
* Fermenting Your Harvest: Once you’ve harvested your bounty, consider preserving some of it through fermentation. Sauerkraut and kimchi are delicious and healthy ways to enjoy your homegrown cabbage for months to come.
Growing cabbage at home easily is a rewarding experience that connects you to nature and provides you with fresh, healthy food. It’s a project that’s suitable for gardeners of all skill levels, from beginners to seasoned pros. So, what are you waiting for? Grab some seeds, prepare your soil, and get ready to enjoy the fruits (or rather, vegetables) of your labor.
We’re confident that you’ll find the process of growing cabbage at home easily to be both enjoyable and fulfilling. But don’t just take our word for it – try it yourself! We encourage you to embark on this gardening adventure and share your experiences with us. Post photos of your cabbage plants, share your tips and tricks, and let us know what you’ve learned along the way. Together, we can create a community of cabbage-growing enthusiasts and inspire others to embrace the joys of homegrown produce. Happy gardening!
Frequently Asked Questions (FAQ)
Q1: What is the best time of year to plant cabbage?
The best time to plant cabbage depends on your climate and the specific variety you’re growing. Generally, cabbage is a cool-season crop, meaning it thrives in temperatures between 60°F and 70°F (15°C and 21°C). For spring crops, start seeds indoors 6-8 weeks before the last expected frost. Transplant seedlings outdoors 2-3 weeks before the last frost. For fall crops, start seeds indoors in mid-summer and transplant seedlings outdoors in late summer or early fall. Check the specific recommendations for your chosen cabbage variety, as some are better suited for spring planting while others are more tolerant of fall frosts.
Q2: How much sunlight does cabbage need?
Cabbage requires at least 6 hours of direct sunlight per day to thrive. Choose a planting location that receives full sun for optimal growth and head development. If you’re growing cabbage in containers, make sure to place them in a sunny spot. If you live in a particularly hot climate, providing some afternoon shade can help prevent the leaves from scorching.
Q3: What kind of soil is best for growing cabbage?
Cabbage prefers well-drained, fertile soil that is rich in organic matter. The ideal soil pH is between 6.0 and 7.0. Before planting, amend the soil with compost or well-rotted manure to improve its fertility and drainage. If your soil is heavy clay, consider adding sand or other amendments to improve drainage. A soil test can help you determine the pH and nutrient levels of your soil and guide you in making necessary amendments.
Q4: How often should I water my cabbage plants?
Cabbage plants need consistent moisture to thrive. Water deeply and regularly, especially during dry periods. Aim to keep the soil consistently moist but not waterlogged. A good rule of thumb is to water when the top inch of soil feels dry to the touch. Mulching around the plants can help retain moisture and suppress weeds.
Q5: What are some common pests and diseases that affect cabbage?
Cabbage is susceptible to a variety of pests and diseases, including cabbage worms, cabbage loopers, aphids, flea beetles, and clubroot. Regularly inspect your plants for signs of infestation or disease. Use organic pest control methods, such as handpicking pests, using insecticidal soap, or applying Bacillus thuringiensis (Bt), to control pests. To prevent diseases, practice crop rotation, ensure good air circulation, and avoid overhead watering. Choose disease-resistant varieties whenever possible.
Q6: How do I know when my cabbage is ready to harvest?
Cabbage is ready to harvest when the head is firm and solid to the touch. The size of the head will vary depending on the variety. Check the seed packet or plant tag for the expected head size. To harvest, use a sharp knife to cut the head from the stem, leaving a few outer leaves attached.
Q7: Can I grow cabbage in containers?
Yes, cabbage can be successfully grown in containers, provided they are large enough to accommodate the plant’s root system. Choose a pot that is at least 12 inches in diameter and filled with a well-draining potting mix. Make sure the container has drainage holes to prevent waterlogging. Water regularly and fertilize as needed.
Q8: How can I prevent cabbage worms from eating my plants?
Cabbage worms are a common pest that can quickly decimate cabbage plants. To prevent them, cover your plants with row covers or netting to prevent butterflies from laying eggs. Regularly inspect your plants for eggs and larvae and remove them by hand. You can also use Bacillus thuringiensis (Bt), a natural bacteria that is effective against cabbage worms.
Q9: What is clubroot, and how can I prevent it?
Clubroot is a soilborne disease that affects cabbage and other members of the brassica family. It causes the roots to swell and become distorted, which can stunt growth and reduce yields. To prevent clubroot, practice crop rotation, avoid planting cabbage in the same location year after year, and amend the soil with lime to raise the pH to 7.0 or higher. Choose disease-resistant varieties whenever possible.
Q10: Can I eat the outer leaves of the cabbage?
Yes, the outer leaves of the cabbage are edible, but they may be tougher and more fibrous than the inner leaves. Remove any damaged or discolored leaves before cooking. The outer leaves can be used in soups, stews, or stir-fries. They can also be fermented to make sauerkraut or kimchi.

Leave a Comment